Table of Contents
Advertisement
Quick Links
Advertisement
Table of Contents

Summary of Contents for TrickleStar Optimizing Energy TS2104
- Page 1 TS2104 C-Wire Adapter Installation Guide...
-
Page 2: Table Of Contents
Table of Contents Welcome Preparation - What is in the box? - Precautionary measures - With or without C-Wire? Installation Without a C-Wire - Step 1: Check if there are 3 or 4 wires - Step 2: Prepare the necessary tools - Step 3: Open your HVAC system's cover - Step 4: Label the wires - Step 5: Disconnect the wires from the HVAC control board... -
Page 3: Welcome
The common wire (C-wire) is used to provide a return path to power your thermostat. If your HVAC system has a C-wire, you can directly connect the TrickleStar Thermostat to the 24 V AC power source and you do not need to install the C-Wire Adapter. If your HVAC system does not have a C-wire, it will not power your TrickleStar Thermostat. -
Page 4: Preparation
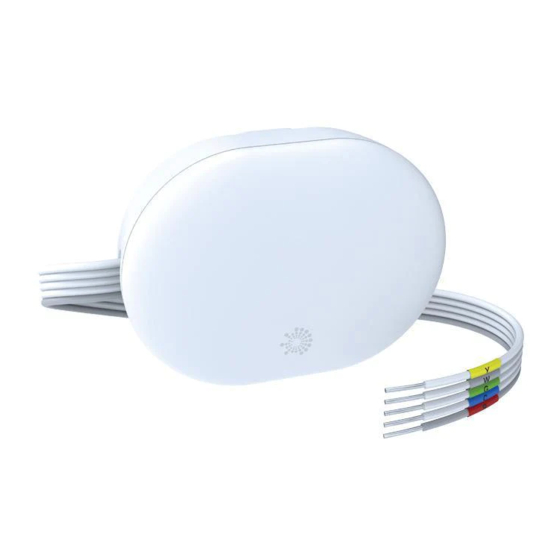
Preparation What is in the box? C-Wire Adapter Screws (2 pcs.) Drywall plugs (2 pcs.) Wire Labels QR code sheet Fig 4-A... -
Page 5: Precautionary Measures
Precautionary measures • Read all instructions carefully before starting the installation. • Before installing the C-Wire Adapter, be sure to turn off the power for your HVAC system either at the Circuit Breaker Box or at the Main Switch. • Leave the power OFF until you have finished the installation. Fig 5-A Hint: Your system should not make any noise and you should not feel any air exiting your vents when the power is OFF. -
Page 6: With Or Without C-Wire
With or without C-Wire? The TrickleStar Thermostat supports installation for both with and without C-Wire, but the installation is a little different. Do you have a C-Wire connected to your old thermostat? Check the wires connected to the terminals on the base of your old thermostat. -
Page 7: Installation Without A C-Wire
Installation Without a C-Wire If your system does not have a C-Wire, it will not power your new TrickleStar Thermostat. You need the TrickleStar C-Wire Adapter (sold separately as an accessory). For more information on the TS2104 C-Wire Adapter, visit our website at: www.tricklestar.com... -
Page 8: Step 1: Check If There Are 3 Or 4 Wires
Step 1: Check if there are 3 or 4 wires The TrickleStar C-Wire Adapter requires your system to have either three or four wires: 3 wires 3 wires Y/Y1, G, and R (or Rc or RH) W/W1/E, G, and R (or RC or... - Page 9 4 wires W/W1/E, Y/Y1, G, and R (or Rc or RH) Fig 9-A Continue to the next page Email or call our technical support: Email: customer.service@tricklestar.com Toll Free: 1-888-700-1098...
-
Page 10: Step 2: Prepare The Necessary Tools
Step 2: Prepare the necessary tools Bring along your TrickleStar C-Wire Adapter, wire labels, Phillips screwdriver and your mobile device with Wi-Fi connection to your HVAC system. Label the wires at your control board. Phillips screwdriver TrickleStar C-Wire Wire Labels... -
Page 11: Step 3: Open Your Hvac System's Cover
Step 3: Open your HVAC system’s cover Open your HVAC system’s cover to reveal the control board. We recommend that you take a photo of the wires connected to the HVAC control board. You may need to refer to this photo at a later stage. HVAC control board Fig 11-A Note:... -
Page 12: Step 4: Label The Wires
Fig 12-A Note: If you have wires connected to both RC and RH terminals at the HVAC control board, you may have a two-transformer system. Contact our technical support to help you with the installation: Email: customer.service@tricklestar.com Toll Free: 1-888-700-1098... -
Page 13: Step 5: Disconnect The Wires From The Hvac Control Board
Step 5: Disconnect the wires from the HVAC control board Disconnect the wires labeled R, Y/Y1, G, and W/W1 from the HVAC control board. HVAC control board Fig 13-A... -
Page 14: Step 6: Connect The Wires From The C-Wire Adapter To The Hvac Control Board
Step 6: Connect the wires from the C-Wire Adapter to the HVAC control board Connect the five white wires from your TrickleStar C-Wire Adapter to their corresponding terminals on the HVAC control board. HVAC control board TrickleStar C-Wire Adapter Fig 14-A Note: Pull the wires gently to ensure that they are connected securely. -
Page 15: Step 7: Connect The Disconnected Wires From The Hvac Control Board
Step 7: Connect the disconnected wires from the HVAC control board to the C-Wire Adapter Connect the wires you disconnected from the HVAC control board in Step 5 to their corresponding terminals on the TrickleStar C-Wire Adapter. HVAC control board TrickleStar C-Wire Adapter... -
Page 16: Step 8: Mount The C-Wire Adapter Inside Your Hvac System
Step 8: Mount the C-Wire Adapter inside your HVAC system • Mount the TrickleStar C-Wire Adapter inside your HVAC system. Be sure not to strain the wires. • Close your HVAC system’s cover securely. • You can now return to your thermostat. -
Page 17: Step 9: Disconnect And Label Old Thermostat Wires
Fig 17-A Jumper wire Note: If the terminals on your old thermostat has a jumper wire between RH, RC or R, remove the jumper wire. Your new TrickleStar Thermostat does not need this jumper wire. -
Page 18: Step 10: Unscrew Old Mounting Plate
Step 10: Unscrew old Mounting Plate Unscrew the Mounting Plate of your old thermostat to remove it from the wall. When you remove the Mounting Plate, be sure not to tear off the labels on the wires. Fig 18-A... -
Page 19: Step 11: Replace With New Thermostat Mounting Plate
Step 4: Replace with new Thermostat Mounting Plate Decide if you want to mount the TrickleStar Thermostat directly to the wall or you want to use the Trim Plate. The Trim Plate helps you to hide marks or holes left on the wall by your old thermostat. -
Page 20: Step 12: If The Trim Plate Is Used (Optional)
Step 12: If the Trim Plate is used (Optional) Step 5: If the Trim Plate is used (Optional) If you use the Trim Plate, align the mounting holes on the Trim Plate and Mounting Plate, then press them together into place. Fig 20-A Fig 20-B... -
Page 21: Step 13: Pull The Labeled Wires Through The Hole Of The Mounting Plate
Step 13: Pull the labeled wires through the hole of the Mounting Plate Pull the labeled wires carefully through the hole of the Mounting Plate. Fig 21-A... -
Page 22: Step 14: Attach The Mounting Plate On The Wall
Step 14: Attach the Mounting Plate on the wall Step 7: Attach the Mounting Plate on the wall Attach the Mounting Plate on the wall using the drywall plugs and screws provided. Use the built-in bubble level to make sure the base is level. Without Trim Plate Bubble level Fig 22-A... -
Page 23: Step 15: Connect The Wires
Step 15: Connect the wires • Connect the RC, GK, YK and W/W1/E wires to their corresponding terminals on the Thermostat Mounting Plate as shown below. • Connect the remaining wires to their corresponding terminals on the Thermostat Mounting Plate. ACC+ ACC- Fig 23-A... -
Page 24: Step 16: Set The Jumpers On The Back Of Your Thermostat
Step 16: Set the jumpers on the back of your Thermostat Step 9: Set the jumpers on the back of your Thermostat The Accessory (ACC) wires are used to power devices such as humidifier or dehumidifier. If your system does not have any ACC wires, you can leave the black jumper in either position. Fig 24-A Jumper Position for Accessory &... -
Page 25: Step 17: Attach The Thermostat Onto Its Mounting Plate Until It Clicks
Step 17: Attach the Thermostat onto its Mounting Plate until it clicks Step 10: Attach the Thermostat onto its Mounting Plate until it clicks Fig 25-A... -
Page 26: Step 18: Turn On The Power
Step 18: Turn on the power Step 11: Turn on the power Turn the power back ON for your HVAC system either at the Circuit Breaker Box or at the Main Switch. Fig 26-A... -
Page 27: Installation Done
Installation done! Congratulations! You have completed your installation. Fig 27-A... -
Page 28: Wiring Diagrams
Wiring Diagram C-Wire Adapter wiring Wire the TrickleStar C-Wire Adapter as shown below. YK, GK: Used for C-Wire Adapter ACC+ connections only ACC- Fig 28-A Note: • Connect the R wire to the RC terminal on your TrickleStar Thermostat. Wires from C-Wire Adapter •... -
Page 29: Troubleshooting
RC terminal on the Thermostat. If the problem persists, you can refer to the Frequently Asked Questions (FAQ) section on our website, or email or call our technical support: Website: www.tricklestar.com Email: customer.service@tricklestar.com Toll Free: 1-888-700-1098... - Page 30 TrickleStar® is a registered trademark of TrickleStar Ltd. All other trademarks are the property of their respective owners. The information in this document is subject to change without notice. TrickleStar assumes no responsibility for any errors that may appear in this document.
Need help?
Do you have a question about the Optimizing Energy TS2104 and is the answer not in the manual?
Questions and answers