
Related Manuals for Koki Holdings Hikoki R36DA


Summary of Contents for Koki Holdings Hikoki R36DA
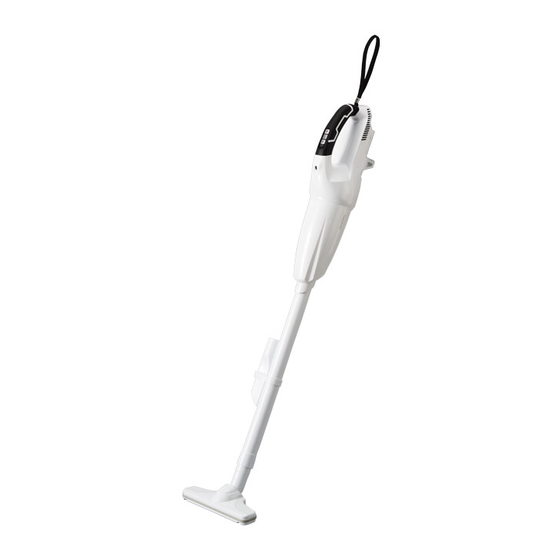
- Page 1 Cordless Cleaner 充电式吸尘器 吸塵器 R36DA Keep for future reference 保留备用 保留備用 Handling instructions 使用说明书 使用說明書...
-
Page 2: Table Of Contents
English CONTENTS SAFETY WARNINGS FOR CORDLESS CLEANER ........2 CAUTION ON LITHIUM-ION BATTERY ............4 REGARDING LITHIUM-ION BATTERY TRANSPORTATION ......6 USB DEVICE CONNECTION PRECAUTIONS ..........6 PRECAUTIONS FOR CORDLESS CLEANER ..........6 SYMBOLS ......................8 NAME OF PARTS...................8 SPECIFICATIONS ..................9 STANDARD ACCESSORIES ...............10 APPLICATIONS ....................10 BATTERY REMOVAL / INSTALLATION ............11 CHARGING ....................11 PRIOR TO OPERATION ................14... - Page 3 English Electrical safety a) Charger plugs must match the outlet. Never modify the plug in any way. Unmodifi ed plugs and matching outlets will reduce risk of electric shock. b) Do not expose appliances to rain or wet conditions. Water entering an appliance will increase the risk of electric shock. Do not abuse the cord of charger.
-
Page 4: Caution On Lithium-Ion Battery
English Battery pack use and care Power can only be supplied to this appliance using the included lithium battery or one that is designated by our company. a) Recharge only with the charger specifi ed by the manufacturer. A charger that is suitable for one type of battery pack may create a risk of fi re when used with another battery pack. - Page 5 English WARNING In order to prevent any battery leakage, heat generation, smoke emission, explosion and ignition beforehand, please be sure to heed the following precautions. Make sure that swarf and dust do not collect on the battery. ○ During work make sure that swarf and dust do not fall on the battery. ○...
-
Page 6: Regarding Lithium-Ion Battery Transportation
English WARNING Battery cover If a conductive foreign matter enters in the terminal of lithium ion battery, the battery may be shorted, causing Ventilation holes fi re. When storing the lithium ion battery, obey surely the rules of following contents. ○... - Page 7 English Do not use the charger continuously. When one charging is completed, leave the charger for about 15 minutes before the next charging of battery. Do not allow foreign matter to enter the hole for connecting the rechargeable battery. Never disassemble the rechargeable battery and charger. Never short-circuit the rechargeable battery.
-
Page 8: Symbols
English SYMBOLS WARNING The following show symbols used for the appliance. Be sure that you understand their meaning before use. To reduce the risk of injury, user must Direct current read instruction manual. Rated voltage Warning NAME OF PARTS 1. CLEANER Switch panel LED light Indicator Lamp... -
Page 9: Specifications
English SPECIFICATIONS CLEANER Model R36DA Voltage 36 V Motor DC motor 3 (HIGH) Approx. 15 min. Continuous operating time 2 (MID) Approx. 30 min. (Battery: using BSL36A18) 1 (LOW) Approx. 60 min. 3 (HIGH) : Approx. 155 W Suction Work Rate 2 (MID) : Approx. -
Page 10: Standard Accessories
English STANDARD ACCESSORIES In addition to the main unit (1 unit), the package contains the accessories listed in the below. Table 1 R36DA R36DA (XC) (NN) Charger (UC18YSL3) — Battery (BSL36A18) — Battery cover — Flooring Nozzle Crevice Nozzle Extension Pipe (With Nozzle Holder) Nozzle Holder Standard accessories are subject to change without notice. -
Page 11: Battery Removal / Installation
English BATTERY REMOVAL / INSTALLATION Battery removal Handle Hold the handle tightly and push the battery latches to remove the battery (see Fig. 6). Battery CAUTION Never short-circuit the battery. Insert Battery installation Push Match the battery with the unit's groove and fi rmly press Latch Pull out the battery in until you hear a click (see Fig. - Page 12 English Charging When inserting a battery in the charger, the charge indicator lamp will blink in blue. When the battery becomes fully recharged, the charge indicator lamp will light up in green. (See Table 2) Charge indicator lamp indication The indications of the charge indicator lamp will be as shown in Table 2, according to the condition of the charger or the rechargeable battery.
- Page 13 English Regarding the temperatures and charging time of the rechargeable battery The temperatures and charging time will become as shown in Table 3. Table 3 Charger UC18YSL3 Type of battery Li-ion Temperatures at which the 0 oC – 40 oC battery can be recharged Charging...
-
Page 14: Prior To Operation
English How to make the batteries perform longer. Recharge the batteries before they become completely exhausted. When you feel that the power of the tool becomes weaker, stop using the tool and recharge its battery. If you continue to use the tool and exhaust the electric current, the battery may be damaged and its life will become shorter. - Page 15 English Hold here Filter Filter Turn clockwise Protruding marks free of Dust Remove debris Filter and dust Case Connector free of Housing damage Housing Filter holder Rubber not Remove deteriorated Intake Port Tighten Fig. 8 Fig. 9 Fig. 10 (4) Install the fi lter (Fig. 11) When installing the fi...
-
Page 16: The Switch Panel
English THE SWITCH PANEL CAUTION Do not subject the switch panel to shock or damage. Switch Panel Switch operation (Fig. 13) Indicator Lamp The vacuum of the appliance can be switched HIGH Mode between three stages of operation, depending on your need. -
Page 17: How To Use
English HOW TO USE WARNING To prevent accidents when installing or removing the rechargeable battery, make sure that the appliance is switched off . CAUTION ○ Make sure that the rechargeable battery Filter is properly installed. If not properly installed, the battery may fall out, causing injury. - Page 18 English Install the battery (Fig. 18) As shown in the diagram below, fi rmly insert until a click is heard. Switch on the appliance (Fig. 19) Press the button for the mode you wish to operate. (See "THE SWITCH PANEL" on page 16.) Switch LED light Battery...
- Page 19 English Table 4 State of lamp Battery Remaining Power Lights ; The battery remaining power is over 75%. Lights ; The battery remaining power is 50% – 75%. Lights ; The battery remaining power is 25% – 50%. Lights ; The battery remaining power is less than 25%.
-
Page 20: Emptying The Dust Case
English EMPTYING THE DUST CASE CAUTION ○ To prevent accidents, make sure the power is switched off and remove the rechargeable battery from the appliance. ○ Do not subject the dust case to strong impacts as this may cause deformation or damage. Remove ○... -
Page 21: How To Recharge Usb Device
English HOW TO RECHARGE USB DEVICE WARNING ○ Prior to use, check the connecting USB cable for any defect or damage. Using a defective or damaged USB cable can cause smoke emission or ignition. ○ When the charger is not being used, cover the USB port with the rubber cover. Buildup of dust etc. -
Page 22: Maintenance And Inspection
English When charging is completed ○ To verify charge status, check the USB device. ○ Unplug the power cord from the electrical outlet. (Fig. 25) ○ Place the rubber cover over the USB port. Rubber cover USB port USB cable Fig. - Page 23 English Dry off any moisture Clean with a toothbrush or similar tool (Do not brush vigorously) Do not detach the fi lter holder and the fan fi lter! Filter Point the fan fi lter downwards Filter holder Filter Fig. 26 Inspecting the mounting screws Regularly inspect all mounting screws and ensure that they are properly tightened.
- Page 24 English NOTE ○ Do not store in a location where children can easily reach or take out the appliance. ○ Do not store in a damp location or in an area exposed to rainfall. ○ Do not store in direct sunlight or in a location where temperatures may suddenly change. ○...
-
Page 25: Troubleshooting
English TROUBLESHOOTING Use the inspections in the table below if the cleaner does not operate normally. If this does not remedy the problem, consult your dealer or the HiKOKI Authorized Service Center. Symptom Possible cause Remedy No remaining battery power Charge the battery. -
Page 26: Selecting Accessories
English SELECTING ACCESSORIES Select accessories that are suited to a specifi c task. For details contact HiKOKI Authorized Service Center. BSL36A18 UC18YSL3 Part Number: 329897 Battery (14.4 V - 18 V) Battery cover Charger Part Number: 375373 Part Number: 375371 Flexible Hose Rack Brush Part Number: 375375... -
Page 27: 目次 充电式吸尘器通用安全警告
中文 目次 充电式吸尘器通用安全警告....27 电池的拆卸/安装法.........34 锂离子电池使用注意事项.......29 充电..............35 锂离子电池运输...........30 作业之前............37 USB 设备连接器使用注意事项 ....30 开关面板............38 充电式吸尘器的使用注意事项.....31 使用方法............39 符号..............32 清空集尘盒.............42 零件名称............32 USB 设备的充电方法 ........43 规格..............33 维护和检查.............44 标准附件............34 故障排除............47 用途..............34 选择附件............48 充电式吸尘器通用安全警告 警告! 阅读所有警告和所有说明。 不遵照以下警告和说明会导致电击、着火和/或严重伤害。 保存所有警告和说明书以备查阅。 1) 工作场地的安全 a) 保持工作场地明亮。 黑暗的场地会引发事故。 b) 不要在易爆环境,如有易燃液体、气体或粉尘的环境下操作电器。 电器产生的火花会点燃粉尘或气体。 c) 让儿童和旁观者离开后操作电器。 注意力不集中会使操作者失去对电器的控制。... - Page 28 中文 3) 人身安全 a) 保持警觉,当操作电器时关注所从事的操作并保持清醒。 当你感到疲倦,或在有药物、酒精或治疗反应时,不要操作电器。 在操作电器时瞬间的疏忽会导致严重人身伤害。 b) 手不要伸展得太长。时刻注意立足点和身体平衡。 这样在意外情况下能很好地控制电器。 4) 吸尘器使用和注意事项 a) 不要滥用电器,根据用途使用适当的电器。 选用适当设计的电器会使你工作更有效、更安全。 b) 如果开关不能接通或关断电器电源,则不能使用该电器。 不能用开关来控制的电器是危险的且必须进行修理。 c) 在进行任何调节、更换附件或贮存电器之前,必须将电池盒与电器脱开。 这种防护性措施将减少电器意外起动的危险。 d) 将闲置不用的电器贮存在儿童所及范围之外,并且不要让不熟悉电器或 对这些说明不了解的人操作电器。 电器在未经培训的用户手中是危险的。 e) 保养电器。检查运动件是否调整到位或卡住,检查零件破损情况和影响 电器运行的其他状况。 如有损坏,电器应在使用前修理好。 许多事故由维护不良的电器引发。 f) 按照使用说明书,考虑作业条件和进行的作业来使用电器和附件等。 将电器用于那些与其用途不符的操作可能会导致危险。 5) 电池盒的使用和注意事项 此电器仅可使用附带的或本公司规定的锂电池来供电。 a) 只用制造商规定的充电器充电。 将适用于某种电池盒的充电器用到其他电池盒时会发生着火危险。 b) 只使用配有特制电池盒的电器。 使用其他电池盒会发生损坏和着火危险。...
-
Page 29: 锂离子电池使用注意事项
中文 注意! 不可让儿童和体弱人士靠近工作场所。 应将不使用的电器存放在儿童和体弱人士接触不到的地方。 锂离子电池使用注意事项 为延长使用期限,锂离子电池备配停止输出的保护功能。 在下述的 1 至 3 情况下,在使用本产品时,即使其已开启,电机仍可能停止。 这并非故障,而是启动保护功能的结果。 1. 在残留的电池电力即将耗尽时,马达会停止。 在这种情况下,请立即予以充电。 2. 若工具超过负荷,马达亦可能停止。在此情况下,将工具关闭并消除过载的 可能原因。之后您就可以再度使用。 3. 若电池在过载工作情况下过热,电池电力可能会中止。 在这种情况下,请停止使用电池,让电池冷却。之后您就可以再度使用。 此外,请留心下列的警告及注意事项。 警告! 为防止发生电池漏电、发热、冒烟、爆炸及提前点燃,请确保留意下列事项。 1. 确保电池上没有堆积削屑及灰尘。 ○ 在工作时确定削屑及灰尘没有掉落在电池上。 ○ 确定所有工作时掉落在电器上的削屑和灰尘没有堆积在电池上。 ○ 请勿将未使用的电池存放在曝露于削屑和灰尘的位置。 ○ 在存放电池之前,请清除任何可能附着在上面的削屑和灰尘,并请切勿将它 与金属零件 (螺丝、钉子等) 存放在一起。 2. 请勿以钉子等利器刺穿电池、 以铁锤敲打、 踩踏、 丢掷电池, 或将其剧烈撞击。 3. -
Page 30: 锂离子电池运输
中文 注意! 1. 若电池渗漏出的液体进入您的眼睛,请勿搓揉眼睛,并以自来水等干净清水 充分冲洗,立刻送医。 若不加以处理,液体可能会导致眼睛不适。 2. 若液体渗漏至您的皮肤或衣物,请立即以自来水等清水冲洗。 上述情况可能会使皮肤受到刺激。 3. 若初次使用电池时发现生锈、 异味、 过热、 褪色、 变形及/或其它异常情况时, 请勿使用并将该电池退还给供货商或厂商。 电池盖 警告! 通风孔 如果导电异物接触到锂离子电池的端子,电池可能短路, 并导致火灾。 存放锂离子电池时,请务必遵循下列注意事项。 ○ 切勿在存放盒中放置导电的残片,钉子,以及导线, 端子 如铁线和铜线。 插销 ○ 或者将电池装在电器中,或者在牢固按入电池盖并挡 电池 住通风孔后再存放,以防止短路。( 参照图 1) 图 1 锂离子电池运输 当运输一个锂离子电池,请注意以下预防措施。 警告! 输出功率 告知运输公司,包装内包含一个锂离子电 池,告知该公司其功率输出并且要按照运... -
Page 31: 充电式吸尘器的使用注意事项
中文 充电式吸尘器的使用注意事项 1. 务请在 0℃~ 40℃的温度下进行充电。温度低于 0℃将会导致充电过度,极 其危险。 电池不能在高于 40℃的温度下充电。 最适合于充电的温度是 20 ~ 25℃。 2. 请勿连续使用充电器。 充电结束时,在下节电池充电之前,请先将充电器放置大约 15 分钟。 3. 勿让杂质进入充电式电池连结口内。 4. 切勿拆卸充电式电池与充电器。 5. 切勿使充电式电池短路。使电池短路将会造成很大的电流和过热,从而烧坏 电池。 6. 请勿将电池丢入火中。 电池受热将会爆炸。 7. 充电后电池寿命太短不够使用时,请尽快将电池送往经销店。请勿将用过的 电池乱丢。 8. 请勿使用耗竭了的电池,否则会损坏充电器。 9. 请勿将异物插入充电器的通风口。 若将金属异物或易燃物插入通风口的话, 将会引起触电事故或使充电器受损。 10. 请勿吸下列物品 : 否则可能会造成起火或受伤。 ○... -
Page 32: 零件名称
中文 符号 警告! 如下所示的符号用于本电器。使用前请务必理解其含意。 为降低伤害风险,用户必须阅 直流电 读使用说明书。 额定电压 警告 零件名称 1. 吸尘器 开关面板 LED 灯 指示灯 机壳 集尘盒 吸嘴座 延长管 带子 铭牌 电池 地面吸嘴 进气 电机 端口 缝隙吸嘴 图 3 2. 电池 3. 电池充电器 电池盖 充电指示灯 电线 通风口 通风口 端子 机身... - Page 33 中文 规格 吸尘器 R36DA 型式 36 V 电压 DC 马达 马达 约 15 分钟 3 ( 高 ) 连续工作时间 约 30 分钟 2 ( 中 ) ( 电池 : 使用 BSL36A18 时 ) 约 60 分钟 1 ( 低 ) 3 ( 高...
-
Page 34: 标准附件
中文 标准附件 除了主机 (1 台) 外,产品包中还包括表中所列的附件。 表 1 R36DA R36DA (XC) (NN) 充电器 (UC18YSL3) — 电池 (BSL36A18) — 电池盖 — 地面吸嘴 缝隙吸嘴 延长管 (包含吸嘴座) 吸嘴座 标准附件可能不预先通告而已予更改。 用途 ○ 干燥表面的轻负荷吸尘 电池的拆卸/安装法 1. 电池的拆卸法 把手 请先紧抓住把手、然后再推压电池插销 以拆下电池 ( 参照图 6)。 电池 注意! 切勿使电池短路。... - Page 35 中文 充电 使用电器之前,按下述方法将电池进行充电。 电池 1. 将充电器的电源线连接到插座。 将充电器插头连接到插座时,充电指示灯闪烁红 色(间隔为 1 秒) 。 充电指示灯 2. 将电池插入充电器。 如 图 7 所示,将电池紧紧地插入充电器。 3. 充电 将电池插入充电器后,充电指示灯将呈蓝色闪烁。 导轨 电池完全充电后,充电指示灯将持续点亮呈绿色。 ( 参照 表 2) 图 7 (1) 充电指示灯的指示状态 根据充电器或可充电电池的情况,充电指示灯的显示如 表 2 所示。 表 2 充电指示灯的指示状态 点亮 0.5 秒钟。不点亮 闪烁...
- Page 36 中文 (2) 可充电电池温度和充电时间相关资料。 温度和充电时间如表 3 所示 表 3 充电器 UC18YSL3 电池类型 锂离子电池 电池可充电 0℃ - 40℃ 温度 14.4 充电电压 多电压 BSL14xx 系列 BSL18xx 系列 系列 充电 (4 节) (8 节) (5 节) (10 节) (10 节) 电池 时间 BSL1815S : 15 BSL1415S : 15 BSL1815 : 15 (环境...
-
Page 37: 作业之前
中文 注意! ○ 如果电池长时间放置在阳光直射的地方或者刚刚使用完毕时,电池会变 热。如果此时对电池充电,充电器的充电指示灯会点亮 0.3 秒钟,然后熄灭 0.3 秒钟(熄灭 0.3 秒钟) 。此时请等待电池冷却后再开始充电。 ○ 充电指示灯闪动 ( 闪动间隔为 0.2 秒钟 ) 时,请检查充电器的电池连接器内 是否有异物并加以清除。如没有异物,则可能是电池或充电器发生了故障。 请将其送往当地授权服务中心。 ○ 因内置的微电脑需要约 3 秒钟才能确认正用 UC18YSL3 充电的电池已被取出, 因此请等待 3 秒钟后再重新插入电池继续充电。如果在不到 3 秒内就插入电 池,则电池可能充电不正常。 ○ 废弃电池须移出电器并安全地弃置。 ○ 电器长时间不使用时,请将电池从电器移出。 ○ 充电端子不可短路。 ○... -
Page 38: 开关面板
中文 (4) 安装过滤器 ( 图 11) 安装过滤器时,沿水平方向用力按压机壳的突起处。然后旋转过滤器, 直到突起处固定在机壳的凹槽中。 旋转使之 机壳凹槽 紧固 突起 过滤器 过滤器支架 推进 机壳凹槽 突起 图 (5) 安装集尘盒 ( 图 12) 将集尘盒安装在机壳上, 对准两处凸痕。 然后顺时针旋转集尘盒约 120 度。 凸痕 对准 凸痕 集尘盒 机壳 集尘盒 顺时针旋转 * 安装集尘盒时, 约120度 也可以将吸嘴朝上。 图 12 注... -
Page 39: 使用方法
中文 连续工作时间 模式 指示灯 BSL36A18 3 ( 高 ) 约 15 分钟 2 ( 中 ) 约 30 分钟 1 ( 低 ) 约 60 分钟 * 连续工作时间因电池状况而异。请参照表格。 2. 指示灯 ( 图 14) Ø 关于过滤器清洁的通知 图 14 如果过滤器堵塞并且吸力降低,则指示灯将闪烁,并且 主机会发出震动响声,但这并非故障的迹象。 如果此情况发生, 请彻底清空灰尘盒并清洁过滤器。 (请参阅第 42 页中的 “清 空集尘盒”... - Page 40 中文 2. 安装吸嘴 ( 图 16) 通过操作,将吸嘴插入产品的吸入口。不安装吸嘴也可使用本电器。 注 : 安装吸嘴或延长管时,按照箭头指示的方向插入。( 图 17) 拆下时,按照箭头指示的方向扭转。 按照相反的方向扭转将导致集尘盒与机壳分离。 延长管 吸嘴和延长管 扭转方向 吸嘴 插入 拆下 集尘盒 机壳 图 16 图 17 3. 安装电池 ( 图 18) 如下图所示,将电池插到底直到听见喀哒声。 4. 启动本电器 ( 图 19) 根据需要按下模式按钮。 (参照第 38 页的“开关面板” ) 开关...
- Page 41 中文 ○ 在如地毯等某些表面上使用 3 模式时,吸力可能会使动作感觉沉重。如果此 情况发生,请切换至 2 或 1 模式。 5. 剩余电池电量指示灯 剩余电池电量 剩余电池电量 (1) 电池 指示灯开关 指示灯 可以按下剩余电池电量指示灯开关点亮指示 灯,查看电池的剩余电量。 (图 20,表 4) 按住剩余电池电量指示灯开关约 3 秒后,指 示灯将熄灭。 显示板 环境温度和电池状态可能会对剩余电池电量 产生轻微的影响,因此,建议您仅将指示灯 作为参考。 注 : 此外,充电器上的剩余电池电量指示灯可能 有所不同。 图 20 表 4 指示灯状态 电池剩余电量...
-
Page 42: 清空集尘盒
中文 清空集尘盒 注意 ! ○ 为了防止事故,请务必关闭电源,并从本电 取下 器中取出充电电池。 ○ 请勿让集尘盒受到强烈冲击,否则会造成变 集尘盒 形或损坏。 机壳 ○ 请经常清空集尘盒,并保持本电器和过滤器 等的清洁,否则可能会降低吸尘效率或造成 将吸入口朝下 马达的故障或发出异味。 1. 旋转集尘盒,将其从机壳取下。( 图 21) 灰尘 注 : 取下集尘盒时,将吸入口朝下,倒出灰尘。 集尘盒 2. 处理集尘盒中的灰尘。 图 21 3. 若处理灰尘后无法重新盖上吸嘴,请清洁过 滤器。 4. 将过滤器和集尘盒安装到机壳。 高效清除灰尘 ( 图 22) 将集尘盒前后... -
Page 43: Usb 设备的充电方法
中文 USB 设备的充电方法 警告 ! ○ 使用之前请检查 USB 连接线缆是否有破损或损坏。 使用有破损或损坏的 USB 线缆可能会导致冒烟或着火。 ○ 不使用充电器时,请用橡胶盖封好 USB 端口。 USB 端口中落入灰尘等可能会导致冒烟或着火。 注 : ○ USB 充电过程中,可能会有偶尔暂停。 ○ USB 设备未充电时,请将充电器上拔下 USB 设备。 否则不仅会减少 USB 设备的电池寿命,还会导致意外事故。 ○ 根据设备类型,可能无法对部分 USB 设备进行充电。 (1) 选择充电方式 根据所选的充电方式,将电池插入充电器或连接电源线插入插座。 ○ 将 USB 设备插入插座进行充电 ( 图 23-a)。 ○... -
Page 44: 维护和检查
中文 (3) 充电完成时 ○ 检查 USB 设备以检验充电状态。 ○ 从插座中拔下电源线。( 图 25) ○ 用橡胶盖盖住 USB 端口。 橡胶盖 USB 线 USB 端口 图 25 维护和检查 注意! 维护和检查前请务必关闭开关。 1. 清洁过滤器 注意 ! ○ 请勿用洗涤机清洗过滤器。 ○ 请勿用热水清洗过滤器或用火将其烘干。 如果即使清空集尘盒后吸尘效率也不理想,请取下过滤器,并用冷水或温水 清洗。( 水温应为不烫手。) 清洗后,在阴凉处晾干。 如风扇过滤器上沾有灰尘,请拿起吸尘器,使风扇过滤器朝下,以免灰尘进 入电机,同时用小刷子(如用过的牙刷)轻轻清洁。 注 : ○... - Page 45 中文 晾干水分 使用牙刷或类似工具清洁 (请勿用力刷洗) 请勿拆卸风扇 过滤器和过滤 错误 ! 器支架。 过滤器 将风扇过滤器 空气 朝下 过滤器支架 过滤器 图 26 2. 检查安装螺钉 要经常检查安装螺钉是否紧固妥善。若发现螺钉松了,应立即重新扭紧,否 则会导致严重的事故。 3. 电动机的维护 电动机绕线是电动工具的“心脏部”应仔细检查有无损伤,是否被油液或水 沾湿。 注 : 定期空转电机,以清除污垢和灰尘。 若电机内堆积有污垢或灰尘,可能会导致设备损坏。 4. 检查端子(工具和电池) 确保端子上没有堆积削屑和灰尘。 在操作前、操作时和操作后需要时常检查。 注意! 请清除端子上的削屑或灰尘。 否则可能导致故障。 5. 清理外部 在工具脏污时,使用柔软的干布或用肥皂水润湿的布进行擦拭。切勿使用氯 溶液、汽油或稀释剂,以免塑胶部分溶化。 6.
- Page 46 中文 注 : ○ 请勿将本电器存放在儿童可以轻易触碰或取出的地方。 ○ 请勿将本电器存放在潮湿或可能被雨淋湿的地方。 ○ 请勿将本电器存放在阳光直射或温度变化较大的地方。 ○ 请勿将本电器与易燃易爆的挥发性物质一同存放。 ○ 若无带子固定,请勿将本电器靠在墙上。( 图 27) 否则电器可能会摔落导致损坏。 错误 ! 正确 靠墙放置 使用带子 固定 图 27 注 : 存放锂离子电池 在存放前请确保电池已完全充电。 电池在低电量的状态下长时间存放 (3 个月或更长 ),可能会导致电池性能劣 化,使用时间明显减少或无法进行充电。 但是,即使是使用时间明显减少的电池,通过反复充电和使用 2 ~ 5 次,有 时也可恢复使用时间。 若反复充电和使用后电池的使用时间仍非常短,请认作为电池已达到了使用 寿命并更换新的电池。...
-
Page 47: 故障排除
中文 故障排除 如果吸尘器操作不正常,请使用下表中的检查步骤。如果未能解决问题,请向 经销商或 HiKOKI 公司授权服务中心咨询。 现象 可能的原因 解决办法 吸尘器无法运行 没有剩余电池电量 为电池充电 吸尘器突然停止 风扇被灰尘堵塞引起设备过 联系经销商并安排拆卸和清 载。 洁作业。 电池过热。 让电池冷却。 电机过热。 清理灰尘并清洁过滤器,然 后让电机冷却。 集尘盒已满。 清除灰尘。 吸力不足 吸嘴堵塞。 取出堵塞物。 吸嘴或延长管松动。 紧固组件。 吸嘴或延长管破裂或损坏。 请更换新组件。 过滤器堵塞。 旋转集尘盒并用除尘刀清除 灰尘,或取下过滤器,轻轻 敲打或用水清洗。 排气或主要组件过 集尘盒已满或过滤器堵塞导 清除灰尘。或清洁过滤器。 热 致电机过热。 发出异常噪音/散... -
Page 48: 选择附件
中文 选择附件 根据特定作业选择适合的附件。 有关详细信息请联系 HiKOKI 授权服务中心。 BSL36A18 UC18YSL3 产品编号 : 329897 锂电池 (14.4 V - 18 V) 电池盖 充电器 产品编号 : 375373 产品编号 : 375371 软管 刷头挂架 产品编号 : 375375 产品编号 : 375372 延长管(短) 圆刷头 产品编号 : 375374 产品编号 : 376509 角接头... -
Page 49: 目次 吸塵器的一般安全規則
中國語 目次 吸塵器的一般安全規則......49 電池的拆卸 / 安裝方法 ......56 鋰離子電池使用注意事項...... 51 充電..............57 關於鋰離子電池的運輸......52 操作前.............. 60 連接 USB 裝置的注意事項 開關面板............61 (限有配備的裝置) ........52 使用方法............62 吸塵器的注意事項........53 清空集塵箱............ 65 符號..............54 如何給 USB 裝置充電 各部位名稱............ 54 (限有配備的裝置) ........65 規格.............. - Page 50 中國語 3) 人員安全 a) 保持機警,注意您正在做什麼,並正常操作電器。 當您感到疲勞或受藥品、酒精或醫療影響時,請勿操作電器。 操作中瞬間的不注意可能造成人員嚴重的傷害。 b) 身體勿過度伸張,任何時間要保持站穩及平衡。 以便在不預期的狀態下,能對電器有較好的控制。 4) 吸塵器之使用及注意事項 a) 勿強力使用電器,使用正確之電器為您所需。 正確使用電器會依其設計條件使工作做得更好、更安全。 b) 如果開關不能轉至開及關的位置,勿使用電器。 任何電器不能被開關所控制是危險的,必須要修理。 c) 進行任何調整、更換附件或收存電器時,必須將電池組從電器中取出。 此種預防安全措施可減少意外開啟電器之危險。 d) 收存停用之電器,需遠離兒童和體弱人士等,且不容許不熟悉電器或未 瞭解操作電器說明書的人操作電器。 在未受過訓練的人手裡,電器極為危險。 e) 保養電器,檢核是否有可動零件錯誤的結合或卡住、零件破裂及可能影 響電器操作的任何其他情形。請勿讓孩童或不熟悉者保養。 電器如果損壞,在使用前要修好。 許多意外皆肇因於不良的保養。 f) 按照說明書使用電器及附件時,必須考量工作條件及所執行之工作。 若未依照這些使用說明操作電器時,可能造成相關之危害情況。 5) 電池組的使用及注意事項 本電器僅可使用附屬或本公司規定的鋰電池作為供電。 a) 需再充電時,僅能使用本公司指定的充電器。 因充電器僅適合同一型式的電池組,若使用任何其它電池組時,將導致 起火的危險。 b) 使用電器時,僅能使用按照其特性設計的電池組。...
-
Page 51: 鋰離子電池使用注意事項
中國語 注意 對於生理、感知、心智能力、使用經驗與知識之不足者 ( 包含孩童 ),需在對其 負有安全責任的人員之監護或指導下,並了解可能產生之危險的清況下使用本 器具。當然,兒童應受監護,以確保孩童不嬉玩本電器。 鋰離子電池使用注意事項 為延長使用壽命,鋰離子電池具有停止輸出的保護功能。 如果是以下 1 至 3 情況,在使用本產品時,即使將其開啟,馬達也可能會停止。 這並非故障,而是啟動保護功能的結果。 1. 在殘留的電池電力即將耗盡時,馬達會停止。 在這種情況下,請立即予以充電。 2. 若工具超過負載,馬達亦可能停止。此時,請關閉工具並消除過載原因。之 後您就可以再度使用。 3. 若電池在過載工作情況下過熱,電池電力可能會中止。 在這種情況下,請停止使用電池,讓電池冷卻。之後您就可以再度使用。 此外,請留心下列的警告及注意事項。 警告 為事先防止電池發生滲漏、發熱、冒煙、爆炸及起火等事故,請確保留意下列 事項。 1. 確保電池上沒有堆積削屑及灰塵。 ○ 在工作時確定削屑及灰塵沒有掉落在電池上。 ○ 確定所有工作時掉落在電器上的削屑和灰塵沒有堆積在電池上。 ○ 請勿將未使用的電池存放在曝露於削屑和灰塵的位置。 ○ 在存放電池之前,請清除任何可能附著在上面的削屑和灰塵,並請切勿將它 與金屬零件(螺絲、釘子等)存放在一起。 2. -
Page 52: 關於鋰離子電池的運輸
中國語 注意 1. 若電池滲漏出的液體進入您的眼睛,請勿搓揉眼睛,並以自來水等乾淨清水 充分沖洗,立刻送醫。 若不加以處理,液體可能會導致眼睛不適。 2. 若液體滲漏至您的皮膚或衣物,請立即以自來水等清水沖洗。 上述情況可能會使皮膚受到刺激。 3. 若初次使用電池時發現生銹、異味、過熱、褪色、變形或其他異常情況時, 請勿使用並將該電池退還給經銷商或廠商。 電池蓋 警告 通風孔 若具有導電性的異物進入鋰離子電池的端子,可能會造 成短路, 進而引發火災。請在存放電池時遵循以下事項。 ○ 請勿將導電物品,如鐵釘、鐵絲等金屬絲,銅線和 端子 電線放入儲存箱內。 ○ 無論是將電池安裝在電器內,或是儲存電池,請確 閂扣 實壓下電池蓋,直至遮住通風孔為止,以防短路 ( 電池 請參閱圖 1)。 圖 1 關於鋰離子電池的運輸 運輸鋰離子電池時,請遵守以下注意事項。 警告 安排運輸時,請通知運輸公司包裹中含有 輸出功率 鋰離子電池,告知該電池之輸出功率,並 按照運輸公司的指示。 2至3位數 ●... -
Page 53: 吸塵器的注意事項
中國語 吸塵器的注意事項 1. 請務必在 0 ∼ 40℃ 的溫度下進行充電。溫度低於 0℃ 將會導致充電過度, 極其危險。電池不能在高於 40℃ 的溫度下充電。 最適合於充電的溫度是 20 ∼ 25℃。 2. 請勿持續使用充電器。 一次充電完成後,請將充電器擱置 15 分鐘以上,然後再進行下一次充電。 3. 勿讓雜質進入充電池連結口內。 4. 切勿拆卸充電式電池與充電器。 5. 切勿使充電式電池短路。造成過大電流和過熱,從而燒壞電池。 6. 請勿將電池丟入火中。 燃燒電池將引起爆炸。 7. 充電後電池壽命太短不夠使用時,請盡快將電池送往經銷商。不可將用過的 電池亂丟。 8. 請勿使用耗竭了的電池,否則將會損壞充電器。 9. 請勿將異物插入充電器的通風口。 若將金屬異物或易燃物插入通風口的話, 將會引起觸電事故或使充電器受損。 10. -
Page 54: 各部位名稱
中國語 符號 警告 以下為使用於本電器的符號。請確保您在使用前明白其意義。 使用前請詳讀使用說明書 直流電流 額定電壓 警告 各部位名稱 1. 吸塵器 開關面板 LED 燈 指示燈 機殼 集塵箱 吸頭座 延長管 帶子 銘牌 電池 進氣口 機體 地面吸頭 縫隙吸頭 圖 3 2. 電池 3. 電池充電器 電池蓋 充電指示燈 電線 通風孔 通風孔 端子 機體 導軌 閂扣... - Page 55 中國語 規格 吸塵器 型式 R36DA 電壓 36 V 馬達 直流馬達 3 ( 高 ) 約 15 分鐘 連續運轉時間 2 ( 中 ) 約 30 分鐘 ( 電池 : BSL36A18) 1 ( 低 ) 約 60 分鐘 3 ( 高 ) : 約 155 W 吸入功率...
-
Page 56: 標準附件
中國語 標準附件 除主要組件(整機)外,包裝中還包含下表所列的附件。 表 1 R36DA R36DA (XC) (NN) — 充電器 (UC18YSL3) — 電池 (BSL36A18) — 電池蓋 地面吸頭 縫隙吸頭 延長管 (包含吸頭座) 吸頭座 標準附件可能不預先通告而徑予更改。 用途 ○ 乾燥表面的輕型吸塵 電池的拆卸 / 安裝方法 1. 取下電池的方法 手柄 緊抓手柄,按下電池閂扣取出電池(見圖 6) 。 電池 注意 請勿使電池短路。 2. 安裝電池的方法 插入... - Page 57 中國語 充電 使用電器之前,按下述方法將電池進行充電。 電池 1. 將充電器的電源線連接到插座。 插頭接上插座時,充電指示燈會閃爍紅燈 ( 閃爍 充電指示燈 間隔時間為 1 秒 )。 2. 將電池裝入充電器 將電池牢固地裝入充電器,如圖 7 所示。 3. 充電中 當電池插入充電器時,充電指示燈會閃爍藍燈。 導軌 當電池已完全充電時,充電指示燈會亮起綠燈。 圖 7 ( 見表 2) (1) 充電指示燈指示 依據充電器或充電池的狀態,充電指示燈會有不同的指示,如表 2 所示。 表 2 充電指示燈的指示 亮起 0.5 秒,熄滅 0.5 秒。 閃爍...
- Page 58 中國語 (2) 關於充電的溫度和充電時間 溫度和充電時間如表 3 中所示。 表 3 充電器 UC18YSL3 電池類型 Li-ion 電池可充電 0℃ - 40℃ 的溫度 充電電壓 14.4 BSL14xx 系列 BSL18xx 系列 系列 電池 (4 個電池芯) (8 個電池芯) (5 個電池芯)(10 個電池芯)(10 個電池芯) 充電 BSL1815S : 15 時間, BSL1415S : 15 BSL1815 : 15 約(於...
- Page 59 中國語 (2) 避免在高溫下充電。 充電電池在剛使用後會發熱。如果在電池剛使用後為電池充電,電池的內部 化學物質的性能會下降,電池使用壽命會縮短。請先將電池放置一會兒,待 電池冷卻後再進行充電。 注意 ○ 電池因長時間放置在直射陽光處遭到日曬或剛使用後會發熱,若在此時進行 充電,充電器的信號燈會亮起 0.3 秒,非亮起 0.3 秒(熄滅 0.3 秒) 。此時 您必須先待電池冷卻,再進行充電。 ○ 充電指示燈快速閃爍時(間隔時間為 0.2 秒) ,請檢查充電器的電池連接處 是否有異物並加以清除。 若沒有異物,則表示電池或充電器可能發生故障, 請將其送往當地授權服務中心。 ○ 由於充電器內置微電腦需要約 3 秒的時間確認進行充電的電池已被取出,請 等待至少 3 秒後再將電池重新插入繼續充電。如果電池在 3 秒之內重新插入, 電池可能無法正常充電。 ○ 廢棄電池須移出電器並安全地棄置。 ○ 若電器長時間不使用時,請將電池自電器移出。 ○...
-
Page 60: 操作前
中國語 操作前 1. 裝配及工作環境的檢查 請仔細地檢查工作環境是否妥當。 2. 安裝和拆卸過濾器 使用本電器前,請檢查過濾器是否妥善安裝。 (1) 取下集塵箱 ( 圖 8) 從進氣口觀察集塵箱的同時,將其朝逆時針方向轉動約 120 度,使集塵 箱上的凸起與機殼對齊,然後將其拉下。 (2) 取下過濾器。( 圖 9) 順時針旋轉過濾器,將其從機殼處取下。 (3) 檢查過濾器 ( 圖 10) 檢查過濾器有無損壞或髒污。 握住這裡 過濾器 順時針旋轉 凸起 過濾器上 取下 無碎片 過濾器 集塵箱 或灰塵 連接處 無損壞 機殼... -
Page 61: 開關面板
中國語 (5) 安裝集塵箱 ( 圖 12) 將集塵箱安裝在機殼上,對準兩處凸起。然後順時針旋轉集塵箱約 120 度。 凸起 對準 凸起 集塵箱 機殼 集塵箱 順時針旋轉 * 安裝集塵箱時, 約120度 也可以將吸頭朝上 圖 12 註: 若過濾器安裝不當,可能會使灰塵或污垢進入風機,導致發生故障或損壞。 開關面板 注意 請勿撞擊或損壞開關面板。 開關面板 1. 開關操作 ( 圖 13) 指示燈 可根據需要,在 3 檔間選擇吸塵模式操作。 高模式 電源關閉時,按下「3」按鈕或「2 1」按鈕 中... -
Page 62: 使用方法
中國語 指示燈 2. 指示燈 ( 圖 14) 關於過濾器清潔的通知 如果過濾器堵塞且吸力下降,指示燈將閃爍,並且主 機會發出脈沖聲,但這並非提示故障。 此時,請立即清空集塵箱並清潔過濾器。 (參閱第 65 頁「清空集塵箱」 ) Ø 關於進氣口堵塞的通知 如果在使用過程中進氣口堵塞——例如在吸地毯上的 圖 14 灰塵時——主機會發出脈沖聲,同時指示燈將閃爍。 但這並非提示故障。 發生此情況時,請從進氣口清除堵塞物。 註: 如果在過濾器堵塞或進氣口堵塞時連續運行,則電器將透過馬達的溫度保護 而停止運行。 使用方法 警告 安裝或拆卸充電式電池時,為了防止意外,請確保本電器的電源已關閉。 注意 ○ 請確保充電式電池已正確安裝。若安 過濾器 裝不正確,電池可能會掉落,從而造 成人體傷害。 ○ 確保使用本電器時已安裝過濾器。否 集塵箱 機殼 則可能會導致人員受傷或設備故障。 過濾器支架... - Page 63 中國語 2. 安裝吸頭 ( 圖 16) 將吸頭插入電器的吸氣口。不安裝吸頭也可使用本電器。 註: 安裝吸頭或延長管時,按照箭頭指示的方向插入。( 圖 17) 拆下時,按照箭頭指示的方向扭轉。 按照相反的方向扭轉將導致集塵箱與機殼分離。 延長管 吸頭和延長管 扭轉方向 吸頭 插入 拆下 集塵箱 機殼 圖 16 圖 17 3. 安裝電池 ( 圖 18) 如下圖所示,將電池插到底直到聽見喀噠聲。 4. 啟動本電器 ( 圖 19) 根據需要按下模式按鈕。 (請參閱第 61 頁的「開關面板」 ) 開關...
- Page 64 中國語 5. 電池剩餘量指示燈 電池剩餘量 電池剩餘量 (1) 電池 指示燈開關 指示燈 您可以透過按下電池剩餘量指示燈開關,使指 示燈亮起,以檢查電池的剩餘電量。 (圖 20,表 4) 在電池剩餘量指示燈開關被按下後約 3 秒,指 開關面板 示燈將熄滅。 由於環境溫度和電池狀況等細微差異,最好使 用電池剩餘量指示燈作為指標。 註: 此外,電池剩餘量指示可能與充電器所配備的 指示燈不同。 圖 20 表 4 指示燈狀態 電池剩餘電量 亮起: 電池剩餘電量超過 75%。 亮起: 電池剩餘電量為 50% – 75%。 亮起: 電池剩餘電量為 25% – 50%。 亮起:...
-
Page 65: 清空集塵箱
中國語 清空集塵箱 注意 ○ 為了防止意外發生,確保電源已切斷,並從 取下 本電器中取出充電式電池。 ○ 請勿讓集塵箱受到強烈的撞擊,因為這可能 集塵箱 會導致變形或損壞。 機殼 ○ 頻繁清空集塵箱,並保持本電器、過濾器等 的清潔。否則可能會降低吸塵效率或導致馬 將吸入口朝下 達故障或產生異味。 1. 旋轉集塵箱,將其從機殼取下 ( 圖 21)。 塵 註: 取下集塵箱時,將吸入口朝下,倒出灰塵。 集塵箱 2. 處理集塵箱中的灰塵。 圖 21 3. 若處理灰塵後無法重新蓋上吸頭,請清潔過 濾器。 4. 將過濾器和集塵箱安裝到機殼。 前後翻轉集塵箱 高效率的清除灰塵 ( 圖 22) 2 或... - Page 66 中國語 註: ○ 在 USB 充電過程中可能會偶爾發生暫停的現象。 ○ 未給 USB 裝置充電時,請將 USB 裝置從充電器上取下。 否則不僅會縮短 USB 裝置的電池壽命,而且會導致發生意外事故。 ○ 有時候可能不能給某些 USB 裝置充電,具體視裝置類型而異。 (1) 選擇充電方法 取決於所選充電方法,將電池插入充電器或將電源線插入插座。 ○ 從電氣插座給 USB 裝置充電(圖 23-a) 。 ○ 從電氣插座給 USB 裝置和電池充電(圖 23-b) 圖 23 (2) 連接 USB 線。 (圖 24) 將橡膠蓋往前拉並將市售的...
-
Page 67: 維修和檢查
中國語 維修和檢查 注意 進行維修和檢查之前,務必要關閉開關,並取出電池。 1. 清潔過濾器 注意 ○ 請勿用洗衣機清洗過濾器。 ○ 請勿以熱水清洗過濾器,或用火烤乾。 若甚至在已清空集塵箱後,吸塵效率仍舊不佳,請將過濾器卸下,並以冷水 或溫水清洗過濾器。 (水溫摸起來不燙手) 。 清洗後,放在陽光直射不到的地方將其晾乾。 如果風扇過濾器上有灰塵,請握住機殼並將風扇過濾器朝下,以防止灰塵進 入馬達,並用小刷子(如用過的牙刷)輕輕刷拭。 註 : ○ 請勿使用汽油、稀釋劑、苯或煤油,以防融化塑膠。 ○ 請勿使用氣槍或類似的工具清潔過濾器、風扇過濾器或電器本身。( 圖 26) 否則會使灰塵進入電器內部並導致故障。 擦乾任何水分 用牙刷或類似工具清潔 (請勿用力刷拭) 機殼 請勿拆卸風扇 過濾器或過濾 錯誤 ! 器支架。 過濾器 將風扇過濾器 空氣 朝下 過濾器支架... - Page 68 中國語 註: 定期空轉馬達,以清除污垢和灰塵。 若馬達內堆積有污垢或灰塵,可能會導致機器損壞。 4. 端子的檢查(工具和電池) 檢查以確保端子上沒有堆積削屑和灰塵。 有時於操作前、操作期間和操作後檢查。 注意 去除任何可能已堆積在端子上的削屑或灰塵。 否則可能會導致故障。 5. 清理外部 當工具髒污時,請用柔軟的乾布或沾肥皂水的布擦拭。切勿使用氯溶液、汽 油或稀釋劑,以免塑膠部分溶化。 6. 存放 請將吸塵器存放在溫度低於 50℃、兒童無法拿到的地方。 豎立放置本電器時,請將電器的帶子掛到掛鉤上。 (圖 27) 註: ○ 請勿將本電器存放在兒童可以輕易觸碰或取出的地方。 ○ 請勿將本電器存放在潮濕或可能被雨淋濕的地方。 ○ 請勿將本電器存放在陽光直射或溫度變化較大的地方。 ○ 請勿將本電器與易燃易爆的揮發性物質一同存放。 ○ 若無帶子固定,請勿將本電器靠在牆上。( 圖 27) 否則電器可能會摔落導致損壞。 錯誤 ! 正確 靠牆放置 使用帶子...
-
Page 69: 疑難排解
中國語 然而,反覆將電池充電和暫停充電二至五次,可能會改善電池使用時間的顯 著降低情況。 反覆充電後,若電池的使用時間仍呈現極短現象,表示電池壽命已盡,請購 買新的電池。 注意 在操作和維修電器中,必須遵守各國的安全規則和標準規定。 HiKOKI 充電式電池重要注意事項 請務必使用本公司所指定的原廠電池。若未使用本公司所指定的電池,或使 用經拆解及改裝的電池(例如,拆解後更換電池芯或其他內部零件 ),則本公 司無法保證充電式電器的性能及操作安全。 疑難排解 若吸塵器無法正常運作,請參閱下表的檢查項目。若問題仍無法解決,請洽當 地經銷商或 HiKOKI 所認可的維修中心。 情況 可能原因 解決方法 吸塵器無法運轉 無剩餘電池電量 請為電池充電 吸塵器突然停止 風扇被灰塵堵塞,導致過載 請聯繫經銷商並安排拆卸和清潔 電池過熱 請讓電池冷卻下來 電機過熱 清理灰塵並清潔過濾器,然後 讓電機冷卻下來。 吸力不足 集塵箱已滿 請清除灰塵 吸頭堵塞 請取出堵塞物 吸頭或延長管鬆動 請緊固組件 吸頭或延長管破裂或損壞 請更換新附件... -
Page 70: 選購附件
中國語 選購附件 選購特定操作適用的附件。 詳情請聯繫經銷商或授權維修中心。 BSL36A18 UC18YSL3 零件編號:329897 鋰電池 (14.4 V - 18 V) 電池蓋 充電器 零件編號:375373 零件編號:375371 軟管 刷頭掛架 零件編號:375375 零件編號:375372 延長管(短) 圓刷頭 零件編號:375374 零件編號:376509 角接頭 過濾器 錯誤 ! * 不可將角接頭直接安裝到主要組 件上。 可與延長管或其他附件配套使用。... - Page 72 服务中心 高壹工机商业 ( 上海 ) 有限公司 上海市闵行区浦江工业园区三鲁路3585号7幢3楼 制造商 广东高壹工机有限公司 广东省广州市番禺区化龙镇工业路富裕围工业村 Shinagawa Intercity Tower A, 15-1, Konan 2-chome, Minato-ku, Tokyo, Japan 编号:C99739252 G 发行日期:2021年4月 中国印刷...
Need help?
Do you have a question about the Hikoki R36DA and is the answer not in the manual?
Questions and answers