Table of Contents
Advertisement
Quick Links
Quick Installation Guide
www.seowonintech.co.kr
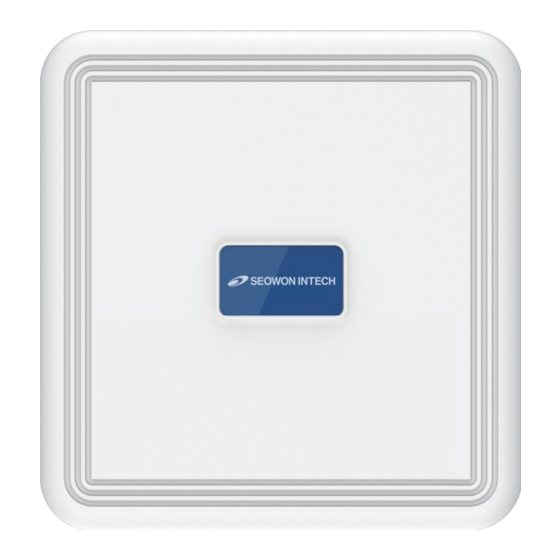
LTE Network Outdoor CPE
SLC-120T42OGA
Package Contents
Connection Diagram
Data IN
AC Code
Quick
(100~240V)
PoE Injector
Installation
Mounting Kits
Guide
AC IN
LAN
Cable
(Not included)
NOTE :
It is recommended to
LAN Cable
AC Code
PoE
use the accessory provided.
(100~240V)
for PC or WiFi Access Point
Data &
Power Out
Mounting Configuration
You need the following :
2
1
One Bracket
1
Bolt M3 (6ea)
6
Mounting Bar (2ea)
2
7
Nuts (4ea)
4
5
Mounting U-Bolt (2ea)
3
Spring Washers (4ea)
8
Bolts (4ea)
4
9
Washer (4ea)
Toothed lock washer (4ea)
7
8
5
WARNING : The guarantee of product quality
and warranty service is not available by removal
Assembly sequence optimization
this label purposely
Step 1
Remove the four Bolt M3 from the outdoor CPE.
* Remaining 4 screws are enclosed in the mounting kits as
6
(4ea)
Step 2 (Installing USIM Card)
Carefully insert the USIM Card into USIM slot.
CAUTION :
The surface of IC(metal)
IC
should be facing downward from
USIM
the USIM card.
card
USIM card
Step 3
Remove the cap by turning. Then follow the next steps
as shown below.
Remove the cap.
1
Put A, B, Cap and Aluminum plate to cable line in order.
2
3
Plug the cable line into the
LAN hole
of outdoor CPE.
4
Connect A and B in order.
5
Lastly, connect Cap to Aluminum plate by turning.
Cable line Cap
B
A
Aluminum plate
[5M93-0000] QUICK GUIDE,SLC-120T42OGA,서원향(FCC인증_PART 96_CAT_B)_V1.0,영문+불어,8PAGE 칼라.indd 1-4
Step 4
6
Assemble the Aluminum plate and outdoor CPE
(8ea)
using the screws Bolt M3(8ea).
Step 5
LAN Cable
Attach item 1 to the back side of the device
for PC or WiFi Access Point
using item 4 as shown.
(Insert item 5 into item 4 before installing)
5
4
Step 6
Install the device to pole using item 2 & 3,
Outdoor CPE
tighten the bracket by using item 7 & 8 & 9.
3
6
7
8
9
Step 7
9
Adjust the device, using the different position
on the bracket. Check the LED light (1~5).
RESET Button (
When the device turned On)
- Press the reset button once : Device reboot
- Press and hold the reset button 5sec : Factory reset
NOTE :
If you forget the Login password for the
Outdoor CPE or IP address after making changes,
use the reset button to restore the Outdoor CPE to its
Turn left: Open
original factory default settings.
Turn right: Closed
LED Presentation
Status icon & LED indicator
Boot in progress
One Yellow LED Blinking, Blinking period = 1sec
S/W Update
Five Yellow LED Blinking, Blinking period = 1sec
Number of LED depending on signal strength
- Strongest Signal : Five yellow LED
- Strong Signal : Four yellow LED
Network connection
- Medium Signal : Three yellow LED
- Weak Signal : Two yellow LED
- Weakest Signal : One yellow LED
Log-in to Web Interface
- Go to WEB "http://192.168.1.1" then press ENTER to access the login screen.
- The default one is
user
for both User Name and Password.
IMPORTANT SAFETY AND INSTALLATION WARNINGS
WARNING:
DO NOT ATTEMPT TO SERVICE THIS PRODUCT YOURSELF
LAN
Cable line
AS OPENING OR REMOVING COVERS MAY EXPOSE YOU TO
DANGEROUS VOLTAGES OR OTHER HAZARDS. REFER ALL
SERVICING TO QUALIFIED SERVICE PERSONNEL.
MOUNTING:
Mount this device only as described in the installation instructions, otherwise
it may fall causing serious personal injury and/or damage the device. Use
1
only with the brackets supplied with the device. Do not use attachments not
recommended for this device as they may cause hazards.
SERVICING:
Remove power from this device and refer servicing to qualified personnel
under the following conditions:
3
1. If the inside of the device has been exposed to rain or water.
2. If the device does not operate normally by following the operating
2
instructions. Adjust only those controls that are covered by the
operating instructions as an improper adjustment of the controls may
result in damage and will often require extensive work by a qualified
technician to restore the device to its normal operation.
3. If the device has been dropped or the chassis has been damaged.
4. If the device exhibits a distinct change in performance.
REPLACEMENT PARTS:
When replacement parts are required, be sure the service technician has
used replacement parts specified by the manufacturer or have the same
characteristics as the original part. Unauthorized substitutions may result in
fire, electric shock or other hazards.
RESET Button
For safety reasons, use only the Adapter provided with the unit or
an authorized replacement adapter from SEOWON INTECH.
This Product is designed to be waterproof in compliance with IP68.
CONSIGNES IMPORTANTES AN MATIERE DE SÉCURITÉET D'INSTALLATION
MISE EN GARDE :
N'ESSAYEZ PAS DE RÉPARER VOUS-MÊME CE PRODUIT
CAR L'OUVERTURE OU LE RETRAIT DU BOÎTIER POURRAIT
VOUS EXPOSER À DES TENSIONS DANGEREUSES OU À
D'AUTRES RISQUES. CONFIEZ LA RÉPARATION À UN
PERSONNEL QUALIFIÉ.
ASSEMBLAGE :
Assemblez cet appareil uniquement suivant la description fournie dans les
consignes relatives à l'installation. Le non-respect de ces consignes pourrait
entraîner d'importantes lésions corporelles et/ou l'endommagement de
l'appareil. Utilisez uniquement les supports fournis avec l'appareil. N'utilisez
pas les accessoires non recommandés pour cet appareil car ils pourraient provoquer
des accidents.
RÉPARATION :
Mettez l'appareil hors tension et confiez la réparation à un personnel qualifié
dans les conditions ci-après :
1. Si l'intérieur de l'appareil a été exposé à la pluie ou à l'eau.
2. Si l'appareil ne fonctionne toujours pas après avoir suivi toutes les
consignes d'utilisation. Réglez uniquement les commandes
couvertes par les consignes d'utilisation car un mauvais réglage
pourrait entraîner des dégâts et nécessiterait de longues heures de
travail par un technicien qualifié pour rétablir le fonctionnement
normal de l'appareil
3. Si l'appareil était tombé ou si le châssis a été endommagé.
4. Si vous constatez un changement notable des performances de l'appareil.
PIÈCES DE RECHANGE :
Lorsque le remplacement des pièces est nécessaire, assurez-vous que le
technicien utilise les pièces de rechange spécifiées par le fabricant ou
celles qui ont les mêmes caractéristiques que la pièce d'origine. Les
substitutions non autorisées peuvent déclencher une incendie, un choc
électrique ou d'autres risques.
Pour des raisons de sécurité, utilisez uniquement l'adaptateur
fourni avec l'appareil ou un adaptateur de rechange autorisé de
SEOWON INTECH.
Ce produit est conçu pour résister à toute forme d'immersion conformément
à la norme IP68.
2020-03-12 오전 11:43:09
Advertisement
Table of Contents

Summary of Contents for SEOWON INTECH SLC-120T420GA
- Page 1 CAUTION : The surface of IC(metal) Status icon & LED indicator should be facing downward from an authorized replacement adapter from SEOWON INTECH. celles qui ont les mêmes caractéristiques que la pièce d'origine. Les USIM the USIM card. card...
- Page 2 Trojan Horses, etc. • Treated with its Product Serial # removed or defaced. SEOWON INTECH CO., LTD R&D Center 69, LS-ro 115beon-gil, Gunpo-si, Gyeonggi-do, Korea 15809 Tel +82-31-428-9531 l Fax +82-31-428-9537 l E-Mail sales@seowonintech.co.kr l Website http://www.seowonintech.co.kr/en/ FCC ID: V7MBSLC-120T42OGA The content in this document can be modified without prior notice for improving performance or function of device.
Need help?
Do you have a question about the SLC-120T420GA and is the answer not in the manual?
Questions and answers