
Summary of Contents for Gaviota Simbac Esenzia 80210001
- Page 1 Esenzia Manual Instalación Manuel d´ Installation Manuale di Installazione Assembly Instructions...
-
Page 3: List Of Items
Listado de artículos: Liste d’articles: List of items: Listado de artículos: Perfiles • Profiles • Profils • Profili Código Nº Code Nombre Artículo • Article Description • Articolo Descrizione Codice Kit hoja fija sobrepuesta Esenzia blanco • Set of fixed flush panel, Esenzia, white 80210001 Kit chevauchement ventail Esenzia blanc •... - Page 4 11-12...
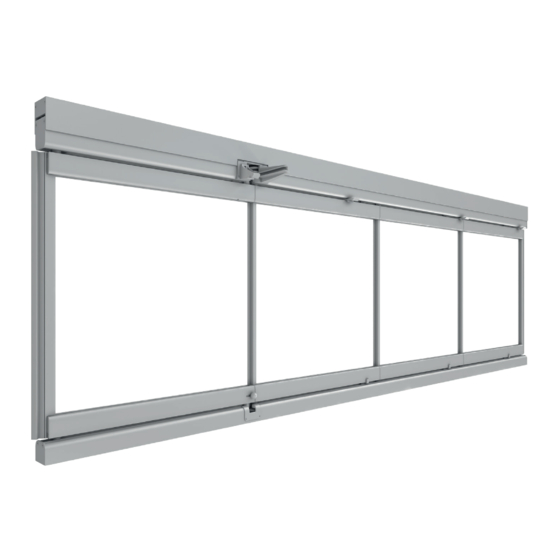
- Page 5 Conjuntos del sistema: Ensembles du système: System sets: Assiemi del sistema: Conjunto marco superior: Top frame set: Ensemble châssis supérieur: Assieme telaio superiore: Hoja fija Esenzia: Hoja deslizante Esenzia: Fixed panel Esenzia: Slide panel Esenzia: Ventail fixe Esenzia: Ventail coulissant Esenzia: Anta fissa Esenzia: Anta scorrevole Esenzia: Conjunto marco inferior:...
- Page 6 Dimensiones: Dimensions: Dimensions: Dimensioni: Hoja fija Esenzia Fixed panel Esenzia Ventail fixe Esenzia Anta fissa Esenzia Hoja deslizante Esenzia Slide panel Esenzia Ventail coulissant Esenzia Anta scorrevole Esenzia L= Longitud acristalamiento • Length of glazing • Longueur vitrage • Lunghezza invetriatura H= Altura acristalamiento •...
- Page 7 Montaje conjunto marco superior: Montage ensemble châssis supérieur: Assembly of top frame set: Montaggio assieme telaio superiore: El Conjunto Marco Superior debe estar pre-montado siguiendo las indicaciones del Manual Fabricación Cortina Cristal Esenzia. The Top Frame Set must be pre-assembled as described in the Manufacturing Instructions of the Esenzia Glass Curtain.
- Page 8 Paso 1: Colocar el Conjunto Marco Superior Fase 1: Posizionare l’Assieme Telaio Superiore y marcar los taladros a realizar en el techo e segnare i fori da praticare nel tetto in coincidiendo con los orificios ya perforados en el corrispondenza con gli orifici già prodotti nello mismo, perforar, introducir los tacos y finalmente stesso, perforare, introdurre i tasselli ed infine atornillar el Conjunto Marco Superior.
- Page 9 Mise à niveau du profil Nivelación Perfil Compensador: compensateur: Levelling the compensation Livellamento del Profilo Profile: Compensatore: Paso 1: Liberar el tornillo (1) de bloqueo. Step 1: Release the locking screw. 1: Libérer la vis (1) de blocage. Fase 1: Liberare la vite (1) di bloccaggio. Paso 2: Regular la altura con el tornillo (2).
- Page 10 Montage ensemble du châssis Montaje conjunto marco inferior: inférieur: Assembling bottom frame set: Montaggio assieme telaio inferiore: El Conjunto Marco Inferior debe estar pre-montado siguiendo las indicaciones del Manual Fabricación Cortina Cristal Esenzia. The Bottom Frame Set must be pre-assembled as described in the Manufacturing Instructions of the Esenzia Glass Curtain.
- Page 11 Paso 2: Colocar los calzos de nivelación entre 2: Disposer les cales de mise à niveau entre le el Perfil Marco Inferior y el suelo para que éste profil du châssis inférieur et le sol pour que ce quede perfectamente horizontal y atornillar el dernier soit parfaitement horizontal puis visser le Perfil Marco Inferior.
- Page 12 1: Une fois les ensembles du châssis supérieur et inférieur montés et mis à niveau, les ventaux doivent être insérées dans les châssis. D’abord le dernier ventail coulissant et, en dernier lieu, le ventail fixe. Les ventaux fixes doivent être insérés dans les châssis avant de fixer les pièces d’ouverture.
- Page 13 Paso 3: Para introducir la Hoja Fija el Casquillo Soporte Superior debe quedar perpendicular al cerramiento, de forma que al introducir el panel éste quede situado en la cara exterior del Marco Superior. Step 3: To insert the Fixed Panel the Top Bushing Support must always be perpendicular to the enclosure, so that when this panel is introduced it will remain on the exterior side of the Top Frame.
- Page 14 Paso 6: Nivelar la Hoja Fija por medio del Perfil Compensador o en su defecto por medio de la posición del Soporte Superior Rodamiento y del Soporte Inferior Fijo. Step 6: Level the Fixed Panel using the Compensation Profile or otherwise by positioning the Top Bearing Support and the Bottom Fixed Support.
- Page 15 Paso 2: Deslizar la Hoja Fija en esta posición 2: Glisser le ventail fixe dans cette position jusqu’à l’ouverture du châssis supérieur et introduire le hasta la apertura del Marco Superior e introducir el Soporte Superior Rodamiento por la apertura, support supérieur de roulement par l’ouverture.
- Page 16 Paso 4: Repetir la misma operación tantas veces 4: Répéter la même opération pour chaque como Hojas Deslizantes disponga el cerramiento. ventail coulissant de l’enveloppe. Step 4: Repeat this operation as many times the Fase 4: Ripetere la stessa operazione un numero number of Sliding Panels in the encltosure.
- Page 17 Paso 2: Introducir la Tapa Apertura Superior en su alojamiento y fijarla mediante tornillos al Perfil Marco Superior. Step 2: Insert the Top Opening Cover into its housing and secure with screws to the Top Frame Profile. 2: Introduire le couvercle d’ouverture supérieure dans son logement et le fixer au moyen de vis au profil du châssis supérieur.
- Page 18 Nivelación de las Hojas: Mise à niveau des ventaux: Livellamento delle Ante: Levelling the Panels: Paso 1: Una vez insertadas todas las hojas en el Step 1: Once all the panels have been inserted cerramiento, se debe fijar el Tope Marco Inferior, in the enclosure, the Bottom Frame Stopper must cuya posición viene determinada por el Pivote be placed according to the position determined...
- Page 19 Paso 2: Al finalizar la instalación se debe sellar 2: Une fois l’installation terminée, le profil du con silicona el Perfil Marco Superior e Inferior châssis supérieur et inférieur doit être scellé avec para evitar la filtración de agua. du silicone pour éviter toute filtration d’eau. Step 2: Once the installation is complete, the Fase 2: Quando l’installazione è...
- Page 20 GAVIOTA SIMBAC, S.L. Autovía de Alicante A-31, Km.196 03630 Sax (Alicante) - España / Spain Tel. +34 965 474 200•Fax +34 965 475 680 International Dept.: +34 966 968 276•Fax +34 966 968 075 comercial@gaviotasimbac.com - export@gaviotasimbac.com www.gaviotasimbac.com...
Need help?
Do you have a question about the Esenzia 80210001 and is the answer not in the manual?
Questions and answers