
Summary of Contents for MOA T1B
- Page 1 Toaster Instruction Manual English / Nederlands / Deutsch / Français www.moacolors.com...
-
Page 2: Before Use
BEFORE USE Before use, please read this manual carefully. Only connect the appliance to an earthed wall socket. This appliance is for household use only. When using electrical appliances, basic safety precautions should always be followed to avoid fires, electric shocks, burns, or other injuries and damage. Read these operating and safety instructions carefully. - Page 3 IMPORTANT SAFEGUARDS (2/4) 11. Never leave the appliance unsupervised when in use. 12. The appliance must be used only for its intended purpose. No responsibility can be taken for any possible damage caused by incorrect use or improper handling. 13. Children and persons with disabilities are not always aware of the danger posed by the use of appliances.
- Page 4 IMPORTANT SAFEGUARDS (3/4) 24. If the supply cord is damaged, it must be replaced by the manufacturer, its service agent or similarly Competent qualified person(*) in order to avoid a hazard. 25. Disconnect the power source cable before any operation of cleaning of maintenance and accessories assembly.
- Page 5 IMPORTANT SAFEGUARDS (4/4) 37. Always place the unit on a flat surface. Ensure, also, not to cover the device and not to put anything on it. 38. Always remove the plug from the wall socket when the appliance is not in use. 39.
-
Page 6: Parts Description
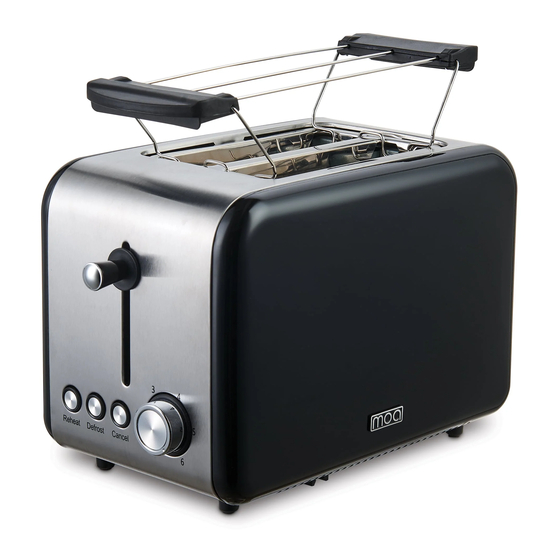
PARTS DESCRIPTION 1. Bread carriage handle 2. Reheat/Cancel/Defrost Buttons 3. Browning control selector 4. Crumb tray (under the unit) 5. Stainless steel housing 6. 2 Large slots 7. Bun warmer Before first use Let the unit run, without bread, about 3 minutes to remove the protective layer of resistance. -
Page 7: How To Use
HOW TO USE (1/2) 1. Unroll the power cord completely. 2. Check that the tension in force in the country where you are corresponds to that indicated on the apparatus. 3. Connect the apparatus in a correct socket-outlet, (and connected to the ground if the unit is Class I), to avoid any danger. -
Page 8: Maintenance And Cleaning
HOW TO USE (2/2) 13. You can adjust the browning intensity to obtain a more or less toasted bread by positioning the browning control selector to one of the degrees marked from 1 to 6. Therefore you only have to turn clockwise to increase the intensity, and anticlockwise to decrease it. -
Page 9: Warranty
Should you find any defect or malfunction of your MOA product, please contact the appropriate Customer Care Center. Sincerely yours,... -
Page 10: Voor Het Gebruik
VOOR HET GEBRUIK Lees deze handleiding voor gebruik met aandacht. Sluit het apparaat alleen aan op een geaard stopcontact. Dit apparaat is alleen voor huishoudelijk gebruik. Bij gebruik van elektrische apparaten, moeten algemene veiligheidsmaatregelen altijd opgevolgd worden om brand, elektrische schokken, brandwonden en andere verwondingen en vormen van schade te voorkomen. - Page 11 BELANGRIJKE VEILIGHEIDSMAATREGELEN (2/4) 11. Laat het apparaat nooit zonder toezicht wanneer het in gebruik is. 12. Het apparaat mag alleen worden gebruikt voor het beoogde doel. Er kan geen verantwoordelijkheid worden genomen voor mogelijke schade veroorzaakt door onjuist gebruik. 13. Kinderen en personen met een beperking zijn zich niet altijd bewust van het gevaar van het gebruik van apparaten.
- Page 12 BELANGRIJKE VEILIGHEIDSMAATREGELEN (3/4) 24. Als het netsnoer beschadigd is, moet het worden vervangen door de fabrikant, zijn serviceagent of een vergelijkbare bevoegde persoon (*) om gevaar te voorkomen. 25. Haal de stekker uit het stopcontact voordat u reinigt of de onderdelen in elkaar zet.
- Page 13 BELANGRIJKE VEILIGHEIDSMAATREGELEN (4/4) 37. Plaats het apparaat altijd op een vlakke ondergrond. Zorg er ook voor dat u het apparaat niet bedekt en er niets op zet. 38. Haal altijd de stekker uit het stopcontact wanneer het apparaat niet in gebruik is. 39.
-
Page 14: Beschrijving Onderdelen
BESCHRIJVING ONDERDELEN 1. Hendel broodslede 2. Opwarmen/Annulering/Ontdooi knop 3. Bruiningsstand knop 4. Kruimellade (onder het apparaat) 5. Roestvrijstalen behuizing 6. 2 grote gleuven 7. Broodjeswarmer Eerste gebruik Laat het apparaat ongeveer 3 minuten zonder brood aan staan om de beschermende weerstandslaag te verwijderen. Selecteer hiervoor de hoogste stand met de keuzeknop voor stand van mate waarin geroosterd wordt. - Page 15 GEBRUIK (1/2) 1. Rol het netsnoer helemaal uit. 2. Controleer of de spanning die van kracht is in het land waar u zich bevindt, overeenkomt met die op het apparaat. 3. Sluit het apparaat aan op een correct stopcontact (en geaard indien het apparaat klasse I is) om elk gevaar te voorkomen.
-
Page 16: Onderhoud En Reiniging
GEBRUIK (2/2) 13. U kunt de bruining van het brood aanpassen om minder of meer geroosterd brood te verkrijgen door de bruiningsstandknop op een van de graden te plaatsen die is gemarkeerd van 1 tot 6. Daarom hoeft u alleen met de klok mee te draaien om de intensiteit te verhogen en tegen de klok in te draaien om het te verlagen. -
Page 17: Garantie
Mocht u een defect of storing vaststellen aan uw MOA-product, neemt u dan a.u.b. contact op met het passende Customer Care Center (klantenservice), waar u het product heeft gekocht. -
Page 18: Vor Inbetriebnahme
VOR INBETRIEBNAHME Bitte lesen Sie diese Bedienungsanleitung vor Gebrauch sorgfältig durch. Schließen Sie das Gerät nur an eine geerdete Steckdose an. Dieses Gerät ist nur für den Hausgebrauch bestimmt. Bei der Verwendung von elektrischen Geräten sollten immer grundlegende Sicherheitsregeln beachtet werden, um Brände, Stromschläge, Verbrennungen oder andere Verletzungen und Schäden zu vermeiden. - Page 19 WICHTIGE SCHUTZMAßNAHMEN (2/4) 11. Lassen Sie das Gerät nie unbeaufsichtigt, wenn es in Betrieb ist. 12. Das Gerät darf nur für den vorgesehenen Zweck verwendet werden. Für eventuelle Schäden, die durch unsachgemäßen Gebrauch oder unsachgemäße Handhabung entstehen, kann keine Verantwortung übernommen werden.
- Page 20 WICHTIGE SCHUTZMAßNAHMEN (3/4) 24. Wenn das Netzkabel beschädigt ist, muss es vom Hersteller, dessen Servicevertreter oder einer ähnlich kompetenten qualifizierten Person(*) ersetzt werden, um eine Gefährdung zu vermeiden. 25. Trennen Sie das Kabel von der Stromquelle, bevor Sie die Reinigung der Wartungs- und Zubehörbaugruppe durchführen. 26.
- Page 21 WICHTIGE SCHUTZMAßNAHMEN (4/4) 37. Stellen Sie das Gerät immer auf eine flache Oberfläche. Achten Sie auch darauf, das Gerät nicht abzudecken und nichts darauf abzustellen. 38. Ziehen Sie immer den Stecker aus der Wandsteckdose, wenn das Gerät nicht benutzt wird. 39.
- Page 22 PARTS DESCRIPTION 1. Mechanismusgriff 2. Aufwärmen/Auftauen/Abbruch 3. Bräunungsschalter 4. Krümelschale (unterhalb) 5. Edelstahlgehäuse 6. 2 große Schlitze 7. Brötchen wärmer VOR DER ERSTINBETRIEBNAHME Lassen Sie das Gerät ohne Brot etwa 3 Minuten laufen, um die Schutzschicht des Widerstandes zu entfernen. Wählen Sie dazu die maximale Einstellung am Bräunungsschalter.
- Page 23 GEBRAUCHSANWEISUNG (1/2) 1. Rollen Sie das Netzkabel vollständig aus. 2. Überprüfen Sie, ob die in dem Land, in dem Sie sich befinden, geltende Spannung mit der auf dem Gerät angegebenen übereinstimmt. 3. Schließen Sie das Gerät an eine ordnungsgemäße Steckdose an (geerdet, wenn das Gerät der Klasse I entspricht), um jede Gefahr zu vermeiden.
-
Page 24: Wartung Und Reinigung
GEBRAUCHSANWEISUNG (2/2) 13. Sie können die Bräunungsintensität einstellen, um ein mehr oder weniger getoastetes Brot zu erhalten, indem Sie den Schalter auf einen der markierten Grade von 1 bis 6 einstellen. Sie müssen also nur im Uhrzeigersinn drehen, um die Intensität zu erhöhen, und gegen den Uhrzeigersinn, um sie zu verringern. - Page 25 Zweifelsfall an Ihre zuständige Recyclinganlage. GARANTIE Sehr geehrte Kundin, sehr geehrter Kunde, vielen Dank, dass Sie sich für ein Produkt der Marke MOA entschieden haben. Wir möchten Sie hiermit darüber informieren, dass die Gewährleistung dieses Produkts sämtliche gesetzlichen Vorschriften zu bestehenden Gewährleistungen sowie Ihre Rechte als Verbraucher in dem Land...
-
Page 26: Avant Utilisation
AVANT UTILISATION Avant utilisation, veuillez lire attentivement ce manuel. Branchez l’appareil uniquement sur une prise murale mise à la terre. Cet appareil est destiné à un usage domestique uniquement. Lors de l’utilisation d’appareils électriques, des précautions de sécurité de base doivent toujours être suivies pour éviter les incendies, les chocs électriques, les brûlures ou autres blessures et dommages. - Page 27 CONSIGNES DE SÉCURITÉ IMPORTANTES (2/4) 11. Ne laissez jamais l’appareil sans surveillance pendant son utilisation. 12. L’appareil ne doit être utilisé que pour l’usage auquel il est destiné. Nous déclinons toute responsabilité pour les dommages éventuels causés par une utilisation ou une manipulation incorrecte. 13.
- Page 28 CONSIGNES DE SÉCURITÉ IMPORTANTES (3/4) 24. Si le cordon d’alimentation est endommagé, il doit être remplacé par le fabricant, son agent de service ou toute autre personne qualifiée compétente (*) afin d’éviter tout risque. 25. Débranchez le câble de la source d’alimentation avant toute opération de nettoyage ou d’entretien et le montage des accessoires.
- Page 29 CONSIGNES DE SÉCURITÉ IMPORTANTES (4/4) 37. Placez toujours l’appareil sur une table ou une surface plane. Veillez également à ne pas couvrir l’appareil et à ne rien mettre dessus. 38. Retirez toujours la fiche de la prise murale lorsque l’appareil n’est pas utilisé.
-
Page 30: Description Des Pièces
DESCRIPTION DES PIÈCES 1. Poignée du compartiment à pain 2. Boutons Réchauffer / Annuler / Décongeler 3. Sélecteur de contrôle du brunissement 4. Tiroir à miettes (sous l’appareil) 5. Boîtier en acier inoxydable 6. 2 Fentes larges 7. Chauffe-pain Avant la première utilisation Laissez l’appareil fonctionner, sans pain, pendant environ 3 minutes pour enlever la couche de résistance protectrice. - Page 31 MODE D’EMPLOI (1/2) 1. Déroulez entièrement le cordon d’alimentation. 2. Vérifiez que la tension en vigueur dans le pays où vous vous trouvez correspond à celle indiquée sur l’appareil. 3. Branchez l’appareil dans une prise de courant correcte, (et reliée à la terre si l’appareil est de classe I), pour éviter tout danger.
-
Page 32: Entretien Et Nettoyage
MODE D’EMPLOI (2/2) 13. Vous pouvez régler l’intensité du brunissement pour obtenir un pain plus ou moins grillé en positionnant le sélecteur de contrôle du brunissement sur l’un des degrés marqués de 1 à 6. Il suffit donc de tourner le bouton dans le sens des aiguilles d’une montre pour augmenter l’intensité, et dans le sens inverse pour la diminuer. - Page 33 été acheté. Si vous constatez un défaut ou un dysfonctionnement de votre produit MOA, veuillez contacter le centre de service clientèle approprié. Cordialement, L’équipe MOA Grill Pain - Manuel d’instructions...
Need help?
Do you have a question about the T1B and is the answer not in the manual?
Questions and answers