
Related Manuals for MovieBird MB12

Summary of Contents for MovieBird MB12
- Page 1 MB12 Verticrane Instruction Manual MovieBird International Sp. z o.o. ul. Romualda Traugutta 5 45-667 Opole Poland Tel: +48 77 456 60 77 Fax: +48 77 456 60 77 e-mail: info@moviebird.com www.moviebird.com...
- Page 2 MovieBird MB12 Verticrane Instruction Manual Technical Support: Piotr Czernecki – pcz@moviebird.com , Phone +48 782479077 Maciej Hełm – mhelm@moviebird.com , Phone +48 513141258...
-
Page 3: Table Of Contents
MovieBird MB12 Verticrane Instruction Manual Table of contents Safety guidelines........................4 Safety precautions........................6 Crane balancing......................... 9 SYSTEM DESCRIPTION / CONTENTS..................12 SYSTEM ASSEMBLY........................17 Dolly assembly........................17 PanBearing installation/removal..................18 Yoke installation........................19 Arm installation. -
Page 4: Safety Guidelines
2. The MovieBird Telescopic Crane may only be assembled, setup or operated by trained and experienced operator. 3. The crane may not be assembled or operated under the influence of alcohol, drugs or any other intoxicating substances. - Page 5 21. Pan and Tilt brake must be operated by MovieBird operator only. 22. Base must be maintained horizontally in a level position when in use. 23. All personnel in the vicinity of the MovieBird are to be made aware of its scope and speed of movement.
-
Page 6: Safety Precautions
MovieBird MB12 Verticrane Instruction Manual Safety precautions. Safety straps. When not in use, or during transport, the crane should always be secured by two safety straps – one at the front and one at the back. On the dolly, fasten the safety straps with snap hooks at the eyebolts. - Page 7 MovieBird MB12 Verticrane Instruction Manual Levelling jacks. MB12 dolly has 6 sets of levelling jacks – one on each corner and additional two on the extendable side supports. When stationary, use the levelling jacks to keep the base from moving. Always set the base levelled (horizontal) before using the arm.
- Page 8 MovieBird MB12 Verticrane Instruction Manual Protective covers. It is forbidden to operate a crane without the protective covers being fitted. The protective covers should only be removed for servicing and cleaning the rails or tightening cables and must always be screwed back on afterwards. Operating the crane without side covers may result in serious hand injury.
-
Page 9: Crane Balancing
Telescopic camera cranes need proper balancing for safe operation, quite different than balancing a fixed length camera crane. Due to the small size and weight of the MB12 crane it is mandatory to have the crane perfectly balanced every time the electric control unit is on. - Page 10 After balancing the crane in horizontal position it is important to balance the center of gravity (COG) relative to the tilt rotational axis. Due to the small size and weight of the MB12 and multiple load variants (underslung, overslung, matrix) the COG can move up or down relative to the tilt axis.
- Page 11 MovieBird MB12 Verticrane Instruction Manual To adjust the screw: Put the arm in horizontal position Loosen the locking nuts on both sides of the yoke: Turn the central adjusting screw to lift or lower the arm. Lift the arm if it’s bottom heavy, lower the arm when top heavy.
-
Page 12: System Description / Contents
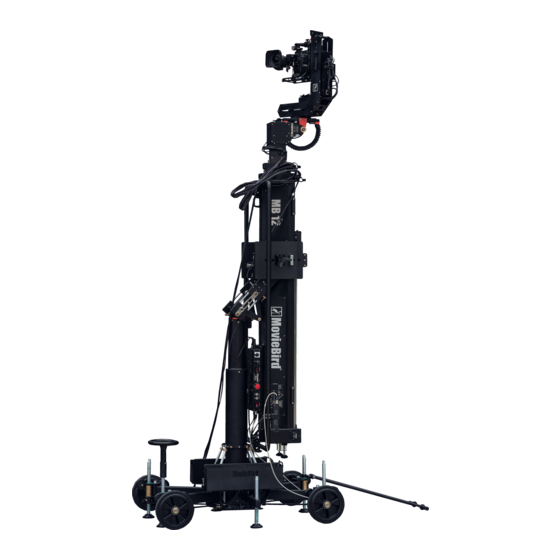
Depending on the options You’ve selected on ordering, the MB12 Verticrane System will come with the following main parts: MovieBird MB12 Arm. The MB12 arm will come with its own dedicated levelling head, a set of counterweights and an Electronic Control Box with a separate Power Supply Unit:... - Page 13 MovieBird MB12 Verticrane Instruction Manual The power supply unit is necessary if using mains power (230/120V). You can also run the system with 48V battery pack, in that case plug the power cable straight into the electronic control unit.
- Page 14 MovieBird MB12 Verticrane Instruction Manual The MB12 can be ordered with one of the following Yokes, both dedicated for different jobs: Verticrane Yoke. The Verticrane Yoke is a folding Yoke that allows the MB12 arm to enter the Verticrane position. In the Verticrane...
- Page 15 MB12 PanBearing is a universal double-Mitchell pan bearing with integrated pan brake. By default it’s mounted on the top of the MB12 column but can be easily removed and mounted on a car/dolly or any other platform that can accept Mitchell or Moe mounts.
- Page 16 MovieBird MB12 can be ordered with a dedicated case set that consists of an MB12 arm case and a MB12 dolly and column case. The MB12 arm case holds the MB12 arm and one of the Yokes, as well as the counterweight hanger and side rails. The arm rests on a specially designed cradle that can be removed from the case and used as a servicing stand.
-
Page 17: System Assembly
SYSTEM ASSEMBLY. Dolly assembly. The MB12 dolly comes mostly assembled, the only thing to do on arrival is installation of the column. The dolly can be ordered with its own dedicated case: To install the column, unstrap it from its cradle and position it on the base with the drive nut... -
Page 18: Panbearing Installation/Removal
MovieBird MB12 Verticrane Instruction Manual With column fixed to the dolly, install 4 side braces connecting dolly with the column. Side braces have adjustable length, You might need to adjust it to ease the installation process. The braces are mounted to the base by 4 M10 bolts and fixed to the column by special sliding pins. -
Page 19: Yoke Installation
MovieBird MB12 Verticrane Instruction Manual Yoke installation. Both types of MB12 yokes are installed the same way: position the Yoke base on top of the PanBearing, pay attention that the key goes inside the slot in the base. Secure the Yoke with a Mitchell nut screwed in from the top. - Page 20 MovieBird MB12 Verticrane Instruction Manual Unstrap the side rails from the MB12 arm case and install them in their mounting brackets on the arm and secure them with bolts. The dedicated MB12 case has special cutouts that allow that. Grab the arm by the side rails on both sides and lift it from the case. Position the arm on top the Yoke and slide it downward making sure the Yoke uprights slide easily onto the cradle cutouts on the arm.
- Page 21 MovieBird MB12 Verticrane Instruction Manual Install the counterweight hanger and secure it with two M14 bolts:...
-
Page 22: Levelling Head And Electronics Installation
MovieBird MB12 Verticrane Instruction Manual Levelling head and electronics installation. The MB12 levelling head and Electronics module are transported in their own dedicated case: To install the levelling head, position it in front of the 3 section and slide the motor tube in. - Page 23 MovieBird MB12 Verticrane Instruction Manual Take the electronic box out of the case and slide it into its slot at the back of the arm. Secure it with locking screws on both sides. Connect the arm motor and endstops to the control unit. Connect the levelling head power...
-
Page 24: Enabling Verticrane Function
The Verticrane function is an option possible only on the MB12 dedicated base and column and using the Verticrane tiltable Yoke. IT IS IMPORTANT TO FULLY AND PROPERLY BALANCE THE CRANE WHEN USING THE VERTICRANE FUNCTIONALITY !! CHECK THE BALANCE AT ALL ANGLES, THE CRANE MUST NOT ROTATE ALONG THE TILT AXIS ON ITS OWN. - Page 25 MovieBird MB12 Verticrane Instruction Manual 2. Level the crane and install the VertiCrane levelling head in the Overslung position. Do not put any load on the levelling head, do not install any counterweights. 3. Rise the column to the full extended position.
- Page 26 MovieBird MB12 Verticrane Instruction Manual 4. Manually extend the telescopic sections to the point where the crane arm is naturally balanced by it’s own weight. Do not balance the crane with counterweights. 5. Turn on the electronic box to hold the motor, do not use the remote and do not...
- Page 27 MovieBird MB12 Verticrane Instruction Manual 6. Engage the Yoke Lock pins on the bottom of the Yoke cradle by shifting the lever mechanism. The pins must lock into their seats on both sides. 7. Engage the Tilt brake on the left side of the Yoke.
- Page 28 8. Slightly loosen fixing screws on both sides of the Yoke with a hex wrench. 9. Carefully press on the sidebars on the back of the MB12 arm tilting the Verticrane Yoke back about 45 degrees. Do not let go of the sidebars, the operator must...
- Page 29 MovieBird MB12 Verticrane Instruction Manual 10. Tighten both fixing screws on the sliders. 11. Disengage the Tilt brake and the Yoke Lock pins (red lever)
- Page 30 MovieBird MB12 Verticrane Instruction Manual 12. Rotate the arm to level position by lifting the sidebars at the back of the arm. 13. Cycle the electronic box off and on to reset the levelling head. You might need to do it twice in order for the levelling head to calibrate properly.
- Page 31 MovieBird MB12 Verticrane Instruction Manual IT IS IMPORTANT TO FULLY AND PROPERLY BALANCE THE CRANE WHEN USING THE VERTICRANE FUNCTIONALITY !! CHECK THE BALANCE AT ALL ANGLES, THE CRANE MUST NOT ROTATE ALONG THE TILT AXIS ON ITS OWN. IT IS UNSAFE TO USE A VERTICRANE THAT IS NOT PROPERLY BALANCED.
-
Page 32: Crane Maintenance
Crane maintenance. Cables. MovieBird 12 has two sets of cables responsible for extension and retraction of the third section of the crane. They’re located on both sides of the arm an need to be regularly checked for wear and tension. -
Page 33: Main Drive Belt
The main drive belt is responsible for moving the counterweight hanger and section 2 of the MB12 arm. Extending of section 2 causes and opposite movement of the counterweight hanger. It is important to keep the belt tight at all times, otherwise it may skip a tooth when accelerating or stopping with a large load and cause damage to the arm. -
Page 34: Motor Belt
MovieBird MB12 Verticrane Instruction Manual Motor belt. Motor belt is located on the right side of the drive unit attached to the back of section 1. Remove the cover to inspect it – check for excessive flex under load changing. DO NOT PUT YOUR HANDS NEAR THE BELT WHILE THE POWER IS ON AND THE CRANE IS RUNNING. -
Page 35: Guide Rails
MovieBird MB12 Verticrane Instruction Manual Guide rails. Ball-type guide rails are used for the telescopic movement of both sections and counterweight hanger. When properly lubricated they provide smooth and quiet operation of the arm. Each telescopic section runs on 5 guide blocks, 4 on the top guide rails and one stabilizing the bottom guide rail. -
Page 36: Dolly Mechanics
Dolly mechanics. Articulated arms. MovieBird 12 dedicated dolly has articulated arms that allow it to change its wheelbase to accommodate various track spacing and to allow it to pass narrow door openings. For standard operation on rubber wheels and for Verticrane use the widest setting should be used. The minimum width setting should be used only for passing through narrow door openings with assistance of at least 2 technicians. -
Page 37: Steering Handlebar
MovieBird MB12 Verticrane Instruction Manual Steering handlebar. The dedicated MB12 dolly has removable handle bars that You can install on any of the four wheels. To install them, slide them on one of the corner levelling jacks and rest them on top of the knuckle making sure the steering axis/pin goes inside the hole in the handlebar. -
Page 38: Track Wheels
MovieBird MB12 Verticrane Instruction Manual Track wheels. There is a full set of track wheels mounted permanently on wheel axes of the dolly that can be used on tracks of multiple width by adjusting the position of the arms. To prevent any damage and for better ground clearance the track wheels are mounted upside down. -
Page 39: Column Lifting
MovieBird MB12 Verticrane Instruction Manual Column lifting. The MB12 column has a 41 cm (approx. 16 inches) telescopic lift range. To raise the column: Loosen the locking screw on the side of the column Using a power drill, lift the column by turning the 24mm hex screw at the base of the column. -
Page 40: Electronics
MovieBird MB12 Verticrane Instruction Manual Electronics. Parts list and description. MB12 electronic equipment is stored in a case and consists of: Electronic Control Box (ECB) 48V Power Supply Unit (PSU) Levelling Head Cable remote control (“Joystick”) Loom cable for levelling head... -
Page 41: Connection And Power Up
Control Box to its slot at the back of the crane and secure it with screws on both sides. Install the Levelling Head. Connect both ECB-Arm cables to their corresponding sockets on the ECB and MB12 rear. Connect one end of the Loom cable to the ECB socket marked “Leveling Head” and Tilt encoder socket on the Yoke. - Page 42 MovieBird MB12 Verticrane Instruction Manual fully until the rear limit switch is engaged. Now the arm is fully calibrated and will operate with the speed selected on the remote control dial switch (Speed 1-9). THE CALIBRATION PROCESS IS DONE IN REDUCED SPEED, INDEPENDENT FROM THE SELECTION ON THE REMOTE CONTROL.
-
Page 43: Levelling Head Manual
The MB12 Levelling Head has a load capacity of 60kg (132 lbs) in both underslung and overslung positions. It relies on input from the tilt encoder located in the MB12 Yoke and from an inclinometer located on the levelling head main plate. It’s powered by 48V from the ECB. -
Page 44: Troubleshooting
MovieBird MB12 Verticrane Instruction Manual Troubleshooting. Symptom Cause Solution After turning Blown fuse or power supply Check fuse power Electronic control Box the problem. supply. DC Monitor is off and crane doesn’t respond. LCD display on the remote Remote control cable fault or Check remote control cable, shows “TERMINAL”... - Page 45 MovieBird MB12 Verticrane Instruction Manual LCD display shows “ERROR Remote control speed wire is Check connection between 04” damaged speed potentiometer and remote control PCB. LCD display shows “ERROR DAC range error Check connection between 05” security voltage check, if it’s ok then check internal DAC module.
Need help?
Do you have a question about the MB12 and is the answer not in the manual?
Questions and answers