Advertisement
Quick Links
Advertisement

Related Manuals for Clinch Rivets CR-1

Summary of Contents for Clinch Rivets CR-1
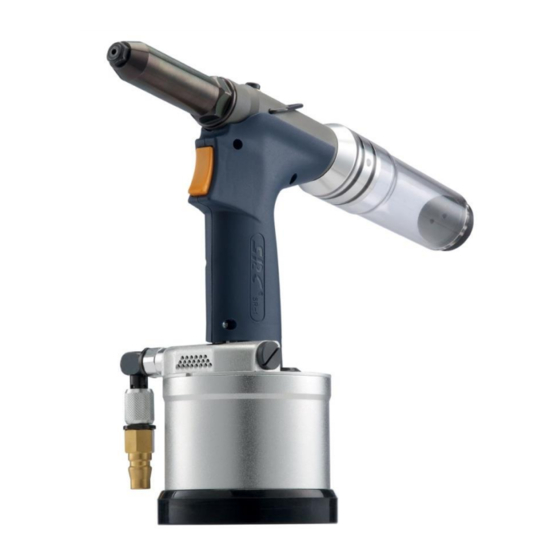
- Page 1 CR-1 Instruction Manual Page 1 of 11...
-
Page 2: Table Of Contents
Contents: Tool Properties Technical Specifications Safety Instructions Tool Preparation Operating Instructions Maintenance and Service Exploded Drawing Parts List Page 2 of 11... - Page 3 Tool Property: Light weight High-speed operation, high power Low noise Shock absorption Long stroke Easy maintenance Sets standard rivets up to 3/16” diameter into any materials Rear adjustable vacuum security system for powering on and off mandrel retention function.
-
Page 4: Technical Specifications
Technical Specification: Rivet size: Diameter 0.9 – 1.9 inches Air pressure: 8.8 – 15.4 lbf Stroke: 0.787 inches Pull force @ 5 Bar: 1798 lb Weight: 2.87 lb Tool dimension (inches): 11.8 X 4.8 X 10.4 Page 4 of 11... -
Page 5: Safety Instructions
Safety Instructions: Please read the following instructions carefully Never dissemble the tool without reading the following safety instructions. Always use the tool in accordance with the specified safety instructions. Direct any queries regarding safety and operation to our company. ... -
Page 6: Tool Preparation
Tool Preparation: The tool must be connected to an air filter. This unit filters the compressed air to separate dirt and condensate. A pressure regulator with a preferred setting of 87 psi must be installed. Air supply must be free of moisture and particles. Use dry and clean materials (hose, couplings, fittings, etc.) to connect the tool to the filter. -
Page 7: Operating Instructions
Operating Instruction: 1. Connect the air supply, switch ON/OFF vale (48) to ON Fig 1 position. (See figure 1) 2. Adjust the vacuum security system counter-clockwise when the vacuum system is ON, then adjust to optimal air volume so that the rivet can be held in any orientation. - Page 8 Priming: After 100,000 cycles, the stroke is reduced and rivets are not set by one operation, then the tool needs to be oiled. Please use the attached bottle of lubrication oil in the box. 1. Disconnect air supply to tool and switch ON/OFF valve (48) to OFF position. 2.
- Page 9 Head Cleaning and Oiling: Every 10,000 cycles the tool should be oil on the jaws. (See figure 5) Fig 5 1. Disconnect air supply and air valve switch. 2. Dismantle the riveter head by wrench. 3. Use wrench to disassemble head components and cleaning these parts, and then lubricate them before assembling.
- Page 10 Page 10 of 11...
-
Page 11: Parts List
Parts list: PART NO. DESCRIPTION PART NO. DESCRIPTION CR-1-01 Nosepiece CR-1-37 Tie ring CR-1-02 O-ring (meas.9*1) CR-1-38 Air tube CR-1-03 Nosepiece casing CR-1-39 Tapping screw CR-1-04 Jaw carrier CR-1-40 Air valve body CR-1-05 CR-1-41 Air valve ring CR-1-06 Pusher CR-1-42 O-ring (meas.9.5*12.5*1.5)
Need help?
Do you have a question about the CR-1 and is the answer not in the manual?
Questions and answers