Table of Contents
Advertisement
Advertisement
Table of Contents

Summary of Contents for FIBRO PGX+ PG1000
- Page 3 The model 68-76 Pocket Goniometer PGX+ is manufactured, sold and The 68-76 Pocket Goniometer PGX+ is delivered in a carrying case distributed by Fibro System. We warrant this instrument to be free of defects in performance, materials and workmanship. We will replace free of charge Check the instrument for transport damage.
-
Page 5: Table Of Contents
INDEX Operator Safety General information Safety precautions Introduction ABOUT THE PGX+ Instrument specifications PC specifications Scope of supply Consumables and accessoiries Setup Software Calibration and Validation Calibration Procedure (Perspex plate) Validation Procedures Setting up the instrument Preparing a specimen Special specimens Pump dispenser Software functions Graphmaster camera... -
Page 8: Introduction
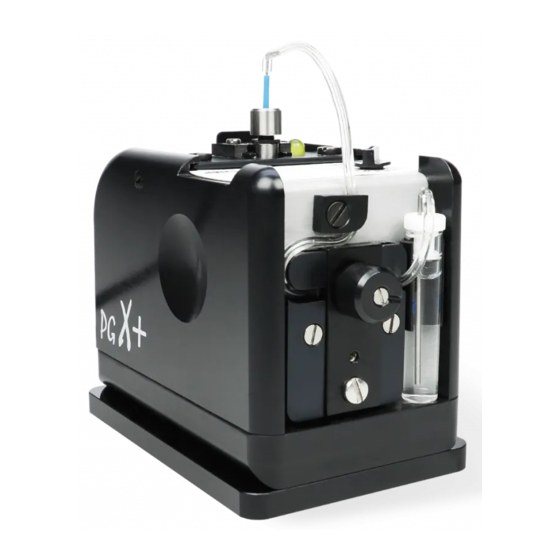
INTRODUCTION The PGX+ measures contact angle (dynamic and static), surface tension, and surface energy. The PGX+ makes a drop in µl according to the size that is set. The drop is automatically released and 80 images per second are made. The instrument is used for paper &... -
Page 9: About The
ABOUT THE PGX+ Instrument specifications Recommended system Camera Core i5 5th generation Intel (or compatible) processor Image Capture Rate: 80 frames/second 8GB of RAM Field of View: 7,0 x 5,2 mm 100MB of free disk space Sensor Resolution: 640 x 480 pixels 1920x1080 screen resolution Pixel resolution: 11 µm... - Page 11 The first time the instrument is activated also the Device Driver must be installed. Confirm the security message. Connect the PGX+ instrument to the USB port you wish to use and I follow the displayed instructions. When the installation is terminated the new device 68-76 Pocked Goniometer PGX+ is ready to use.
-
Page 12: Calibration And Validation
CALIBRATION AND VALIDATION Your PGX+ instrument has been carefully assembled and checked during production. It should not be necessary to do any further adjustments. For a correct performance, however, the instrument must be calibrated according to the procedure below. Without a correct calibration the instrument readings will be incorrect. -
Page 13: Setting Up The Instrument
SETTING UP THE INSTRUMENT The 68-76 Pocket Goniometer PGX+ is powered directly from the USB cable, it is not require external power or batteries. Warning: The instrument must be connected to a port USB2.0 or higher. Insert the Pump Dispensing Unit into the centre of the Applicator Tube. NOTE: The dispensing tip should now appear at the top of the live video image Preparing a specimen... -
Page 14: Pump Dispenser
Pump dispenser The test liquid is applied from the built-in micro-pump via the pump applicator unit. It is suggested the pump system is used for a single standard test liquid (e.g. water or fountain solution). Use different tuning for each test liquid to avoid contamination! To pump liquids of higher viscosity or to determine the wetting hysteresis (advanced/receding contact angles), it will be necessary to use the optional PG Dosing Unit. -
Page 15: Software Functions
SOFTWARE FUNCTIONS Graphmaster camera The Camera screen will always reside on top of the other screens, if not you can recall it from the taskbar. Its size is adjustable to not interfere with other windows. Double-click on the image to switch the live image between greyscale and binary (black/white) mode. -
Page 16: Graphmaster Test
7.1.3 Advanced configuration 7.1.4 Service 7.1.5 Exit It allows to close the Camera window even if the software doesn’t reply. Graphmaster test This manual covers only the functions specific for the 68-76 Pocket Goniometer, see the GraphMaster manual for all other information. 7.2.1 Select test procedure | 16... - Page 17 Static is designed to capture a single reading of the static contact angle at ”equilibrium”. This value can be measured on smooth, non-porous surfaces not penetrated by the test liquid. Typical examples are water droplets on hydrophobic release papers and polymer barriers (e.g. liquid container board). Dynamic captures a video sequence during the interaction between the liquid and the surface.
- Page 18 7.2.3 Elaboration image The windows is open with a double click on the image from the main page Elaboration Image allows to change the points where the measurement are done. Adjust the position of an incorrect Base line When the automatic base line is set incorrectly, keep press Shift and use the “Page Up”...
- Page 19 Update the values Once the contact angle is measured in the correct position, press one of the buttons (3) to re-calculate the measurement with the new settings. The dimension and position of the contour is used only for the selected image, the baseline position can be used to recalculate all the images or only the forward images.
-
Page 20: Graphmaster Database
7.2.5 Calibration Graphmaster database 7.3.1 Surface energy The Surface Energy functions is available only for the Static and Dynamic mode. The function is enabled only when 2 or 3 records are selected. | 20... -
Page 22: Static Mode
Dynamic mode This mode captures a video sequence showing the dynamic interaction between the liquid and the surface. Here the dynamic wetting (contact angle), liquid penetration (volume) and spreading is measured as a function of time. After a droplet has been pumped out at the dispensing tip, a new test is started when the Measure button is pressed. -
Page 23: Advancing Mode
Advancing mode This mode captures a video sequence showing the dynamic interaction between a liquid and a surface as the liquid spreads over the dry surface (“wets”) and then retracts from the wet surface (“de-wets”). This interaction, described as “wetting hysteresis”, is characterized by the highest (“advancing”) and lowest (“receding”) contact angles. -
Page 26: Wettability
8.5.1 Parameters Auto Method Manual test Volume Automatic test with droplet size control Time Automatic test with time control Droplet Size Enable only if the Auto Method is selected to Volume Time Pump Enable only if the Auto Method is selected to Time Duration Liquid The characteristic of the liquid are used in the formula. -
Page 27: Manual Testing In Static And Dynamic Mode
The Save button will store a copy of the report in the default directory (e.g. \fibro\pg) with the extension sfe (e.g. 45901.sfe). When the file has been Use the slider below the image to shift to another image. stored the ‘Save’ button becomes inactive until a new result is calculated. -
Page 28: Options Screen
For corona treated polymers water can be used as the single liquid to 8.9.2 Base Line determination determine SFE in accordance with ASTM D5946-0. The SFE result is then A water droplet applied on a reflecting background will appear as a dark presented directly in the Static window when the ASTM parameter in the ’saucer’... -
Page 30: 10 Trouble Shooting
10 TROUBLE SHOOTING Camera “not found” or missing live image or “too dark” image It is necessary to use the camera drivers supplied with your instrument! If you have downloaded “later drivers” from the Internet, the results will become unpredictable and Windows might even refuse re-loading of your original drivers once “later versions”... - Page 31 The Dynamic test might have “timed out” After the test button has been pressed the scanning process will time out after 30 seconds. Pump out a droplet before the program button is activated and apply the droplet during the 30-second period. Test results appear to be incorrect or “zero”...
-
Page 32: 11 Miscellaneous
11 MISCELLANEOUS 11.1 Instrument storage 11.3 Droplets 11.3.1 Recommended droplet sizes The liquid system (dispenser, tubing and liquid container) should never be left with a liquid for a long time as this may clog the system. The procedures The default droplet size is 4,0 µl, which has been used as the recommended below are recommended when your PGX+ is to be stored for some time or size in contact angle testing for historical reasons. -
Page 33: Pump
11.4 Pump 11.4.1 Replacement of Pump Tubing Remove the pump tubing from its holder Open up the pump lid screw (C) and lift up the pump lid. Disconnect the old pump tubing from the liquid container and the cannulus connected to the droplet dispenser. Install the new tubing between the liquid container and the tubing connected to the dispenser. - Page 35 35 |...
- Page 36 | 36...
Need help?
Do you have a question about the PGX+ PG1000 and is the answer not in the manual?
Questions and answers