Advertisement
Quick Links
Advertisement

Related Manuals for Maximum 054-0338-0

Summary of Contents for Maximum 054-0338-0
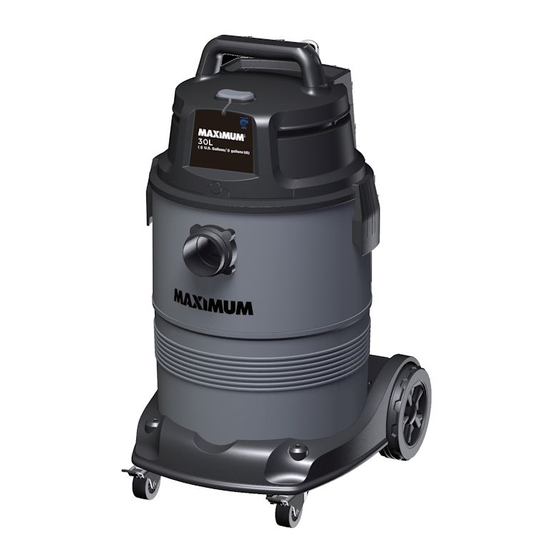
- Page 1 30 L (8 U.S. Gallons) HEPA Wet/Dry Vacuum 054-0338-0...
- Page 3 TABLE OF CONTENTS PAGE TECHNICAL SPECIFICATIONS SAFETY GUIDELINES SYMBOLS KEY PARTS DIAGRAM GENERAL ASSEMBLY INSTRUCTIONS DRY VACUUM OPERATION WET VACUUM OPERATION MAINTENANCE HEPA CARTRIDGE FILTER & MICROFIBRE PRE-FILTER FOAM WET FILTER HEPA MATERIAL EXHAUST FILTER WHEN TO CHANGE FILTERS TROUBLESHOOTING ACCESSORIES EXPLODED VIEW PARTS LIST...
- Page 4 054-0338-0 | contact us 1-888-670-6682 SPECIFICATIONS Tank size 30 L (8 U.S. gallons) Power 120 V, 60 Hz, 11 A Tank Polypropylene Hose 1 7/8’’ x 10’ (4.8 cm x3.05 m) Water lift 86" at end of hose...
- Page 5 IMPORTANT SAFETY INSTRUCTIONS READ AND UNDERSTAND ALL INSTRUCTIONS BEFORE USING THIS VACUUM. Read and understand this operator’s manual and all labels on the vacuum before operating. Safety is a combination of common sense, staying alert and knowing how your vacuum works. Use this vacuum only as described in this manual. To reduce the risk of personal injury or damage to your vacuum, use only manufacturer recommended accessories.
- Page 6 054-0338-0 | contact us 1-888-670-6682 • Do not leave vacuum when plugged in. Unplug from outlet when not in use and before servicing. • Turn off all controls before unplugging. • Unplug before connecting or disconnecting hose, or any other accessories.
- Page 7 DOUBLE INSULATION INSTRUCTIONS This Wet/Dry Vacuum is double-insulated, eliminating the need for a separate grounding system. Use only identical replacements parts. Read the instructions for Servicing Double-Insulated Wet/Dry Vacuums before servicing. Use this vacuum as described in this manual. Observe the following warnings that appear on the motor housing of your vacuum. DOUBLE INSULATED - GROUNDING NOT REQUIRED - WHEN SERVICING USE ONLY IDENTICAL REPLACEMENT PARTS.
- Page 8 054-0338-0 | contact us 1-888-670-6682 EXTENSION CORDS When using an extension cord with your Wet/Dry Vacuum refer to the following table to determine the required A.W.G. wire size. Before using the cleaner make sure the power cord and extension cord are in good working condition. Make repairs or replacements before using the vacuum cleaner.
- Page 10 054-0338-0 | contact us 1-888-670-6682 No. Description No. Description Power Cord Hook 17 Hose 2 HEPA Material Exhaust Filter 18 Crevice Tool 3 Latch (x2) 19 Floor Brush/Squeegee Nozzle 4 Accessory Storage 20 Round Dust Brush 5 Rear Wheel (x2)
- Page 11 A Philips head screwdriver is required. This HEPA vacuum is supplied with a certified HEPA filter that has been tested by an independent lab to IEST-RP-CC001 that meets the EPA's definition of a HEPA vacuum (must be capable of trapping 99.97% of particles down to 0.3 microns in diameter). It can be used to pick up materials like sawdust and gravel, as well as ultra fine materials like drywall dust and cold fireplace ash.
- Page 12 054-0338-0 | contact us 1-888-670-6682 Lift the power head off the collection tank . Remove the contents from inside the collection tank; make sure you have all contents as shown on pages 9 and 10. Turn the collection tank upside...
- Page 13 Your vacuum comes ready for dry vacuum cleaning. If the HEPA cartridge filter and microfibre pre-filter are not installed, refer to page 20 for installation instructions. Optional: For improved dust filtration, fit the dust bag flange onto the inlet port, taking care not to damage the bag.
- Page 14 054-0338-0 | contact us 1-888-670-6682 Insert the locking end of the hose into the vacuum port on the collection tank and turn clockwise to lock into place. Choose the desired attachment and insert onto the end of the hose or extension wand.
- Page 15 DRY VACUUMING Verify that the power cord is disconnected from the outlet. In order to prepare your vacuum for dry vacuuming, verify that the HEPA cartridge filter is securely mounted. Remove the power head and place in an upside down position.
- Page 16 054-0338-0 | contact us 1-888-670-6682 Place the power head back on the collection tank and secure it in place using the latches. WARNING: Be sure to read, understand, and apply information stated in “Safety Guidelines”. Do not vacuum in areas with flammable gases, vapours, or explosive dusts in the air. Flammable gases or vapours include but are not limited to: lighter fluid, solvent type cleaners, oil- based paints, gasoline, alcohol, or aerosol sprays.
- Page 17 OPERATING INSTRUCTIONS: DRY VACUUMING Insert the locking end of the hose into the vacuum port on the collection tank and lock into place. Push the required attachment onto the free end of the hose or extension wand. To use the round dust brush and crevice tool with an extension wand you will be required to use the metal accessory adaptor.
- Page 18 054-0338-0 | contact us 1-888-670-6682 WET VACUUMING Verify that the power cord is disconnected from the outlet. Make sure that the collection tank is clean and free of dust and dirt. Remove all dry use filters. Carefully install the foam wet filter over the filter cage and place power head back on the collection tank.
- Page 19 The machine is fitted with a float valve that stops the suction action when the collection tank reaches its maximum capacity. You will notice an increase in motor speed. When this happens, turn off the machine, disconnect from power supply, and drain the liquid into a suitable receptacle or drain.
- Page 20 054-0338-0 | contact us 1-888-670-6682 EMPTYING THE COLLECTION TANK Verify that the power cord is disconnected from the outlet. Disconnect the hose from the vacuum. Undo the latches and remove the power head from the collection tank. Place power head on a soft, clean surface upside down.
- Page 21 Clean or replace the filters. Check the hose, attachments, and power cord to ensure that they have not been damaged. Place the power head back onto the collection tank and secure latches. STORAGE Before storing your vacuum, the collection tank should be emptied and cleaned. The accessories should be cleaned and stored so they can be readily available when needed.
- Page 22 054-0338-0 | contact us 1-888-670-6682 INSTALLING HEPA CARTRIDGE FILTER& MICROFIBRE PRE-FILTER Verify that the power cord is disconnected from the outlet. Remove the power head and place in an upside down position. Install the HEPA cartridge filter over the filter cage with the flat end of the filter towards the power head.
- Page 23 REMOVING & CLEANING HEPA CARTRIDGE FILTER & MICROFIBRE PRE-FILTER Loosen the band clamp on the pre- filter with a screwdriver, and remove the microfibre pre-filter from the HEPA cartridge filter. With the removed power head in an upside down position, unlock and remove the filter retainer by turning retainer counter clockwise , and carefully remove the HEPA cartridge...
- Page 24 054-0338-0 | contact us 1-888-670-6682 INSTALLING FOAM WET FILTER Verify that the power cord is disconnected from the outlet. Remove the power head and place in an upside down position. Follow instructions to remove the HEPA cartridge filter and microfibre filter on page 21.
- Page 25 CLEANING HEPA MATERIAL EXHAUST FILTER Verify that the power cord is disconnected from the outlet. Unlock the HEPA material exhaust filter door by lifting the locking tab upwards to the release. Pull the door out. Remove the material exhaust filter from the vacuum.
- Page 26 054-0338-0 | contact us 1-888-670-6682 Install the cleaned or new filter into place. Insert the filter door tabs into the upper slots and lock the filter door into place.
- Page 27 CHANGE THE COLLECTION BAG The collection bag MUST be replaced when you have collected hazardous material OR when the collection bag is 3/4 full. Excessive over filling of this bag makes it difficult to remove from the vacuum tank and can result in breakage and spills. The collection bag comes equipped with a quick closing flap.
- Page 28 054-0338-0 | contact us 1-888-670-6682 Problem Possible Causes Solution Check the power supply, No power supply. cord, breakers, and fuses. Unplug and check the power cord. If damaged, Faulty power cord. The wet/dry vacuum will have it repaired by a not operate.
- Page 29 ® Additional accessories for your Maximum HEPA Wet/Dry Vacuum are available. Consumables 054-0352-4 HEPA Cartridge Filter 054-0353-2 Microfibre Pre-filter 054-0354-0 High Efficiency Collection Bag 054-0355-8 HEPA Material Exhaust Filter 1 7/8" (4.8 cm) Accessories 054-0270-8 Utility Nozzle 054-0271-6 Floor Squeegee Nozzle...
- Page 30 054-0338-0 | contact us 1-888-670-6682...
- Page 31 Description Handle Assembly Power Head Assembly Float Filter Cage HEPA Cartridge Filter HEPA Lid Seal Ring HEPA Nut Microfibre Pre-Filter Castor Assembly Wheel Assembly Base Assembly Wheel Axle Collection Tank Vacuum Port Assembly Latch Assembly HEPA Material Exhaust Filter Exhaust Filter Door Hose Crevice Tool Professional Floor Nozzle...
- Page 32 054-0338-0 | contact us 1-888-670-6682 3-Year Limited Warranty DAYS This MAXIMUM product is guaranteed for a period of 3 years from JOURS the date of original retail purchase against defects in workmanship SATISFACTION DE SATISFACTION GUARANTEE GARANTIE and materials.
- Page 33 This warranty applies for a period of 3 years from the date of original retail purchase, as indicated on the bill of sale. Neither the retailer, Maximum Canada, nor the manufacturer shall be liable for any other expense, loss or damage, including, without limitation, any indirect, incidental, consequential or exemplary damages arising in connection with the sale, use or inability to use this product.
- Page 34 In addition to the 3-Year Limited Warranty, this MAXIMUM product is covered by our: 1-Year Repair Warranty...
Need help?
Do you have a question about the 054-0338-0 and is the answer not in the manual?
Questions and answers