
Summary of Contents for Leader Evaporator Half Pint Evaporator
- Page 1 Leader Half Pint Evaporator Leader Evaporator Co., Inc. 49 Jonergin Drive Swanton, Vermont 05488 (802) 868-5444 www.leaderevaporator.com...
-
Page 2: Table Of Contents
BRICKING ..................................9 SETTING THE PANS ................................12 INSTALLING THE DRAW OFF VALVES ..........................12 First Boil .................................... 13 OPERATION OF THE HALF PINT EVAPORATOR........................14 THEORY OF OPERATION ..............................14 GRADIENT ..................................14 MAKING SYRUP ................................. 16 FLOW REVERSAL ................................16 HYDROMETER FUNCTION .............................. -
Page 3: Introduction
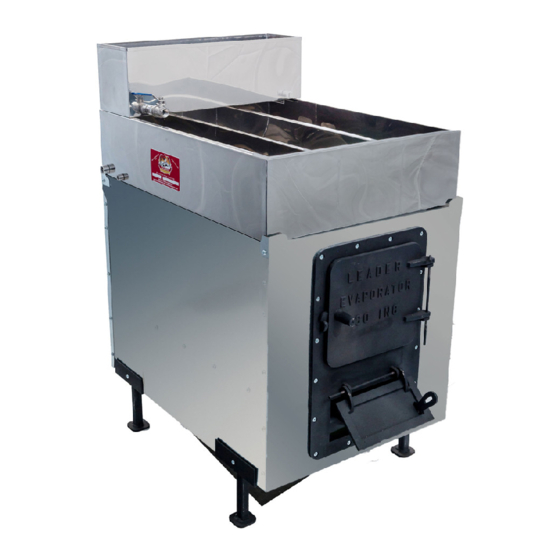
The reverse flow capability of the half pint allows you to change the direction of sap flow allowing the evaporator to “wash” the sand and niter out of the pan. The following is an introduction to the parts of the half pint evaporator: LEADER Half Pint Evaporator... -
Page 4: Checklist / Parts List
Machine Screws ¼-20 X ½” ¼-20 X ¾” Ball Valve ½” Stainless Steel Lead Free ½” Close Nipple (Order #: 60152) (Order #: 72101) Reservoir Pan Boiling Pan (Order #: (Order 372433R) #:372433L) LEADER Half Pint Evaporator Year: 2014 Page: 4... -
Page 5: Optional Setup Parts And Supplies
The following section lists the parts for the Half Pint Startup Kit. The Half Pint Startup kit contains all the parts needed to complete the setup of the Half Pint Evaporator. The following parts can be ordered as a kit (Order #: 302435) of individually as listed. -
Page 6: Setup
Mountings holes only in the bottom flange. b. Flanges on the bottom sides mounted under bottom panel. c. Mount bolts in only the two middle holes of each side. LEADER Half Pint Evaporator Year: 2014 Page: 6... - Page 7 Bracket I to the front right and the back left b. Bracket J to the front left and the back right Brackets must be installed correctly for the fittings of the boiling pan to set on the arch. LEADER Half Pint Evaporator Year: 2014 Page: 7...
- Page 8 13. Install the grates assembly. The edges of the grate assembly are placed on the grate rail. The “V” grooves of the grates will be parallel to the sides of the arch. LEADER Half Pint Evaporator Year: 2014 Page: 8...
-
Page 9: Positioning And Insulating
2. Place the boiling pan on the arch so it rests between the corner brackets (dividers run front to back) and recheck the level. 3. Install the elbow and stack. The half pint evaporator requires a 6” 90° elbow and 6” smoke stack. Install at least 3 three foot lengths of stack. - Page 10 6. Fill the gaps between the smoke stack elbow and the brick with refractory cement. SIDES 1. Both sides are laid out the same. Mirror the above diagram for the left side of the arch. LEADER Half Pint Evaporator Year: 2014 Page: 10...
- Page 11 4. Place bricks in the arch as illustrated. Remember to coat the edges of the bricks with approximately 1/8” of refractory cement. 5. Fill in all edges and gaps with cement. FIREWALL 1. You will need 16 full bricks and 6 half bricks. LEADER Half Pint Evaporator Year: 2014 Page: 11...
-
Page 12: Setting The Pans
(LEADER Order # 72101) be installed. Other options are available. Contact LEADER Customer Service or your local dealer. 1. Remove the threaded plug(s) from the couplers located on each side of the boiling pan. LEADER Half Pint Evaporator Year: 2014 Page: 12... -
Page 13: First Boil
6. Drain the baking soda solution from the pan. Rinse the boiling and reservoir pans thoroughly with clean unsoftened, non chlorinated well or spring water. Drain the water and dry the pans. LEADER Half Pint Evaporator Year: 2014 Page: 13... -
Page 14: Operation Of The Half Pint Evaporator
OPERATION OF THE HALF PINT EVAPORATOR NOTE: NEVER FIRE THE EVAPORATOR WITHOUT LIQUID IN THE PAN AND ENOUGH LIQUID SO THE PAN DOES NOT GO DRY AS IT COOLS AFTER YOU STOP FIRING. You will feed sap into one side of the boiling pan from the reservoir pan and will draw off syrup from the opposite side of the boiling pan. - Page 15 Before you stop for the day, draw-off about a gallon of almost finished syrup into a container and cover. You will add this liquid back into the boiling pan the next time you boil. LEADER Half Pint Evaporator Year: 2014...
-
Page 16: Making Syrup
In order to minimize the buildup of sugar sand and niter, the flow in the pan should be reversed each day. The following is the illustration of the change (Day 1 to Day 2): LEADER Half Pint Evaporator Year: 2014... - Page 17 5. Fill the boiling pan to the operating level (1 ½”). 6. Start the fire in the arch. 7. Slowly feed the liquid saved at the end of the previous day to the new draw off compartment. LEADER Half Pint Evaporator Year: 2014 Page: 17...
-
Page 18: Hydrometer Function
NOTE: Hydrometers from Leader Evaporator by law are calibrated by the State of Vermont. . The HOT and COLD test lines should be considered guidelines. Hydrometers should only be used by reading temperature and Brix/Baume readings. - Page 19 NOTE: To correctly determine the Brix/Baume, you need to read from the line of the syrup. LEADER EVAPORATOR Hydrometers: Hydrometers from LEADER EVAPORATOR are calibrated by the State of Vermont at two temperatures; 60°F Cold Test (66.9°Brix/36°Baume) and 211°F Hot Test (59.1°Brix/32.1°Baume). After numerous measurements it was determined 211°F is the average temperature of...
-
Page 20: Maintenance
FEEDBACK Please use the following e-mail address (feedback@leaderevaporator.com) to suggest improvements or enter comments on this document. Reference the document title in your note. You may also contact LEADER Customer Service. NOTES LEADER Half Pint Evaporator Year: 2014 Page: 20...
Need help?
Do you have a question about the Half Pint Evaporator and is the answer not in the manual?
Questions and answers
does the firewall brick go almost all the way to the top?