
Summary of Contents for Pic Solution GoClic
- Page 1 311-0000-000-048 Part no. 機器說明書/ NO LOGO GoGlic-4218A Product name (Pikdare) /英文 L148*W105mm/模造紙80P/黑/共 Spec 頁/騎馬釘 Writer Lesley Color BLU PANTONE 281C...
- Page 3 TD - 4218 Blood Glucose Monitoring System Owner’s Manual...
- Page 5 Dear GoGlic System Owner: Thank you for purchasing the GoGlic TD-4218 Blood Glucose Monitoring System. This manual provides important information to help you to use the system properly. Before using this product, please read the following contents thoroughly and carefully. Regular monitoring of your blood glucose levels can help you and your doctor gain better control of your diabetes.
- Page 6 IMPORTANT SAFETY PRECAUTIONS READ BEFORE USE Use this device ONLY for the intended use described in this manual. Do NOT use accessories which are not supplied or recommended by the manufacturer. Other accessories may negatively affect EMC performance. Do NOT use the device if it is not working properly or if it is damaged. This device does NOT serve as a cure for any symptoms or diseases.
-
Page 7: Table Of Contents
TABLE OF CONTENTS BEFORE YOU BEGIN ..........................1 Important Information ....................................1 Contents of System ......................................2 Meter Overview ......................................3 Display Screen .........................................4 Test Strip ..........................................4 SETTING THE METER ..........................5 HOW TO SWITCH THE BLOOD GLUCOSE METER ON AND OFF ............6 THE FOUR MEASURING MODES ...................... -
Page 9: Before You Begin
BEFORE YOU BEGIN Important Information • Severe dehydration and excessive water loss may cause readings which are lower than actual values. If you believe you are suffering from severe dehydration, consult a healthcare professional immediately. • If your blood glucose results are lower or higher than usual, and you do not have any symptoms of illness, first repeat the test. -
Page 10: Contents Of System
Contents of System Your new GoGlic system kit includes: Meter 10 Test Strips (for full kit) Owner’s Manual Quick Guide Strip Manual Daily Log Book 10 Sterile Lancets (5 lancets 30G and 5 lancets 32G) Lancing Device (for full kit) Carry Bag (10) Two AAA Batteries... -
Page 11: Meter Overview
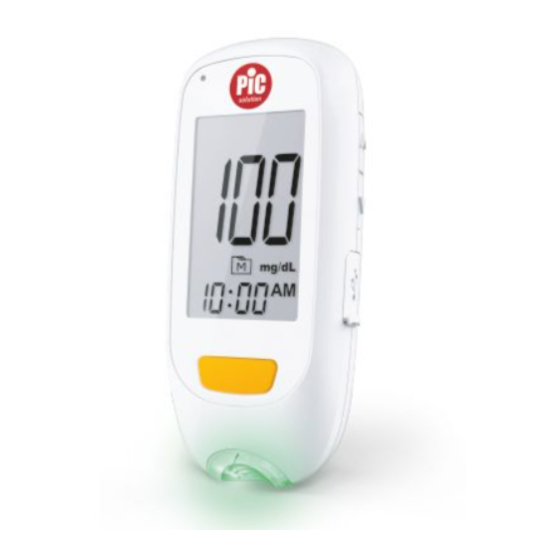
Meter Overview 1 Bluetooth Indication Light 2 Display Screen 3 Central Button (C) Enter the meter memory and silence a reminder alarm. 4 Strip Indication Light The indicator lights up when results appear. INDICATOR MEANING Green while the strip is inserted or result in range result below the range Orange result above the range or ketone warning... -
Page 12: Display Screen
Display Screen 1 QC Mode QC- control solution test 2 Test Results 3 Alarm Symbol 4 Day Average 5 Date / Time 6 Memory Mode 7 Measurement Unit 8 Alarm Reminder 9 Blood Drop Symbol Error Message/Ketone Warning Low Battery Symbol Measuring Mode General –... -
Page 13: Setting The Meter
SETTING THE METER Before using your meter for the first time or if you change the meter battery, you should check and update these settings. Entering the Setting Mode (a) Start with the meter off (no test strip inserted). Press and hold ▲ and ▼ at the same time. -
Page 14: How To Switch The Blood Glucose Meter On And Off
HOW TO SWITCH THE BLOOD GLUCOSE METER ON AND OFF The glucose meter is switched on by one of the following methods: • Pressing the C button once; • Pressing the down scroll button (▼) once; • Press and hold the up scroll button (▲) and the down scroll button (▼) at the same time. •... -
Page 15: Testing With Blood Sample
WARNING: When doing the control solution test, you have to mark it so that the test results will NOT mix with the test results stored in the memory. Failure to do so will mix up the test results with the control solution test results in memory. -
Page 16: Getting A Drop Of Blood (H)
NOTE: • Choose a different spot each time you test. Repeated punctures at the same spot may cause soreness and calluses. • Please consult your health care professional before you begin AST. Getting a drop of blood (h) 1. Unscrew the cap of the device, insert the lancet in the appropriate support of the finger-pricking device and press firmly downwards until it is fully engaged. - Page 17 Obtaining a blood sample (i) Use the pre-set lancing device to puncture the desired site. The size of the drop should be at least 0.5 microliter (μL) of volume for glucose test. Gently squeeze the punctured area to obtain another drop of blood. Be careful NOT to smear the blood sample.
-
Page 18: Alternative Site Testing
Alternative Site Testing You can test on a variety of locations on your body. Important: There are limitations with AST (Alternative Site Testing). Please consult your health care professional before you perform AST. When to use AST? Food, medication, illness, stress and exercise can affect blood glucose levels. Capillary blood at the fingertip reflects these changes faster than capillary blood at other sites. -
Page 19: Reviewing Blood Glucose Day Average Results
Reviewing Blood Glucose Day Average Results Keep pressing C ▼ for 3 seconds until the flashing “ ” appears. Release C and then your 7-day average result measured in general mode will appear on the display Press ▲ or ▼ 7-, 14-, 21-, 30-, 60- and 90- day average results stored in each measuring mode in the order of General (no show), AC, then PC. -
Page 20: Maintenance
System Requirement For the requirement of OS version, please find on App Store or Google Play when you download the app. Please contact your consumers’ toll-free number for Italy 800 900 080 and for France 01.55.93.26.48. for assistance. Please note that you must complete the pairing between meter and Bluetooth receiver before transmitting data. Pairing with your mobile device Turn on the Bluetooth function on your mobile device. -
Page 21: Replacing The Battery
Replacing the Battery To replace the batteries (l), make sure the meter is turned off. Press the edge of the battery cover and lift it up to remove. Remove the old batteries and replace with two 1.5V AAA size alkaline batteries. Close the battery cover. -
Page 22: Caring For Your Test Strips
This product complies with the Directive 2012/19/EU. The crossed bin symbol on the appliance indicates that the product, at the end of its life, must be disposed of separately from domestic waste, either by taking it to a separate waste disposal site for electric and electronic appliances or by returning it to your dealer when you buy another similar appliance. -
Page 23: Measurement Result Readings
MEASUREMENT RESULT READINGS Result Readings STRIP INDICATION MESSAGE WHAT IT MEANS LIGHT NOT APPLICABLE < 10 mg/dL (0.56 mmol/L) SOLID RED Value is below the pre-set individual target area. SOLID GREEN Value is within the pre-set individual target area. SOLID ORANGE Value is above the pre-set individual target area. -
Page 24: Reference Values
Reference Values The blood glucose readings deliver plasma equivalent results. Normal plasma glucose range for Time of day people without diabetes (mg/dL) Fasting and before meal < 100 mg/dL (5.6 mmol/L) 2 hours after meals < 140 mg/dL (7.8 mmol/L) Source: American Diabetes Association. -
Page 25: Troubleshooting
Troubleshooting 1. If the meter does not display a message after inserting a test strip: POSSIBLE CAUSE WHAT TO DO Battery exhausted. Replace the battery. Test strip inserted upside down or incompletely. Insert the test strip with contact bars end first and facing up. The meter will not be able to perform a blood glucose Use wrong test strips with this meter. -
Page 26: Specifications
SPECIFICATIONS Model: GoGlic Dimension & Weight: 87.38 (L) x 38.38 (W) x 20.8 (H) mm, 60g (incl. batteries) Power Source: 2x1.5V AAA alkaline batteries Battery Life: at least 1000 tests Display: LCD with backlight Memory: 1000 measurement results with respective date and time Test Method: GDH (EF test strip) Blood Sample Size: 0.5µl Measuring Time: 5 sec... - Page 27 Tx Power - 0,5 dBm BlueTooth Modulation GFSK Degree of Pollution: Pollution degree 2 This device has been tested to meet the EMC and safety requirements of: IEC/EN 61010-1, IEC/EN 61010-2-101, EN 62479, IEC/EN 61326-1, IEC/EN 61326-2-6, EN 300 328, Draft EN 301 489-1, Draft EN 301 489-17. DECLARATION OF EC COMPLIANCE Hereby, TaiDoc Technology Corporation.
-
Page 28: Symbol Information
SYMBOL INFORMATION SYMBOL REFERENT SYMBOL REFERENT Manufacturer In vitro diagnostic medical device Consult instructions for use Serial number Temperature limit Caution Use-by date Humidity limitation CE marking according to IVD 0123 Batch code directive 98/79/EC (98/79/EC) Authorized representative in the CE marking according to RED European Community directive 2014/53/EU... - Page 29 NOTE...
- Page 32 TaiDoc Technology Corporation TD - 4218 B1-7F , No. 127, Wugong 2nd Rd., Wugu Dist., 24888 New Taipei City, Taiwan Cat. No 02058000100000 www.taidoc.com Per autodiagnosi MedNet GmbH For self-testing Convient à l’auto-contrôle Borkstraβe 10, 48163 Mϋnster, Germany Para autodiagnóstico Distribuito da: / Distributed by: / Distribué...
Need help?
Do you have a question about the GoClic and is the answer not in the manual?
Questions and answers