Advertisement
Quick Links
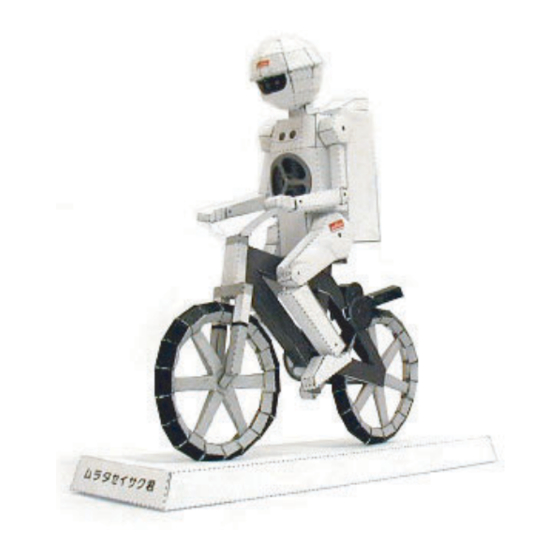
MURATA BOY Paper Craft
Assembly Direction
Download the paper craft data and print it out to assemble MURATA BOY.
Complete the paper craft using all of the parts printed.
It will make a nice family project.
* Make sure to print out all parts. Some printers may have different page settings.
All right reserved, Copyright
Murata Manufacturing Co.,Ltd. 2006
Advertisement

Summary of Contents for Murata MURATA BOY
- Page 1 MURATA BOY Paper Craft Assembly Direction Download the paper craft data and print it out to assemble MURATA BOY. Complete the paper craft using all of the parts printed. It will make a nice family project. * Make sure to print out all parts. Some printers may have different page settings.
-
Page 2: Before Assembling
Fold with this line in. (Valley-shaped fold) *Attention! Some small parts may be hard to fold. You can try folding before cutting, or tracing the line with a blunt point before folding. All right reserved, Copyright Murata Manufacturing Co.,Ltd. 2006... - Page 3 Arms Glue the red palm last. Assemble the blue elbow region first. Fold upper and lower arms into tubes. Insert the blue elbow part and glue the red facet down. All right reserved, Copyright Murata Manufacturing Co.,Ltd. 2006...
- Page 4 Insert the tip of the spoke into the tire and connect the tire sections. Make sure the tire is round before the glue dries. *Rear wheels are assembled in the same way. All right reserved, Copyright Murata Manufacturing Co.,Ltd. 2006...
-
Page 5: Chain Drive
Press it down with Press it down with something heavy something heavy to keep it flat until to keep it flat until it dries. it dries. All right reserved, Copyright Murata Manufacturing Co.,Ltd. 2006... - Page 6 A and B respectively. Main MURATA BOY Parts Assembly Glue the head mark on the head part Install the backpack on back together with head mark on the neck part.
- Page 7 Glue the I mark of a pedal to the I mark marks to the body, matching of the rear section of the frame. their angles with the pedals. *Stand MURATA BOY against some object to ensure that he dries in the correct position. Glue the bottom of the wheels to the pedestal.
Need help?
Do you have a question about the MURATA BOY and is the answer not in the manual?
Questions and answers