
Subscribe to Our Youtube Channel
Related Manuals for Grosfillex WINDMASTER


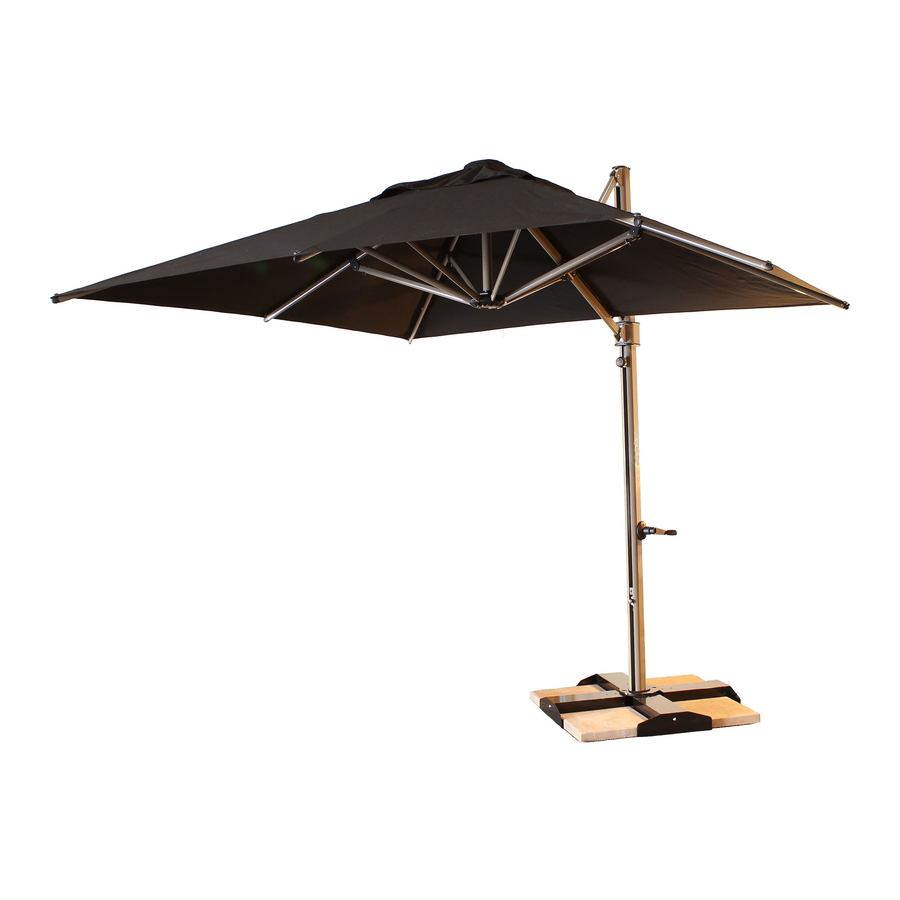
Summary of Contents for Grosfillex WINDMASTER
- Page 1 O W N E R S M A N U A L GROSFILLEX North America 230 Old West Penn Ave, Robesonia, PA 19551 (800) 233-3186 www.grosfillexfurniture.com WM10_Owner_Manual_2020.indd 1 10/7/19 11:48 AM...
-
Page 2: S I M P L E M A I N T E N A N C E P R O C E D U R E S
Particularly the slider car, slider car guide tracks. perfectly designed to give you many years of enjoyment. The following information is to inform you how to operate your Windmaster 10 Cantilever Umbrella to ensure trouble free • Silicon spray in the slider car wheels will assist operation if required. -
Page 3: Fabric Care
FA B R I C C A R E C A S U A L C A R E & C L E A N I N G RECacril Marine Grade Acrylic Fabric Infinity Process is a highly technological finish, •... - Page 4 W I N D M A S T E R 1 0 PA R T S I D E N T I F I C AT I O N NOTE: When the Windmaster is closed, the swivel connection is near the top of the mast. When the Windmaster is open, the swivel connection is near the bottom of the mast.
- Page 5 O P E N I N G T H E W I N D M A S T E R C A N T I L E V E R C L O S I N G T H E W I N D M A S T E R C A N T I L E V E R •...
- Page 6 It is only advised FIGURE A for use in higher winds or commercial applications. DISCLAIMER: The Wind Stabilizer kit should only be used when the Windmaster 10 Cantilever Umbrella is positioned at a 90° angle (most stable position). To Install Stabilizer Kit: •...
-
Page 7: Installation Procedure
Your Windmaster 10 Cantilever Umbrella is delivered fully assembled. There are three different ways to install your Windmaster 10 Cantilever Umbrella: 1. Installing on a wooden deck using a Deck Plate. 2. Installing on an existing concrete slab or pavers using a Deck Plate. - Page 8 BRACE/BLOCKING Once you have decided on the location of the Windmaster 10/Deck Plate, use the four outer holes in the deck plate as a template to start drilling each of the holes in the deck. Make sure each of the DECK JOISTS four holes go through decking and miss the joists.
- Page 9 Attach the spigot to the deck plate using the supplied hardware and tighten down with the supplied Allen key. Lift the Windmaster 10 umbrella onto the spigot on top INSTALLATION HARDWARE NOT INCLUDED.
- Page 10 Remove the spigot from your Windmaster mast and place it on the deck plate lining up the corresponding holes. Bolt the spigot to and through to the cross base legs with the supplied hardware.
- Page 11 GROSFILLEX warrants all FINISHES ON WINDMASTER 10 for a GROSFILLEX reserves the right to determine whether or not fault is caused by faulty nature. period of three (3) years from the original date of purchase. This workmanship, material or a defective part.
- Page 12 5 MPH. Wind ratings do NOT form part of, nor fall under, any Grosfillex USA warranties. Wind ratings are intended as a guide to the relative strength of the umbrellas only and tested at their optimal positions.
Need help?
Do you have a question about the WINDMASTER and is the answer not in the manual?
Questions and answers