Table of Contents
Advertisement
Quick Links
Advertisement
Table of Contents

Summary of Contents for GLITZHOME GH20105
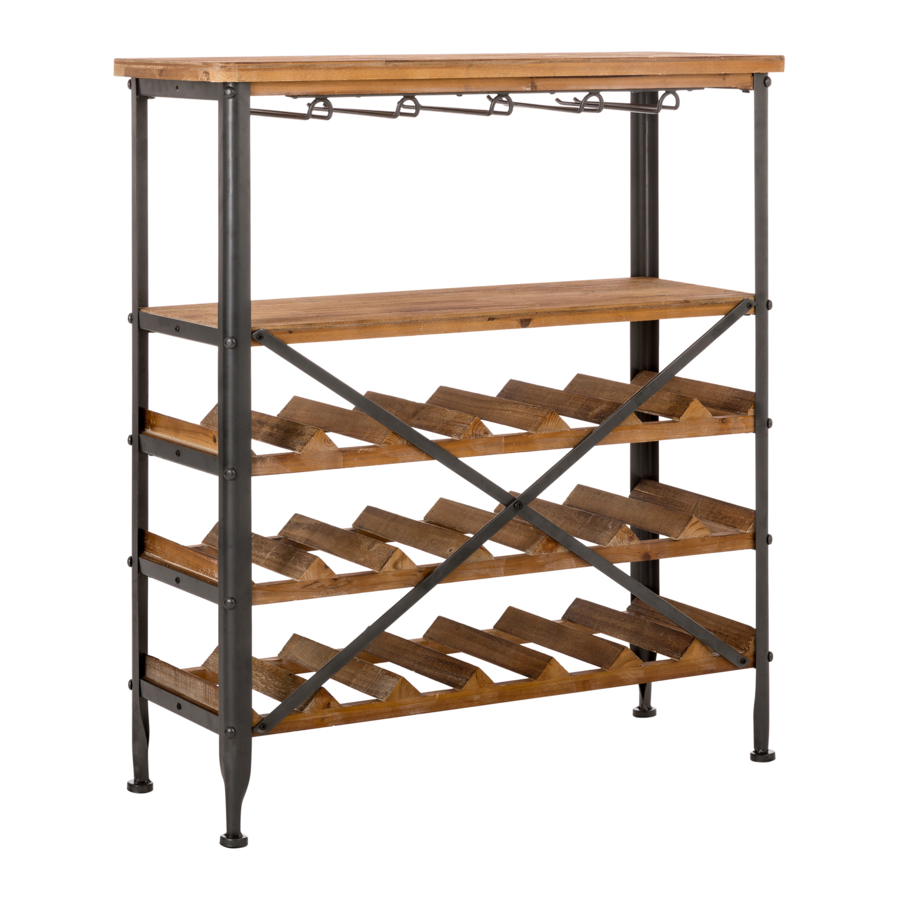
- Page 1 Assembly Instruction WINE RACK...
- Page 2 PRE-ASSEMBLY PREPARATION WARNING: MAXIMUM LOAD NOT EXCEED 55LBS ON SHELVES. • CAUTION: Assembly will require at least 2 adults. DO NOT use power tools.To prevent serious injury or death,this product is equipped with a wall anchoring system.Before this product can be used,the wall anchoring system must be installed as directed in the assembly instructions.
- Page 3 PARTS LIST TOP PANEL (A) SIDE PANEL (B) FLAT SHELF (C) WINE RACK SHELF (D) Qty: 1 Qty: 2 Qty: 1 Qty: 3 REINFORCED POLE (E) Qty: 1 HARDWARE LIST ALLEN BOLT (F) BOLT LOCK (G) PHILLIPS SCREW (H) ALLEN WRENCH (I) M6*15mm Ø15*0.9mm Ø4*20mm...
- Page 4 REQUIRED HARDWARE IN THIS STEP 1 & 2 DESCRIPTION SKETCH ALLEN BOLT 20PCS BOLT LOCK 20PCS ALLEN WRENCH STEP 1 Attach 1 pc Side Panel (B) to the Top Panel (A), the Flat Shelf (C) and 3 pcs Wine Rack Shelves (D) by using 10 pcs Allen Bolt (F), 10 pcs Bolt Lock (G) and Allen Wrench (I).
- Page 5 REQUIRED HARDWARE IN THIS STEP 3 DESCRIPTION SKETCH PHILLIPS SCREW 10PCS SCREWDRIVER STEP 3 Using 10 pcs Phillips Screws (H) and Screwdriver (J) to fix the Side Panel (B), the Top Panel (A), the Flat Shelf (C) and 3 pcs Wine Rack Shelves (D) by two sides. REQUIRED HARDWARE IN THIS STEP 4 DESCRIPTION SKETCH...
- Page 6 REQUIRED HARDWARE IN THIS STEP 5 DESCRIPTION SKETCH PHILLIPS SCREW Ø4*20mm ANTI-TIPPING STRIP WALL ANCHOR Ø 8.5*30mm PHILLIPS SCREW Ø 4*40mm 2PCS STEEL PLATE PHILLIPS SCREW DRIVER NOT INCLUDED NOT INCLUDED WALL WALL WALL STEP 5 Attach steel plate (N) to top panel (A) with screw (H) using screwdriver.
- Page 7 STEP 6...
Need help?
Do you have a question about the GH20105 and is the answer not in the manual?
Questions and answers