Table of Contents
Advertisement
Quick Links
Advertisement
Table of Contents

Summary of Contents for Strack Z6
- Page 1 Z6 PUSH LOCKS OPERATING INSTRUCTION...
- Page 2 A component having the following features: 1. Safe function The Z6 push lock is an addition to the Z4 latch locks. It is used to ensure that the mould tool’s main parting plane is opened first. Only after opening the main parting plane, for example using a Z4 latch lock (with delay), can the second parting plane be opened. 2. Simple mounting Easy mounting and adjusting. No milling work required on injection mould 3. Wide range of applications With the Z6 push lock, the already wide range of applications offered by the combination of different latch lock variants of the Z4 design has been extended yet again. STRACK NORMA GmbH & Co. KG · Königsberger Str. 11 · D-58511 Lüdenscheid · Tel +49 2351 8701-0 · www.strack.de...
- Page 3 (325, 350, 375 or 3-L1) bear against the catches (6) of the actual lock (Z4). (Z6) 3-L1 Figure 3 Now the latch (Z4) draws the mould plate (H1V) forward by the opening stroke (S2) (Z4) in the direction of the arrow „S2“. When this opening movement has been completed the actuated mould plate (H1V) is locked. Figure 4 The main parting plane (S3) can now be fully opened. The closing process is effected in reverse order. NOTE: In combination with the Z4 latch locks, the locking travel distance „S“ (see fig. 1), which must be completed before the second parting plane is opened, is shorter by half the width of the latches (6) than the delay travel of the latch bar (325, 350, 375 or 3-L1). STRACK NORMA GmbH & Co. KG · Königsberger Str. 11 · D-58511 Lüdenscheid · Tel +49 2351 8701-0 · www.strack.de...
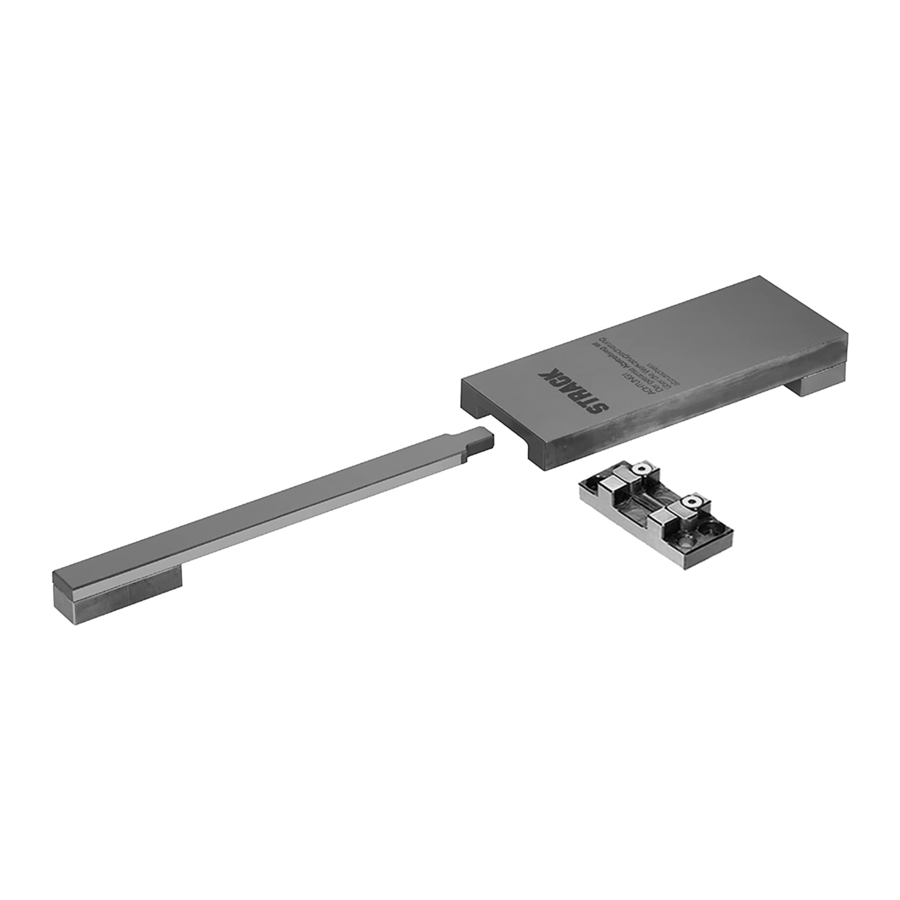
- Page 4 1. General All push locks must be mounted square, parallel and symmetrical to the mould guide. Secure all screws with spring washers or STRACK NORM adhesive Z9092 (fig. 2). All areas of the control plate and control bar that are exposed to wear are case hardened to 58 HRC. The surface hardness is about 33 HRC on the bol- ting surfaces of the Z6 latch lock, so that the mounting holes can be drilled. 2. Preparatory work Match the length of the control plate (21), control bar (31) and spacer (102) in accordance with the mould design and shorten if necessary. If the abovementioned components are to be shortened, the hardened layer on the side faces must first be ground down (see figure 3). Drill mounting holes in control plate (21), steady (4), control bar (31) and spacer (102). Drill mounting holes for control plate (21), steady (4), control bar (31) and spacer (102) in the mould plate. The parallel dowel holes for the latch housing (11) must be made in the mould plate at the same time (see figures 4 and 5). STRACK NORMA GmbH & Co. KG · Königsberger Str. 11 · D-58511 Lüdenscheid · Tel +49 2351 8701-0 · www.strack.de...
- Page 5 4. Mould safety device The catches (6) of the push lock (Z6) and of the latch lock (Z4), when closing the injection mould, must be protected against unacceptably high locking forces in the strokes (S1 and S2) by the mould safety device of the injection moulding machine (see Figure 8A). If there are mould slides with angle pins within the stroke range (S2), the mould safety device must respond even before the angle pins enter the mould slides. If the two mould halves are to be mounted separately, it is important to ensure that the drawn mould plate (H1V) is in the limit position of the fully drawn stroke (S1) and that the lock is active before the injection mould closes. A = Right; B = Wrong 5. Maintenance All the functional components of the push lock must be lubricated regularly (e.g. STRACK NORM Z9080). The fastening screws should be checked and tightened regularly. STRACK NORMA GmbH & Co. KG · Königsberger Str. 11 · D-58511 Lüdenscheid · Tel +49 2351 8701-0 · www.strack.de...
Need help?
Do you have a question about the Z6 and is the answer not in the manual?
Questions and answers