Table of Contents
Advertisement
Available languages
Available languages
Quick Links
Hemden- & Blusenbügler Kompakt
INHALTSVERZEICHNIS
2
7
LIEFERUMFANG
(Bild A)
1 Ballon 1 x
2 Aufhängung 1 x
3 Haupteinheit 1 x
4 Klammer zum Beschweren 5 x
Nicht abgebildet:
Aufbewahrungs-Etui 1 x
Gebrauchsanleitung 1 x
Den Lieferumfang auf Vollständigkeit
und die Bestandteile auf Transport-
schäden überprüfen. Bei Schäden nicht
verwenden, sondern den Kundenservice
kontaktieren.
Eventuelle Folien, Aufkleber oder
Transportschutz vom Gerät abnehmen.
Niemals das Typenschild und eventuel-
le Warnhinweise entfernen!
04067_Inlay_de-en-nl-fr-es-it_A5_V2.indb 1
04067_Inlay_de-en-nl-fr-es-it_A5_V2.indb 1
1
1
2
3
5
7
7
8
8
3
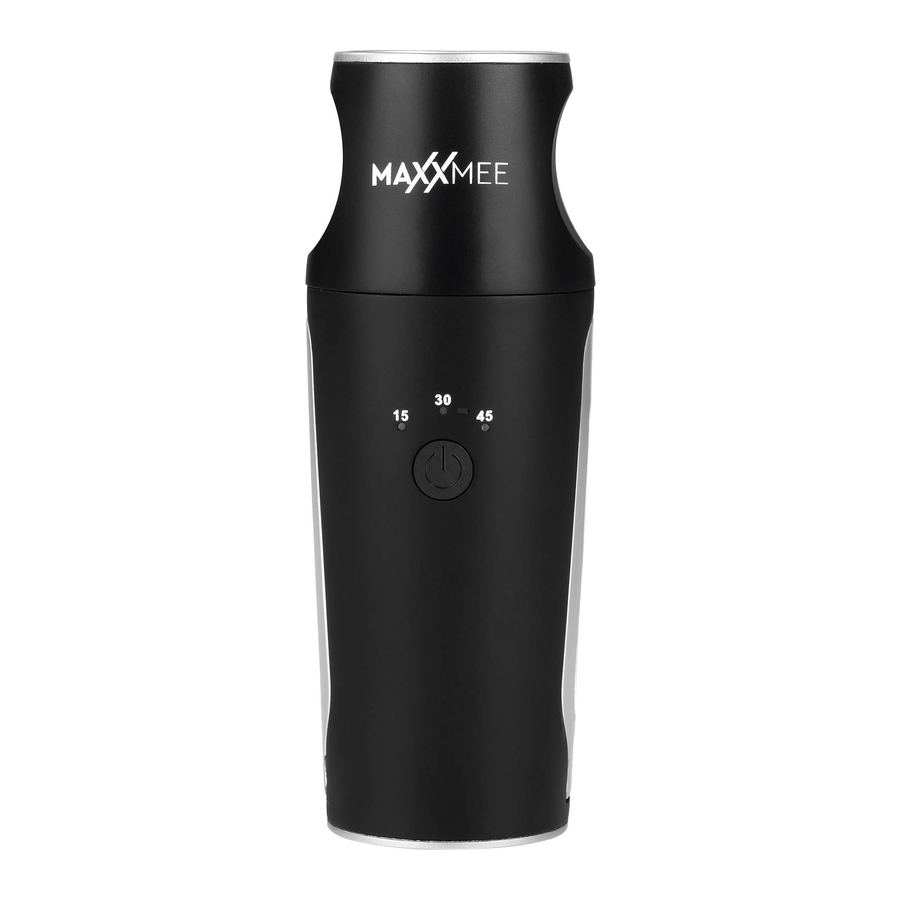
AUF EINEN BLICK
(Bild B)
5 Lufteinlass
6 Anschlussleitung
7 Luftauslass
8 Bügel
9
: Ein- / Aus / Timer-Taste
10
Aus
DE
1
30.11.2020 12:09:03
30.11.2020 12:09:03
Advertisement
Chapters
Table of Contents

Related Manuals for MAXXMEE KB-6026


Summary of Contents for MAXXMEE KB-6026
-
Page 1: Table Of Contents
Hemden- & Blusenbügler Kompakt INHALTSVERZEICHNIS Lieferumfang Auf einen Blick Symbole Signalwörter Bestimmungsgemäßer Gebrauch Sicherheitshinweise Benutzung Reinigung Aufbewahrung Problembehebung Entsorgung Technische Daten LIEFERUMFANG AUF EINEN BLICK (Bild A) (Bild B) 1 Ballon 1 x 5 Lufteinlass 2 Aufhängung 1 x 6 Anschlussleitung 3 Haupteinheit 1 x 7 Luftauslass 4 Klammer zum Beschweren 5 x... -
Page 2: Symbole
Liebe Kundin, lieber Kunde, wir freuen uns, dass du dich für den MAXXMEE Hemden & Blusenbügler Kompakt entschieden hast. Mit diesem Gerät glättest und trocknest du deine Garderobe ganz automatisch, mühelos und in Minutenschnelle. Die Anwendung ist kinderleicht, kompliziertes Aufbauen ist überflüssig. Das platzsparende Gerät wird einfach an die nächste Tür gehängt, das Hemd oder die Bluse auf den Ballon gezogen, mit den... -
Page 3: Bestimmungsgemäßer Gebrauch
Hemden- & Blusenbügler Kompakt BESTIMMUNGSGEMÄßER GEBRAUCH ■ ■ Dieses Gerät ist zum Trocknen und Das Gerät nur für den angegebenen Bügeln von Textilien bestimmt, die Zweck und nur wie in der Gebrauchs- trockner- und bügelgeeignet ist. Es anleitung beschrieben nutzen. Jede ist nicht für empfindliche Textilien weitere Verwendung gilt als bestim- (z. - Page 4 WARNUNG: Dieses Gerät nicht in der Nähe von Bade- wannen, Duschwannen oder anderen Gefäßen benutzen, die Wasser enthalten. VORSICHT: heiße Oberfläche! Das Gerät und Zubehör (inkl. der Klammern) wird während des Gebrauchs heiß. Daher nicht während oder kurz nach dem Gebrauch berühren.
-
Page 5: Benutzung
Hemden- & Blusenbügler Kompakt ■ BENUTZUNG Die Anschlussleitung so verlegen, dass sie keine Stolpergefahr darstellt. Beachten! HINWEIS – Risiko von Material- und ■ Das Gerät nur an eine vorschriftsmä- Sachschäden ßig installierte Steckdose anschlie- ■ Während des Betriebes kann Wasser- ßen. - Page 6 5. Die beiden Bügel (8) der Hauptein- 5. Die Taste wiederholt drücken, heit hinunterklappen (Bild G). um die Bügeldauer in 15-Minuten- Schritten (15 / 30 / 45 Minuten) zu er- 6. Die Anschlussleitung an die Steckdo- höhen. Die Kontrollleuchte neben der se anschließen. Minutenangabe zeigt die gewählte 7.
-
Page 7: Reinigung
Hemden- & Blusenbügler Kompakt REINIGUNG PROBLEMBEHEBUNG Sollte das Gerät nicht ordnungsgemäß funktionieren, überprüfen, ob ein Prob- Beachten! lem selbst behoben werden kann. Lässt ■ Zum Reinigen keine scharfen oder sich mit den nachfolgenden Schritten scheuernden Reinigungsmittel oder das Problem nicht lösen, den Kundenser- Reinigungspads verwenden. -
Page 8: Entsorgung
(WEEE). Dieses Gerät nicht als normalen Hausmüll, sondern um- weltgerecht über einen behördlich zugelassenen Entsorgungsbetrieb entsorgen. TECHNISCHE DATEN Artikelnummer: 04067 Modellnummer: KB-6026 Stromversorgung: 220 – 240 V~ 50 / 60 Hz Leistung: 1000 W Schutzklasse: Schutzart: IPX1 Max. Belastung: 2,5 kg... -
Page 9: Items Supplied
Compact Shirt & Blouse Ironer LIST OF CONTENTS Items Supplied At A Glance Symbols Signal Words Intended Use Safety Notices Cleaning Storage Troubleshooting Disposal Technical Data ITEMS SUPPLIED AT A GLANCE (Picture A) (Picture B) 1 Balloon 1 x 5 Air inlet 2 Mounting bracket 1 x 6 Connecting cable 3 Main unit 1 x... -
Page 10: Symbols
Dear Customer, We are delighted that you have chosen the MAXXMEE Compact Shirt & Blouse Iron- er. With this device you can smooth and dry your wardrobe fully automatically and ef- fortlessly in just a few minutes. The device is very easy to use and there is no need for any complicated set-up. -
Page 11: Intended Use
Compact Shirt & Blouse Ironer INTENDED USE ■ ■ This device is intended to be used to Use the device only for the specified dry and press textiles which are suita- purpose and as described in the ble for tumble drying and ironing. It is operating instructions. - Page 12 CAUTION: hot surface! The device and accessories (incl. the clamps) will get hot during use. You should therefore not touch them during or shortly after use. ■ The device must always be switched off and disconnected from the mains power when it is not being used or before cleaning it.
-
Page 13: Use
Compact Shirt & Blouse Ironer NOTICE – Risk of Damage to Material and Property ■ Steam may rise during operation. For Please Note! this reason, do not place the device ■ Only connect the device to a plug under equipment containing electrical socket that is properly installed. -
Page 14: Cleaning
6. Plug the connecting cable into the The control lamp next to the minute plug socket. indicator shows the chosen pressing time. 7. Hang the balloon (1), with its zip 6. Once the balloon has inflated, fastener at the front, on the clip and straighten out the item of clothing close the zip fastener (Picture H). -
Page 15: Storage
Compact Shirt & Blouse Ironer STORAGE The device is overloaded. ► Switch off the device and pull the 1. Detach the balloon from the main mains plug out of the plug socket. unit (3) and flip up the clips (8). Allow the device to cool down. Then 2. -
Page 16: Technical Data
TECHNICAL DATA Article number: 04067 Model number: KB-6026 Power supply: 220 – 240 V~ 50 / 60 Hz Power: 1000 W Protection class: Type of protection: IPX1 Max. load: 2.5 kg ID of operating instructions: Z 04067 M DS V2 1120 md All rights reserved. -
Page 17: Omvang Van De Levering
Strijkmachine voor hemden en blouses Compact INHOUDSOPGAVE Omvang van de levering Overzicht Symbolen Signaalwoorden Doelmatig gebruik Veiligheidsaanwijzingen Gebruik Reiniging Opbergen Oplossen van problemen Verwerking Technische gegevens OMVANG VAN DE OVERZICHT LEVERING (Afbeelding B) 5 Luchtinlaat (Afbeelding A) 6 Aansluitsnoer 1 Ballon 1 x 7 Luchtuitlaat 2 Ophanging 1 x 8 Beugel... -
Page 18: Symbolen
Beste klant, Wij danken je dat je hebt gekozen voor de aankoop van de MAXXMEE strijkmachine voor hemden en blouses Compact. Met dit apparaat maak je je garderobe geheel automatisch, moeiteloos en binnen een paar minuten glad en droog. Het gebruik is kinderlijk eenvoudig, lastig opbouwen is overbodig. -
Page 19: Doelmatig Gebruik
Strijkmachine voor hemden en blouses Compact DOELMATIG GEBRUIK ■ ■ Dit apparaat is bedoeld voor het dro- Gebruik het apparaat alleen voor het gen en strijken van textiel dat in de genoemde doel en uitsluitend zoals droger kan en gestreken mag worden. beschreven in de bedieningshand- Het is niet geschikt voor gevoelig leiding. - Page 20 WAARSCHUWING: gebruik dit apparaat niet in de buurt van badkuipen, douchebakken of andere bakken waar water in zit. VOORZICHTIG: heet oppervlak! Het apparaat en toe- behoren (incl. de clips) worden tijdens gebruik heet. Raak het daarom niet aan tijdens of vlak na het gebruik. ■...
-
Page 21: Gebruik
Strijkmachine voor hemden en blouses Compact ■ GEBRUIK Leg het aansluitsnoer zo, dat niemand erover kan struikelen. Opgelet! LET OP – Risico van materiële schade ■ Sluit het apparaat alleen aan op een ■ Tijdens het gebruik kan er stoom volgens de voorschriften geïnstal- opstijgen. -
Page 22: Reiniging
5. Klap de twee beugels (8) van de hoof- 5. Druk meerdere keren op knop deenheid omlaag (afbeelding G). de strijkduur in stappen van 15 minu- ten (15 / 30 / 45 minuten) te verhogen. 6. Sluit het aansluitsnoer aan op een Het controlelampje naast de minute- contactdoos. -
Page 23: Opbergen
Strijkmachine voor hemden en blouses Compact OPBERGEN Vreemde geluiden De luchtinlaat (5) is afgedekt. 1. Haal de ballon van de hoofdeen- ► Maak de luchtinlaat vrij. heid (3) en klap de beugels (8) omhoog. Het apparaat schakelt uit, voordat 2. Verwijder de hoofdeenheid van de de ingestelde duur is afgelopen. -
Page 24: Technische Gegevens
TECHNISCHE GEGEVENS Artikelnummer: 04067 Modelnummer: KB-6026 Voeding: 220 – 240 V~ 50 / 60 Hz Vermogen: 1000 W Veiligheidsklasse: Beschermingsgraad: IPX1 Max. belasting: 2,5 kg ID bedieningshandleiding: Z 04067 M DS V2 1120 md Alle rechten voorbehouden. 04067_Inlay_de-en-nl-fr-es-it_A5_V2.indb 24 04067_Inlay_de-en-nl-fr-es-it_A5_V2.indb 24 30.11.2020 12:09:40... -
Page 25: Composition
Cintre de repassage pour chemises et chemisiers Compact SOMMAIRE Composition Aperçu général Symboles Mentions d’avertissement Utilisation conforme Consignes de sécurité Utilisation Nettoyage Rangement Résolution des problèmes Mise au rebut Caractéristiques techniques COMPOSITION APERÇU GÉNÉRAL (Illustration A) (Illustration B) 1 Ballon 1 x 5 Entrée d’air 2 Dispositif de suspension 1 x 6 Sortie d’air... -
Page 26: Symboles
Chère cliente, cher client, Nous vous félicitons d'avoir fait l'acquisition du cintre de repassage pour chemises et chemisiers Compact MAXXMEE. Cet appareil vous permet de défroisser et de sécher automatiquement toute votre garde-robe, sans effort et en quelques minutes seulement. -
Page 27: Utilisation Conforme
Cintre de repassage pour chemises et chemisiers Compact UTILISATION CONFORME ■ ■ L'appareil est destiné au séchage et Utiliser cet appareil uniquement dans au repassage de pièces textiles qui le but indiqué et tel que stipulé dans supportent le sèche-linge et le fer à le présent mode d’emploi. - Page 28 AVERTISSEMENT : ne pas utiliser cet appareil à proxi- mité de baignoires, bacs à douche ou autres récipients contenant de l'eau. ATTENTION, surface chaude ! À l'utilisation, l’appareil et ses accessoires (pinces incluses) deviennent brûlants. Ils ne doivent donc pas être touchés ni pendant l'utilisa- tion, ni directement après l'utilisation.
-
Page 29: Utilisation
Cintre de repassage pour chemises et chemisiers Compact UTILISATION jeunes enfants et des animaux. Risque de strangulation ! ■ Afin que personne ne risque de À observer ! trébucher, faire cheminer le cordon de ■ Brancher l'appareil uniquement sur raccordement de sorte qu'il ne gêne une prise installée de façon réglemen- pas le passage. - Page 30 4. Fixez le cordon de raccordement (6) Pour les chemises classiques au dispositif de suspension afin qu’il essorées (à 1200 tours), la durée ne touche pas l’appareil chaud (illus- de repassage de 15 minutes est tration F). suffisante. Pour les textiles plus humides 5. Déployer les deux cintres (8) du corps ou plus épais (par ex.
-
Page 31: Nettoyage
Cintre de repassage pour chemises et chemisiers Compact NETTOYAGE RÉSOLUTION DES PROBLÈMES À observer ! Si l'appareil ne fonctionne pas correcte- ■ Pour le nettoyage, n’utiliser ni agent ment, examiner le problème pour consta- caustique ou récurant, ni tampon de ter s’il est possible d’y remédier soi- nettoyage. -
Page 32: Mise Au Rebut
CARACTÉRISTIQUES TECHNIQUES Référence article : 04067 Numéro de modèle : KB-6026 Alimentation électrique : 220 – 240 V~ 50 / 60 Hz Puissance : 1000 W Classe de protection : Indice de protection : IPX1 Charge max. :... -
Page 33: Volumen De Suministro
Planchador de camisas y blusas compacto ÍNDICE Volumen de suministro Descripción del aparato Símbolos Palabras de advertencia Uso previsto Indicaciones de seguridad Limpieza Almacenamiento Solución de problemas Eliminación Datos técnicos VOLUMEN DE SUMINISTRO DESCRIPCIÓN DEL APARATO (Imagen A) 1 maniquí hinchable 1 x (Imagen B) 2 colgador 1 x 5 entrada de aire... -
Page 34: Símbolos
Nos alegramos de que se haya decidido por el planchador de camisas y blusas com- pacto de MAXXMEE. Con este aparato puede planchar y secar toda su ropa de forma totalmente automática, sin esfuerzo y en pocos minutos. Su manejo es un juego de niños y no requiere montajes complicados. -
Page 35: Uso Previsto
Planchador de camisas y blusas compacto USO PREVISTO ■ ■ Este aparato está diseñado para secar Utilizar el aparato solo para el fin y planchar prendas de ropa aptas para indicado y solo del modo descrito en secadora y plancha. No es adecuado el manual de instrucciones. - Page 36 ¡ATENCIÓN: superficie caliente! El aparato y sus com- ponentes (incluyendo las pinzas) se calientan durante su uso. Por tanto, no tocarlos durante su uso ni poco des- pués de usarlos. ■ Apagar el aparato y desenchufarlo de la red siempre que no se vaya a usar o antes de limpiarlo.
-
Page 37: Uso
Planchador de camisas y blusas compacto AVISO – Riesgo de daños materiales ■ Durante el uso puede liberarse vapor de agua. Por este motivo, no colocar ¡Tener en cuenta! el aparato bajo dispositivos que con- ■ Conectar el aparato únicamente a una tengan componentes eléctricos. - Page 38 5. Desplegar las dos aletas (8) de la nela), elevar el tiempo a 30 o 45 unidad principal (Imagen G). minutos, si es necesario. 6. Conectar el cable de conexión en la 5. Volver a pulsar el botón para in- toma de corriente. crementar el tiempo de planchado en 7.
-
Page 39: Limpieza
Planchador de camisas y blusas compacto LIMPIEZA SOLUCIÓN DE PROBLEMAS ¡Tener en cuenta! Si el aparato no funciona correctamen- ■ Para la limpieza no se deben utilizar te, comprobar si puede solucionar el detergentes ni estropajos corrosivos problema por cuenta propia. Si los pasos o abrasivos, ya que podrían dañar las siguientes no resuelven el problema, superficies. -
Page 40: Eliminación
DATOS TÉCNICOS Número de artículo: 04067 Número de modelo: KB-6026 Alimentación de corriente: 220 – 240 V~ 50 / 60 Hz Potencia: 1000 W Clase de protección: Grado de protección: IPX1 Carga máxima:... -
Page 41: Contenuto Della Confezione
Stiracamicie compatto SOMMARIO Contenuto della confezione Panoramica Simboli Indicazioni di pericolo Destinazione d’uso Indicazioni di sicurezza Pulizia Conservazione Risoluzione dei problemi Smaltimento Dati tecnici CONTENUTO DELLA PANORAMICA CONFEZIONE (Figura B) 5 ingresso dell’aria (Figura A) 6 cavo di collegamento 1 pallone 1 x 7 uscita dell’aria 2 gancio 1 x 8 grucce... -
Page 42: Simboli
Gentile Cliente, siamo lieti che abbia deciso di acquistare lo stiracamicie compatto MAXXMEE . Con questo apparecchio può stirare e asciugare il Suo guardaroba in modo completamente automatico, senza sforzo e in pochi minuti. L’utilizzo e il montaggio sono semplicissimi. -
Page 43: Destinazione D'uso
Stiracamicie compatto DESTINAZIONE D’USO ■ ■ Questo apparecchio è indicato per Utilizzare l’apparecchio solo in con- l’asciugatura e la stiratura di tessuti formità alle istruzioni e per lo scopo adatti ad asciugatura e stiratura. Non indicato. Ogni altro uso è considerato è... - Page 44 AVVERTENZA: non utilizzare questo apparecchio in prossimità di vasche, docce o altri recipienti contenenti acqua. ATTENZIONE: superficie bollente! Il dispositivo e gli accessori (comprese le mollette) si riscaldano durante l’uso. Pertanto, non toccare durante o poco dopo l’uso. ■ L’apparecchio va sempre spento e staccato dalla corrente in caso di non utilizzo o prima della pulizia.
-
Page 45: Uso
Stiracamicie compatto ■ Sistemare il cavo di collegamento in modo tale che non costituisca un pericolo d’inciampo. Nota bene! ■ Collegare l’apparecchio esclusiva- AVVISO – Pericolo di danni a cose e mente a una presa elettrica instal- materiali lata a norma. La presa deve essere ■... -
Page 46: Pulizia
5. Piegare le due grucce (8) dell'unità 5. Premere ripetutamente il pulsante principale (Figura G). per aumentare la durata di stiratura a intervalli di 15 minuti (15/30/45 6. Collegare il cavo di collegamento alla minuti). La spia di controllo accanto presa di corrente. all'indicazione dei minuti mostra la 7. -
Page 47: Conservazione
Stiracamicie compatto CONSERVAZIONE L’apparecchio si spegne prima che il tempo impostato sia finito. 1. Rimuovere il pallone e l’unità principa- L’ingresso dell’aria (5) è coperto. le (3) e sollevare le grucce (8). ► Liberare l’ingresso dell’aria. 2. Rimuovere l’unità principale dal gan- cio (2). -
Page 48: Dati Tecnici
DATI TECNICI Codice articolo: 04067 Codice modello: KB-6026 Alimentazione: 220-240 V~ 50/60 Hz Potenza: 1000 W Classe di protezione: Tipo di protezione: IPX1 Carico max.: 2,5 kg ID istruzioni per l’uso: Z 04067 M DS V2 1120 md Tutti i diritti riservati.
Need help?
Do you have a question about the KB-6026 and is the answer not in the manual?
Questions and answers