Advertisement
Available languages
Available languages
Quick Links
Thank you for choosing our product
This product contains small items that could be a choking hazard if swallowed. Keep
these items away from young children
1.Make sure these instructions are read and completely understood before attempting
installation. If you are unsure of any part of this installation, contact a professional
installer for assistance.
2.The wall or mounting surface must be capable of supporting the combined weight of
the mount and the display; otherwise the structure must be reinforced
3.Safety gear and proper tools must be used. A minimum of two people are required
for this installation. Failure to use safety gear can result in property damage, serious
injury or death.
-8-
Warning
!
.
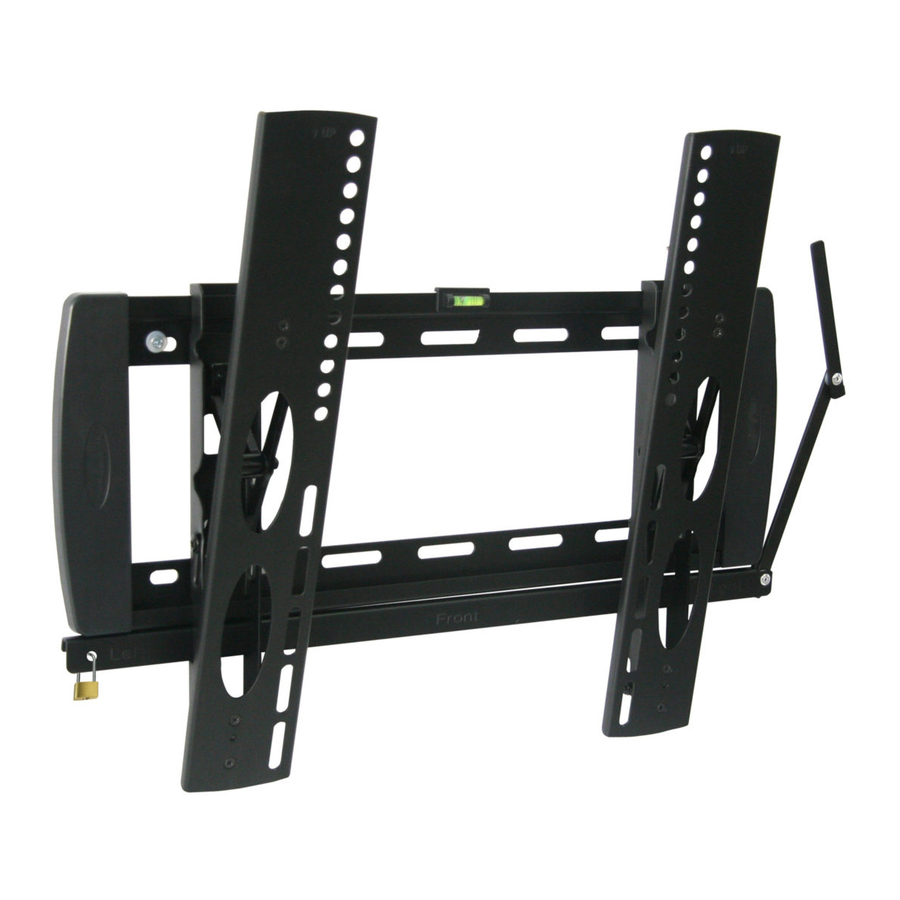
Rocelco MVT
TV Size Range: 23 ~42
Maximum Weight Capacity: 20kg/44lbs
Security bar locks screen in place and prevents theft,
user may install optional lock
CAUTION
This product was designed to be installed on wood stud walls and solid concrete walls.
Before installing make sure the supporting surface will support the combined load of the
equipment and hardware. Never exceed the Maximum Load Capacity. This product is
intended for indoor use only. Use of this product outdoors could lead to product failure or
personal injury.
"
"
Advertisement

Summary of Contents for Rocelco MVT
- Page 1 Rocelco MVT Thank you for choosing our product " " TV Size Range: 23 ~42 Maximum Weight Capacity: 20kg/44lbs Warning Security bar locks screen in place and prevents theft, user may install optional lock This product contains small items that could be a choking hazard if swallowed. Keep these items away from young children 1.Make sure these instructions are read and completely understood before attempting...
- Page 2 Hardware Kit: A1-A4 Description Description A3(1) Wall plate M6× bolt Left bracket A3(2) M6× bolt Right bracket A4(1) M8× bolt M8× bolt Locking bar A4(2) Rotating rod Spacer A1(1) ×12 bolt Square washer A1(2) Long bolt 4×25 bolt A2(1) M × 5 12 bolt Wall anchor...
- Page 3 Part 2b-Attaching brackets to screen with recessed back Part 2b-Attaching brackets to screen with recessed back Part 1a-Wood Stud Mounting Part 1a-Wood Stud Mounting Center brackets vertically on back of screen. Select the medium[A2(2)or Use wall plate(1) as a template, make sure it is level, and mark four mounting ”(5mm)dia A3(2)]or large[A4(2)] screws.
- Page 4 Part 1b-Concrete Wall Mounting Part 1b-Concrete Wall Mounting Part 2a-Attaching Brackets To Screen With Flat Back Part 2a-Attaching Brackets To Screen With Flat Back Level wall plate(1) and use wall as a template to mark four holes. Drill four Center brackets vertically on back of screen. Select the small[A1(1) or ”...
-
Page 5: Guide D'installation
Rocelco MVT Monture inclinable très compacte de taille moyenne GUIDE D’INSTALLATION Merci d’avoir choisi notre produit Tailles d’écran acceptées : 23"~42" Poids maximal supporté : 20 kg/44 livres AVERTISSEMENT Blocage assuré par une barre de sécurité, l’'utilisateur Ce produit contient de petits éléments pouvant entraîner un risque d’étouffement s’ils sont peut installer un cadena en option. - Page 6 Kit de matériel: Partie 3 – Installation de l’écran plat Accrochez la partie supérieure des supports (2,3) à la bride supérieure de l’applique (1). Faites pivoter l’écran vers le bas. REMARQUE : Demandez de l'aide ou utilisez toujours REMARQUE un dispositif de levage mécanique pour lever et positionner les équipements lourds en toute sécurité.
- Page 7 Partie 1a – Installation sur des montants en bois Partie 1a – Installation sur des montants en bois Partie 2b – Fixation des supports sur un écran à dos encastré Partie 2b – Fixation des supports sur un écran à dos encastré Maintenez l’applique (1) droite contre le mur et servez-vous en comme modèle Centrez les supports verticalement au dos de l’écran.
- Page 8 Partie 2a – Fixation des supports sur un écran à dos plat. Partie 2a – Fixation des supports sur un écran à dos plat. Partie 1b – Installation sur un mur en béton Partie 1b – Installation sur un mur en béton Centrez les supports verticalement au dos de l’écran.
Need help?
Do you have a question about the MVT and is the answer not in the manual?
Questions and answers