Advertisement
Quick Links
HDL-P287
Rhythmus Outdoor Speaker P287
Datasheet
Issued: June 25, 2019
Edition: V1.0.0
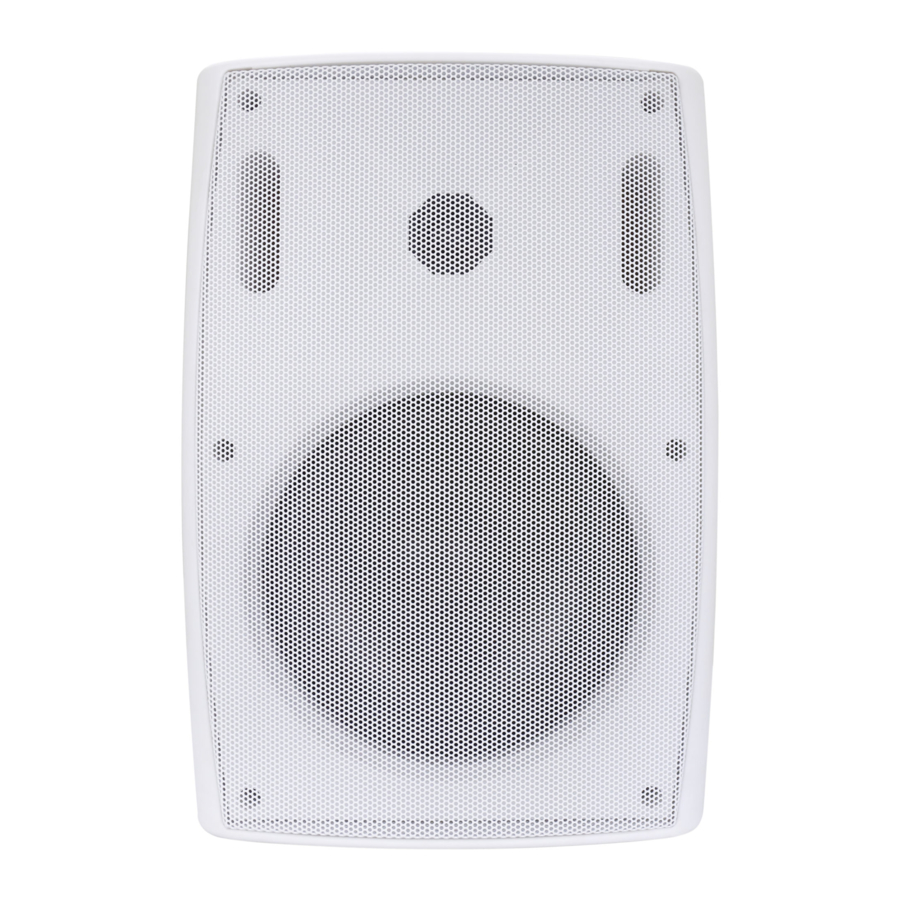
Figure 1. HDL-P287 speaker with grille
Figure 2. HDL-P287 speaker without grille
1
5
2
3
4
Figure 3. Components - Front View
Figure 4. Components - Front View
Figure 5. Bare wire connection
Figure 6. Wall-mount speaker bracket
Overview
Rhythmus Outdoor Speaker P287(See Figure 1 and 2)
fidelity music in an outdoor environment. It produces crisp highs necessary for an outdoor situation as
well as a surprising amount of bass given their compact size. Rhythmus Outdoor Speaker P287 is
waterproof and built to last through all seasons. All exposed screws are stainless steel and the alumi-
num grille is powder-coated so rust is not an issue. The cabinet is made of a high-impact ABS polymer
and includes paint with UV protection. The primary components include a polypropylene driver with a
butyl rubber surround and a PEI tweeter that hold up under extreme temperature fluctuations.
Features
See Figure 3 and 4
1. 1" PEI tweeter for clear highs and long outdoor life.
2. 6.5" polypropylene cone for smooth mids and bass.
3. Butyl rubber surround ensures a long life.
4. Stainless steel screws will not rust
5. Powder-coated aluminum grille will not rust, and micro-mesh design keeps rain out.
Important Notes
You will achieve the best stereo sound and imaging if you mount both speakers along the same
■
wall between 7 and 15 feet apart.
Make sure the material on which you plan to mount the speakers can support the weight of the
■
speakers.
Never attach the speakers to a wall that might contain electrical wiring or plumbing.
■
It is recommended to use a "drip loop" when installing your speaker cable to help minimize the
■
direct flow of water onto the speaker.
Product Information
Bare wire connection - See Figure 5
Wall-mount speaker bracket - See Figure 6
Protecting Your Outdoor Speaker with a "Drip Loop" Figure - See Figure 7
Installation steps are as below:
1.
Using the "keyhole" slots in the U-brackets as a guide, mark where the two screws will be in-
stalled.
2.
If a stud is not available behind the drywall, drill a hole slightly smaller than the diameter of the
drywall anchor and insert the drywall anchor until it is flush with the wall. Drive screws into a wall
stud (if available) or into the drywall anchors leaving the screw heads protruding about 1/8"from
the wall. Always use two screws (and two drywall anchors if no stud is available) for each speak-
er.
3.
Run the speaker cable into position and pull the cable through the hole in the center of the bracket
before mounting the bracket. Leave an extra 18" of cable to make installation and positioning of
the speaker easier.
4.
With the bracket attached to the speaker (using the round bracket knobs), place the large center
portion of each "keyhole" over the protruding heads of each screw. Slide the speaker and brack-
ets down so that the screw head slips behind the smaller end of the keyhole.
5.
Tug gently on each speaker and bracket to make sure that the screws and bracket are properly
held snugly in place. If necessary, disconnect a speaker from the bracket, tighten the screws, and
then reattach the speaker.
6.
Connect the speaker cables to the speaker before connecting the other end to your amplifier:
Strip approximately 1/2" of insulation away and tightly twist the wires. For both the positive and
negative cable, twist open the binding post by turning counter-clockwise to reveal an "eye". Insert
the wire into the "eye" and tighten the binding post back down. When connecting a speaker it is
important to maintain correct polarity.
7.
With the amplifier turned off, connect the other end of the speaker cable in accordance with the
instructions provided with that component. Once connected, turn on the amplifier and test the
speakers.
Safety Precautions
The device must be mounted and commissioned by an authorized electrician. For planning and
■
construction of electric installations, the relevant guidelines, regulations and standards of the
respective country are to be considered.
All consequences caused by installation and wire connection which are not in accordance with
■
this specification have nothing to do with our company.
Please do not privately disassemble the device or replace parts, otherwise it may cause mechani-
■
cal failure, electric shock, fire or body injury.
Please resort to our customer service department or designated agencies for maintenance ser-
■
vice. The warranty is not applicable for the product fault caused by private disassembly.
Package Contents
HDL-P287(with grille)*2 / Datasheet*1
is designed to accurately reproduce high
1/2
Advertisement

Subscribe to Our Youtube Channel
Related Manuals for HDL Rhythmus Outdoor Speaker P287

Summary of Contents for HDL Rhythmus Outdoor Speaker P287
- Page 1 fidelity music in an outdoor environment. It produces crisp highs necessary for an outdoor situation as HDL-P287 well as a surprising amount of bass given their compact size. Rhythmus Outdoor Speaker P287 is Rhythmus Outdoor Speaker P287 waterproof and built to last through all seasons. All exposed screws are stainless steel and the alumi- num grille is powder-coated so rust is not an issue.
- Page 2 The symbol “×” indicates that the content of the hazardous substance in at least one of the homogene- ous materials of the part exceeds the limit requirement specified in the Standard IEC62321-2015. Technical support E-mail: support@hdlautomation.com Website: https://www.hdlautomation.com ©Copyright by HDL Automation Co., Ltd. All rights reserved. Specifications subject to change without notice.
Need help?
Do you have a question about the Rhythmus Outdoor Speaker P287 and is the answer not in the manual?
Questions and answers