Advertisement
Quick Links
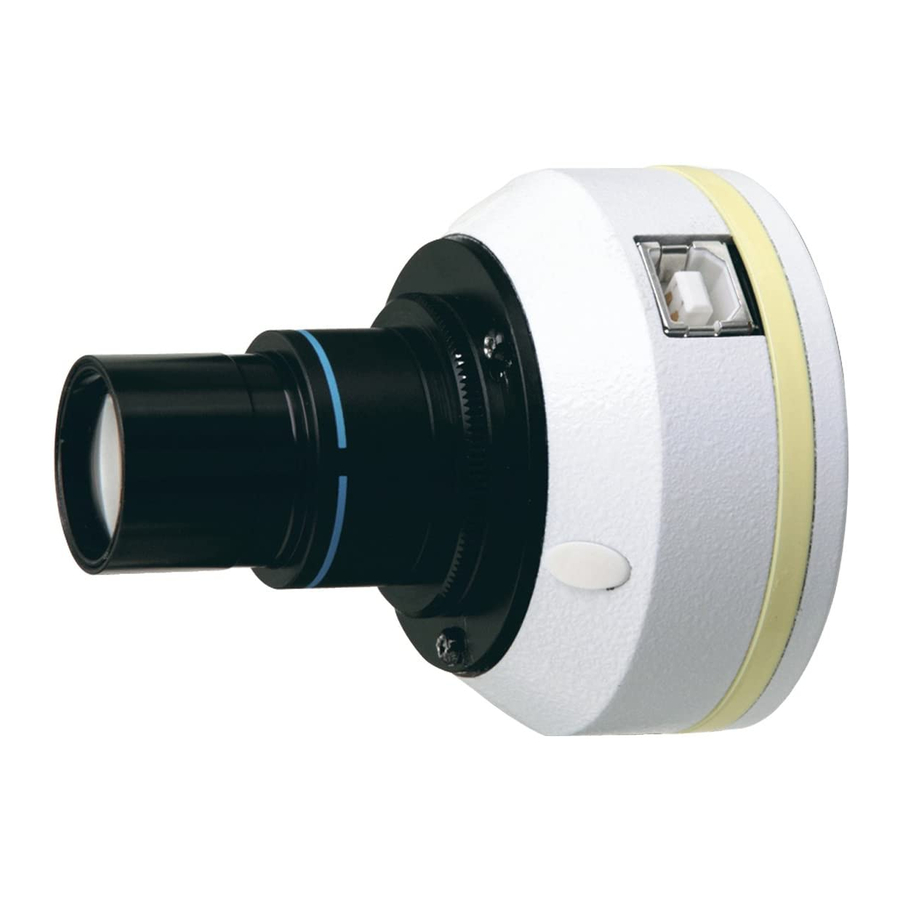
USB CAMERA FOR MICROSCOPE
INSTRUCTION
MU-130
Thank you for purchasing the USB Microscope Camera. Please read this instruction
manual thoroughly before use to insure proper operation and long service.
■FEATURES
●
1.3M pixel USB Camera designed for easy use on a microscope.
Simply connect to USB port for video image display.
●
Powered by USB port; No separate power supply required.
■NOTES
●
This is a precision instrument – Handle With Care. Use caution to avoid
shock or excessive forces on instrument when in use or transport.
●
Do not use or store in direct sunlight or areas with high temperatures or
high levels of dust. Keep in location where temperature and humidity are
stable.
●
Keep lens surface clean from dirt and fingerprints. To clean the lens,
wipe gently with lens cleaning cloth or soft cotton cloth.
●
When not in use, store in supplied case in location which has low
moisture in order to prevent corrosion or internal mold growth.
■SPECIFICATIONS
Model
MU-130
Sensor
1/3.2 CMOS
Pixel Count
130M Pixels
Frame Rate
30Frames/sec.
Interface
USB 2.0
Power Supply
Supplied by USB port
WIndows XP (SP3) 、 Vista、 7、 8、 10
Supported OS
●
CPU: 2.4GHz clock
Min. recommended
●
Memory: 1GB
PC requirements
●
Hard Drive: 10GB Free space
Weight
(Body + Lens)
approx.175g
Software CD ...1
●
●
Bore Adapters:
Accessories
φ23.2→φ30.0mm...1
φ23.2→φ30.5mm...1
USBCable(~1.5m) ...1
●
3
USING THE VIEWER SOFTWARE (ScopeImage 9.0) - continued
□
2 Image Preview Operation
● The function toolbar can be used to manipulate the image displayed on the
preview screen.
1:1
Display pixels in without scaling for
Open preview screen. When icon is not
1:1
lit, preview can not be opened.
highest details when adjusting focus.
Display full field of view for adjusting size
Play or resume the preview screen.
of image shown on preview screen.
Full screen display on monitor (click
Pause the preview screen display.
on "Close Full Screen" button to
close.
Save the displayed preview as a still
□
3 )
image.(→
Flip the preview display along
vertical axis (right and left.)
Freeze the image displayed on the
Flip the preview display along
preview screen.
※ To save image, click on:
horizontal axis (up and down.)
File menu → Save
※1 Depending on PC settings, these features may not be
Clicking on the【×】in the image
operable.
tab closes the image.
Open the destination folder.
□
)
Save a video of the image.(→4
□
)
Pause video capture.(→4
□
)
Resume video capture.(→4
1
PART NAMES & ASSEMBLY
MANUAL
① Remove the eyepiece from the microscope.
② Remove the Lens Caps from the Camera Body and the Lens.
③ Follow the diagram below to connect.
※Select one of the two adapters to fit the
Remove Caps
Camera Body
microscope.
Conn.
Conn.
Bore
Camera Lens
Adapter
Blue Light
On
Camera body
Power is on
(from PC USB)
Red Light
Flashing
Image being
sent to PC
To PC
USB Port
④ When MU-130 Camera is connected to the PC USB port using the cable, the
following message will appear in the bottom right corner of screen. Please proceed.
※Screen appearance will vary for different PC settings.
※Keep the MU-130 camera connected to the USB port and continue
with the additional installation steps.Keep the MU-130 camera connected
to the USB port and continue with the additional installation steps.
□
3
Still Image Capture and Save
● The preview screen image can be frozen and saved as an image file by
clicking on the image capture icon
on the toolbar.
● Location and file
type can be
specified in the
Camera control →
Capture → Capture
preferences menu
□
4 Video Capture and Save
※1
※1
● Image displayed on the Preview Screen can be captured and saved as video.
Start video
Stop video
capture.
capture.
Pause video capture.
● Image format can be specified in the Camera
control → Image Source menu.
Select the image format based on your
requirements:
◆ MJPG
Select when high frame rate is
desired.
◆ YUY2
Select for high image quality.
2
INSTALLING
ScopeImage 9.0
Administrator privileges for computer are required for installation.
① Double click on the file "SISetupX1N.exe" in the CD-ROM folder.
② When the language selection screen appears,
select "English" and click "OK"
Insert
③ When the installation guide screen
appears, click on "Accept and Install" to
continue
Microscope
④ Click on the "Browse" button to specify the
directory for installation; when done click on
"Install" to start the installation.
⑤
Click on "Finish" when the installation is
complete.
※
To start the software immediately once
installation is complete, check the box
labeled "Run application now"
⑥ The icon shown to the
right will be placed on the
desktop when the viewer
software is installed.
4
UNINSTALL PROCEDURE
● In the Windows Control Panel, Select "Uninstall a program" and then
select ScopImage9.0 and uninstall.
5
TROUBLESHOOTING
Q.Display image is dark or blurry.
A.Insure there is sufficient lighting using microscope lamp or accessory light.
Q.Driver software does not install. Viewer software does not work properly.
A.Please confirm PC operating system is compatible; contact distributor.
Q.Shortcut does not appear on the desktop.
A.Shortcut will only be created for user with administrator privileges.
If you want to create a shortcut for user without administrator privileges, go to the
application installation directory to create the shortcut.
Note) For default installation, the application is installed in the following
directories: C:\Program Files\ScopeImage\ScopImage 9.0
C:\Program Files (x86)\ScopeImage\ScopImage 9.0
3
SOFTWARE
USING THE VIEWER SOFTWARE (ScopeImage 9.0 )
Feature Support
Viewer Software (ScopeImage 9.0) provides supports for the following
features:
●
Image preview display
Still image capture and save
●
Other features are not covered. Please note, support for additional
features can not be provided even if requested.
□
1 Image Preview
● Double click on ScopeImage9 icon to start the application.
※ Select the device labeled "Camera-X1N"
● Using the preview screen, follow the microscope instructions for
adjusting focus of the object being viewed.
※ Will vary for different PC settings
MEMO
●
Preview screen control toolbar
●
Video capture and save
Preview Screen
Niigata seiki Co., Ltd.
5-3-14, Tsukanome, Sanjo, Niigata, Japan, 955-0055
Tel. : +81-256-33-5522 Fax. : +81-256-33-5518
MAIL intl.sales@niigataseiki.co.jp
URL
http://www.niigataseiki.co.jp
Advertisement

Summary of Contents for Niigata seiki MU-130
- Page 1 WIndows XP (SP3) 、 Vista、 7、 8、 10 To start the software immediately once Supported OS ④ When MU-130 Camera is connected to the PC USB port using the cable, the installation is complete, check the box ● CPU: 2.4GHz clock following message will appear in the bottom right corner of screen.
- Page 2 1 各部の名称と組み立て方 2 ビューワソフ ト(ScopeImage 9.0)のインス トール 3 ビューワソフ ト (ScopeImage 9.0) の使用方法 顕微鏡用USBカメラ 取扱説明書 ①取り付ける顕微鏡の接眼レンズを外してください。 MU-130 保証範囲について ビューワソフ トのインストールには、 パソコンの管理者(Administrator)権限が必要です。 ②カメラ本体とカメラレンズのキャップをそれぞれ外してください。 ビューワソフト(ScopeImage 9.0)について当社にて機能説明・保証するも ③下図を参考に接続してください。 ①CD-ROMのフォルダの『SISetupX1N.exe』をダブルクリックします。 のは下記の通りです。 この度は、 顕微鏡用USBカメラをお買い上げ頂きまして、 誠にありがとうございます。 プレビュー画像表示 プレビュー画面の操作ツールバー ● ● キャップを外す 静止画撮影・保存 動画撮影・保存 ご使用に際し、 本説明書を最後までお読みいただき、 正しい使い方で末長く御愛用くだ ※口径変換アダプタは2サイズあります。 使用...