Advertisement
INSTALLATION &
CARE INSTRUCTIONS
AJPR50-2 - PRE-RINSE PRODUCT
Thank you for purchasing your AquaJet product.
GENERAL ADVICE
Please follow these instructions carefully to ensure
trouble free operation.
• Inspect the product for damage carefully before installation.
No claims for damage can be accepted after installation.
• Ensure all pipework is flushed free of debris before installation.
• Installation must be in accordance with local authority regulations.
• We recommend a service valve is fitted to the hot & cold supplies.
• Ensure supply pipes are properly sized to avoid problems with
flow rate, pressure loss or water hammer.
• We recommend the installation is protected with water filters,
water-hammer arrestors and water pressure reducers as required.
• Do not install where there is the possibility of the water
supplies freezing.
• Recommended minimum water pressure 1.5 Bar (22.5psi).
Maximum water pressure 5 Bar (75psi).
• Maximum recommended water temperature 55ºC (131ºF).
• Leave this Manual with the operator after installation.
&
installation
care instructions
REVISION: 04/2018 | page 1 of 4
Advertisement
Table of Contents

Related Manuals for MECHLINE AQUAJET AJPR50-2

Summary of Contents for MECHLINE AQUAJET AJPR50-2
- Page 1 INSTALLATION & CARE INSTRUCTIONS AJPR50-2 - PRE-RINSE PRODUCT Thank you for purchasing your AquaJet product. GENERAL ADVICE Please follow these instructions carefully to ensure trouble free operation. • Inspect the product for damage carefully before installation. No claims for damage can be accepted after installation. • Ensure all pipework is flushed free of debris before installation.
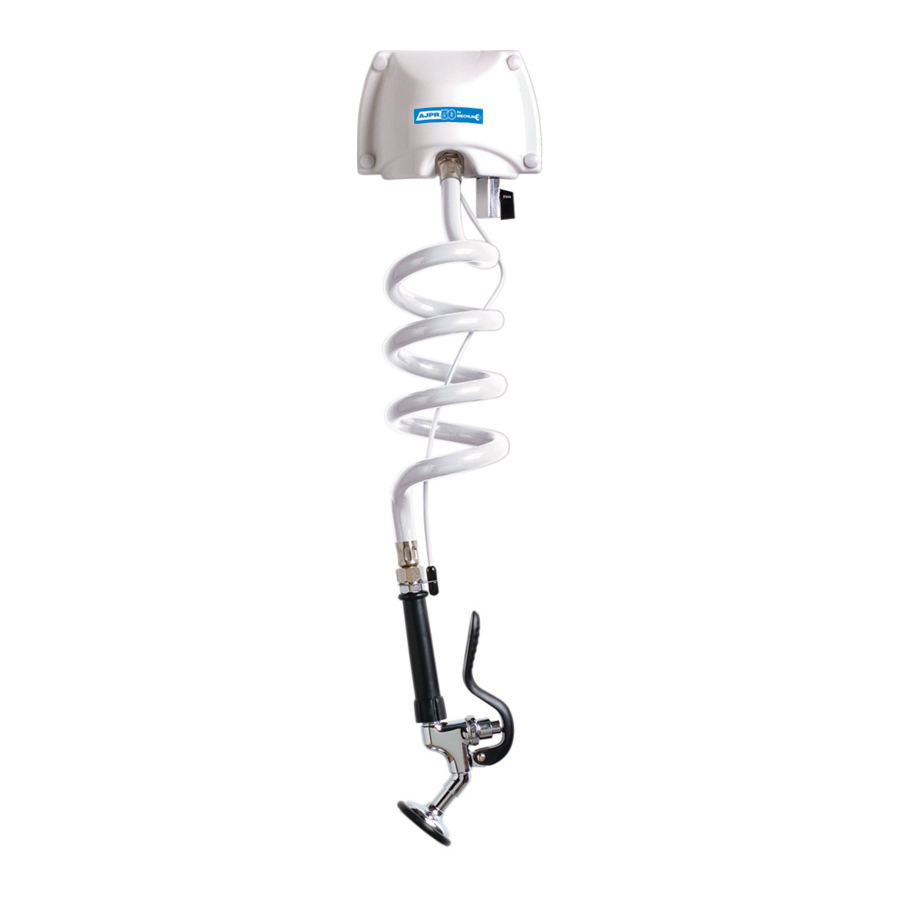
- Page 2 AquaJet Pre-Rinse Products AJPR50 INSTALLATION 1.1 Remove the transit screws before installation. 1.2 Measure and mark any guides for mounting at a height of 1120mm from sink top to allow for an adequate air break gap, to prevent potential water back flow. NOTE: The pre-rinse hose coils will relax with use and allow the gun to hang slightly lower. installation &...
- Page 3 AquaJet Pre-Rinse Products 1.3 Securely fix the wall box to a solid wall surface using appropriate fixings. If possible, use the screw caps supplied. 1.4 Connect the water hose to the water inlet/isolation valve using a thread sealing compound or PTFE tape. IMPORTANT: Do not twist valve during installation. To ensure a secure fit use a 24mm spanner to hold the valve in place when tightening hose to valve. 1.5 Test unit for water leaks.
- Page 4 Dimensions shown in mm unless otherwise stated. Product accreditation may not apply to all products in the relevant range. Please contact Mechline to confirm. Unless otherwise stated, all products carry a warranty of twelve (12) months against manufacturing defect or workmanship on parts with no inclusion for labour or site attendance.
Need help?
Do you have a question about the AQUAJET AJPR50-2 and is the answer not in the manual?
Questions and answers