Advertisement
Quick Links
C Prox Ltd (inc Quantek)
Unit 11 Callywhite Business Park, Callywhite Lane, Dronfield, S18 2XP
+44(0)1246 417113
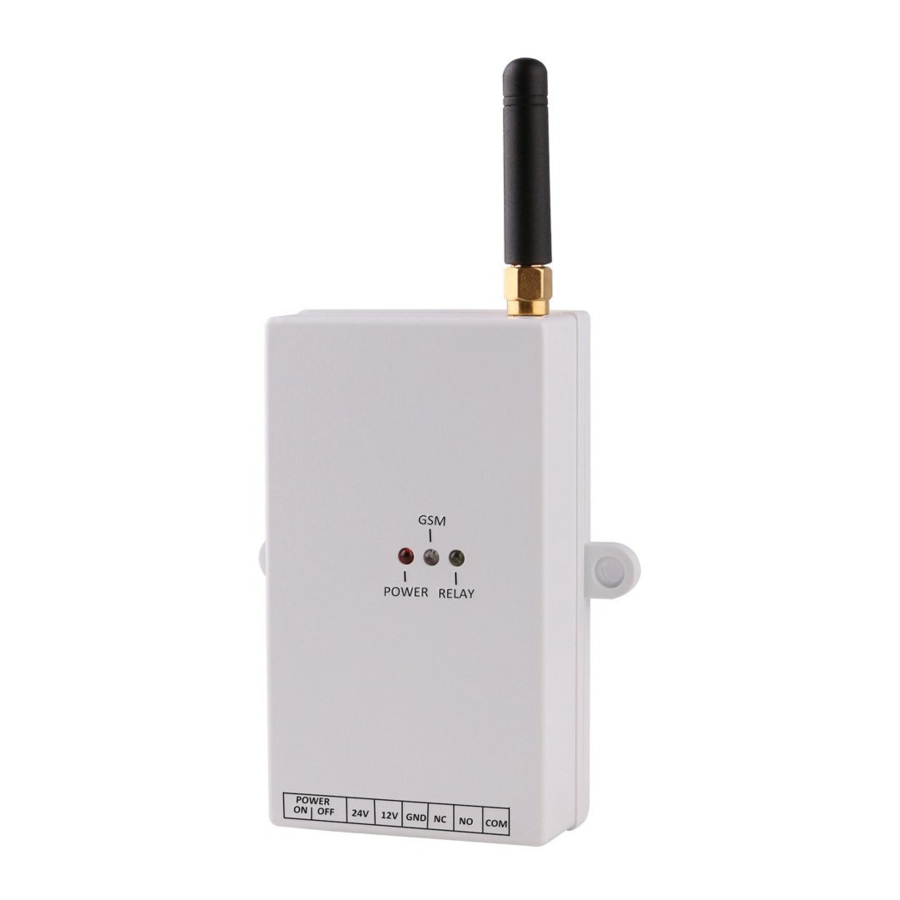
Single Channel GSM Remote Controller
1. FEATURES
• Supports up to 1023 authorised users
• Add user by free phone call, SMS or computer programming
• Backup authorised user numbers
• Control automated gates, barriers and doors by SMS or phone call
• Timed or latching relay
• Programming and status query by SMS
• Sends notifications when the relay is turned on or off (optional)
• Configurable user permissions
• Control can be by authorised phone numbers only, or by any phone
number without limitations, depending on the setting
• Automatically send out a text message at intervals to keep the SIM
card active
2. SPECIFICATION
• GSM frequency: 850/900/1800/1900MHz
• Antenna: 50
•
SIM card size: Micro
•
Supply voltage: 12-24Vdc
•
Current: 30mA standby / 120mA max
•
Working temperature: -10 to +50°C
•
Relay output: Clean contact, NO or NC. Maximum 5A@230Vac
•
Dimensions: 98 x 74 x 28mm (without antenna)
sales@cproxltd.com
GSM-ONE
User Manual
Ω SMA interface
1
www.quantek.co.uk
Advertisement

Summary of Contents for C Prox GSM-ONE
- Page 1 C Prox Ltd (inc Quantek) Unit 11 Callywhite Business Park, Callywhite Lane, Dronfield, S18 2XP +44(0)1246 417113 sales@cproxltd.com www.quantek.co.uk GSM-ONE Single Channel GSM Remote Controller User Manual 1. FEATURES • Supports up to 1023 authorised users • Add user by free phone call, SMS or computer programming •...
- Page 2 3. DIAGRAM 6. Now call the unit within 30 seconds. 5. Press the reset button for 3-5 seconds, the BLUE LED will start flashing every second. Release the button and the BLUE LED will be lit solid. 2. Affix the unit. 1.
- Page 3 4. SETTING AUTHORISED USERS All SIM cards must be activated, have no PIN, and voicemail turned off. Once you have installed the unit and inserted the SIM Card, you can now power up the system. The RED power LED will remain solid. The BLUE LED will flash every second until it connects to the network and will then flash once every 3 seconds.
- Page 4 4.5 TURN OFF LEARNING MODE To turn the caller ID learning mode off you would send the following SMS command: 1234ADD OFF And receive SMS confirmation: DISABLE ADDING USER NUMBER 4.6 ADDING CALLER ID NUMBERS BY SMS It is possible to add up to 1000 caller ID numbers into the system and to add the number 07847170001 you would send the following SMS command as:...
- Page 5 7. WORKING MODE SETTING MODE A Mode A is the factory default function and allows the caller to activate the relay from 1 second up to 65,000 seconds. When programming this function, it is possible to decide whether to receive SMS confirmations or not.
- Page 6 8. SETTING UP CUSTOMISED SMS CONFIRMATIONS The system allows up to 20 characters for each customised message. (Optional). 1. To set the SMS message when the relay is activated, assuming the SMS message is ‘Gate opening’ send the following command: 1234RL11: GATE OPENING And receive SMS confirmation: SMS CONTENT: GATE OPENING.
-
Page 7: Resetting The Device
12. SOFTWARE Download and install the software ‘GSM-CONFIG’ onto your computer. This can be obtained from our website. Open the software and connect the GSM-ONE to your computer with a MICRO-B to USB cable (not supplied). 12.1 SYSTEM Click CONNECT... - Page 8 PAGE DEFINITION AND APPLICATION 1. CONNECT/Disconnect: Click to connect or exit the network connection, the network signal strength value (1-26) can be seen after the successful network registration. 2. OUTPUT1/OUTPUT Activate relay 1 and relay 2 respectively, select to activate the relay and unselect to deactivate the relay.
- Page 9 12.3 SMS 1. Custom SMS: Set an optional customised message when the relay is turned on or off. Up to 20 characters allowed for each message. 2. SMS Control: OUT1 working time (sec): Set relay time, 1-65000 (optional). If set to 5 seconds for example, when short command ON1 is sent to the device, the relay will switch for 5 seconds.
-
Page 10: Upgrade Firmware
3. Add a restricted user number: Enter the phone number of the restricted user into the ‘Restricted number’ box. Enter the number of times they will have access to the system (0-255). Click Save. 4. Query if a number is in the system: Enter the number in the ‘Restricted number’ box. Click Query. 5. - Page 11 To upgrade the firmware: 1. Ask your distributor for the latest firmware. 2. Save the firmware file to your desktop. 3. Power off the unit. 4. Press and hold the reset button. 5. Plug in the device to your computer via USB cable. 6.
- Page 12 To restore the numbers from the file: 1. Click Restore all numbers from file. 2. Select the file name you want to restore. It will be called something like ‘myNumber_20210602_131410.go2’. Click this file and open it. 3. When the progress bar reaches 100%, a pop-up window will appear to confirm the restore has been successful.
Need help?
Do you have a question about the GSM-ONE and is the answer not in the manual?
Questions and answers