Table of Contents
Advertisement
Advertisement
Table of Contents

Related Manuals for Artist Guitars EDK924M


Summary of Contents for Artist Guitars EDK924M
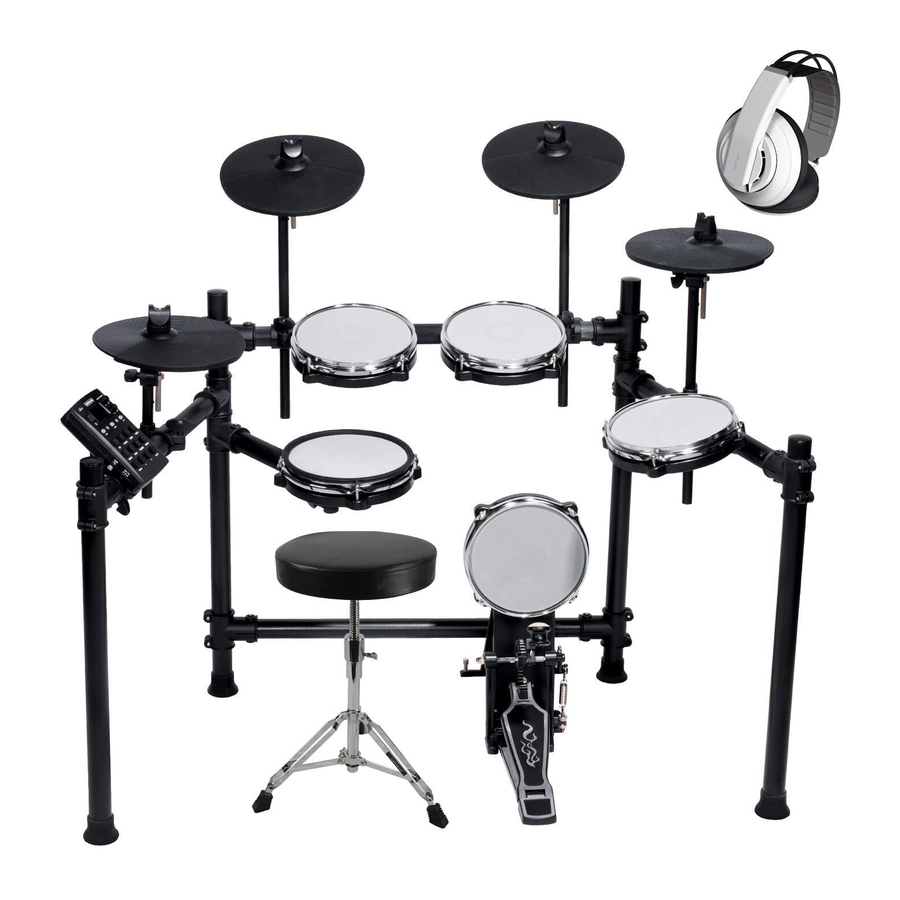
- Page 1 EDK924M DRUM KIT MANUAL...
- Page 2 EDK924M DRUM KIT MANUAL INFORMATION FOR YOUR SAFETY! THE FCC REGULATION WARNING (for USA) This equipment has been tested and found to comply with the limits for a Class B digital device, pursuant to Part 15 of the FCC Rules.
- Page 3 EDK924M DRUM KIT MANUAL PRECAUTIONS Please keep this manual in a safe place for future reference. Power Supply Please connect the designated AC adaptor to an AC outlet of the correct voltage. Do not connect it to an AC outlet of voltage other than that for which your instrument is intended.
- Page 4 EDK924M DRUM KIT MANUAL Handling • Do not apply excessive force to the switches or controls. • Do not let paper, metallic, or other objects into the instrument. • If this happens, unplug the AC adaptor from the wall outlet.
-
Page 5: Table Of Contents
EDK924M DRUM KIT MANUAL CONTENTS Installation Instructions Installing frame .................... Install Kick Drum................... Install Drum Module ..................Panel & Display Description Front Panel ....................Rear & Side Panel ..................QUICK START Setup Connecting Pads and Pedals ..............Connections Connecting an Audio Equipment .............. - Page 6 EDK924M DRUM KIT MANUAL Playing Along with Songs Selecting and Playing Back a Song ............Adjusting the Volume of the Accompaniment and Drum ......Muting the Drums in Songs ..............Recordind your Performance Recording Your Performance Quickly ............Playing Back Your Recorded Performance ..........
-
Page 7: Installation Instructions
EDK924M DRUM KIT MANUAL INSTALLATION INSTRUCTIONS Completed Note: Use the drum key (V) to loosen or tighten the bolts of clamps when assembling the kit or making adjustments. -
Page 8: Installing Frame
EDK924M DRUM KIT MANUAL 1. Installing Frame Install the cymbal stands, be attention, the shorter tube is for Hit-Hat. Adjust the heigth, width , and tighten screws of frame. The electric drum frame is done. - Page 9 EDK924M DRUM KIT MANUAL 2. Installing Toms Referring to Fig. ①, the drum is mounted on the drum frame, and the installation method is as follows. (1) Install the Tomdrum on the (2) Install the locking screw, adjust aluminium tube, cover the...
-
Page 10: Install Kick Drum
EDK924M DRUM KIT MANUAL 4. Install Kick Drum (1) Connect L shape and V shape stand (2) Install kick drum pad on by screws, and Install the anti-skidding stand by 4 screws. screws with springs on the V shape stand. -
Page 11: Install Drum Module
EDK924M DRUM KIT MANUAL 5. Install Drum Module (1) Put the cable snake into the holder of (2) Connect drum module with drum machine. cable snake, and Lock it by three screws. Drum module holder Cable snake... -
Page 12: Panel & Display Description
EDK924M DRUM KIT MANUAL PANEL DESCRIPTION Front Panel 1. POWER Button 10. RECORD Button This button turns the power on and Enter the Record menu. off. 11. UTILITY Button 2. LINE OUT Knob Enter the utility menu. Adjust the volume of line output. -
Page 13: Rear & Side Panel
EDK924M DRUM KIT MANUAL Real Panel & Side Panel 17. AUX IN Jack (1/8”) This stereo input jack is for an external sound source, such as an MP3 player. 18. PHONES Jack (1/8”) This stereo input jack is used to connect headphones to the unit. -
Page 14: Setup
EDK924M DRUM KIT MANUAL SET UP CAUTION! To prevent electric shock and damage to the device, make sure the power is turned OFF on the drum and all related device before making any connection. Connecting Pads and Pedals Standard: KICK, SNARE, TOM1-3, CRASH1-2, RIDE, HIHAT, HIHAT CONTROL PEDAL using the provided cables, connect with kick, snare, tom1~tom3, ride, crash1-2, hi-hat, hi-hat control triggers. -
Page 15: Connections Connecting An Audio Equipment
EDK924M DRUM KIT MANUAL CONNECTIONS Connecting an Audio Equipment When using an amplifier, connect the Output L/MONO jack located on the side of the drum module. Note: The line output volume is controlled by the LINE OUT knob. Connecting a set of Headphones Headphones can be connected to the PHONES jack located on the side of the drum module. -
Page 16: Connecting A Computer
EDK924M DRUM KIT MANUAL Connecting a Computer Via the USB Connector, which can receives and transmits MIDI messages to a computer. Power Supply & Switch Make sure the power is switched OFF. Connect the adaptor to the DC IN jack on the side panel. After confirming that all connections have been completed, rotate the volume knob to the left (minimum volume level) before switching the power on. -
Page 17: Performing Selecting A Drum Kit
EDK924M DRUM KIT MANUAL PERFORMING Selecting a Drum Kit After powering up, the digital drum will be in KIT menu (KIT button's led ON). 1. Use the [+] and [-] buttons to select the kit. There are 15 kits in the digital drum: •... -
Page 18: Adjusting The Sensitivity Of A Pad
EDK924M DRUM KIT MANUAL Hi-Hat The Hi-Hat sound varies depending on the position of Hi-Hat pedal. Open Hi-Hat: Strike the Hi-Hat pad without pressing the pedal. Closed Hi-hat: Strike the Hi-Hat pad with the pedal Pressed completely down. Pedal Close: Press the pedal completely down without striking the pad. -
Page 19: Using The Metronome/Click Feature
EDK924M DRUM KIT MANUAL Metronome/CLick Feature Time signature Press CLICK button to Start/Stop Metronome function, The click LED will flash accordingly when metronome is Working. Press Menu button to “Click” submenu, Interval Press once - Time signature Press twice - Interval... -
Page 20: Editing And Saving A Drum Kit
EDK924M DRUM KIT MANUAL EDITING AND SAVING A DRUM KIT In module, you can modify the parameters as you like and save to the selected user kit. Adjusting the Volume of a Drum Kit 1. Press the [KIT] button, press the [+] or [-] Volume button to select the kit you want to edit. -
Page 21: Saving The Edited Kit
EDK924M DRUM KIT MANUAL Saving a User Kit 1. Adjust the voice, volume and sensitivity User kit of each pad as described above. 2. Save the kit by holding the [KIT] button unti it flashes. 3. Press the [+] or [-] button to select which user kit to save the changes to. -
Page 22: Muting The Drums In Songs
EDK924M DRUM KIT MANUAL Muting the Drums in Songs In Song model Drum On 1. Press the [MENU] button again. Select the Drum Off Page. 2. Press the [+] or [-] button to set drum on/off. Drum Off RECORDING YOUR PERFORMANCE 1. -
Page 23: Recording Your Performance Quickly
EDK924M DRUM KIT MANUAL Recording Your Performance Quickly 1. Press the [RECORD] button. The Metronome will be turned Drum Off on automatically. 2. Press the [ST/SP] button to start recording. 3. Press the [ST/SP] button again to stop recording, your performance has been recorded to user song. -
Page 24: Selecting A Beat Or Rhythm To Begin Practicing
EDK924M DRUM KIT MANUAL COACH There are two types of practice. They are basic practice and super practice. Basic: Snare Practice Super: Drums Practice Selecting a beat or rhythm to begin Practicing 1. Press the [COACH] button. COACH INDEX 2. Press the [+] or [-] button. -
Page 25: Beat And Rhythm
EDK924M DRUM KIT MANUAL Beat and rhythm Basic type show as follows: 1 1. -
Page 26: Making The Settings For Pads About Settings Of Pads
EDK924M DRUM KIT MANUAL MAKING THE SETTINGS FOR PADS About Settings of Pads Pad Settings If the digital drum is not yet in UTILITY menu, Threshold (1-8) Press the [UTILITY] button to enter it. Sensitivity (1-16) Crosstalk (0-9) The UTILITY's LED will light up. You can use [+]... -
Page 27: Selecting The Pad Curve
EDK924M DRUM KIT MANUAL If the value is set too high, then when two Crosstalk pads are played simultaneously, the one that is struck less forcefully will not sound. So be careful and set this parameter to the minimum value required to prevent such crosstalk. With a setting of 0, crosstalk prevention does not function. -
Page 28: Saving Settings Of Pads
EDK924M DRUM KIT MANUAL Curve1: The standard settng, this produces the most natural correspondence between playing dynamics and volume change. Curve2,3: Compared to Curve1, strong dynamics produce a greater change. Curve4,5: Compared to Curve1, a soft playing produces a greater change. -
Page 29: Drum Kit List
EDK924M DRUM KIT MANUAL DRUM KIT LISTS Preset Kit ROCK FUNK METAL JAZZ BRUSH VINTAGE LATIN DANCE CONCERT PERCUSSION 1 PERCUSSION 2 DRUM INSTRUMENT LISTS Name Name KICK SNARE KICK01 SNARE01 KICK02 SNARE02 KICK03 SNARE03 KICK04 SNARE04 KICK05 SNARE05 KICK06... - Page 30 EDK924M DRUM KIT MANUAL Name Name SNARE HIHAT SIDESTICK4 CLOSED IHAT1 SIDESTICK5 CLOSED IHAT2 SNARERIM1 CLOSED IHAT3 SNARERIM2 CLOSED IHAT4 SNARERIM3 CLOSED IHAT5 SNARERIM4 CLOSED IHAT6 SNARERIM5 CLOSED IHAT7 SNARERIM6 CLOSED IHAT8 SNARERIM7 CLOSED IHAT9 1 10 CLOSED IHAT10 TOM1H...
-
Page 31: Song List
EDK924M DRUM KIT MANUAL DEMO SONG LIST Name Name Name CRASH METRO_CLICK 16BEAT1.mid CRASH01 METRO_BELL 16BEAT2.mid CRASH02 808_CLAP 16BEAT3.mid CRASH03 TAMBRINE 8BEAT1 CRASH04 COWBELL1 8BEAT2 CRASH05 COWBELL2 ROCK1 CRASH06 ECOW BELL ROCK2 CRASH07 VSLAP ROCK3 CRASH08 HIBONGO ROCK4 CRASH09 LOBANGO...
Need help?
Do you have a question about the EDK924M and is the answer not in the manual?
Questions and answers
Headphone volume too low have tried following instructions without success