Table of Contents
Advertisement
Advertisement
Table of Contents

Related Manuals for Bryton Rider 15 neo

Summary of Contents for Bryton Rider 15 neo
- Page 1 User Manual Rider 15 neo...
- Page 2 Video Tutorial For a step-by-step demonstration of device and Bryton Active app, please scan the QR code below to check out Bryton Tutorial Videos. http://www.youtube.com/c/BrytonActive...
-
Page 3: Table Of Contents
Specification ......20 Initial Setup ....... 7 Battery Information ....21 Step 1: Power On Rider 15 neo ..7 Wheel Size Chart ....... 23 Step 2: Select Unit ..... 7 Install Speed/Cadence Sensor ..24 Step 3: Acquire GPS Signal ..7 Install Heart Rate Belt .... -
Page 4: Getting Started
Getting Started This section will guide you on the basic preparations before you start using your Rider 15 neo. Rider 15 neo Key Functions POWER/MENU/BACK OK/RECORD Power: x Press to turn the device on. x In Menu, press to confirm a selection. -
Page 5: Reboot Rider 15 Neo
Reboot Rider 15 neo To reboot the Rider 15 neo, press the two keys ( ) at the same time. Accessories The Rider 15 neo comes with the following accessories: USB Cable Bike Mount Optional items: Smart Heart Rate Monitor... -
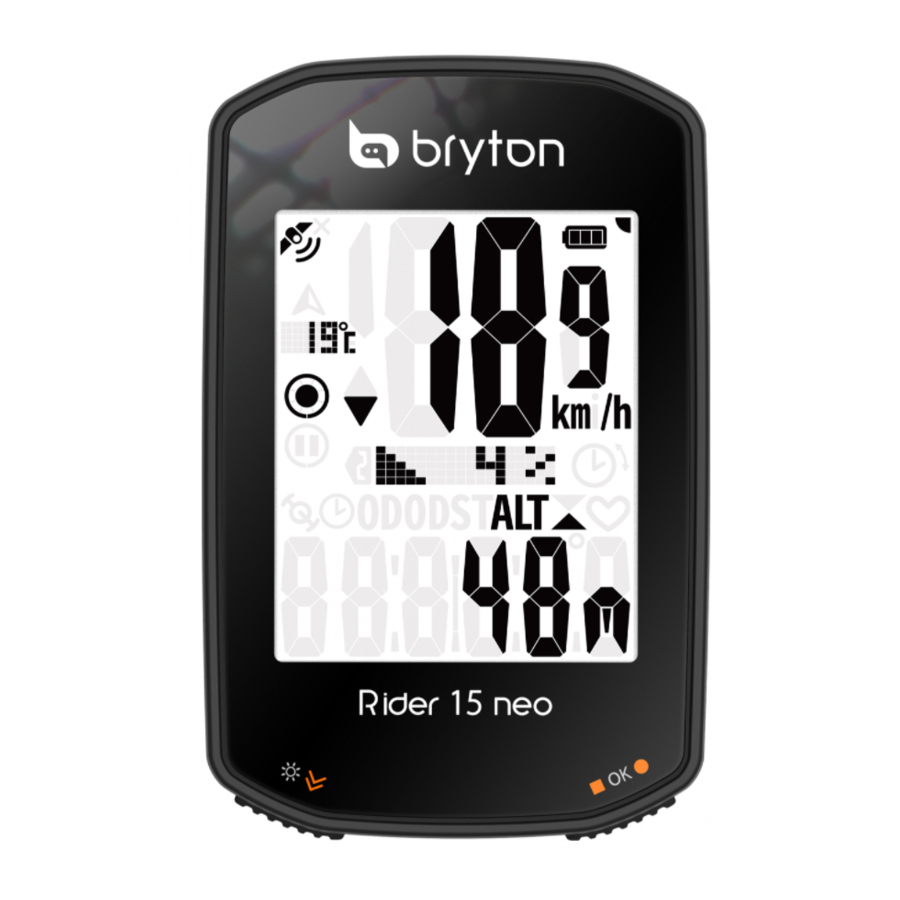
Page 6: Icon Description
Charge your Rider 15 neo Before start using the device, connect Rider 15 neo to a PC with Bryton USB cable to charge the battery for at least 4 hours. The temperature suitable for charging battery is 0°C ~ 40°C. -
Page 7: Initial Setup
Initial Setup When turning on Rider 15 neo for the first time, the setup wizard appears on the screen. Follow the instruction to complete setup. Step1. Turn on Rider 15 neo Press to turn on Rider 15 neo. Step2. Select Unit km/h, ˚C... -
Page 8: Step 4: Ride With Rider 15 Neo
4. Ride with Rider 15 neo After acuired GPS signal, you can enjoy your ride with Rider 15 neo. x Free ride: Measurement starts and stops automatically in sync with the movement of the bicycle. -
Page 9: Step 5: Install On Bikes
5. Install on Bikes Table of Getting Settings Bryton App Appendix Contents Started 9 Getting Started... -
Page 10: Share Your Records
UUID does not match, press NO and try again. Note: Bryton Active App syncs with Brytonactive.com. If you already have a brytonactive.com account, please use the same account to log in to Bryton Active App and vice versa. Table of... - Page 11 Register for a new account or use your current account to log in. iii. Turn on your Rider 15 neo and connect it to your computer by USB cable. Then find the “Bryton” disk in the computer. c. Share Your Records to Strava a.
-
Page 12: Bryton Update Tool
Bryton Update Tool Bryton Update Tool is the tool for you to update GPS data, firmware and download Bryton Test. 1. Go to http://www.brytonsport.com/#/supportResult?tag=BrytonTool and download Bryton Update Tool. 2. Follow the on-screen instructions to install Bryton Update Tool. Update GPS Data The newer GPS data can speed up the GPS acquisition. -
Page 13: Settings
Once the profile is set up, bike to the next digit. infomation will be stored. Make the ride more easier. Increase numbers Confirm and move to the next digit. Table of Getting Settings Bryton App Appendix Contents Started 13 Settings... -
Page 14: Calibrate Altitude
Confirm and move to the next digit. The first digit can be set as "-" or "0". Note: Bryton Active App provides altitude information for you to calibrate altitude manually. Go to Page 18 to see more information. Table of... -
Page 15: Sensor Pairing
You can pair Heart Rate Monitor, Speed Sensor, Cadence Sensor or Combo Sensor with Rider 15 neo. However, pairing a sensor with Rider 15 neo is not mendatory, the divice will analyze your distance and speed data with the GPS signal. -
Page 16: Delete Data
“30” or “00”. x Identify time format by the clock icon. 5:25 pm Select numbers. 5:25 am Confirm and move to the next digit. Table of Getting Settings Bryton App Appendix Contents Started 16 Settings... -
Page 17: Odometer
Confirm and move to the next digit. 8. Reset Data x You can reset your device to Select factory settings. "YES" or "NO". Confirm to reset data. Table of Getting Settings Bryton App Appendix Contents Started 17 Settings... -
Page 18: Bryton App Advanced Settings
Notifications After pairing your compatible smartphone using Bluetooth Smart wireless technology with Rider 15 neo, you can receive phone calls, texts and email notifications on your Rider 15 neo. 1. iOS Phone Pairing a. Go to your phone “Settings>Bluetooth” and enable Bluetooth. -
Page 19: Altitude Calibration
2. Calibrate Your Altitude a. Tap “Alt. Cal” in Bryton Active App. b. Tap ”Allow” to enable Bryton Active App to use current location for altitude information. (For iOS phone only) c. Bryton Active App shows altitude of your current location. You can also make manual changes by pressing or tap on the number to input manually. -
Page 20: Appendix
Cadence Avg CAD activity. Max CAD The maximum cadence for current activity. Heading function informs you which direction you are Heading Heading currently heading. Temperature Temp The current temperature. Table of Getting Settings Bryton App Appendix Contents Started 20 Appendix... -
Page 21: Specification
Specification Rider 15 neo Item Description Display 2” Segment Type HTN LCD Physical Size 71.1 X 46.1 X 21.6 mm Weight 51 g Operating Temperature -10°C ~ 60°C Battery Charging 0°C ~ 40°C Temperature Battery Li-polymer rechargeable battery Battery Life... -
Page 22: Battery Information
( 3. Remove the cover and battery tab. 4. Use your finger to press and twist cover clockwise so the indicator on the cover points to locked icon ( Table of Getting Settings Bryton App Appendix Contents Started 22 Appendix... - Page 23 5. Use a coin to twist the cover clockwise. NOTE: x Be careful not to damage or lose the O-ring gasket. x Contact your local waste disposal department to properly dispose of of used batteries. Table of Getting Settings Bryton App Appendix Contents Started 23 Appendix...
-
Page 24: Wheel Size Chart
2200 26x1,40 2005 700x42C 2224 26x1,50 2010 700x44C 2235 26x1,75 2023 700x45C 2242 26x1,95 2050 700x47C 2268 26x2,10 2068 29x2,1 2288 26x2,125 2070 29x2,2 2298 26x2,35 2083 29x2,3 2326 Table of Getting Settings Bryton App Appendix Contents Started 24 Appendix... - Page 25 After around 15 times blink, it stops blinking. If not used for 10 minutes, sensor would go into sleep mode to preserve power. Please complete the pairing during the time the sensor is awake. Table of Getting Settings Bryton App Appendix Contents Started 25 Appendix...
-
Page 26: Install Heart Rate Belt
The belt should be worn directly on your body. x Adjust the sensor position to the middle part of the body (wear it slightly below the chest). The Bryton logo shown on the sensor should be facing upward. Tighten the elastic belt firmly so that it will turn loose during the exercise. -
Page 27: Basic Care For Your Rider 15 Neo
Basic Care For Your Rider 15 neo Taking good care of your device will reduce the risk of damage to your device. x Do not drop your device or subject it to severe shock. x Do not expose your device to extreme temperatures and excessive moisture. - Page 28 20 cm separation distance to the user. Hereby, Bryton Inc. declares that the radio equipment type Bryton product is in compliance with Directive 2014/53/EU. The full text of the EU declaration of conformity is available at the following internet address: http://www.brytonsport.com/download/Docs/CeDocs_Rider15neo.pdf...
Need help?
Do you have a question about the Rider 15 neo and is the answer not in the manual?
Questions and answers
Bike 1 is staying on all the time
Good afternoon - i really like the device - just wonder can I swap the time section to show ride time instead of the 12 / 24 hour clock?
bike 1 is staying on cannot remove it
@Robert Biancotti the Bike 1 is staying on all the time