
Summary of Contents for STEININGER ROCK.AIR
- Page 1 ROCK.AIR OUTDOOR KITCHEN USER MANUAL Showrooms: Sankt Martin Linz Vienna Hamburg London St. Gallen (GB) (CH) www.steiningerdesigners.com K I T C H E N I N T E R I O R D E S I G N A R C H I T E C T U R E...
-
Page 2: Table Of Contents
CONTENTS SAFETY INSTRUCTIONS p. 3 INSTALLATION INSTRUCTIONS p. 4 PLANNING INSTRUCTIONS p. 6 ROCK.AIR.FIRE p. 7 ROCK.AIR.WASH p. 10 ROCK.AIR.COOL p. 14 ROCK.AIR.COOK p. 18 CLEANING AND CARE p. 24 WINTERIZATION & DEWINTERIZATION p. 25... -
Page 3: Safety Instructions
SAFETY INSTRUCTIONS • Please read this user manual and the safety instructions carefully. • The unit may only be connected to the gas line by a specialist. • For units operated using natural gas, the connection must always be carried out in coordination with the local gas works. -
Page 4: Installation Instructions
INSTALLATION INSTRUCTIONS... - Page 5 INSTALLATION INSTRUCTIONS...
-
Page 6: Planning Instructions
PLANNING INSTRUCTIONS • When setting up the individual cubes, make sure that the load points are positioned on a solid base. • The tools supplied with the unit can be used to adjust the height of the feet and level the cubes. Level the bodies carefully. -
Page 7: Rock.air.fire
Fire noise generator (opt.) lower 6 Fire noise generator (opt.) higher 8 Flame smaller 9 Model Item Pressure Connection Gas consumption ROCK.AIR Fire Gas Tall sm-ro-air-fire-gt Natural gas n.s. ROCK.AIR Fire Gas Tall sm-ro-air-fire-gt Liquid gas 3-5 kg/h ROCK.AIR Fire Gas Small sm-ro-air-fire-gs Natural gas 1,42 m³/h... - Page 8 ROCK.AIR.FIRE Removing the glass front A for gas inspection: • Take the glass front in both hands. • Lift upwards. • Pull it away towards your body. Mounting the glass front A • Take the glass front in both hands and hang it on the hooks (two on each side, top and bottom) from above.
- Page 9 ROCK.AIR.FIRE ATTENTION The ROCK.AIR fireplaces may only be heated or fired with the fuels intended for them (= burning gel or gas). These are only suitable for outdoor use. • Lighting a fire in any other way (with wood, coal or other combustible materials) is strictly prohibited! •...
-
Page 10: Rock.air.wash
ROCK.AIR.WASH Available items • sm-ro-air-wash ... • sm-ro-air-wash-fp ... A Cover To open, lift up and slide back. B Extendible tap C Drain cover and, below, sieve cover. D Drawer: To open, pull out at left or right side. Gas canister and replacement utensils in drawer. - Page 11 ROCK.AIR.WASH Inspection flap F Opening: • To open the inspection flap, grip it at the bottom. • Gently press it upwards. • Pull towards your body. • Pull down and remove. Closing: • Insert the top section of the inspection flap in the toothed rail.
- Page 12 ROCK.AIR.WASH Available items • sm-ro-air-wash • sm-ro-air-wash-fp Removing the dishwasher: • Grip the dishwasher on the left and right-hand sides. • Apply a little pressure to detach it from the front (magnet). • Hold the front plate in one hand, and use the oth- er hand to pull out the plastic retaining pin.
- Page 13 ROCK.AIR.WASH Removing the dishwasher: • Blue cable: Pull the clip on the white plug forwards, then pull the plug upwards to unplug it. • Remove the front plate. Removing the drawer D • Remove all 5 screws on both sides (see photo).
-
Page 14: Rock.air.cool
ROCK.AIR.COOL Available items • sm-ro-air-cool-fp ... • sm-ro-air-cool-sz ... • sm-ro-air-freeze-szi ... A Cover To open, lift up and slide back. B Worktop C Refrigerator drawer To open, pull out at left or right side. D Inspection flap (rear) Removing the cooler:... - Page 15 ROCK.AIR.COOL Removing the cooler: • Remove the magnetic panels from both sides of the unit. • Using your finger, pull the rail towards your body. • Remove one screw on each side from the inside of the unit. • Grip the cooler in both hands and apply a little pres- sure to detach it from the drawer (magnet).
- Page 16 ROCK.AIR.COOL Removing the cooler: • Push the unit back (into the body) to allow access to the screws. • Undo 7 screws each on the left and right-hand sides of the frame. • Remove the frame. • Carefully pull the unit out and lift it towards the front (ideally with 2 people).
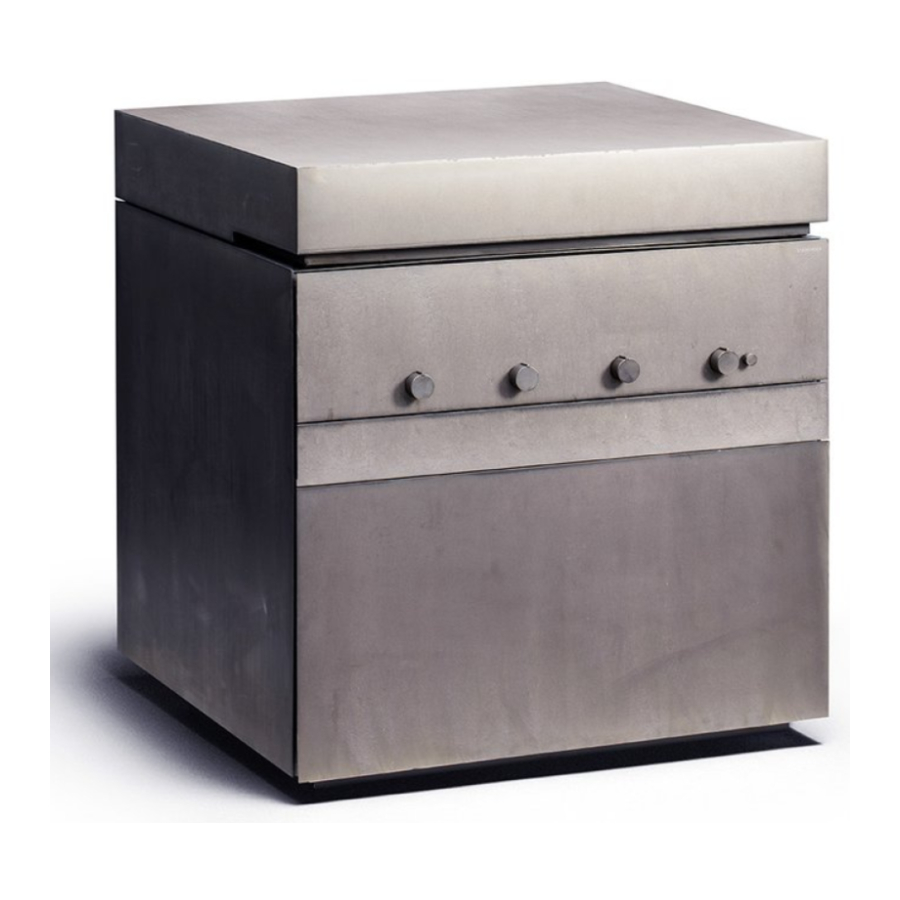
- Page 17 ROCK.AIR.COOK Available items • sm-ro-air-cook-gas ... • sm-ro-air-cook-el ... • sm-ro-air-cook-opt ... A Cover To open, lift up and slide back. B Grill surface C Gas knob D Drawer To open, pull out at left or right side. E Gas canister (in the drawer).
-
Page 18: Rock.air.cook
ROCK.AIR.COOK Connection values in acc. with CE Germany Propane 50mbar Natural gas LL 20mbar Natural gas H+E 20mbar Propane 28-30/37 mbar, 29 mbar 1,2 kg/h 1,88 m 1,60 m 1,20 kg/h Starting operation: Fill the bottom grease tray with water. - Page 19 ROCK.AIR.COOK Cleaning, care and maintenance: Replacing the battery (AA) in the electric ignition: Turn the electric ignition to the left. (If you do not hear a ‘clicking’ sound when the ignition is pressed, the battery needs replacing.) Remove the battery and insert a new AA battery.
- Page 20 ROCK.AIR.COOK Removing the tubular burner: Close the gas valve. Ensure that the unit is cooled down, then: Grip the tubular burner with both hands and swivel it away from your body. The tubular burner will come loose from the mixer pipe at the front, and can now be carefully removed from above.
- Page 21 ROCK.AIR.COOK Accessories: FLAME SHIELD 1/2 (FOR COOKING GRATE): Item: sm-ro-air-acc-shield FLAME SHIELD “LAVA” 1/2 (FOR COOKING GRATE): Item: sm-ro-air-acc-shield-lav LAVA STONES 3 KG (FOR FLAME SHIELD “LAVA”): Item: sm-ro-air-acc-lav COOKING GRATE 1/2: Item: sm-ro-air-acc-grate1/2 Grill grate over 2 burners, 39.5 x 43.5 cm. Accessories in conjunction with FLAME SHIELD or FLAME SHIELD LAVA.
- Page 22 ROCK.AIR.COOK 2 Accessories: TUB SIZE 1/4: Item: sm-ro-air-acc-tub1/4 RGS 240 x 43 x 8 cm over 1 burner (for stewing and steaming in plenty of liquid - not suitable for roasting in fat). TUB SIZE 1/2: Item: sm-ro-air-acc-tub1/2 RGS 39 x 43 x 8 cm over 2 burners (for stewing and steaming in plenty of liquid - not suitable for roasting in fat).
- Page 23 RGS 39.4 x 43.4 cm over 2 burners, with drainage - height to corner 25 mm, stainless base. TEPPANYAKI fat drain COVER 75 x 51.5 x 109 cm: Item: sm-ro-air-acc-hu-51.5 Material: Fabric, medium grey, STEININGER logo, fits FIRE SMALL 72.5 x 51.5 x 109 cm. COVER 75 x 103 x 109 cm: Item: sm-ro-air-acc-hu103 Material: Fabric, medium grey, STEININGER logo, fits all elements 72.5 x 103 x 109 cm.
-
Page 24: Cleaning And Care
CLEANING AND CARE • It is easiest to clean the unit while it is still warm. Stainless steel surfaces Important information • Salt residue must be removed immediately. Combined with stainless steel, it can form hydrochloric acid, which will irreparably damage the stainless steel. Cleaning and care •... -
Page 25: Winterization & Dewinterization
Emptying the siphon | Rinsing the dishwasher with antifreeze. Winterizing: • Turn off/shut off the water supply line to the Rock.Air module and drain the lines. • Fill food grade antifreeze (0.5 litres) into the dishwasher rinse chamber and let it drain. For this pur- pose, please click on the following symbol.
Need help?
Do you have a question about the ROCK.AIR and is the answer not in the manual?
Questions and answers