Table of Contents
Advertisement
Available languages
Available languages
Quick Links
Houd, wanneer u contact opneemt met de serviceafdeling, de productiecode (PCODE)
en het volledige itemnummer (ITEMNR) bij de hand.
When contacting the service department, have the production code (PCODE)
and complete item number (ITEMNR) to hand.
Adressen en telefoonnummers van de serviceorganisatie vindt u op de garantiekaart.
You will find the addresses and phone numbers of the service organisation on the guarantee card.
Advertisement
Chapters
Table of Contents

Related Manuals for ETNA ESM220WIT


Summary of Contents for ETNA ESM220WIT
- Page 1 Houd, wanneer u contact opneemt met de serviceafdeling, de productiecode (PCODE) en het volledige itemnummer (ITEMNR) bij de hand. When contacting the service department, have the production code (PCODE) and complete item number (ITEMNR) to hand. Adressen en telefoonnummers van de serviceorganisatie vindt u op de garantiekaart. You will find the addresses and phone numbers of the service organisation on the guarantee card.
- Page 2 GEBRUIKSAANWIJZING Handleiding Manual INSTRUCTIONS FOR USE EKK0850WIT EKV0850WIT MAGNETRON ESM220WIT ESM220ZIL MICROWAVE OVEN...
- Page 3 Nederlands ............NL 3 – NL 21 English.
-
Page 4: Table Of Contents
Inhoud ■ Uw magnetron......4 Beschrijving ......4 Inleiding . -
Page 5: Uw Magnetron
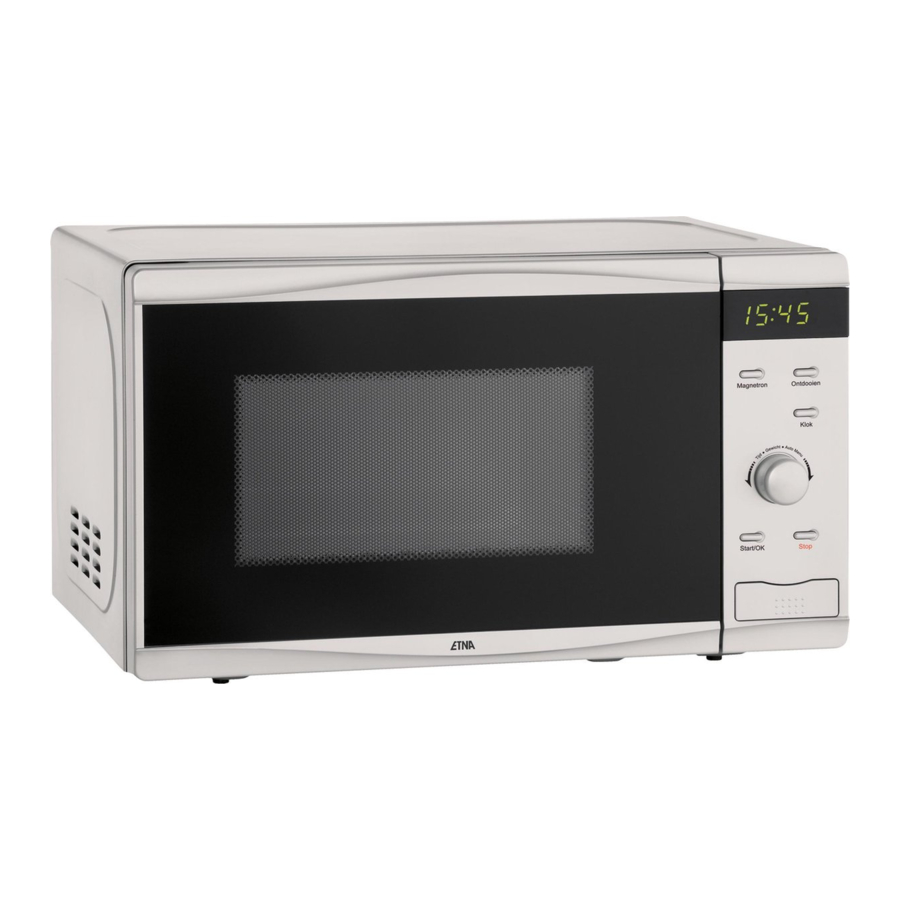
Beschrijving Display Magnetron Ontdooien Klok Bedieningspaneel Aandrijving Start/OK Stop Bedieningspaneel Magnetron Ontdooien Magnetron Ontdooien Klok Klok Tijd/gewicht/auto-menu Stop Start/OK Start/OK Stop Toebehoren draaiplateau ring voor draaiplateau nokje voor draaiplateau... -
Page 6: Inleiding
Inleiding U heeft gekozen voor een magnetron van De bediening van deze magnetron is Etna. eenvoudig. Met deze handleiding willen we vooral inzicht geven in alle mogelijkheden Optimaal gebruikscomfort en een eenvoudige van dit toestel. bediening stonden voorop bij de ontwikkeling van dit product. -
Page 7: Algemeen
Algemeen Deze magnetron is uiterst veilig. Toch is er, Bij het bereiden van gerechten die alcohol net als bij elk product, een aantal zaken waar bevatten kan de alcohol door de hoge u op moet letten. temperaturen verdampen. Reparaties mogen alleen door een bevoegd Gebruik de magnetron niet voor het opbergen servicemonteur worden uitgevoerd. -
Page 8: Veiligheid
Waar u op moet letten Zet een kunststof lepeltje in het kopje als u Schakel de magnetron uit en neem de stekker vloeistof (bijvoorbeeld water) wilt koken. Het uit het stopcontact indien iets in de combi- kan namelijk gebeuren dat de vloeistof kookt oven vlam vat. - Page 9 Waar u op moet letten Prik met een vork of ander puntig voorwerp even in het vel van vlees, kip of vis. Hiermee voorkomt u dat deze gerechten gaan spetteren. Als de magnetron ingeschakeld is, mag de deur geopend worden; de magnetron schakelt automatisch uit en de ingestelde tijd wordt stilgezet.
-
Page 10: Bediening
Ingebruikname plaatsen magnetron en toebehoren reinigen Plaats de magnetron op een stevige en vlakke Neem het toebehoren uit de combi-magnetron ondergrond. en reinig het met een mild reinigingsmiddel. Zorg voor voldoende ventilatie rondom de opmerking magnetron. Houd aan de bovenzijde 30 cm Als de oven voor de eerste maal sterk verhit ruimte vrij. -
Page 11: Klok Instellen
Klok instellen 1 Druk toets ‘Klok’. De uren-aanduiding gaat knipperen. 2 Draai regelknop ‘Tijd/Gewicht/Auto Menu’. Stel de uren in (tussen 0-23 uur). Magnetron Ontdooien 3 Druk toets ‘Klok’. Klok De minuten-aanduiding gaat knipperen. 4 Draai regelknop ‘Tijd/Gewicht/Auto Menu’. Stel de minuten in (tussen 0-59). Start/OK Stop 5 Druk toets ‘Klok’. -
Page 12: Koken Met De Magnetron
Koken met de magnetron tabel magnetronvermogen Vermogen Druk toets ‘Magnetron’ 1 Druk toets ‘Magnetron’ om de 100% (P100) magnetronfunctie te selecteren. Op het 80% (P80) display verschijnt ‘P100’. 50% (P50) 30% (P30) 2 Druk herhaaldelijk op ‘Magnetron’ of draai 10% (P10) regelknop ‘Tijd/Gewicht/Auto Menu’... -
Page 13: Ontdooien
Ontdooien met ingesteld gewicht 1 Druk 1x toets ‘Ontdooien’. In de display verschijnt “dEF1”. 2 Draai regelknop ‘Tijd/Gewicht/Auto Menu’. Stel het gewenste gewicht in (tussen 100 en 2000 gram). Magnetron Ontdooien Klok 3 Druk toets ‘Start/OK’ om het ingestelde programma te starten. Start/OK Stop met ingestelde tijd... -
Page 14: Koken In Meerdere Fasen
Koken in meerdere fasen U kunt maximaal 2 kookfasen instellen. Stel de ontdooifunctie (indien van toepassing) als eerste fase in. Na elke fase klinkt een pieptoon en begint de volgende fase. Auto-menu kan in deze stand niet worden Magnetron Ontdooien gebruikt. -
Page 15: Voorinstelfunctie
Voorinstelfunctie stel eerst de tijdklok in (zie hoofdstuk “Klok instellen”) 1 Stel een kookfunctie in. Maximaal kunnen 2 functies worden ingesteld (met uit- zondering van de ontdooistand). Bij “Auto Ontdooien Magnetron menu” kunt u maximaal 1 functie instellen. Klok 2 Druk toets ‘Klok’. In de display verschijnt de huidige tijd. -
Page 16: Auto Menu
Auto menu 1 Draai regelknop ‘Tijd/Gewicht/Auto Menu’ rechtsom. Stel het gewenste programma in (A-1, A-2...A-8). 2 Druk toets ‘Start/OK’ om het ingestelde programma te selecteren. Ontdooien Magnetron 3 Draai regelknop ‘Tijd/Gewicht/Auto Menu’. Klok Stel het gewenste gewicht of hoeveelheid in. 4 Druk toets ‘Start/OK’... -
Page 17: Kooktabel Auto Menu
Kooktabel auto menu Vermogen Menu Gewicht/Hoeveelheid Display 200 g 100% 400 g REHEAT 600 g 200 g 300 g VEGETABLE 100% 400 g 250 g 350 g FISH 450 g 250 g 350 g MEAT 100% 450 g 50 g (met koud water 450 g) PASTA 100 g (met koud water 800 g) 200 g... -
Page 18: Controlefunctie
Controle functie ■ Druk tijdens het koken toets ‘Magnetron’. Het ingestelde vermogen wordt 2-3 sec. weergegeven in de display. ■ Druk in de voorinstel functie toets ‘Klok’. De actuele auto-starttijd wordt 2-3 sec. weergegeven in de display. ■ Druk tijdens het koken toets ‘Klok’. De dagtijd wordt 2-3 sec. -
Page 19: Onderhoud
Reinigen ■ Maak de binnenzijde direct na gebruik ■ Geurtjes verdwijnen als u een glas azijn schoon. Gebruik een vochtige doek of water met citroen in de ovenruimte om condens, overgekookt vocht zet. Schakel de magnetron gedurende en voedselresten te verwijderen. twee minuten in op vol vermogen. -
Page 20: Storingen
Wat te doen als... Algemeen Wanneer het toestel niet goed werkt, Raadpleeg bij storingen het telefoonnummer betekent dit niet altijd dat het defect is. van de servicedienst. Zie hiervoor de Probeer het euvel eerst zelf als volgt te bijgeleverde garantiekaart of raadpleeg de verhelpen. -
Page 21: Milieuaspecten
Verpakking en toestel afvoeren De verpakking van het toestel is recyclebaar. Gebruikt kunnen zijn: ■ karton; ■ polyethyleenfolie (PE); ■ CFK- vrij polystyreen (PS- hardschuim). Deze materialen op verantwoorde wijze en conform de overheidsbepalingen afvoeren. Op het typeplaatje is het symbool van een doorgekruiste vuilnisbak aangebracht: Dit betekent dat het apparaat aan het einde van zijn levensduur niet bij het gewone... -
Page 22: Algemeen
Technische gegevens Voeding 230 V 50 Hz Aansluitwaarde 1150 W Magnetronvermogen 800 W Oveninhoud 20 l Gewicht 11 kg Afmetingen (bxhxd) 440 x 258 x 345 mm... - Page 24 Contents ■ Your microwave oven ....4 Description ......4 Introduction .
-
Page 25: Your Microwave Oven
Description Display Magnetron Ontdooien Control panel Klok Drive Start/OK Stop Control panel Defrost Microwave Magnetron Ontdooien Clock Klok Timer/weight/auto-menu Stop Start/OK Start/OK Stop Accessories Turntable Roller stay Cam for turntable... -
Page 26: Introduction
Introduction You have chosen an Etna microwave oven. The controls for this oven are very easy. What we particularly want to do in this Optimum ease of use and simple operation manual is give you an idea of all the were the most important factors in the possibilities this appliance offers. -
Page 27: General
General This microwave oven is extremely safe. When cooking dishes that contain alcohol, As with all products, however, there are a the alcohol may evaporate due to the high number of things you need to bear in mind. temperature. Repairs must only be carried out by an Do not use the microwave oven for storing authorised service engineer. -
Page 28: Safety
What you should pay attention to Place a plastic spoon in the cup if you want If something in the combi-oven catches fire, to boil a liquid (water, for example). The liquid switch the microwave oven off and take the may boil without you seeing any bubbles. - Page 29 What you should pay attention to Prick the skin of meat, chicken and fish with a fork or other pointed object. This prevents these foods spattering. You can open the door when the microwave function is switched on; the microwave function then switches off automatically and the time set is stopped.
-
Page 30: Operation
Bringing the oven into operation positioning cleaning the microwave oven and Place the microwave oven on a firm, flat accessories surface. Remove the accessories from the combi- microwave oven and clean the oven with a Make sure that there is sufficient ventilation mild cleaning agent. -
Page 31: Setting The Clock
Setting the clock 1 Press the ‘Klok’ button. The hours-display starts to flash. 2 Turn the ‘Tijd/Gewicht/Auto Menu’ control knob. Set the hours (between 0 and 23 hour). Ontdooien Magnetron 3 Press the ‘Klok’ button. The minutes- Klok display starts to flash. 4 Turn the ‘Tijd/Gewicht/Auto Menu’... -
Page 32: Cooking Using The Microwave
Cooking using the microwave microwave power level table Power level Press the ‘Magnetron’ button 1 Press the ‘Magnetron’ button to select the 100% (P100) microwave function. The display shows 80% (P80) “P100”. 50% (P50) 30% (P30) 2 Press the ‘Magnetron’ button repeatedly or 10% (P10) turn the ‘Tijd/Gewicht/Auto Menu’... -
Page 33: Defrosting
Defrosting by setting the weight 1 Press the ‘Ontdooien’ button once. The display shows “dEF1”. 2 Turn the ‘Tijd/Gewicht/Auto Menu’ control knob. Set the desired weight (between 100 Magnetron Ontdooien and 2,000 grams). Klok 3 Press the ‘Start/OK’ button to start the set programme. -
Page 34: Multistage Cooking
Multistage cooking You can set a maximum of 2 cooking stages. Set the defrost function (if applicable) as the first stage. A beep sounds after the end of each stage and the next stage will start. The Auto-menu cannot be used with this mode. -
Page 35: Pre-Set Function
Pre-set function first set the clock (see the chapter entitled “Setting the clock”) 1 Set a cooking function. A maximum of 2 functions can be set (apart from the defrost function). When using the “Auto menu”, only one function can be set. 2 Press the ‘Klok’... -
Page 36: Auto Menu
Auto menu 1 Turn the ‘Tijd/Gewicht/Auto Menu’ control knob to the right. Set the desired programme (A-1, A-2...A-8). 2 Press the ‘Start/OK’ button to confirm the set programme. Magnetron Ontdooien 3 Turn the ‘Tijd/Gewicht/Auto Menu’ control Klok knob. Set the desired weight or quantity. 4 Press the ‘Start/OK’... -
Page 37: Cooking Table Auto Menu
Cooking table auto menu Power Menu Weight/quantity Display 200 g 100% 400 g REHEAT 600 g 200 g 300 g VEGETABLE 100% 400 g 250 g 350 g FISH 450 g 250 g 350 g MEAT 100% 450 g 50 g (with cold water 450 g) PASTA 100 g (with cold water 800 g) 200 g... -
Page 38: Checking The Settings
Checking the settings ■ Press the “Magnetron” button during cooking. The set power level is shown on the display for 2-3 sec. ■ Press the ‘Klok’ button while using the pre-set function. The current auto-start time is shown on the display for 2-3 sec. ■... -
Page 39: Maintenance
Cleaning ■ Clean the inside immediately after ■ Odours will disappear if you put a glass of use. Use a damp cloth to remove any vinegar or water with lemon juice added condensation, liquid that has boiled over in the oven space. Switch the microwave and food remains. -
Page 40: Faults
What should I do if… General If the appliance does not work properly, this In case of faults phone the service does not always mean that it is defective. department. See the guarantee certificate or Try to deal with the problem yourself first. consult the internet site www.hps.nl. -
Page 41: Environmental Aspects
Disposal of packaging and appliance The appliance packaging is recyclable. As a reminder of the need to dispose of The following may have been used: household appliances separately, the product ■ cardboard; is marked with a crossed-out wheeled ■ polythene film (PE); dustbin. -
Page 42: General
Technical information Power supply 230 V 50 Hz Connected load 1150 W Power microwave 800 W Volume oven 20 L Weight 11 kg Dimensions (wxhxd) 440 x 258 x 345 mm...
Need help?
Do you have a question about the ESM220WIT and is the answer not in the manual?
Questions and answers