Advertisement
Quick Links
BAND-IT-IDEX, Inc.
A Unit of IDEX Corporation
4799 Dahlia Street
Denver, CO 80216-3070 USA
P: 1-800-525-0758
F: 1-800-624-3925
Table of Contents
Imprinter Operating Instructions
Changing Character Dial Instructions
Line and Letter Charts
1/16"
3/32"
1/8"
3/16"
1/4"
Kits
www.BAND-IT-IDEX.com
Page
2-3
4
5-9
5
6
7
8
9
10-11
12
13
14
Page 1 of 14
ID200 Series
Imprinter
© Copyright
BAND-IT-IDEX, Inc. 2007
All rights reserved
Advertisement

Summary of Contents for Band-it ID200 Series
-
Page 1: Table Of Contents
Operating ID200 Series Instructions Imprinter Table of Contents Page Imprinter Operating Instructions Changing Character Dial Instructions Line and Letter Charts 1/16” 3/32” 1/8” 3/16” 1/4" Assembly Drawings 10-11 Repair Parts List Trouble Shooting Kits BAND-IT-IDEX, Inc. Document # P98289 rev. C A Unit of IDEX Corporation www.BAND-IT-IDEX.com... -
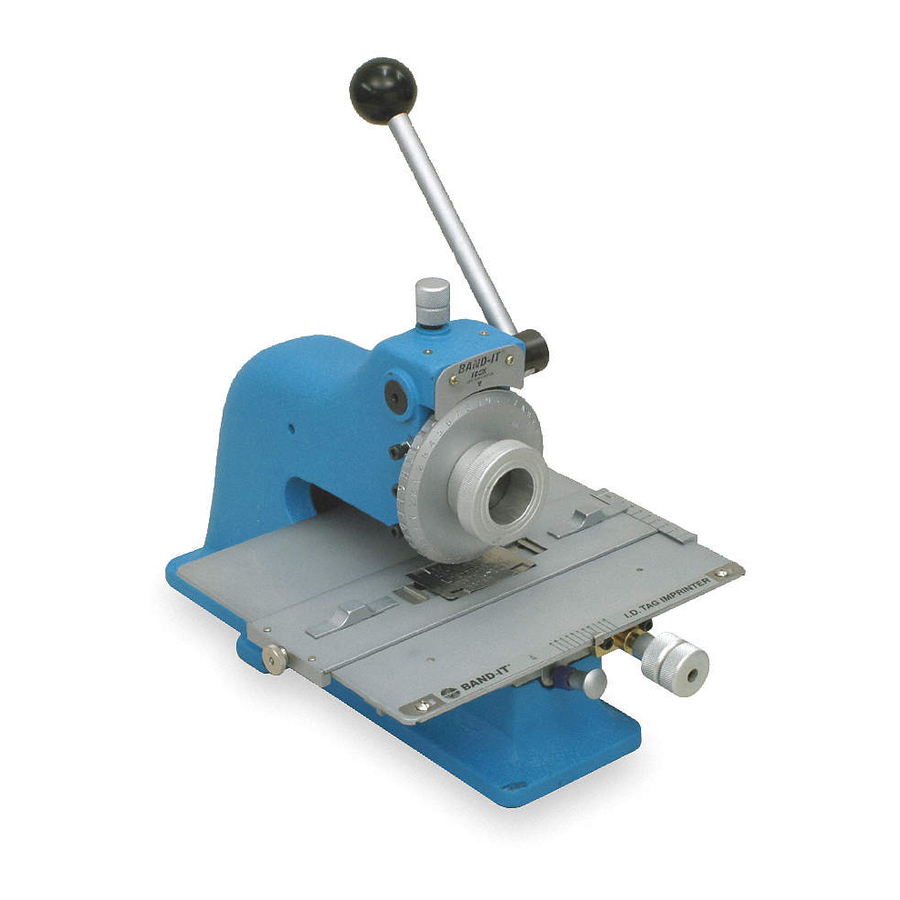
Page 2: Operating Instructions
ID200 Series Operating Imprinter Instructions Tag Anvils Handle ¾ x 3.5 Depth Adjustment Mounting Plate 1.5 x 2.5 ¾ x 2 Knurled Nut Tag & Anvil Location Dial Wheel Setup Capstan Screw Edge Line Indicator Table Limit Screw Location Letter Indicator... - Page 3 ID200 Series Operating Imprinter Instructions The I.D Tag Imprinter The imprinter is an easy-to-use machine for stamping data neatly and uniformly on I.D tags. Familiarize yourself by imprinting some practice pieces. With the 3/32" letter size dial, the large 1 1/2 x 2 1/2 I.D tag can hold as many as 91 characters on 7 lines, plus 30 more using all the space...
- Page 4 ID200 Series Character Dial Imprinter Instructions Remove screw in center of dial and take dial and knob assembly off. Place new dial and knob in position and tighten with retaining screw. Replace line and letter indicator with corresponding parts from kit. Slide table to extreme right and remove table limit screw.
- Page 5 ID200 Series 1/16” Line and Imprinter Letter Position Chart BAND-IT-IDEX, Inc. Document # P98289 rev. C A Unit of IDEX Corporation www.BAND-IT-IDEX.com © Copyright 4799 Dahlia Street BAND-IT-IDEX, Inc. 2007 Denver, CO 80216-3070 USA All rights reserved Page 5 of 14...
- Page 6 ID200 Series 3/32” Line and Imprinter Letter Position Chart BAND-IT-IDEX, Inc. Document # P98289 rev. C A Unit of IDEX Corporation www.BAND-IT-IDEX.com © Copyright 4799 Dahlia Street BAND-IT-IDEX, Inc. 2007 Denver, CO 80216-3070 USA All rights reserved Page 6 of 14...
- Page 7 ID200 Series 1/8” Line and Letter Imprinter Position Chart BAND-IT-IDEX, Inc. Document # P98289 rev. C A Unit of IDEX Corporation www.BAND-IT-IDEX.com © Copyright 4799 Dahlia Street BAND-IT-IDEX, Inc. 2007 Denver, CO 80216-3070 USA All rights reserved Page 7 of 14...
- Page 8 ID200 Series 3/16” Line and Imprinter Letter Position Chart BAND-IT-IDEX, Inc. Document # P98289 rev. C A Unit of IDEX Corporation www.BAND-IT-IDEX.com © Copyright 4799 Dahlia Street BAND-IT-IDEX, Inc. 2007 Denver, CO 80216-3070 USA All rights reserved Page 8 of 14...
- Page 9 ID200 Series 1/4” Line and Letter Imprinter Position Chart BAND-IT-IDEX, Inc. Document # P98289 rev. C A Unit of IDEX Corporation www.BAND-IT-IDEX.com © Copyright 4799 Dahlia Street BAND-IT-IDEX, Inc. 2007 Denver, CO 80216-3070 USA All rights reserved Page 9 of 14...
-
Page 10: Assembly Drawings
ID200 Series Assembly Imprinter Drawings Handle Adjustment Assembly Front Guide Tag Holder Screw Leaf Spring Rear Guide Table Spring Arm Stop Mounting Plate Slide Tag Holder Assembly Pawl Assembly Safety Spring Stop Adjustment Set Screw Connector Link Internal Linkage Detail BAND-IT-IDEX, Inc. - Page 11 ID200 Series Assembly Imprinter Drawings BAND-IT-IDEX, Inc. Document # P98289 rev. C A Unit of IDEX Corporation www.BAND-IT-IDEX.com © Copyright 4799 Dahlia Street BAND-IT-IDEX, Inc. 2007 Denver, CO 80216-3070 USA All rights reserved Page 11 of 14 P: 1-800-525-0758 F: 1-800-624-3925...
-
Page 12: Repair Parts List
Repair ID200 Series Parts List Imprinter BAND-IT QTY Description Part ID2698 1/16” Dial Wheel ID2918 3/32” Dial Wheel ID2728 1/8” Dial Wheel ID2758 3/16” Dial Wheel ID2788 1/4” Dial Wheel ID2068 1/16” Escapement Wheel ID2078 3/32” Escapement Wheel ID2088 1/8” Escapement Wheel ID2098 3/16”... -
Page 13: Trouble Shooting
ID200 Series Trouble Imprinter Shooting Problem Probable Cause Solution Line setup edge of mounting plate with bottom of table anvil (Page 2). Lock tag holder in place Loose or misaligned line with knurled nut. Line first line of line indicator Improper line location indicator. - Page 14 ID200 Series Kits Imprinter BAND-IT-IDEX, Inc. Document # P98289 rev. C A Unit of IDEX Corporation www.BAND-IT-IDEX.com © Copyright 4799 Dahlia Street BAND-IT-IDEX, Inc. 2007 Denver, CO 80216-3070 USA All rights reserved Page 14 of 14 P: 1-800-525-0758 F: 1-800-624-3925...
Need help?
Do you have a question about the ID200 Series and is the answer not in the manual?
Questions and answers