Advertisement
Quick Links
Advertisement

Subscribe to Our Youtube Channel
Related Manuals for Fisher-Price CMK04


Summary of Contents for Fisher-Price CMK04
- Page 1 CMK04 Please keep this instruction sheet for future reference, as it contains important information. Requires four D (LR20) alkaline batteries (not included) for operation. Adult assembly is required. Tool required: Phillips screwdriver (not included). fisher-price.com...
-
Page 2: Consumer Information
Consumer Information WARNING • Keep mobile out of baby’s reach. • Remove mobile portion of product from crib or playpen when baby begins to push up on hands and knees. • This product may not attach to all crib designs. Do not add additional strings or straps to attach to a crib or playpen. - Page 3 Smart Connect ™ App Download Information ® • Some features of this product only work with the Fisher-Price Smart Connect™ app. ® • Download the Fisher-Price Smart Connect™ app to control the crib mobile/soother from your smart device (not included). This app is available from the App Store or Google Play.
- Page 4 These limits are designed to provide reasonable protection against harmful interference in a residential installation. Fisher-Price, Inc., 636 Girard Avenue, East Aurora, NY 14052. Hearing-impaired consumers: 1-800-382-7470. This equipment generates uses and can radiate radio frequency energy and, if not...
-
Page 5: Battery Installation
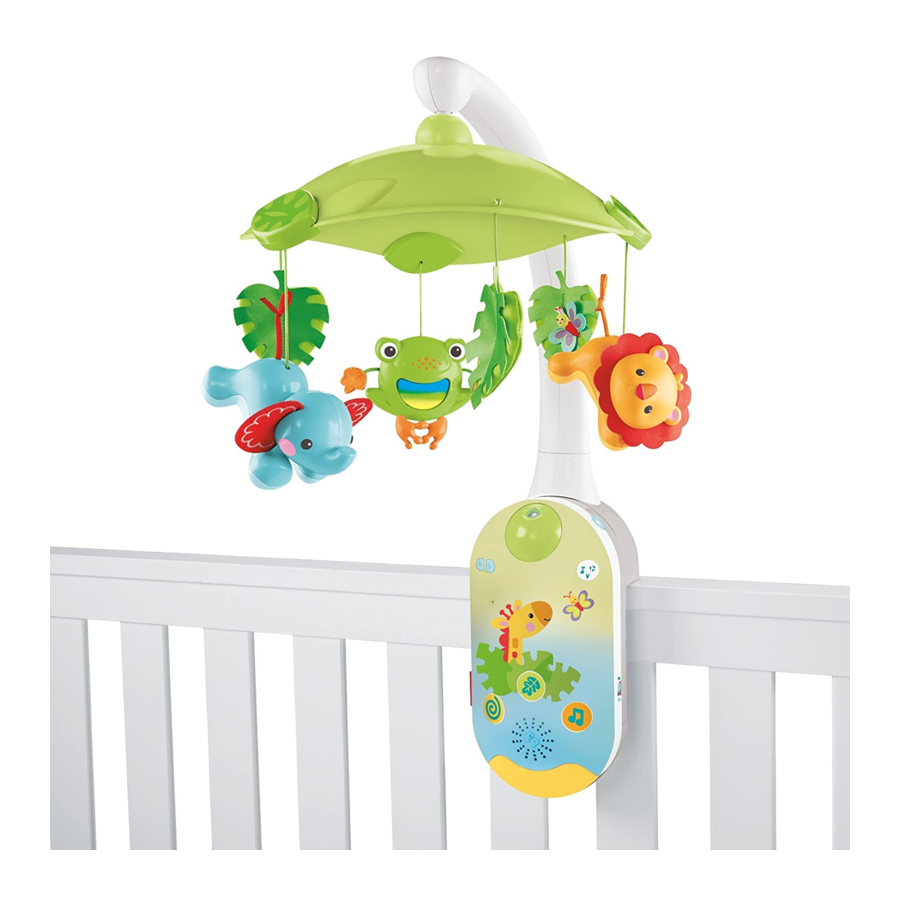
Battery Installation 1,5V x 4 D (LR20) For longer life, use alkaline batteries. • Loosen the screws in the battery compartment door and remove the door. • Insert four D (LR20) alkaline batteries. • Replace the battery compartment door and tighten the screws. Do not over-tighten. •... - Page 6 Assembled Parts Canopy Crib Adaptor Mobile Base Mobile Adaptor Note: All of the screws used to assemble this toy are attached to the product. Follow these instructions carefully to fully secure the screws. Tighten and loosen all screws with a Phillips screwdriver.
- Page 7 Assembly Canopy • Fit the canopy onto the peg on the end of the arm. Push to “snap” in place. Mobile Adaptor • Fit the arm into the socket in the mobile adaptor. Push to “snap” in place.
- Page 8 Assembly Mobile Base • Fit the mobile assembly onto the back of the mobile base. Tighten all four screws. Crib Adaptor • Fit the crib adaptor onto the mobile adaptor. Tighten the two screws.
- Page 9 Crib Attachment IMPORTANT! Always attach all provided fasteners (strings, straps, clamps, etc.) tightly to a crib or playpen according to the instructions. Check frequently. Crib Rail Attachment Strap Attachment Strap • Position the toy inside the crib. Make sure the attachment strap is on the outside of the crib •...
- Page 10 Crib Attachment • Tie the toy’s strings to a crib spindle. Note: It is better to tie the strings in a knot than a bow, since a bow may be easily untied. 7” (18 cm) 7” (18 cm) • If the distance between the base and the mattress is less than 7 inches (18 cm), lower the crib mattress.
- Page 11 Light Button Press to turn the check light ON or OFF. Hint: The check light times out Volume Buttons after approximately one minute. Press to adjust the volume level. Mobile/Projector Button Press to turn on the mobile and projector. Press the button again to turn on the mobile only.
- Page 12 Convert to Soother • Remove the mobile from the crib. • Loosen the screws in the crib adaptor and remove it • Loosen the screws in the mobile assembly and remove it . Store the mobile in a safe place for future use.
-
Page 13: Pairing Your Device
Pairing Your Device Pairing Button • Slide the mobile power switch • Press the pairing button on the back of the mobile. • Then, open the Smart Connect™ app on your device. Hints: • The mobile will stay in the pairing mode for approximately 30 seconds. •... -
Page 14: Smart Connect™ App
Smart Connect™ App PRESS • Open the Smart Connect™ app on your device. • Press the mobile icon to open the mobile controls. - Page 15 Smart Connect™ App Press to customize View your device status mobile name. here: You’re Connecting, Press to connect or You’re Connected, Another disconnect your device Device is connected or Out from the mobile. of Range. Choose the time out Press to turn the duration for the mobile.
- Page 16 12.2, or newer, Galaxy Mega • Sony Xperia (SP, Z, ZR, ZL, Z1, Z Ultra HSPA+) • Sony Xperia Tablet Z As technology changes, this app may become compatible with additional devices. Visit fisher-price.com/SmartConnect for an up to date, complete list of compatible devices.
Need help?
Do you have a question about the CMK04 and is the answer not in the manual?
Questions and answers