Table of Contents
Advertisement
Quick Links
Advertisement
Table of Contents

Related Manuals for Formax FD 3300

Summary of Contents for Formax FD 3300
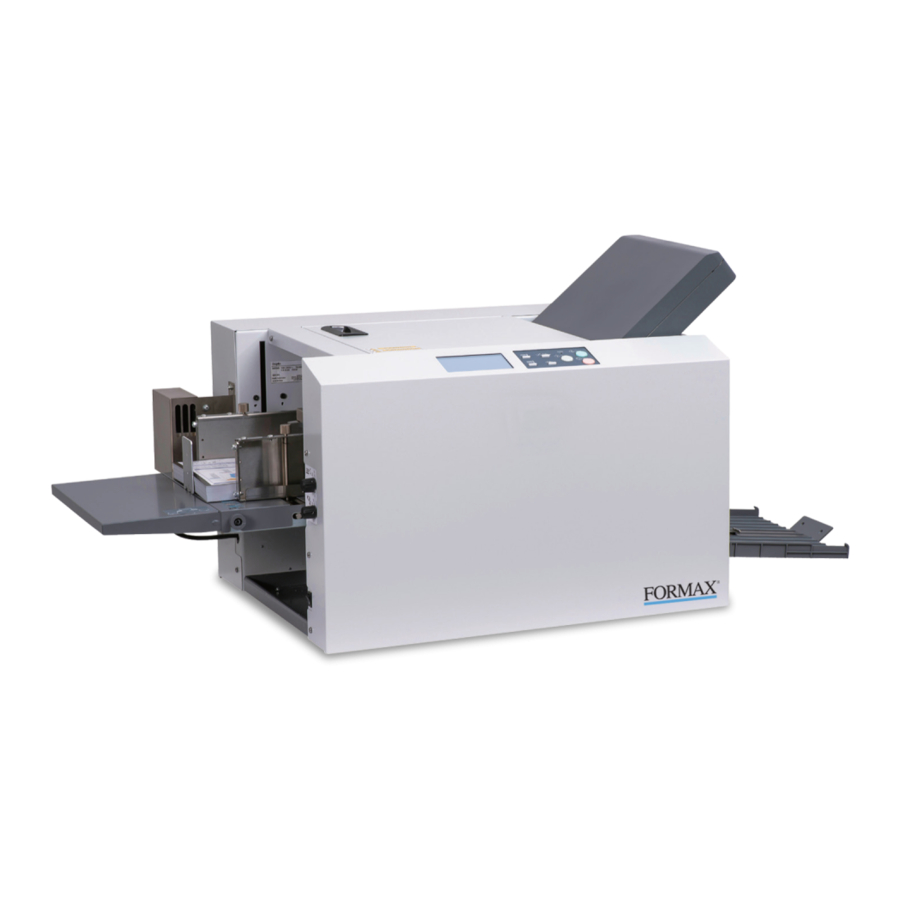
- Page 1 FD 3300 Tabletop Air Feed Folder OPERATION MANUAL 1/2020...
- Page 2 Introduction Thank you for purchasing a Formax product. Be sure to read this manual and "Safety Guide A" supplied with this product before use. “Safety Guide A” contains information for correct and safe use of this product. After reading, leave the manual and “Safety Guide A” at the site of use for easy reference whenever questions related to the product arise in the future.
-
Page 3: Safety Precautions
Safety Precautions Safety Precautions Power supply • Make sure the power supply used is always within the following range. Power supply : 100 to 240 V AC, 50/60 Hz • When you power other appliances from the same AC outlet, make sure that the combined power consumption does not exceed the power supply capacity. Rated power: 190 W Rated current: 1.9 to 0.8 A Operating environment Operate this unit in the following environment. -
Page 4: Warning/Caution Labels
Safety Precautions WARNING/CAUTION labels "WARNING" and "CAUTION" labels are pasted on the machine to ensure user safety. Do not remove or change them. When the labels become dirty or are lost, be sure to contact your dealer for a new one. For EU... - Page 5 Safety Precautions For North America...
- Page 6 Memo Safety Precautions...
-
Page 7: Table Of Contents
Contents Contents Safety Precautions ..........i 2-1. Before stacking paper ..........30 2-2. Stacking paper ............30 Power supply .................i 3. Standard Folding of Standard Paper ..33 Operating environment ............i 4. Storage of Machine ........ 40 WARNING/CAUTION labels .............ii Chapter 1 Chapter 3 Before Operation Advanced Operation 1. - Page 8 Contents 8-13. Power saving ...............68 8-14. Alarm ................69 8-15. Operation mode when turned on ......70 8-16. Initial screen ..............71 8-17. Custom screen ............72 8-18. mm/inch ................73 Chapter 4 Maintaining the Machine Cleaning folding roller and conveyance roller ................74 Cleaning LCD ...............75 Cleaning belts .............75 Cleaning sensors ............76 Chapter 5 Trouble Guide 1. Error Code ..........79 1-1.
-
Page 9: Before Operation
Chapter 1 Before Operation Chapter 1 Before Operation Features • This machine is a desktop paper folder. Standard folding of standard paper can be easily controlled and operated from the control panel. • This machine is designed to fold paper into six popular folding modes. Single fold Double fold Irregular Letter fold Gate fold Accordion-fold accordion fold-out • Single folded paper can be folded further into other folding modes. (Cross fold) -
Page 10: Names And Functions Of Components
Chapter 1 Before Operation Names and Functions of Components 2-1. External parts [14] [13] [12] [15] [11] [10] Name Function Folding plate 1 Guide plate for deciding the paper folding position. Control panel Use this panel to enter information to operate the machine (p.9) Separating air adjustment For adjusting the separating air amount. -
Page 11: Internal Parts (Paper Feed Section)
Chapter 1 Before Operation 2-2. Internal parts (paper feed section) Name Function Stack height sensor adjustment For adjusting the distance between the paper and suction belt. Suction belt Sucks and conveys paper. Separating-air duct Blows out air for separating paper stacked on the paper feed tray. Separator Prevents double-feed. Shutter Adjusts the amount of separating air blown out. Use the separating air adjusting knob to adjust the amount. Folding plate 2 Guide plate for deciding the paper folding position. -
Page 12: Internal Parts (Top Cover Section)
Chapter 1 Before Operation 2-3. Internal parts (top cover section) Name Function Jam correction knob For rotating the folding rollers when paper has jammed inside the unit or when cleaning the unit. Folding roller These rollers are used to fold paper. This machine is equipped with four rollers to make six types of folding. -
Page 13: Internal Parts (Paper Ejecting Section)
Chapter 1 Before Operation 2-4. Internal parts (paper ejecting section) Name Function Stacker roller lever This is the lever that supports the stacker roller. The height of the roller can be adjusted. Ejecting section For receiving folded paper ejected out. Power inlet Connector for the power cord. Paper receiving tray For stacking ejected paper. -
Page 14: Accessories
Chapter 1 Before Operation 2-5. Accessories [10] [11] [12] Name Function Folding plate 1 Folding plate 2 Auxiliary paper ejection guide Auxiliary paper feed tray Trail edge guide unit Side guide unit Plate unit Scale label Instruction manual This manual [10] Safety Guide A Contains information for correct and safe use of this machine. -
Page 15: Names Of Control Panel
Chapter 1 Before Operation Names of Control Panel Name Function LCD touch panel Displays the menus or error messages. Touch to operate. Paper feed tray up key While pressing the key, the paper feed tray goes up. Press and hold to forcibly eject paper from inside the folding plate. (folding plate paper ejection) key Lamp When the machine is in the power saving mode, the lamp blinks slowly. When a message requiring service personnel is displayed, the lamp blinks faster. Press to start paper folding. -
Page 16: Lcd Touch Panel
Chapter 1 Before Operation LCD Touch Panel Cautions in using the touch panel • The touch panel is designed to touch lightly with a finger or a pen (its tip radius is 0.8 or smaller). Do not press the panel strongly with a finger or push it with any sharp objects (such as a fingernail, ball- point pen, and pin). • If you perform the following operations, the touch panel may not work even though you are touching it. Additionally, note that such operations may cause malfunction of the machine. - Operation with the tip of a nail - Operation with a foreign object placed on the touch panel - Operation with a protective sheet or sticker applied on the touch panel - Operation with the touch panel being wet - Operation with a finger wet with sweat or water The following terms are used when explaining screen operation in this document. - Page 17 Chapter 1 Before Operation 5-1-1. Touch panel display [Ready] screen (Custom fold) [Ready] screen [2] [3] [10] [10] [Processing] screen (Custom fold) [Processing] screen [11] [11] [10] [10] Name Function Paper size Displays the detected standard paper size. A3/B4/A4/B5/A5/B6 (For EU) LGR (double letter)/LGL (legal)/LTR (letter)/STMT (statement)/INV (invoice) (For North America) When non-standard paper or custom folding is set, the paper length is displayed. Memory number of custom Displays the memory number currently used. folding When data is newly created but not saved, [00] is displayed.
- Page 18 Chapter 1 Before Operation Name Function Count mode Displays counter mode (addition or subtraction). Count up Count down Folding mode Displays the folding mode currently set. When in custom folding or stopper fixed mode, displays a rough shape of the folding form. Processing speed Displays processing speed currently set. The processing speed is not displayed during [Ejecting Paper]. Setting range: 1- to 7 (speed) (1-) (1) (2) (3) (4) (5) (6) [10] Special function display...
- Page 19 Chapter 1 Before Operation 5-1-2. Touch panel operation section [Ready] screen [Processing] screen [12] [11] [10] Name Function The processing speed is slowed each time the key is touched. (Processing speed down) When processing speed is set to “1-”, the key is grayed out and cannot be operated. Adjustable range: 1- to 7 The processing speed is sped up each time the key is touched. (Processing speed up) When processing speed is set to [7], the key is grayed out and cannot be operated.
- Page 20 Chapter 1 Before Operation Name Function [10] Touching the key displays the [Fold Position] screen. (Adjustment) key Locked custom fold and stopper fixed mode can also be adjusted [11] Touching the key displays the screen to select a paper size. (Paper size) key When the standard folding (with paper size detection set to off ) is selected, the [Standard Size] screen is displayed. When the standard folding or non- standard paper is selected, the [Paper Length] screen is displayed. [12] Displays icons set in the custom screen. The set screen is displayed when the key is touched. However, it is not displayed when stopper fixed mode (Custom screen) key is selected. (Standard folding) The [Folding Mode] screen of [Standard Fold] is displayed. However, when automatic paper size detection is turned off, the [Standard Size] screen is displayed. (Standard folding of non-standard paper).
-
Page 21: Basic Settings] Screen
Chapter 1 Before Operation 5-2. [Basic Settings] screen Name Function Standard Fold Touch the key for standard folding. The [Folding Mode] screen is displayed. When automatic paper size detection is turned off, the [Standard Size] screen is displayed. STD Fold for Non-STD Size Touch the key for standard folding of non-standard paper. The [Paper Length] input screen is displayed. Custom Fold Touch the key for custom folding. The [Custom Fold] screen is displayed. Returns to the previous screen. (Cancel) key The [Function Settings] screen is displayed. (Function settings) key 5-3. [Standard Size] select screen When automatic paper size detection is turned on, the following screen is not displayed. Name Function Standard paper size key Sets the standard paper size to be used. -
Page 22: Paper Length] Input Screen (Non-Standard Paper)
Chapter 1 Before Operation 5-4. [Paper Length] input screen (non-standard paper) Name Function Paper length setting value Displays the currently set paper length. Preview screen Displays the position of the input value. Saves the input value and transits to the next screen. (Return) key When you touch the key when the input value is outside the specification range, the value that you can specify is displayed on the preview screen. -
Page 23: Of Sheet] Input Screen
Chapter 1 Before Operation Name Function Sets the folding mode as double fold. (Double fold) key Sets the folding mode as irregular accordion fold-out. (Irregular accordion fold) Sets the folding mode as letter fold. (Letter fold) key Sets the folding mode as accordion fold. (Accordion fold) key Sets the folding mode as gate fold. (Gate fold) key (*) Returns to the previous screen without saving the input content. -
Page 24: Fold Position] Screen
Chapter 1 Before Operation 5-7. [Fold Position] screen Standard fold/standard folding of non-standard paper Custom folding [10] [10] [11] [11] [12] [12] Name Function Folding A reversal Reverses [+] and [-] of folding dimension A. When the value after being reversed is outside the specification range, it is corrected to the nearest value within the specification range. When in custom folding or stopper fixed mode, it is not displayed. Folding A position adjustment Standard folding: The folding A position adjustment value is displayed. value/Folding dimension A Custom folding: The folding dimension A is displayed. position (*) When you touch the key, the numeric keypad is displayed, which enables you to input values. -
Page 25: Stacker Roller] Screen
Chapter 1 Before Operation Name Function Warning message When the input value is outside the specification range, a warning message is displayed. [10] Outline of folding dimension The outline of folding position for the selected folding form is displayed. [11] Returns to the [Ready] screen without saving the input content. (Cancel) key [12] The [Stacker Roller] screen is displayed. (Stacker roller) key When the combination of position adjustment values is invalid, a warning message is displayed and the [Stacker Roller] screen is not displayed. (*) This is not displayed depending on the folding mode selected. 5-8. [Stacker Roller] screen Name Function Stacker roller position... -
Page 26: Custom Fold] Screen
Chapter 1 Before Operation 5-9. [Custom Fold] screen Saved data selection screen [10] [11] Name Function Saved data number/Saved data “5-1-1. Touch panel display” (p.11) lock display Selection frame Touch to select the saved data you want to use. The color of the frame of the selected saved data changes. - Page 27 Chapter 1 Before Operation Editing screen [10] Name Function Saved data number display Displays the number of the data being edited. When data is newly created, [00] is displayed. Paper length Displays the currently set paper length. Folding form outline display Displays a rough shape of the folding form. Folding A setting Displays currently set folding A length.
- Page 28 Chapter 1 Before Operation Name Function [10] Saves the input value and returns to the [Ready] screen. (Return) key The input value is not saved. [Save] screen Name Function “5-9. [Custom Fold] screen” (p.20) Custom fold saved data (Lock/unlock) key Saves the setting content. (Save) key When creating new data, custom fold data is saved in the free space. When there is no free space, the key is grayed out and cannot be operated. When saved data is edited, data is overwritten and saved.
-
Page 29: Folding A/Folding B Input Screen
Chapter 1 Before Operation 5-10. Folding A/Folding B input screen Name Function Folding A setting value display Displays the currently set folding A value. Folding A outline display Displays the position of folding A on the paper. When the input value is outside the specification range, a warning message is displayed. Folding B setting value display Displays the currently set folding B value. -
Page 30: Function Setting Screen
Chapter 1 Before Operation 5-11. Function Setting screen [1/3 FUNC Setting] screen Name Function Interval Sets whether to use the interval (division) function or not. (p.59) D-Feed Detect Sets whether to perform double-feed detection or not. (p.61) (Double Feed Detect) Detection Sets whether to perform paper stacked/standard size detection or not. (p.62) Feed Interval Sets a feed interval. (p.63) Belt Convey Vol Sets the amount of conveyance. (p.63) When touched, the display returns to the [Basic Settings] screen. (Cancel) key Press and hold to return to the [Ready] screen. - Page 31 Chapter 1 Before Operation [2/3 FUNC Setting] screen Name Function Idling Sets whether or not to perform idling operation. (p.64) Tray Desc Amount Sets the tray descended amount. (p.65) Tone Sets whether to enable or disable the buzzer (key operation sound on the control panel). However, the buzzer that sounds when an abnormality occurs will sound even if the setting is disabled. (p.66) LCD Bright Sets the brightness of the LCD touch panel screen.
-
Page 32: Classification Of Buzzer Sounds
“pi”: Operational sound at the time of normal key operation “pipi”: Warning alarm at the time of mis-operation, mis-feed of paper, or paper empty “pii”: At the start of folding operation or end of normal folding operation. When saving changes in various settings. The time when you set the alarm has come. “piipii”: At the occurrence of an error such as paper jam “piipiipiipii”: At the occurrence of an error to be asked for Formax dealer’s assistance Paper Types and Sizes Paper type Fine quality paper : 52.3 to 157 g/m /35.56 to 106.76 lb Particular paper Art paper, coated paper: 73.3 to 157 g/m... -
Page 33: Handling Paper
Chapter 1 Before Operation Handling Paper 7-1. Paper used • Make sure that the printing ink on the paper has dried completely prior to use. • Wet ink or ink that is not completely dried may stain the folding roller causing trouble such as smearing on paper. • Use of paper printed with special types of ink may cause the folding roller to swell or deform, and folding misalignment may occur. • Paper may not be fed smoothly into the folding plate or deformed folding may occur depending on different environmental factors (temperature, humidity), paper ream weight, paper type, paper grain direction if curled paper is used. Make sure to flatten curled paper or paper with folded lines before use. • Separate the sheets of paper well before stacking them. 7-2. Precautions on stacking paper [a] Do not stack the sheets of paper on the paper feed tray with the sides of sheets unaligned or some sheets protruding from the stack. -
Page 34: Workflow
Chapter 1 Before Operation Workflow The following flowchart illustrates the flow of basic operation. For details, refer to the text and relevant pages. (p.29) Turning on the power (p.30) Stacking paper (p.33) Selecting folding mode (p.35) Adjusting air (p.35) Checking the separating air adjustment knob (p.35) Checking the separator adjustment knob Checking stack height sensor adjustment knob (p.36) (p.37) Setting processing speed (p.37) Test feed Starting paper folding (p.38) Ending paper folding Removing processed paper (p.29) Turning off the power... -
Page 35: Basic Operation
Chapter 2 Basic Operation Chapter 2 Basic Operation Turning On/Off Power Use the supplied power cord. Do not touch the power Do not touch the power switch plug with wet hands. with wet hands. Otherwise electric hazards may occur. Otherwise electric hazards may occur. 1-1. -
Page 36: Stacking The Paper
Chapter 2 Basic Operation Stacking the Paper 2-1. Before stacking paper Checking the front/back,top/end of paper Check the “front/back” and “top/end” of paper when stacking paper on the paper feed tray. Check for folding misalignment, and check “front/back” and “top/end” of paper when checking the finished fold after test folding. When paper is stacked with the gray surface on the obverse side and white surface on the reverse side on the paper feed tray, and processing is completed in the standard folding mode, the folded paper is as shown in the figure. - Page 37 Chapter 2 Basic Operation Stack paper striking the leading edge of paper lightly at the shutter. [a] If there is some clearance between the leading edge of paper and shutter, the paper detecting sensor [b] does not function properly. Adjust the paper feed guide to match the paper size.
- Page 38 Chapter 2 Basic Operation Set the plate unit onto the auxiliary paper feed tray. Be sure to set the plate unit so that it does not extend beyond the rear end of paper. Attach the side guide unit on each side of paper.
-
Page 39: Standard Folding Of Standard Paper
Chapter 2 Basic Operation Standard Folding of Standard Paper Method to fold standard paper by setting a mode among standard folding modes displayed on the control panel. For the standard paper sizes, refer to Chapter 1 “6. P aper Types and Sizes” (p.26). Six standard folding modes are available as shown below. Paper feed direction Ejection direction Single Double Irregular Letter Accordion- Gate fold fold fold accordion fold-out fold fold Depending on the thickness of paper, this machine may not be able to process some standard sheets of paper. - Page 40 Chapter 2 Basic Operation The operating procedure will be explained using the example of when the paper size is “A4” and the folding mode is “single Fold. ” Touch the key on the [Ready] screen. Touch the [Standard Fold] key. The standard size setting screen is displayed. Touch the [A4] key. When automatic detection of a paper size is set to on, this screen is not displayed. Go to step 4. Touch the key.
- Page 41 Chapter 2 Basic Operation Touch [Air Adjust]. The [Air Adjust] screen is displayued. Set [Separating Air],[Pickup Air] and [Side Air]. • Adjust a value using [–] or [+]. • To enter a value, touch [a]. The numeric keypad is displayed. • The appropriate value for the searating air and pick up air vary depending on the paper type and ream weight. (p.39) Touch the key.
- Page 42 Chapter 2 Basic Operation Check that the separator adjustment knob is set to [2]. (The separator should be lightly in contact with the suction belt.) • The larger the setting, the wider the space between the separator and the suction belt. • Turn the knob towards [3] if mis-feed occurs. • Turn the knob towards [1] if double-feed occurs. Check that the stack height sensor adjustment knob is set to the standard position (the second scale from the bottom).
- Page 43 Chapter 2 Basic Operation Touch the key to set the processing speed. • If folding misalignment occurs, decrease the processing speed. • When paper jam or abnormal folding occurs by using thin and flimsy paper, adjust the processing speed referring to “Thin paper mode”. (p.59) • The processing speed can be changed during folding process or in the idling state. However, folding misalignment may be caused by changing the processing speed largely.
- Page 44 Chapter 2 Basic Operation Touch the key. The number of sheets input screen is displayed. Count up Touch the key. • If you press the key without setting the counter to [0], the paper folding operation restarts and the number of sheets set for processing is incremented from the current value.
- Page 45 Chapter 2 Basic Operation Air Adjustment Table The air adjustment table is a guide to set numerical values. The setting range of each setting is the following numerical value ±5. Depending on paper, the numerical values in ( ) in the table will be the appropriate setting range. Set each air volume to a smaller value than that of the table, when handling thin and flimsy paper such as rough paper and recycled paper. The larger the air volume, the more folding misalignment may occur. Change the numerical value when double-feed or mis-feed occurs even though the values are set according to the air adjustment table. A3 / LGR A4 / LGL,LTR A5 / INV, STMT Paper Paper ream [Separating...
-
Page 46: Storage Of Machine
Chapter 2 Basic Operation Storage of Machine Store the machine as follows, when it is not used. Turn off the power switch. Do not touch the power switch with wet hands. Otherwise electric hazards may occur. Disconnect the power plug from the outlet. - Page 47 Chapter 2 Basic Operation Loosen the setting screws. Remove the auxiliary paper feed tray.
-
Page 48: Advanced Operation
Chapter 3 Advanced Operation Chapter 3 Advanced Operation Correcting Folding Misalignment Folding misalignment consists of “folding misalignment along the sides of the paper” and “folding misalignment along the vertical length of the paper”. Other than this, “deformed folding” may also occur due to paper characteristics, etc. Depending on the usage environment (temperature and humidity), paper type, thickness, paper grain direction, trimming accuracy, and printing states folding misalignment may occur. - Page 49 Chapter 3 Advanced Operation Turn the skew correction knob and to correct misalignment. Turn the skew correction knob by a quarter to half turn , then check the skew correction effect (test fold). Folding misalignment A Turn the knob in the clockwise direction. The leading edge of paper on the right side (on the control panel side) will be fed earlier. Folding misalignment B Turn the knob in the counterclockwise direction. The leading edge of paper on the left side (on the non-operator’s side) will be fed earlier.
-
Page 50: Adjusting Folding Misalignment In Up And Down Direction
Chapter 3 Advanced Operation 1-2. Adjusting folding misalignment in up and down direction When the folded paper is misaligned along the vertical length, adjust the positions of the folding stopper of folding plates 1 and 2 to Ejection correct the misalignment. direction Adjustable range and correction restrictions • Adjustable range of folding position A Example: for single fold adjustment key/folding position B adjustment Center key on the [Fold Position] screen during standard folding is within ±5.0 mm/0.20 inch. - Page 51 Chapter 3 Advanced Operation Folding plate 1 Folding plate 2 Folding mode State of Folding A Folding mode State of Folding B folded position folded position plane A adjustment plane B adjustment Double A is long Double B is long fold fold A is short B is short Irregular A is long...
-
Page 52: Deformed Folding
Chapter 3 Advanced Operation • The changed value is cleared when power is turned off. To save the changed value, see “Saving the adjusted value” (p.46). Saving the adjusted value If you save the adjustment value for the next time you use the same paper, you can perform folding operation under the same adjustment value as the one that is saved at this time. • For standard folding of standard paper, touch the key. —> Press and hold the key to save the adjustment value. • For standard folding or custom folding of non-standard paper, touch the key. —> Touch the key. —> Select and save the saved data number of custom folding. (p.46) 1-3. -
Page 53: Custom Folding
Chapter 3 Advanced Operation Example: When performing letter fold on 300.0 mm/11.81 inches length paper Touch the key on the [Ready] screen —> Touch [STD Fold for Non-STD Size]. Using the numeric keypad, enter the paper length [300] —> Touch the key. Touch the key. Return to the [Ready] screen. Custom Folding Custom folding is an operation method to fold paper <Standard single fold>... -
Page 54: Operation
Chapter 3 Advanced Operation 3-1. Operation As an example of accordion fold, operation procedures for custom folding are described with the following setting. Paper size: A4 (210.0 x 297.0 mm/8.27 x 11.69 inches) Fold A: 85.0 mm/3.35 inches (length A) Fold B: 95.0 mm/3.74 inches (length B) Prepare a folding sample manually using the paper to be folded. Measure the length of the folding Paper feed position of the sample. -
Page 55: Editing Saved Data
Chapter 3 Advanced Operation The procedures taken after that will be the same as the steps 8 to 13 in Chapter 2 “3. Standard Folding of Standard Paper” (p.33). The stacker roller position moves automatically according to the paper set. Adjust the stacker roller position, if the paper flaps or misaligns at the time of ejection, or paper jam occurs in the paper ejecting section. “5-2. Adjusting stacker roller position” (p.55) 3-2. Editing saved data When the custom fold data that you want to edit is opened Touch the key on the top screen. -
Page 56: Locking Saved Data
Chapter 3 Advanced Operation 3-4. Locking saved data To prevent accidentally deleting data you want to be saved, you can lock saved data and prevent the numerical value from being changed. Touch the key on the [Ready] screen —> Touch [Custom Fold]. The [Custom Fold] saved data selection screen is displayed. Select the number of the saved data you want to lock —>... -
Page 57: Cross Fold
Chapter 3 Advanced Operation Cross Fold Cross fold is folding single-folded paper another time as shown in the figure. The maximum paper thickness is fine quality paper 104.7 g/m /71.20 lbs and coated paper 157 g/m /106.76 lbs. Rough paper, which is thin and flimsy, is not suitable for cross fold. • Paper Σ dent and folding misalignment in both directions may increase or paper may be fed unstably depending on the following conditions. However, it is not a malfunction. - The folded line of single-folded paper is not folded properly. - Usage environment (temperature and humidity) - Paper thickness, paper size, paper type, or paper grain direction, etc. - Page 58 Chapter 3 Advanced Operation Loosen the guide fixing screw. Stack the single-folded paper on the paper feed tray with the folded line toward the non-operator’s side. The stacking amount is equivalent to about half (25 mm/0.98 inch) [a] of the height of the paper feed guide on the folding side. A feed error may occur if the stacking height of single-folded paper is largely different on both sides even though the stacking height of single-folded paper is...
- Page 59 Chapter 3 Advanced Operation Set the separating air adjustment knob to [2]. Set the separator adjustment knob to [3]. Set the stack height sensor adjustment knob to the scale between the first one and second one. Touch the key on the [Ready] screen to set the speed to Set the processing speed for cross fold to or less.
-
Page 60: Cross Fold Of Non-Standard Paper
Chapter 3 Advanced Operation 4-2. Cross fold of non-standard paper Single fold non-standard paper according to the procedure of “2. Standard Folding of Non-Standard Paper” (p.46). Measure the length of the finished single folded paper [a]. Touch the key on the [Ready] screen —> Touch [Standard Fold for Non-Standard Size]. -
Page 61: Stacker Roller Adjustment
Chapter 3 Advanced Operation Stacker Roller Adjustment 5-1. Changing stacker roller height Some thick and stiff paper may not be ejected smoothly because the paper may open after folding. Change the stacker roller height and widen the space for the paper to pass in ejection. Remove the auxiliary paper ejection guide. Lift the stacker roller and hold it with hand to move to the [a] position shown in the figure. After completing folding operations, be sure to return the stacker roller to the standard position. - Page 62 Chapter 3 Advanced Operation Guide for the setting position of stacker roller Settings Applicable standard paper size and folding mode For EU For North America Double fold STMT, Double fold, Letter fold, Accordion fold Double fold, Letter fold, Accordion fold Double fold, Letter fold, Accordion fold, Gate fold Double fold Double fold...
-
Page 63: Stacking Folded Paper
Chapter 3 Advanced Operation When sheets of paper folded in the gate fold mode, a sheet processed later slips into the one processed before: Depending on the type and size of paper, the adjustable range in the gate fold mode is limited. Be sure to decrease the setting values one scale at a time in this mode and check the results. -
Page 64: Adjusting Spring Pressure
Chapter 3 Advanced Operation Adjusting Spring Pressure When feeding thick paper or slippery paper, the paper may stop at the conveyance roller without reaching to the folding roller. In this case, increase the spring pressure for the conveyance roller. On the other hand, when feeding thin paper or flimsy paper, the paper may get wrinkled lengthways. In this case, decrease the spring pressure for the conveyance roller. • When adjusting the spring pressure, turn off the machine. • When adjusting the spring pressure, be careful not to harm your hand. There are two springs on the operator’s side and the non-operator’s side. The standard position is as shown in the figure. -
Page 65: Function Settings
Chapter 3 Advanced Operation Function Settings The function settings screen is used to set detecting functions such as double-feed, paper feed interval and buzzer sounds according to paper used and operation environment. On the function settings screen, the functions of the (Return) key and (Cancel) key are as follows. : Confirms the setting and returns to the [Function Settings] screen. : Returns to the [Function Settings] screen without saving the input content. Press and hold the key to return to the [Ready] screen. If those keys function otherwise, the function will be mentioned individually. 8-1. Thin paper mode Use the thin paper mode when handling thin and flimsy paper such as rough paper and recycled paper. Do not use for the paper other than thin type. When using this mode for the paper type other than thin paper, paper jam may occur. Touch the key on the [Ready] screen —>... - Page 66 Chapter 3 Advanced Operation Name Function Default value Interval Sets on/off of the interval function. — No. of Sheet The [Interval_No. of Sheets] screen is displayed. When the interval setting is turned off, the key is grayed out and cannot be operated. Setting range: 1 to 999 (sheets) The No. of Sec. The [Interval_No. of Seconds] screen is displayed. When the interval setting is turned off, the key is grayed out and cannot be operated. Setting range: 3 to 30 (seconds) Interval_No. of Sheets Displays the currently set interval sheets number. — setting value Interval_No. of Seconds Displays the currently set interval time. —...
-
Page 67: Double-Feed Detection
Chapter 3 Advanced Operation 8-3. Double-feed detection Double-feed detection refers to a function that reads the thickness of paper on test folding and detects when more than one sheet of paper is fed into the machine at a time. When the ultrasonic sensor is set, there is no need to perform test folding. Touch the key on the top screen —> Touch the key —> Touch [D-Feed Detect]. The [Double Feed Detect] screen is displayed. Name Function Default value D-Feed Detect Sets whether to enable double-feed detection. -
Page 68: Detection
Chapter 3 Advanced Operation When mis-detection occurs Double-feed or miss-feed may sometimes be detected although the paper is fed normally. • If false double-feed detection occurs when paper thickness is set to [Thin], repeat test folding after setting paper thickness to [Thick]. If double-feed is detected mistakenly after selecting [Thick], double-feed detection function cannot be used. Set the double-feed detection to off. • If false miss-feeding detection occurs when paper thickness is set to [Thick], repeat test folding after setting paper thickness to [Thin]. If mis-feed is detected mistakenly after selecting [Thin], double-feed detection function cannot be used. Set the double-feed detection to off. 8-4. Detection If [Paper Empty] is displayed even though paper is stacked in the paper feed tray, turn off paper detection. This setting turns back on when the power is turned off. If a detection error persists even after performing cleaning of the sensor, contact your dealer. Touch the key on the [Ready] screen —> Touch the key —>... -
Page 69: Paper Feed Interval Time
Chapter 3 Advanced Operation 8-5. Paper feed interval time Paper feed interval is a paper feed time lag between one sheet and the next sheet Set the feed interval to [Slow] if [Feed Err Misfeed] occurs with thick, heavy paper even after air volume, etc. has been adjusted. Setting the feed interval to [Fast] will raise processing performance, but feed error may be more likely to occur with large sheets of paper such as B4, A3, etc. Name Function Default value Feed Interval Sets the paper feed interval. Normal Touch the key on the [Ready] screen —>... -
Page 70: Idling
Chapter 3 Advanced Operation Touch the key on the [Ready] screen —> Touch the key —> Touch [Belt Convey Vol]. The [Belt Convey Vol] screen is displayed. [Belt Convey Vol] is not reset until the power is turned off. However, it returns to [Normal] under the following conditions. - When folding mode is changed from custom folding to standard folding. - When turning off the machine with [Oper Mode] set to [Normal]. 8-7. Idling When double-feed or mis-feed occurs, or when stopping paper folding operations by pressing the key, you can put the machine in the idling state by just stopping feeding operations. To resume paper feed, just press the key. Touch the key on the [Ready] screen —> Touch the key —>... -
Page 71: Tray Descend Amount
Chapter 3 Advanced Operation 8-8. Tray descend amount You can specify the descend amount of paper feed tray when pressing the key during paper feed or operations. Touch the key on the [Ready] screen —> Touch the key —> Touch the key —> Touch [Tray Desc Amount]. The [Tray Desc Amount] screen is displayed. -
Page 72: Tone
Chapter 3 Advanced Operation 8-9. Tone The on/off of the buzzer (key operational sound on the control panel) can be set. The buzzer sounds with the setting off when a trouble has occurred. Touch the key on the top screen —> Touch the key —> Touch the —> Touch [Tone]. The [Tone] screen is displayed. Name Function Default value Tone Sets on/off of the tone. 8-10. LCD bright Set the brightness of the backlight of the LCD touch panel section. Touch the key on the [Ready] screen —>... -
Page 73: Number Of Test Sheets
Chapter 3 Advanced Operation 8-11. Number of test sheets The number of sheets is set when performing test feeding. Touch the key on the [Ready] screen —> Touch the key —> Touch the key —> Touch [Number of Test Sheets]. The [Number of Test Sheets] screen is displayed. Name Function Default value Number of test sheets... -
Page 74: Power Saving
Chapter 3 Advanced Operation Name Function Default value Saves the number of test sheets setting and returns to the [Function — (Return) key Settings] screen. When is turned off, the text keys are displayed in the [Ready] screen. When is turned on, the icon keys are displayed. on/off function is only for Japanese mode. If you select any language other than becomes hidden. Returns to the [Function Settings] screen without saving the input — (Cancel) key content. Press and hold to return to the [Ready] screen. 8-13. Power saving Set the time for the backlight of the LCD touch panel section to automatically turn off when the machine is not used for a certain time. Touch the key on the [Ready] screen —>... -
Page 75: Alarm
Chapter 3 Advanced Operation 8-14. Alarm When this machine remains unused for the specified period of time, the buzzer sounds to remind that the power remains turned on. When the machine is not operated after the alarm sounds, the alarm will continue to sound every 1 minute. Touch the key on the [Ready] screen —> Touch the key —> Touch the key —> Touch [Alarm]. The [Alarm] screen is displayed. Name Function Default value Alarm Set on/off of the alarm. Numeric keypad Inputs the value. When the alarm setting is turned off, the key is grayed out and cannot be operated. -
Page 76: Operation Mode When Turned On
Chapter 3 Advanced Operation 8-15. Operation mode when turned on Set the state of the following functions when the power is turned on. • Operation mode • Double-feed detection • Interval • Processing speed Touch the key on the top screen —> Touch the key —> Touch [When Turned On]. -
Page 77: Initial Screen
Chapter 3 Advanced Operation Name Function Default value Interval Sets whether to enable the interval. Processing speed up/down Sets the processing speed when turned on with [Oper Mode] set to — [Normal]. Processing speed display Displays the processing speed currently set. — When [Stopper Fixed] is set to on, folding misalignment in the vertical direction occurs by removing the folding plate with the power turned off. -
Page 78: Custom Screen
Chapter 3 Advanced Operation 8-17. Custom screen You can add custom keys to display the screen you want to move immediately to from the top screen. However, the screen is not displayed when stopper fixed mode is set. Touch the key on the [Ready] screen —> Touch the key —> Touch [Custom Screen]. The [Custom Screen] screen is displayed. Name Function Default... -
Page 79: Mm/Inch
Chapter 3 Advanced Operation 8-18. mm/inch According to the usage environment, units of numerical input saved for the paper size, folding dimensions (folding stopper adjustment value), and custom folding can be changed. Touch the key on the [Ready] screen —> Touch the key —> Touch the key —> Touch [mm/inch]. The [mm/inch] screen is displayed. Name Function Default value mm/inch Sets the display unit of the dimension values. mm (For EU) inch (For North America) -
Page 80: Maintaining The Machine
Chapter 4 Maintaining the Machine Chapter 4 Maintaining the Machine • Make sure that you disconnect the power cord from the wall outlet before cleaning. • Before you use the machine after cleaning, make sure that its surface is completely dry. Do not use ammable sprays and solvents during cleaning, etc. of internal parts of the machine and in the vicinity of the machine. Doing so could cause build-up of gas inside the machine, which in turn could cause ignition, resulting in re and explosion. -
Page 81: Cleaning Lcd
Chapter 4 Maintaining the Machine Wipe with a cloth moistened with alcohol, while rotating the jam correction knob on the folding roller by hand. [a] Wipe the conveyance roller with a cloth moistened with alcohol while rotating it by hand. [b] Cleaning LCD Wipe the LCD on the control panel with the dry cloth. Cleaning belts Suction belt Wipe the belt with a cloth moistened... -
Page 82: Cleaning Sensors
Chapter 4 Maintaining the Machine Cleaning sensors Adhesion of dust to a sensor may cause a false detection. Clean the sensors using an air duster. • Use a non-flammable air duster. Read the cautions for use well, and be sure to keep the descriptions in mind. • The sensors and metallic section are cooled by gas in the air duster, and may be temporarily condensed. - Page 83 Chapter 4 Maintaining the Machine Insert the nozzle of air duster into the hole shown in the figure to blow air. [a] Paper exit sensor upper [b] Home sensor of folding plate 1 Paper exit sensor lower, home sensor of folding plate 2 Remove the folding plate 2. Remove the folding plate 2 holding the place shown in the figure with both hands.
- Page 84 Chapter 4 Maintaining the Machine Optical ultrasonic detection sensor, optical double-feed detection sensor, and paper feed timing sensor Clean the sensors using an air duster. [a] Ultrasonic double-feed detection sensor [b] Optical double-feed detection sensor [c] Paper feed timing sensor...
-
Page 85: Trouble Guide
Chapter 5 Trouble Guide Chapter 5 Trouble Guide Error Code Check the error code or error message and solve the problem by following the guide displayed on the screen or by referring to list below. If the error cannot be solved by the following methods, contact your dealer. Depending on the content of the error, the key might not be displayed. -
Page 86: Motor Error
Chapter 5 Trouble Guide 1-2. Motor error Follow the guide content to solve the error. Error code and error message Guide Error Code Cause Solution E2002 Paper jam caused the motor, which Remove jammed paper and touch the key to clear the automatically elevates the paper feed error. E2003 tray, to be loaded. E2005 E2220 Paper jam caused excessive load on... -
Page 87: Other Errors
Chapter 5 Trouble Guide Error Code Cause Solution J1001 Double-feed occurs at the paper feed Remove the double-fed paper. section. J1005 J1006 Paper jam has occurred in the paper Remove the jammed paper. feed section. J3002 Paper jam has occurred inside the Remove the jammed paper. machine. Clear the error by force ejecting paper or opening and closing the top cover. J6002 Paper jam has occurred in the paper Remove the jammed paper. ejecting section. 1-4. Other errors Error code and error messages Guide Error Code Cause Solution E1101 A problem has occurred inside the Turn off and on the machine. -
Page 88: Paper Jam
Chapter 5 Trouble Guide Paper Jam Do not put ngers inside during operation. Keep away long hair, ties, jewelry and loose clothing. It could cause injury. When paper jams, remove the paper in the following way. 2-1. Paper feed section Pull out jammed paper slowly. If paper cannot be pulled out easily, first remove all the paper on the paper feed tray and pull out the jammed paper. 2-2. Folding plate Press the key on the control panel. - Page 89 Chapter 5 Trouble Guide Folding plate 1 Take out the folding plate 1. Attach the folding plate 1 holding with both hands. Open the top cover. Open or close the top cover gently. Hands or ngers may be caught in the cover section. Doing so may result in injury.
- Page 90 Chapter 5 Trouble Guide Attach the folding plate 1 along the set guides. Attach the folding plate 1 holding with both hands. Check that the gear on the reverse side of the folding plate 1 rotates in the front-back direction, if it is not easy to attach the folding plate 1. Attach the folding plate 1 to this machine after rotating the gear by 360 degrees in a rotating direction, when it does not rotate either in the...
- Page 91 Chapter 5 Trouble Guide Open the top cover. Open or close the top cover gently. Hands or ngers may be caught in the cover section. Doing so may result in injury. Pull out the paper rotating the jam correction knob. Close the top cover. Check if the stopper of the folding plate 2 does not protrude beyond the cover.
-
Page 92: Folding Roller
Chapter 5 Trouble Guide 2) Check that the folding plate 2 will be inserted in the direction of 2 in the figure. Be sure to check that the folding plate 2 is attached properly as shown in the figure. Attach the folding plate 2 holding with both hands. 2-3. Folding roller Take out the folding plate 1. Take out the folding plate 2. Attach the folding plate 2 holding the parts shown in the figure with both hands. -
Page 93: Ejecting Section
Chapter 5 Trouble Guide Close the top cover. Insert the folding plate 1 and folding plate 2. “2-2. Folding plate” (p.82). 2-4. Ejecting section Press the key on the control panel. The paper is forcibly ejected. Paper is ejected forcibly as long as the key is held down. Forcible ejection will stop by releasing the key. Troubleshooting Do not use a ammable static electricity removal spray. Doing so could cause build-up of gas inside the machine, which in turn could cause ignition, resulting in re and explosion. - Page 94 Chapter 5 Trouble Guide Condition Cause Solution Paper jam occurs. Paper is not separated well. Separate the paper well. (p.27) Paper is curled. Correct the paper curl before use. (p.27) The folding roller is stained. Clean with a cloth moistened with alcohol. (p.74) The stacker roller is not positioned Re-set the position of the stacker roller.
- Page 95 Chapter 5 Trouble Guide Condition Cause Solution Double-feed occurs with Paper out of specifications is used. Do not use paper outside the specifications. the leading edge of paper (p.26) misaligned largely. Paper is not stacked in alignment. Stack the paper in alignment. (p.27) Loaded paper is more than 50 mm/ Load paper so that it is less than 1.96 inches in height. 50 mm/1.96 inches in height.
- Page 96 Chapter 5 Trouble Guide Condition Cause Solution Folding misalignment Processing speed was changed midway Adjust the folding stopper positions of the along the vertical length through operation. folding plates 1 and 2. (p.44) of the paper occurs. Paper type (quality, thickness) was changed midway through operation. The folding plate was removed when Press the key, holding down the [Stopper Fixed] was set to on.
- Page 97 Chapter 5 Trouble Guide Condition Cause Solution Paper jam occurs in cross The trail edge guide unit is pressed against Set the trail edge guide unit leaving some fold. the paper strongly. clearance between the trail edge guide unit and paper. (p.52) The set values of separating air and pickup Set the values of each air applicable to cross air are not proper.
-
Page 98: Appendix
Chapter 6 Appendix Chapter 6 Appendix Specifications Design and specifications are subject to change without notice. Basic specifications Model FD 3300 Item Unit Paper feed tray paper loading capacity 50 (*1) inch 1.96 (*1) Power supply Voltage 100 to 240 Frequency 50/60 Current consumption 1.9 to 0.8 Power consumption Airborne noise Conditions With the machine placed on the table with the height of 0.6 m/23.62 inches, measured at a distance of 1 m/39.37 inches from the control panel and at a height of 1.55 m/61.03 inches from the... - Page 99 Chapter 6 Appendix Media Model FD 3300 Item Unit Paper size Maximum 311.0 x 457.2 (W x L) inch 12.24 x 18.00 Minimum 120.0 x 182.0 inch 4.73 x 7.17 Standard paper A3/ B4/ A4/ B5/ A5/ B6 LGR (double letter)/LGL (legal)/ LTR (letter)/ STMT (statement)/INV (invoice) Paper type Sheet Single fold Paper quality Fine quality paper 52.3 to 157.0 (*1) (thickness) 35.56 to 106.76 (*1) Art paper/ coated 73.3 to 157.0 (*2) paper 49.84 to 106.76 (*2)
- Page 100 Chapter 6 Appendix Performance and functions Model FD 3300 Item Unit Processing Maximum Sheets/ 310 (*1) speed min. Folding form (*2) Single fold/ Double fold/ Irregular accordion fold/ Letter fold/ Accordion fold/ Gate fold (*3)/ Specified cross fold (*4)/ Other deformed folding (*5) Folding speed 6 speed Sheets/ adjustment (*6) min. 7 speed (*1) Fine quality paper 81.4 g/m /21.6 lbs (long grain) Paper quality: Paper size: A4 (lengthways) Folding mode: Single fold (*2) The type of folding modes available may be limited depending on the paper quality and size.
Need help?
Do you have a question about the FD 3300 and is the answer not in the manual?
Questions and answers