Table of Contents
Advertisement
Quick Links
Advertisement
Table of Contents

Subscribe to Our Youtube Channel
Related Manuals for EARLY RIDER HELLION X20


Summary of Contents for EARLY RIDER HELLION X20
- Page 1 HELLION X20 | HELLION X24 USER MANUAL...
- Page 2 Please retain these instructions for future reference. Thanks for choosing an Early Rider. Our bikes are brought to you by a small team of life-long bikers based in Henley -on– Thames, UK.
-
Page 3: Table Of Contents
RECOMMENDED TOOLS & TORQUE VALUES CHECK YOUR GEARS INTENDED USE CHECK YOUR WHEELS AND TYRES UNBOXING HELLION X24 CHECK YOUR HEADSET UNBOXING HELLION X20 SAFETY FIRST HANDLEBAR ASSEMBLY SIMPLE MAINTENANCE SEATPOST MINIMUM INSERTION AND HEIGHT ADJUSTMENT MAINTENANCE SCHEDULE REAR DERAILLEUR ASSEMBLY... -
Page 4: Know Your Bike
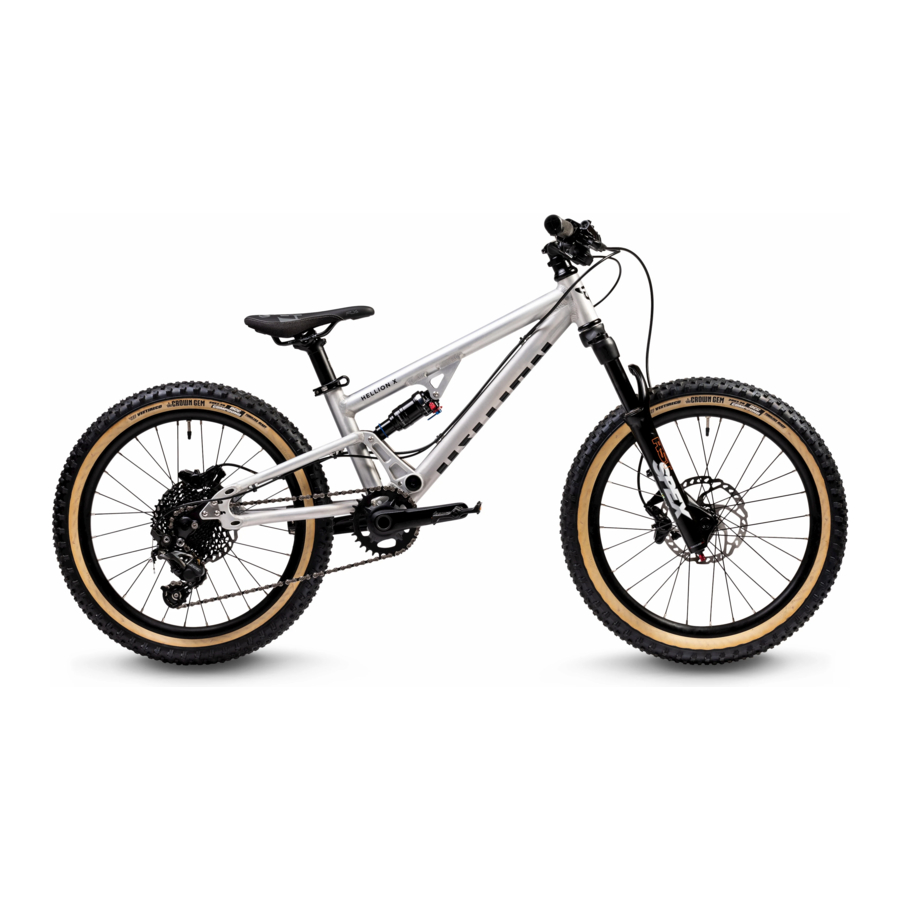
KNOW YOUR BIKE HELLION X24... - Page 5 BRAKE LEVER BRAKE ROTOR REAR SHOCK GEAR SHIFTER BRAKE CALLIPER SEAT CLAMP STEM PEDAL SEAT POST HEADTUBE CRANK SADDLE CHAINRING REAR DERAILLEUR HEADSET CASSETTE SUSPENSION FORK CHAIN HELLION X20...
-
Page 6: Recommended Tools & Torque Values
RECOMMENDED TOOLS & TORQUE VALUES RECOMMENDED TOOLS TORQUE VALUES 4mm Allen Key STEM HANDLEBAR CLAMP BOLTS 5-6 Nm 5mm Allen Key STEM STEERER TUBE BOLTS 5.2 Nm 6mm Allen Key Cross head screw driver REAR DERAILLEUR 8-10 Nm Shock pump REAR WHEEL AXLE 15 Nm Torque wrench... -
Page 7: Intended Use
INTENDED USE The Hellion X20 and Hellion X24 are children’s bikes. As such, they are not intended for use by an adult. Incorrect use could result in damage to parts on the bike including, but not exclusive to, the frame, forks, cranks and wheel set. -
Page 8: Unboxing Hellion X24
UNBOXING HELLION X24 Lift the folded tabs from the box. Be careful not to damage Lift the seatpost assembly and wheels out of the box. the bike box. It can be used again. Keep these in a safe place. Lift the bike upwards and out of the box. Rest the bike on the ground either leaning up against the box or standing safely. -
Page 9: Unboxing Hellion X20
UNBOXING HELLION X20 Lift the folded tabs from the box. Be careful not to damage Lift the seat post assembly out of the box. Keep this in a the bike box. It can be used again. safe place. Lift the bike upwards and out of the box. -
Page 10: Handlebar Assembly
HANDLEBAR ASSEMBLY Remove protection from stem and remove the protective Mount the handlebar to the stem and install the faceplate. wrapping from the handlebar. Remove the stem bolts using the 4mm allen key and put them somewhere safe. Tighten the screws in the order above 1 - 4 to achieve Make sure the gaps of the stem are even, and that the even clamping. -
Page 11: Seatpost Minimum Insertion And Height Adjustment
SEATPOST MINIMUM INSERTION AND HEIGHT ADJUSTMENT Remove the saddle and seatpost assembly from the pack- It is important the seat post is always inserted past the aging. Loosen the seat clamp by opening the quick release minimum insertion mark on the seatpost. (QR) lever and insert the seatpost. -
Page 12: Rear Derailleur Assembly
REAR DERAILLEUR ASSEMBLY Carefully cut the cable ties holding the mech to the frame Using the 5mm allen key, Fit the derailleur into the mech and remove the bubble wrap and foam packaging. hanger but do not tighten yet. Before tightening the derailleur bolt, make sure the notch Tighten the derailleur bolt to 8-10Nm, use a torque on the derailleur sits behind the tab on the mech hanger. -
Page 13: Rear Wheel Assembly (Hx24)
REAR WHEEL ASSEMBLY (HX24) Remove the protective Remove the rear axle Install the rear wheel into the dropouts plates on the packaging from the rear from the frame and frame. Make sure the chain wraps around the cassette. wheel. remove the rear wheel To make this easier pull the rear mech towards the back of axle location box. -
Page 14: Front Wheel Assembly (Hx20)
FRONT WHEEL ASSEMBLY (HX20) Remove the packaging from the front fork and the front Using the 5mm allen Key, unscrew the axle and remove wheel. Be careful not to lose the hub end caps. from the fork. Remove the brake pad spacer, and Insert the front wheel Slide the 15mm axle into the fork from the left hand side into the fork dropouts making sure the rotor is centered in (disc side), gently turn the axle to engage the first few... -
Page 15: Front Wheel Assembly (Hx24)
FRONT WHEEL ASSEMBLY (HX24) Remove the packaging from the front fork and the front Open the axle quick release (QR) lever, unscrew the axle wheel. Be careful not to lose the hub end caps. and remove from the fork. Remove the brake pad spacer, and Insert the front wheel Slide the 15mm axle into the fork, then gently turn the into the fork dropouts making sure the rotor is centered in axle to engage the first few threads and tighten to the... -
Page 16: Chain Guard Installation (X20)
CHAIN GUARD INSTALLATION (X20) Using the supplied 5mm allen key. Remove the 2 pinch Remove the crank preload bolt. Then remove the non bolts. drive-side crank arm. You now should be able to remove the drive side crank Install the guard plate using the 2 x M6 bolts - don’t fully assembly. - Page 17 Reinstall the drive-side crankset, install the chain guard Once installed cycle the suspension to make sure the cover, and install the 2 x M5 bolts and tighten to 3Nm. chain doesn’t contact the chainguard. Rotate the cranks to gain access to the 2 x M6 bolts and Reverse the instructions above to re install the non drive- tighten to 6Nm.
-
Page 18: Parts Kit
PARTS KIT PEDAL ASSEMBLY Make sure you take note of which pedal is the right hand pedal, and which is the left hand pedal. Apply some grease to the threads. If there are washers supplied in the parts kit, make sure to use them. 1 X RIGHT ANGLED 22.2MM BRACKET 1 X STRAIGHT BRACKET HEADSET BOLT INSERT... -
Page 19: Front Reflector
FRONT REFLECTOR To fit the reflectors. Locate the 22.2mm right angled Remove the split screw from the bracket and fit to the han- bracket and white reflector. Slide the reflector down on to dlebar by slotting the handlebar between the split in the bracket until the it “clicks”... -
Page 20: Wheel Reflectors
PARTS KIT continued WHEEL REFLECTOR Your bike will be supplied with 2 x wheel reflectors. These can be installed on either side of the bike. There is one for each wheel To install, slot the wheel reflector between 2 spokes com- Slide the reflector towards the centre of the wheel until ing from the same side of the hub e.g. -
Page 21: Adjusting The Saddle Height
ADJUSTING THE SADDLE HEIGHT Sit your child on the bike. Adjust the saddle position so that your child can support themselves with their feet on the ground and their legs slightly bent. They need to be comfortable and stable when they are getting started on the bike. -
Page 22: Front Suspension Setup And Sag
FRONT SUSPENSION SETUP AND SAG The Hellion X is fitted with an air sprung suspension fork. The air-pressure is set to suit the average weight of rider. At the top you will see a compression adjust with lock-out. On the bottom of the fork you will find your rebound adjust. You can use these to find the best set up for your child and riding environment. -
Page 23: Rear Suspension Setup And Sag
REAR SUSPENSION SETUP AND SAG SETTING SAG When you set up the sag, please have your child sit on the saddle properly making sure all their weight is on the bike. Observe the O-ring position which is on the shock stanchion after getting off the bike. -
Page 24: Check Your Brakes
CHECK YOUR BRAKES CHECK YOUR GEARS Your Early Rider is set up so the right hand brake lever oper- Shift gears by pushing the triggers with your thumbs. To ates the front brake. If the destination country drive on the change to an easier gear, push the largest trigger with your right, the right hand brake will operate the rear brake. -
Page 25: Check Your Wheels And Tyres
CHECK YOUR WHEELS & TYRES CHECK YOUR STEERING TYRES Your Early Rider bike uses a ‘threadless headset’. Threadless headsets use a stem that clamps around an unthreaded steerer Check your tyre pressure before riding, either by hand or by tube of a fork. -
Page 26: Safety First
RIDING IN THE DARK RISK OF ENTRAPMENT Your Early Rider Bike comes with a full set of reflectors. Keep The moving parts on your bike present a danger of entrapment them on the bike and keep them clean; they will help your child during normal use and when riding. - Page 27 PLEASE RIDE WITH CARE! No matter how experienced your child is, it’s worth spending some time allowing your child to get used to riding their new bike in a quiet, open area, free from traffic. The bike is built for speed and awesomeness. Ensure that your child is properly protected at all times and above all...
-
Page 28: Simple Maintenance
SIMPLE MAINTENANCE MAINTENANCE SCHEDULE It is advisable to have your bike serviced regularly to keep it in good working order. If you consistently ride more or in poor weather conditions, then you should check the bike more frequently. COMPONENTS CHECKS FREQUENCY FRAME &... -
Page 29: Lubricants
LUBRICANTS CLEANING After cleaning your bike, it is advisable to spray with a water Weather conditions are generally the biggest factor that dispersant, let it dry and then lubricate moving parts. determine the frequency of cleaning and lubrication. The drivetrain and gear cables will benefit from regular Cleaning your bike regularly means you are more likely lubrication with a suitable bicycle specific lubricant. -
Page 30: Brakes
In the case of brake fluid leakage, You may periodically need to ‘centralise’ your brakes. To do contact your Early Rider dealer immediately. A leak in the this, loosen the 2 calliper bolts so the calliper is free to move, brake lines can render the brake ineffective. -
Page 31: Adjusting Gears
ADJUSTING GEARS ADJUSTING HEADSET The gears on the bike were carefully adjusted during assembly Adjustment of the headset (or re-tensioning after re- and checked by your dealer. However, the cables may stretch a positioning of spacers to adjust the stem height) is relatively little during the first few miles, making gear shifting imprecise straightforward –... -
Page 32: Wheels
SIMPLE MAINTENANCE continued WHEELS SPROCKET, CRANK & FREEWHEEL The condition of your wheels is key. The best maintenance for These are components that come under significant stress. a wheel is preventative maintenance. Watch for these potential The crank and front sprocket fit onto the bottom bracket of usage-created problems: your bike and is held on at either side by a bolt. -
Page 33: Spares And Replacement Parts
SPARES AND REPLACEMENT PARTS USER INFORMATION We carry a stock of replacement parts for your Early Rider bike BIKE MODEL including grips, tyres and inner tubes. Please visit the Early Rider website for a list of readily available parts. BIKE SERIAL NUMBER www.earlyrider.com/collections/spares... -
Page 34: Serious Stuff
USEFUL PRODUCT LIFE CYCLE Warranty coverage on your Early Rider frame, forks and com- Every Early Rider bike and frame set has a useful life cycle. ponents extends for TWO YEARS from the date of purchase The useful life cycle is not the same as the warranty period. -
Page 35: Limitations
• Remote diagnostics are difficult. If you are contacting purpose. Early Rider shall in no event be liable for incidental or Early Rider please provide us with as much information as consequential losses, damages or expenses in connection with possible to help us make the most appropriate decision. - Page 36 WWW.EARLYRIDER.COM @EARLYRIDERBIKES INFO@EARLYRIDER.COM +44 (0) 1264 810777 HENLEY•ON•THAMES, UK © 2020 EARLY RIDER LIMITED All other trademarks are the property of their respective owners. Specifications are subject to change without notice.
Need help?
Do you have a question about the HELLION X20 and is the answer not in the manual?
Questions and answers