Table of Contents
Advertisement
Dedicated PTZ Camera Professional
SUNBA H.265/H.264
Network Video Recorder
User Manual
(NVR-F8009SE / NVR-F2008PL)
2020/09
Version 2.0
Visit http://nvr.sunba.net to access the step by step YouTube video
tutorials for setting up Sunba NVR.
All pictures shown are for illustration purpose only. Actual
product may vary due to product enhancement.
Copyright © 2014 - 2020 All Rights Reserved Powered by:
Sunba Technology Co., Ltd.
Advertisement
Table of Contents

Related Manuals for SUNBA NVR-F8009SE

Summary of Contents for SUNBA NVR-F8009SE
- Page 1 User Manual (NVR-F8009SE / NVR-F2008PL) 2020/09 Version 2.0 Visit http://nvr.sunba.net to access the step by step YouTube video tutorials for setting up Sunba NVR. All pictures shown are for illustration purpose only. Actual product may vary due to product enhancement.
-
Page 2: Table Of Contents
FCC Warning (U.S.A) The device has been tested in compliance with limits set by Part 15 of Federal Communication Commission (Class B). The operation of the device is thus limited by the following two conditions: 1) It is not permitted to cause harmful interference to any authorized radio communi- cations. -
Page 3: Overview And Speci Cation
The system is dedicated to store digital videos captured by front-end devices such as IP Camera (IPC). This series NVR can perform live video preview, recording, playback, remote access, and backup. simultaneously. Feature Model NVR-F8009SE Main Processor Hi3536DV100 Operating System... -
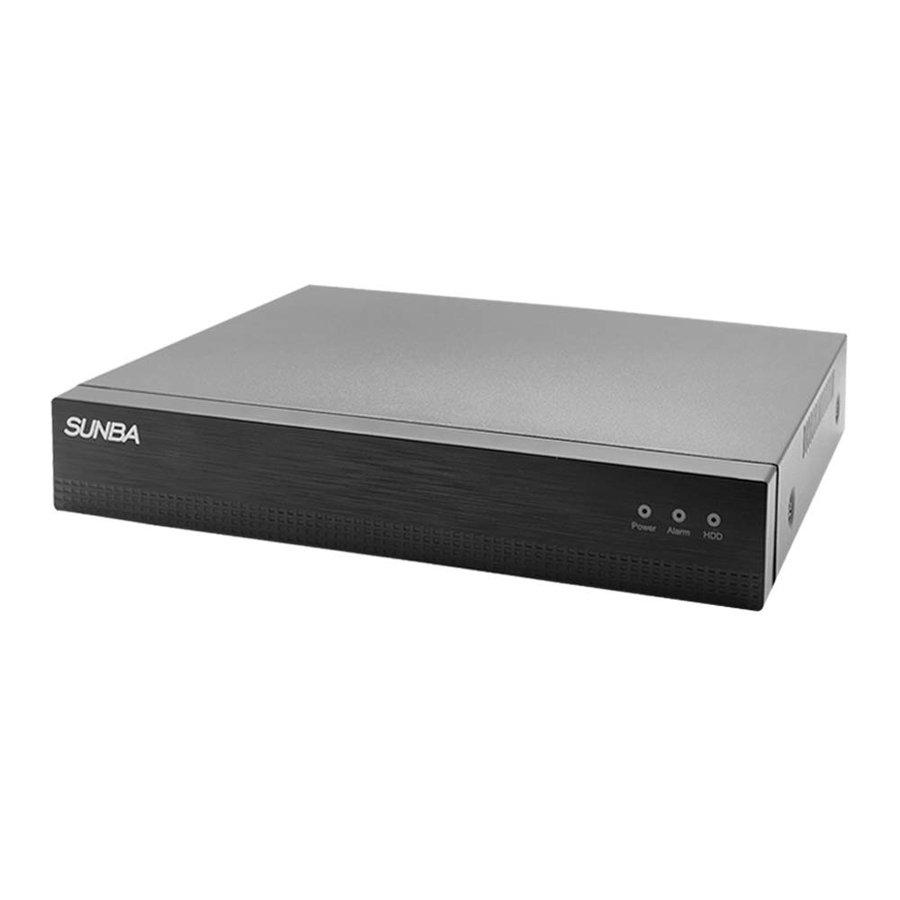
Page 4: Front Panel And Rear Panel
System on Record Green HDD installed and recording normally Green Net connected 2.2 Rear Panel Disclaimer: the following diagram and pictures are adopted from NVR-F8009SE and may vary slightly from the actual model you received. Power Adapter Mouse Speaker Monitor Router... -
Page 5: Hdd Installation
3. HDD Installation Step 1.Remove the 4 screws Step 2.Slide out the NVR upper case on both sides of the NVR Step 3.Put in the HDD Step 4.Install and secure the HDD on the NVR from the bottom with given screws Step 5.Plug-in the data and power cable for Step 6.Put back the NVR upper case the HDD into the slot of the PCB board... -
Page 6: Connecting To Ip Camera
4. Connecting to IP Camera Note: 3rd party IP Camera MUST BE ONVIF compliant to be added to Sunba NVR. 5. Operations and Setting Note the UI and snapshots below were taken from NVR-F8009SE. The actual interface may vary slightly among different firmware versions. For any questions, feel free to contact support@sunba.net. - Page 7 5.1 Account Management You can add additional accounts and modify your administrator account password in Main Menu-System-Account. By default, there are two existing accounts associated with the NVR. Username:admin Password:(blank) [Administrator] Username:default Password:default [User] The user “default” is a reserved user for system interior use only and cannot be deleted. It only has the rights to access live view and check playbacks, but has no access to any other advanced features.
- Page 8 DHCP is a network protocol that enables a server to automatically assign an IP address to a network machine. We suggest assigning a Sunba NVR with a static IP address (by default) and disable this function to avoid potential IP conflict especially if you have multiple network machines connected to a same server (eg., a router or a switch).
- Page 9 Users can enable this function for email alert with any motion detection. For details on how to use this function (example of gmail will be provided), please refer to the FAQ page: https://sunbatech.com/faq/enable-motion-detection-email-photo-alerts-sunba-ip-cameras/ 5.2.4 IP Filter In this submenu, all IP address on the blacklist are blocked from accessing to the camera.
- Page 10 5.2.5 DDNS DDNS means Dynamic DNS. If your external IP address is dynamically assigned , you will need to frequently update settings used to connect to your camera over the Internet whenever a new public IP address is assigned by your ISP. This is time consuming. A DDNS service communicates with your router and translates the dynamic IP address into a static URL.
- Page 11 Sunba does not recommend enabling this feature for average customers for home & business surveillance purpose. 5.2.11 WiFi This function is for device with built-in WiFi signal and is not applicable for Sunba NVR. - 10 -...
- Page 12 5.2.13 Cloud In order to use P2P cloud connection to a Sunba camera, this function is activated by default. You can disable the function if you choose to use other methods to remotely access the camera or to deactivate all network transmission to the public network.
- Page 13 [Region] Select the detection area on the camera view. [Sensitivity] Select the detection sensitivity level accordingly. [Period] Select the schedule (daily or weekly) of detection period. You can choose up to four time periods per day for motion detection functions. [MD Interval] Set time interval between 0 and 600 seconds.
- Page 14 NVR will activate various reporting functions according to the settings below. Please refer to Chapter 5.3.1 for detail settings. 5.3.4 Alarm Input This function is not supported on NVR-F8009SE. 5.3.5 Alarm Abnormality When NVR detects software or hardware abnormalities, the alarm will be triggered.
- Page 15 [Show Traces] When alarm is triggered, there will be a red box showing moving object. [Show Rules] Show virtual lines/polygons on the monitor. [Algorithm] Options for choosing algorithm rule of detection (Perimeter/Item Care). [Alarm Rules] Click to enter the rule setting page for each algorithm.
- Page 16 Click the numerric value box under Tour to name the tour order. Click + next to Start to add/delete preset into the tour, and set its interval. Click – to delete the tour. [Left] Click to set the left boundary of auto scan. [Right] Click to set the right boundary of auto scan.
- Page 17 The channel type diagram below shows the possible channel configuration for NVR application. 5.8 Channel Status The channel status page can be accessed from Main Menu-System-Digital. Channel status enables quick troubleshooting on each channel as it shows the real time status of each channel including “Not Config”, “Connected”, “Wrong Username/- Password”, or “Offline”...
-
Page 18: Add Device To Nvr
5.10 Basic Setting The general setting page can be accessed from Main Menu-System-General. In the General menu, users can set Machine name, assign NVR number (if you have multiple recorders), languages, video standard, actions when storage is full and the time limit for auto-login. - Page 19 Set up the time and language of the NVR. Click Next to save the changes and go to the next interface. The Wizard tool will test whether the NVR is connected to your local network. You can choose to “Retry” the network status examination test, “Skip” the test part to proceed the Wizard Configuration or click “Network”...
- Page 20 Cameras with quick configuration options. 6.2 Sunba Camera Sunba IP cameras (except for the Illuminati series) can be setup automatically. A prompt will pop out with suggestions to switch to H.264+, H.265 or H.265+ to optimize storage space. Click “OK” to accept changes or click “Turn Off” and OK to disable the prompt.
- Page 21 6.3 Third Party ONVIF Camera/Manual Add/Remote Device Add 6.3.1 Quick Set Please open the right-click menu and choose “Quick Set”. The NVR will connect to all searchable end-devices. Select the device and click “add” if the device is not being added automatically. [Search] Detect all IP cameras on the network.
- Page 22 6.3.2 Channel Management Apart from quick set, users can also manually configure channels at Main Menu-Sys- tem-Digital-Digital Channels. This function also enables you to add remote IP cameras to the NVR. In the channel management page, please select “Enable” to start configuring the channel. [Channel] This allows you to browse and select all available channels to configure.
-
Page 23: Record
For Sunba IP cameras, please double check the username/password, the protocol (NETIP) and port (TCP port) will automatically be detected. For 3rd party non-Sunba IP cameras, please check the protocol (ONVIF usually) and the corresponding ONVIF port as well. Note: Many manufacturers such as Hikvision use http port as ONVIF port. -
Page 24: Playback
[Detect] Record when NVR detects “motion detect”, “camera masking”, or “video loss”. Users need to enable “record” for these events (refer to these sections for details). [Alarm] Record when an alarm occurs. Not supported on Sunba 8CH network video recorder wtihout external alarm in/out interface. - Page 25 Select a date to check playbacks on the calendar. Select the channels to playback. Click to de-select a channel and select the other channel to playback. Start the video playback. Play the next file. Step the video playback. Repeat playback. Pause the video playback.
- Page 26 8.1 Manual Manual recording will appear in yellow bar as below. To enable manual recording, select manual in the Recording Config. See details in Chapter 7. yellow bar 8.2 Schedule Scheduled regular recording will appear in green bar as below. To enable scheduled regular recording, select scheduled in Recording Config, and select your desired time range for recording.
- Page 27 8.4 Common Playback Regular playback as described in Chapter 8.1 & 8.2 & 8.3. 8.5 Sync Playback Playback two channels simultanously . 8.6 Dayparting Playback recordings in the selected time frame. - 26 -...
- Page 28 8.7 Express Playback Playback selected video types in fast-forward mode. 8.8 Smart Search Smart search allows users to select intelligent VCA video types and preview in split windows. 8.9 Face Search Users can browse over the human faces captured in the specified date and time frame, and playback the video clips for the capture events.
-
Page 29: Backup
9. Backup Backup can be accessed through the right-click menu by selecting the Main Menu-Sys- tem-Backup. To start backing up, please connect the supported backup storage equipment to the USB slot of the NVR. Then select the device from the list, and click “Backup” to backup the existing recording. -
Page 30: Ie/Desktop Client Operation
Note your computer must connect to the same LAN network as the NVR. 2. Then in Device Manager section, Sunba NVR should show up on the top zone automatically with its IP address. Click IPV4 Search if you don’t see the NVR. - Page 31 A. Temporarily disable the firewall. B. Connect the NVR directly to your parental router. C. Contact support@sunba.net 3. If you haven’t configured the IP of the NVR before, select the device you want to add and check “in order to login device, modify IP automatically”. Then click “add”. The NVR will be automatically connected and changed to a correct IP matching local network.
-
Page 32: Remote Access
4. Once the status of the NVR shows “connected”. Go to the Home panel and select “Monitor” to watch the live view. Then right-click the device and select “open all by main stream”. Note: main stream = video in high definition extra stream = video in standard definition but with better transmission Please select the stream based on the network quality. - Page 33 Step 4. Please make sure the NVR and smartphone are connected to the same local network. If your smart- phone is connected to 4G/LTE, you are unable to search equipment online. Tap “Search” on the bottom to search device online. Step 5.
- Page 34 Step 8. All selected channels will start preview. Preview in 1 window. Preview in 4 split windows. Preview in 9 split windows. Preview in 16 split windows. Open PTZ control panel. Switch between SD/HD mode (1 window mode only). Check remote playback. Speak.
-
Page 35: Face Capture
The face detection function will recognize human faces and capture snapshots in the NVR database. This feature only works in the daylight with the V2 series of Sunba IP cameras. For details, please refer to the data sheet of your corresponding model. - Page 36 In this case, please kindly provide us with your tracking number so that we can match the return package and the refund will be manually pro- cessed within 24 hours. Please watch your email notifications. For any questions, don't hesitate to reach support@sunba.net SUNBA Technology ®...
Need help?
Do you have a question about the NVR-F8009SE and is the answer not in the manual?
Questions and answers