
Summary of Contents for AAI NJ300S
- Page 1 50Hz-300kHz Product manual NJ300S LCR impedance tester Accuracy Agility Instrument...
-
Page 2: Table Of Contents
table of Contents 一、Product introduction ................................ 3 二、Main Specifications ................................. 4 三、Body description................................6 四、Function Description ............................... 8 1、measuring .................................. 8 2、 Calibration ................................12 3、system message ............................... 19 4、Usage intention ................................ 19 5、Anti-interference..............................20 五、Safety requirements ............................... 20 1、Charge..................................20 2、Storage .................................. -
Page 3: 一、Product Introduction
一、Product introduction The NJ300S impedance tester, with a high-performance processor and ultra-low power design, is a portable product that is mainly used to measure the performance of the parameters of three basic components (resistance R, capacitive C, inductor L). Products built-in large-capacity lithium-ion battery, small size, light weight, easy to carry, for outdoor, high-altitude special work more convenient. -
Page 4: 二、Main Specifications
二、Main Specifications Model NJ300S working frequency 50Hz~300kHz Stepping 10Hz~10kHz Display 2.4″TFT Resolution 320×240(QVGA) Battery capacity 2000mAH(7.4Wh) Power <1W Charging current 400mA Charging interface USB(Only as a charging interface) Auto-shutdown Always, now, 5 mins to 60 mins (optional) Rs/Xs/Rp/Xp/Cs/Cp/Ls/Lp Measurement parameters |Z|/D/Q/θ... - Page 5 Operating temperature 5℃~40℃ Atmospheric pressure 860hPa~1060hPa...
-
Page 6: 三、Body Description
三、Body description... - Page 7 Key and interface function description Number sign Name Description Function key, press this key to switch between "measurement", "calibration" and "system" interface; Main after entering the sub-page, change to "BACK" / "NEXT" function. Left Different pages correspond to functions. Right Different pages correspond to functions.
-
Page 8: 四、Function Description
四、Function Description This product has three basic interfaces: measurement, calibration, and system. "Measurement" and "Calibration" contain sub-interfaces. By default, the system enters the Main test settings page (Figure 1-1). 1、measuring (1)Main test settings page Figure 1-1 Main Settings page(First interface after booting) Description of five sub-functions Average: The number of times the last formal measurement result is averaged. - Page 9 "NEXT": switch between the three main function areas. "ANALY", "CAL", "SYSTEM". "DOWN": In the five subfunctions in the left column, the loop switches from top to bottom. "ADJUST": Corresponding setting selection of corresponding sub-function. select the relevant settings of the corresponding sub functions. "OK": After confirmation, enter the main measurement page to start measurement (Figure 1-2).
- Page 10 “MODE” : Circuit equivalent mode selection, automatic, series, parallel. The current item is displayed directly above. “ADJFRQ”: Frequency setting (Figure 1-3). The current frequency is displayed above. “DUT”: Select the type of measurement part, automatic, resistance, inductance, capacitance, electrolysis. The current item is displayed above “Interference degree”:Next to the model (see "0.00"...
- Page 11 Press "ADJ" to set the maximum value of 300K when the small yellow box is on the left; press "ADJ" to clear when the small yellow box is on the right. The minimum frequency is 50 Hz. When setting the frequency, the minimum bit is not adjustable.
-
Page 12: 2、Calibration
Figure 1-5 frequency setting 2 2、Calibration Figure 2-1 calibration page... - Page 13 (1)、"OPEN": Open calibration. User calibrated open circuit data. Figure 2-2 Calibration confirmation page Press the "BACK" key, no calibration; press the "OK" key to start calibration. The calibration process takes a long time, as shown in Figure 2-3. The result prompt after the calibration is completed is shown in Figure 2-4.
- Page 14 Figure 2-4 Calibration result prompt page (2)、“SHORT”: short circuit calibration. The user does short circuit calibration by himself. The operation is similar to "OPEN". (3)、“OPTION”:"Option": The user selects the open and short circuit data (the user and the system have open and short circuit data). Figure 2-5 Options subpage...
- Page 15 User open: Open circuit calibration data made by the user himself. User short: Short circuit calibration data made by the user himself. Sys short: the system has short circuit data. Sys open: the open data of the Kelvin fixture. Sys0603open: The open data when the opening distance of the patch fixture is 0603 package length.
- Page 16 Figure 2-7 SMD fixture Figure 2-8 Confirmation prompt...
- Page 17 (4)、"LOAD": Load calibration. When the user has higher requirements on the measurement accuracy, the user can calibrate the measured value by himself. After calibration, the measured value near the “calibration resistance” value will be more accurate. (Here "calibrated resistance" means standard parts, such as resistance, inductance, capacitance) Figure 2-9 Load options Calibration steps:...
- Page 18 The above " Resistance measurement" in Figure 2-13 is the current measured value of the equipment for "calibration resistance". The following two parameter values of " Resistance cal value" in Figure 2-13 need to be manually filled in with the true value of this "calibration resistance". (f) When the small yellow box is adjusted to the last bit of Xs, press "RIGHT"...
-
Page 19: 3、System Message
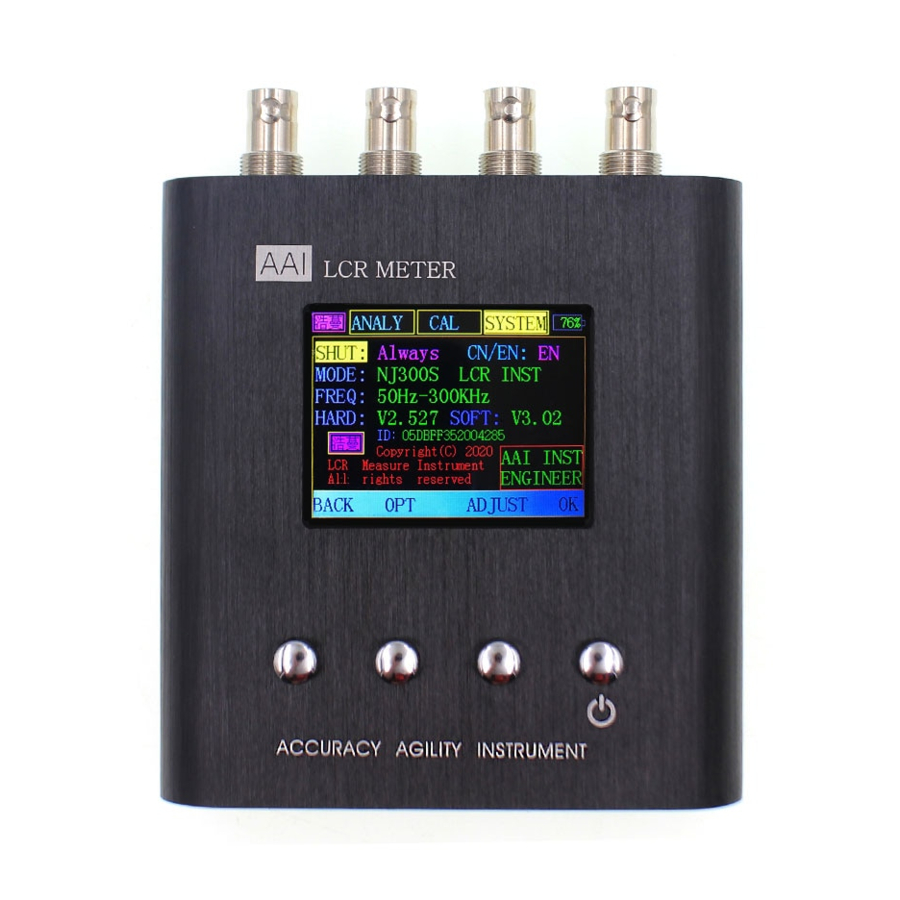
3、system message Figure 3-1 System information page The system information mainly displays the product related information, such as model, frequency range, version, etc. OPT: switch between the two functions "Shutdown" and "Language"; ADJUST: selection of corresponding function parameters. note: SHUT(Automatic shutdown):Always, Now, 5 mins, 10 mins, after 30 mins, 60 mins. -
Page 20: 5、Anti-Interference
possible. Self provided Kelvin fixture: purchase instructions, BNC male pin, regular manufacturer standard head. Otherwise, the main hole will be damaged greatly and the contact will be poor, which will affect the measurement accuracy and accuracy. 5、Anti-interference When the frequency value is an integer multiple of the power frequency (50 / 60Hz), the measured value is superior to other frequency points. -
Page 21: 3、Transport
3、transport When transporting, please make shock-proof and drop-proof packaging. Contains batteries, it is recommended to transport by land or water. 六、Matters needing attention 1. In order to ensure the accuracy of measurement and calibration, please preheat the product for at least 5 minutes before measurement, especially for calibration, it is best to preheat for more than 20 minutes. -
Page 22: 七、After-Sale Service
Until the battery can be charged normally. 七、After-sale service After the product is sold, AAI will provide free repair or replacement within two years due to problems with its own defects. Provide technical support for life 八、contact us...
Need help?
Do you have a question about the NJ300S and is the answer not in the manual?
Questions and answers