Table of Contents
Advertisement
Quick Links
Advertisement
Table of Contents

Subscribe to Our Youtube Channel
Summary of Contents for EOS P 396
- Page 1 1EOS 1Installation Condition Basic training Training manual...
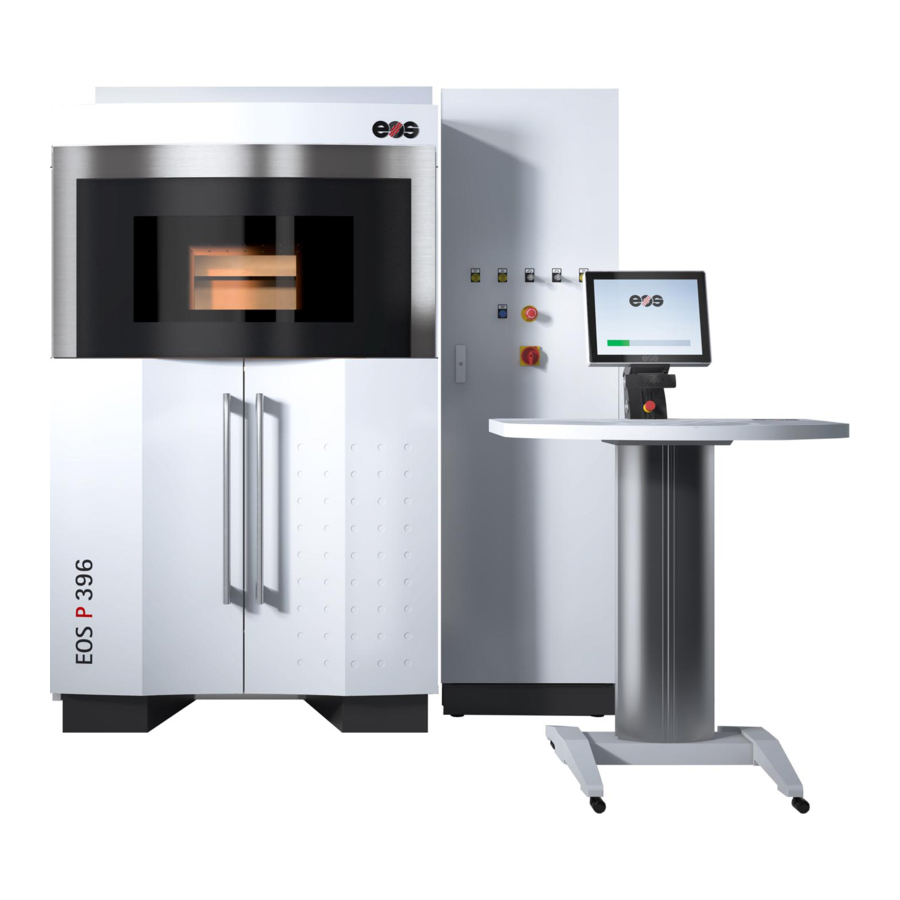
- Page 3 1EOS P 396 1Laser-sintering system for plastics...
-
Page 5: Table Of Contents
Contents EOS P 396 1 About this manual ... Legal notes............................1.1 Layout and contents ........................1.1 Conventions............................1.1 Representations ........................1.1 Terms............................1.2 Definitions ..........................1.2 Pictograms..........................1.3 Safety warning in this manual ...................1.3 Hotline .............................1.4 2 Laser sintering process Basic information on the laser sintering process ..............2.1 Physical process ........................2.1... - Page 6 Contents EOS P 396 Front of switching cabinet, open.................3.6 Rear of switching cabinet, open ..................3.7 Optics chamber.........................3.8 Function ............................3.9 Accessories and Options ......................3.10 Cooling system ........................3.10 Layout..........................3.10 Function ........................... 3.10 Lifting truck........................... 3.11 Layout..........................3.11 Function ........................... 3.11 Unpacking stand ........................
- Page 7 Separation of filled plastic powder ...................4.7 Material - machine compatibility....................4.7 5 Part Property Management Introduction............................5.1 Parameter sets ..........................5.2 Original EOS parameter sets....................5.3 Exposure types for the original EOS parameter sets (without PPP) ....5.3 PPP parameter sets ........................5.5 TopSpeed..........................5.5 Speed ...........................5.6 Balance..........................5.7 Performance ........................5.7 TopQuality ..........................5.8...
- Page 8 Preparing parts using the Build Processor................6.21 Making job settings ......................6.21 Setting part-specific exposure type................6.21 Exporting parts........................6.21 Preparing parts using EOS RP-Tools ..................6.23 Overview..........................6.23 Preparing parts using EOS RP-Tools................6.23 Correcting part data using SLIFIX................... 6.24...
- Page 9 Contents EOS P 396 7 Operation of machine & accessories Overview............................7.1 Administering EOS software......................7.1 Installing EOS software products..................7.1 Licensing EOS software products..................7.3 Set-up the machine ........................7.6 Preparing job using the PSW.....................7.6 Making material-specific settings..................7.7 Loading EOS default job....................7.7 Preparing user-defined default job................7.7 Loading user-defined default job ................7.7...
- Page 10 Contents EOS P 396 Providing refreshed powder to the machine ............7.22 Cleaning parts..........................7.23 8 Process monitoring Overview............................8.1 Checking, determining, setting building temperature ............8.1 Determining shrinkage and beam offset................8.2 Determining, adjusting material-dependent shrinkage..........8.2 Determining, adjusting material-dependent beam offset ..........8.4 Documenting machine data and building process..............8.5...
- Page 11 Contents EOS P 396 Accessories and Options....................9.17 IPCM EOSINT P 3 ......................... 9.17 IPCM P plus ........................... 9.17 Training manual • Basic training • Status 03.14...
- Page 12 Contents EOS P 396 Training manual • Basic training • Status 03.14...
- Page 13 1About this manual ...
-
Page 15: About This Manual
This document must not be electronically or mechanically reproduced, distributed, amended, transmitted, translated into other languages or used in any other way - either in full or in part - without the express written approval of EOS. EOS® and EOSINT® are registered trademarks of EOS. -
Page 16: Terms
About this manual ... EOS P 396 Terms ➢ EOS is used to refer to EOS GmbH - Electro Optical Systems, as well as its subsidiaries. ➢ Machine is used to refer to the laser sintering system EOS P 396. ➢ PSW is used to refer to the process software necessary for the operation of the machine. -
Page 17: Pictograms
About this manual ... EOS P 396 ➢ Parameter set: A parameter set contains optimised settings, e.g. material-dependent values for the scaling, beam offset, building temperature, exposure types, etc. for the processing of a material with a machine. Pictograms Notice Draws your attention to information that you should note. -
Page 18: Hotline
Robert-Stirling-Ring 1 D-82152 Krailling / München E-mail servicehotline@eos.info Homepage www.eos.info When calling the EOS-hotline, ensure you have all the relevant information to hand, including ➢ Machine type ➢ Machine serial number ➢ Software version number - Process software (PSW) - EOSTATE. - Page 19 2Laser sintering process...
-
Page 21: Laser Sintering Process
Laser sintering process EOS P 396 Basic information on the laser sintering process Laser sintering process Physical process The basic principle of the laser sintering process comprises the melting of layers of plastic powder using a CO laser. During the laser sintering process, the plastic powder is briefly heated to a temperature above the melting point by exposure with the laser beam. -
Page 22: Building Process
Laser sintering process EOS P 396 Building process At the start of the building process, the building platform is moved to its start position and a bottom layer of plastic powder applied to the building platform. Then the machine is warmed up. -
Page 23: Factors That Affect The Laser Sintering Process
Laser sintering process EOS P 396 Factors that affect the laser sintering process The laser sintering process is affected by the following factors: ➢ Building temperature ➢ Exposure ➢ Process-related effects ➢ Ambient conditions. To ensure the sintered part meets the quality requirements, these factors must be taken into account on setting the machine parameters, material parameters as well as on the selection of the exposure type. - Page 24 Laser sintering process EOS P 396 With an excessively high building temperature, in the worst case all the plastic powder in the building area may melt. Even before this situation is reached, soiling of the recoater blades, recoating with stripes and the tearing out of parts will occur.
-
Page 25: Exposure
Laser sintering process EOS P 396 Exposure During the exposure of a layer, the contour, i.e. the periphery of the part and the enclosed area of the layer are exposed using a laser beam. During this process the plastic powder is melted and bonds to the layer underneath. - Page 26 Laser sintering process EOS P 396 Beam offset on exposure of the contour If the path of the centre of the laser beam moves along the nominal contour of the part during exposure, the contour of the part is enlarged by the radius of the curing zone of the laser beam.
-
Page 27: Exposure Types
For the different powder materials there are various exposure types defined by EOS that are embedded in parameter sets. See section 5, Exposure types for the original EOS parameter sets (without PPP), Exposure types for the PPP parameter sets. Using the Exposure editor module custom, customer-specific exposure types can be prepared. -
Page 28: Process-Related Effects
Laser sintering process EOS P 396 Process-related effects The geometrical properties of the parts affect the laser sintering process. Optimisation of the part geometry and effective positioning and orientation of the parts in the building chamber contribute to improving the part quality. - Page 29 Laser sintering process EOS P 396 The shrinkage is, depending on the height of the overall job ➢ Less at the wall of the exchangeable frame than in the inside ➢ Greater in the middle of the exchangeable frame than at the top and bottom.
-
Page 30: Distortion
Laser sintering process EOS P 396 Distortion Distortion occurs in the case of large thermal differences during the building process or during cooling after the end of the building process and results in warped parts. The distortion is equally dependent on the part geometry and the material used. -
Page 31: Ambient Conditions
Laser sintering process EOS P 396 For parts that are critical in relation to distortion, powder generously refreshed with new powder should be used. Rule of thumb: The higher the portion of new powder, the less distortion on the parts. - Page 32 Laser sintering process EOS P 396 2.12 Training manual • Basic training • Status 03.14...
- Page 33 3Layout, function of machine and accessories...
-
Page 35: Layout, Function Of Machine And Accessories
Layout, function of machine and accessories EOS P 396 Machine Layout, function of machine and accessories Layout Overview Front valve Switching cabinet Front doors Control terminal Training manual • Basic training • Status 03.14... -
Page 36: Front Of Machine, Open
Layout, function of machine and accessories EOS P 396 Front of machine, open Process chamber Collector bin Removal chamber Removal chamber door Powder supply bin Exchangeable frame Process chamber door Exchangeable frame Building platform Training manual • Basic training • Status 03.14... -
Page 37: Rear Of Machine, Open
Layout, function of machine and accessories EOS P 396 Rear of machine, open X axis cover Scanner ventilation hose Laser Machine terminal boxes Laser terminal box Cooling system terminal box Nitrogen generator Training manual • Basic training • Status 03.14... -
Page 38: Left Of Machine, Open
Layout, function of machine and accessories EOS P 396 Left of machine, open Pneumatic service unit Fine filter Air supply for laser deflection head Coarse filter ventilation NITROGEN FLOW RATE flowmeters NITROGEN FLOW RATE manometer SEALING AIR flowmeter FLUIDISATION manometer... -
Page 39: Front Of Switching Cabinet
Layout, function of machine and accessories EOS P 396 Front of switching cabinet RECHARGEABLE BATTERY LOW SHUTTER OPEN indicator indicator ACKNOWLEDGE EMERGENCY STOP SERVICE key-operated switch button LASER key-operated switch EMERGENCY STOP button LASER READY indication MAIN SWITCH Training manual • Basic training • Status 03.14... -
Page 40: Front Of Switching Cabinet, Open
Layout, function of machine and accessories EOS P 396 Front of switching cabinet, open Controller Fuses Circuit breakers Eurotherm universal regulators Process chamber Motor cut-outs Eurotherm universal regulators Stepper motor final stages with Removal chamber integrated PLC (Posimo) Exposure hours counter... -
Page 41: Rear Of Switching Cabinet, Open
Layout, function of machine and accessories EOS P 396 Rear of switching cabinet, open Mains filter FI-PROTECTION SWITCH Cooling unit Training manual • Basic training • Status 03.14... -
Page 42: Optics Chamber
The irradiation of eyes or the skin by direct or scattered radiation will cause severe burns. The optics chamber is only permitted to be opened by EOS service personnel. A Machine with open optics chamber Powder supply bin to IPCM connection... -
Page 43: Function
Layout, function of machine and accessories EOS P 396 Function The basis for the laser sintering of parts is formed by CAD data containing three- dimensional geometries; these data, appropriately prepared, are processed by the machine. Prior to starting the building process, a base layer of plastic powder is applied to the building platform and the machine warmed up to the building temperature. -
Page 44: Accessories And Options
Layout, function of machine and accessories EOS P 396 Accessories and Options Cooling system Layout MAIN SWITCH Ventilation grille Control panel Function The machine's laser produces heat that is drawn off by cooling water in a Cooling system. The Cooling system is available in two variants: ➢... -
Page 45: Lifting Truck
Layout, function of machine and accessories EOS P 396 Lifting truck Layout Handle Lifting slide Lifting mast Lifting fork Roller Hand crank Fork roller Function The Lifting truck is a manual forklift truck with a winch for removing the exchangeable frame. With the aid of the special lifting fork, the machine's exchangeable frame can be picked up with the Lifting truck. -
Page 46: Unpacking Stand
Layout, function of machine and accessories EOS P 396 Unpacking stand Layout A Unpacking stand Ejection ram B Lifting truck Base plate Spiral hose Tray Exchangeable frame with building Used powder bin platform Connection for Vacuum cleaner Grid with guide rod... -
Page 47: Shot-Peening Cabinet
Layout, function of machine and accessories EOS P 396 Shot-peening cabinet Layout Door catch Shot-peening medium hopper MAIN SWITCH Shot-peening medium hose Viewing window Pedal Openings with gloves Left cabinet door Function In the Shot-peening cabinet the surface of sintered parts is cleaned. Cleaning is undertaken using pure compressed air or with the addition of shot-peening medium. -
Page 48: Ipcm Eosint P 3
Layout, function of machine and accessories EOS P 396 IPCM EOSINT P 3 Overview Layout A Spiral conveyor D Unpacking and sieving station B Machine Recycled powder conveying C Dosing station Function The Integrated Process Chain Management (IPCM) with its components is a production tool for the cost-effective manufacture of parts in an industrial environment. -
Page 49: Powder Conveying System P 3
Layout, function of machine and accessories EOS P 396 Powder conveying system P 3 Layout New powder bin Switching cabinet with control panel Spiral conveyor Recycled powder bin Conveyor motor Powder hopper for the new and recycled powder mixture Spiral hose filling... -
Page 50: Unpacking And Sieving Station P 3
Layout, function of machine and accessories EOS P 396 Unpacking and sieving station P 3 Layout Hand lever for building platform carrier Recycled powder bin Covering hood Machine's exchangeable frame Sieving machine Function The Unpacking and sieving station P 3 comprises an unpacking module and a sieving element. -
Page 51: Powder Conveying Vibro-Kit
Layout, function of machine and accessories EOS P 396 Powder conveying vibro-kit Layout Compressed air line for Powder Switching cabinet, Powder conveying conveying vibro-kit vibro-kit Conical insert with ball vibrator Control panel, Powder conveying vibro-kit Function The Powder conveying vibro-kit is required for processing selected materials. You will find a list in the parameter sheet. -
Page 52: Extension Powder Conveying
Layout, function of machine and accessories EOS P 396 Extension powder conveying Layout A Powder conveying system D Machine 2 B Machine 1 Switching cabinet, 2nd Extension powder conveying for machine 3 C Switching cabinet, 1st Extension powder conveying for machine 2... -
Page 53: Recycled Powder Conveying
Layout, function of machine and accessories EOS P 396 Recycled powder conveying Layout A Unpacking and sieving station P3 1 Switching cabinet with control panel Recycled powder conveying B Powder conveying system P 3 2 Recycled powder bins C Recycled powder conveying... -
Page 54: Sieving Machine P 3
Layout, function of machine and accessories EOS P 396 Sieving machine P 3 Layout Sieve insert (sieve frame) Recycled powder bin Hopper Sieve holder Recycled powder hose MAIN SWITCH Function Using the Sieving machine P 3 unexposed plastic powder (used powder) that is produced during the unpacking of the sintered parts can be sieved. -
Page 55: Ipcm P Plus
Layout, function of machine and accessories EOS P 396 IPCM P plus Layout A Mixing & qualification station (MQS) C Docking station B Multibox D New powder bin Function For the usage of the plastic powder in the laser sintering process, there must be a defined mixture ratio of new to recycled powder. - Page 56 Layout, function of machine and accessories EOS P 396 During the mixing and qualification process new powder is transported to the MQS from a new powder bin and recycled powder is transported from a multibox. After the stirring time has elapsed, a sample can be taken from the powder mixture and checked using suitable methods, e.g.
- Page 57 Layout, function of machine and accessories EOS P 396 the powder discharge, as soon as the active seal is released, the multibox can be pulled out of the docking station. 3.23 Training manual • Basic training • Status 03.14...
- Page 58 Layout, function of machine and accessories EOS P 396 3.24 Training manual • Basic training • Status 03.14...
- Page 59 4Basic information on materials...
-
Page 61: Basic Information On Materials
EOS P 396 Material types Basic information on materials All EOS plastic powders are listed with a description of the properties and the application areas in the PDF file EOS_Materials_Broschure_Table_en.pdf on the EOS homepage at http://www.eos.info/material-p. Pay attention here as to whether the related material can be processed on the machine. - Page 62 Basic information on materials EOS P 396 parts. It occurs primarily during the building process with polyamide powder. For this reason used polyamide powder must be mixed with new powder (refreshed). In the case of filled plastic powder, this ageing is further accelerated by the filler material such that the refresh factors are correspondingly higher, or refreshing may not be possible at all.
-
Page 63: Separating The Powder When Unpacking The Parts
Basic information on materials EOS P 396 Separating the powder when unpacking the parts To keep the refresh factor as low as possible and to obtain consistent powder quality, the following rules should be noted on unpacking the parts: ➢ Baked plastic powder (lumps of powder) should be immediately removed and disposed of when unpacking the parts. -
Page 64: Refreshing The Powder
Basic information on materials EOS P 396 Refreshing the powder After sieving, the sieved used powder (recycled powder) must be refreshed with new plastic powder prior to usage for a new building process. The refresh factor is dependent on the following factors: ➢... -
Page 65: Storage Of The Powder
Basic information on materials EOS P 396 Storage of the powder For consistent quality of the parts and a trouble-free building process, EOS recommends the following storage conditions for plastic powder. Temperature Atmospheric Storage [°C] humidity [%] duration New powder, used powder,... -
Page 66: Problems When Handling Powder
Basic information on materials EOS P 396 Non-compliance with the storage conditions Non-compliance with the storage conditions can result in unsatisfactory part quality, as well as malfunctions in the building process. ➢ Storage temperature too high: Possible chemical change in the material possible in case of extended storage duration ➢... -
Page 67: Separation Of Filled Plastic Powder
- Maximum height the powder falls on filling or transfer should not be more than 1 meter. Material - machine compatibility The materials approved by EOS for the machine are listed in the material information Material – machine compatibility. Training manual • Basic training • Status 03.14... - Page 68 Basic information on materials EOS P 396 Training manual • Basic training • Status 03.14...
- Page 69 5Part Property Management...
-
Page 71: Part Property Management
EOS has defined so-called Part Property Profiles (PPP) for different applications. Parts are given these PPPs by using related PPP parameter sets and the related EOS materials allocated. In addition to the parameter sets from EOS, it is possible to develop custom parameter sets with the aid of the Exposure editor. -
Page 72: Parameter Sets
Part Property Management EOS P 396 Parameter sets With a defined parameter set, an EOS material has, depending on the requirements on the part, matched settings in relation to part and process properties for the usage on the machine. It is also possible to develop custom parameter sets. These can be configured using... -
Page 73: Original Eos Parameter Sets
EOS P 396 Original EOS parameter sets All parameter sets approved by EOS are called original EOS parameter sets. They are matched to the EOS materials and correspondingly optimised. The Part Property Profile parameter sets also provide qualified part properties and material characteristics for specific materials, e. - Page 74 Part Property Management EOS P 396 Exposure type for the material PrimeCast® 101. Using the exposure type Support a support grid to stabilise the parts during the building process is generated. ➢ _fine Exposure type for the material PrimeCast® 101. For higher strengths but with delicate details a skin with a thickness of <...
-
Page 75: Ppp Parameter Sets
Part Property Management EOS P 396 PPP parameter sets For the production of parts with different requirement profiles, special parameter sets with qualified material and process properties are available; these sets are termed PPP parameter sets. Independent of which PPP parameter set was used and on which machine a part was manufactured, the same part properties are ensured. -
Page 76: Speed
Part Property Management EOS P 396 Speed The PPP parameter set Speed is built with a layer thickness of 0.15 mm. Due to its good all-round qualities, it is suitable for large to medium parts. The surface quality and the mechanical properties are somewhat higher than for TopSpeed. At the same time the productivity is higher than with the parameter set Balance. -
Page 77: Balance
The PPP parameter set Balance is built with a layer thickness of 0.12 mm. With its balanced relationship between manufacturing costs, mechanical properties, surface quality and accuracy this is the standard parameter set from EOS. It is suitable for the widest range of geometries, part sizes and requirements. -
Page 78: Topquality
Part Property Management EOS P 396 TopQuality The PPP parameter set TopQuality is built with a layer thickness of 0.06 mm. With this layer thickness it is possible to build small to medium-sized parts with extremely fine and fragile geometries and the highest surface quality. The building height with this parameter set is limited to 300 mm. -
Page 79: Exposure Types For The Ppp Parameter Sets
There are six exposure types available in the individual PPP parameter sets. ➢ Exposure type EOS The exposure type EOS is, as a standard exposure type optimised for complex design data at high building speed, suitable for approx. 90 % of all applications. - Page 80 Part skin and part core are exposed using different exposure types. As a result the building time and the part weight can be reduced with good surface quality, with less strength than with the exposure type EOS. ➢ Exposure type EOS_Box With the aid of this exposure type a storage box with a lattice structure can be built for small or delicate parts.
-
Page 81: Exposure Editor
Part Property Management EOS P 396 ➢ Exposure type No_Exposure If a part is allocated this exposure type, it is not exposed during the building process. Exposure editor Using the Exposure editor module, new, custom exposure types with custom parameters can be prepared. The basic exposure types in the Exposure editor do not contain any initial values that can be used for building. -
Page 82: Initial Values For Parameters
Part Property Management EOS P 396 Initial values for parameters The Initial values for parameters module provides, in addition to the functionality of the Exposure editor module, an additional exposure type with parameters that can be edited. These parameters are pre-defined such that it is possible to build parts on which there are no special requirements. - Page 83 6Data preparation...
-
Page 85: Data Preparation
Build Processor integrated into Magics RP or with the aid of the software application EOS RP-Tools, combined, edited and saved in a job using the process software (offline on a workstation or at the machine). Finally the job is loaded on the machine, edited if necessary and started. -
Page 86: Preparing Parts With Magics
Data preparation EOS P 396 If RP software other than Magics is used for data preparation, the transformation into layer data is undertaken using the software EOS RP-Tools. See Operation manual EOS RP-Tools. Preparing parts with Magics RP Overview In this training manual only the steps in Magics RP necessary for the processing in the PSW are described: ➢... -
Page 87: Adding A Scene
3. In the Add machine from the Magics Library window select the required unit of measure, e. g. mm-settings. 4. By double-clicking the EOS folder, open the EOS machine library in which all EOS machines are listed. Training manual • Basic training • Status 03.14... - Page 88 Data preparation EOS P 396 5. Select the required machine type, using the >> button copy to the My Machines group box and close the window. 6. In the Machine library window add the selected machine using the Add to Default View button and close the window.
-
Page 89: Build Processor Option: Selecting And Setting Up Printer
Data preparation EOS P 396 Build Processor option: selecting and setting up printer To ensure the correct data for the transformation of the 3D data into layer data are available in Magics, the machine type must be setup as a printer. - Page 90 5. In the Installing 3D Printers window, click the Close button to close the window. The Configure EOS Printer window opens. 6. In the Upload Folder group box enter the folder where the part data are to be exported and accept using OK.
-
Page 91: Loading A Machine
Data preparation EOS P 396 Loading a machine 1. On the Scenes menu click the New scene option. The Change Machine window appears. 2. Select required machine type in the Select machine list box and accept using OK. For the Build Processor option the related machine type with the prefix B.PRoc.: [machine type] must be selected so that the correct layer data can be exported at the end. -
Page 92: Importing Parts
Data preparation EOS P 396 In the left part of the Machine Properties window, click the Platform folder • and select the Build envelope option. Reduce the size of the building chamber by the scaling values given in the •... -
Page 93: Automatically Repairing Parts
2. Select the Diagnostics function. 3. In the Diagnostics group box, select the Full Analysis check box. All EOS-relevant repair actions are activated. 4. Click the Update button. The result of the error analysis appears in the Message group box. -
Page 94: Orientating Parts
Data preparation EOS P 396 8. If no error messages are displayed, click Close button. The Fix Wizard window is closed. 9. If further errors are indicated in the message, consideration should be given to replacing the part with a part free of errors. -
Page 95: Orientating Parts Using The Rotate Button
Data preparation EOS P 396 Orientating parts using the Rotate button Using the Rotate button the parts can be rotated by the required angle around a selected axis. 1. On the Tools tab, click the Rotate button. The Rotate part(s) window appears. - Page 96 • part is automatically moved to the pre-set default position. For EOS machines the pre-set default position is X = 10 mm, Y = 10 mm and Z = 6 mm. 8. Accept entries using Apply and close the window using OK.
-
Page 97: Positioning Parts
Data preparation EOS P 396 Positioning parts Shrinkage and distortion of the parts can be reduced by the optimum positioning of the parts. The following recommendations should be followed: ➢ The parts should be positioned in the middle of the building area as far as possible. - Page 98 Data preparation EOS P 396 ➢ Parts critical for distortion and shrinkage should not be positioned in the bottom third of the job, as here shrinkage and distortion will increasingly occur due to the proximity to the cooler removal chamber.
- Page 99 Data preparation EOS P 396 ➢ Support parts (dummy parts) can be positioned under parts critical for distortion to improve the evenness. Part Dummy part - The distance between the dummy parts and the real part should be approx. 0.6 mm to 1 mm.
-
Page 100: Positioning Parts Using The Translate Button
Data preparation EOS P 396 ➢ Parts with geometries critical for distortion should as far as possible be positioned in the middle. The parts should be arranged inside the area of optimised building conditions in the exchangeable frame ("Sweet Spot"). -
Page 101: Generating A Sinter Box
Using the To Default Position button the part is moved to the pre-set value. • For EOS machines the pre-set default position is X = 10 mm, Y = 10 mm and Z = 6 mm. 3. Accept entries using Apply and leave the window using OK. - Page 102 Data preparation EOS P 396 In the Perforation group box enter if necessary the properties of the hole and • the web for the sinter box. Using the Next or Skip button move on to the next step of the Sinterbox Wizard.
-
Page 103: Reducing Triangles
Mesh info group box. 1. Select component. 2. On the Triangle Reduction tab click the Triangle Reduction button. 3. On the Global tab enter the following default values recommended by EOS: Smallest detail: 0.02 mm • Max. Angle: 5 °... -
Page 104: Saving Processed Parts Using A New Name
Data preparation EOS P 396 Select Keep Textures Intact check box. • Textures on the part are retained. As a result some triangles may not be filtered out. Only the triangles marked are reduced on the Local tab. Some neighbouring triangles may also change as a result. -
Page 105: Preparing Parts Using The Build Processor
Data preparation EOS P 396 Preparing parts using the Build Processor The Build Processor is used to transform the 3D data in Magics into layer data that can be processed by the machine. During this process the data are transformed from the .STL format to the .SLI format. - Page 106 Data preparation EOS P 396 3. In the 3D Print window check the entries and accept the export of the part data using Submit Job. The part data are exported to the destination folder defined. 6.22 Training manual • Basic training • Status 03.14...
-
Page 107: Preparing Parts Using Eos Rp-Tools
Using EOS RP-Tools data in STL format are converted into layer data in the EOS SLI format with the file extension *.sli. With the aid of EOS RP-Tools parts can, in one work step, be sliced (SLICER), analysed (SLIVIEW) and corrected (SLIFIX). -
Page 108: Correcting Part Data Using Slifix
2. Select STL file(s) and click using the right mouse button. The Windows context menu contains, in addition to the normal options for the computer configuration, specific options for EOS RP-Tools. A Slice parameter sets PPP B Slice parameter sets OEP 3. - Page 109 , process malfunctions such as exposure errors or process cancellation can occur. 3. Accept message with OK. The main window for the software application EOS RP-Tools appears. A Graphic depiction of the layer data Depiction of error with SLIVIEW...
- Page 110 Consider repair effort. • If necessary, replace part with an error-free part and prepare again. ☞ section 6, Preparing parts with Magics RP. ☞ section 6, Preparing parts using EOS RP-Tools. 6.26 Training manual • Basic training • Status 03.14...
- Page 111 7Operation of machine & accessories...
-
Page 113: Operation Of Machine & Accessories
Operation of machine & accessories EOS P 396 Overview Operation of machine & accessories The initial installation of the software required and the licensing of the software, as prerequisites for the operation of the machine, should already have been undertaken. - Page 114 Programs necessary for a successful installation are: ➢ MS RunTime One-off installation of the run-time libraries ➢ License One-off CodeMeter Runtime Kit installation for all EOS licence products ➢ PSW Initial installation and updates ➢ EOSTATE Initial installation and updates.
-
Page 115: Licensing Eos Software Products
The installation of the PSW is complete. Licensing EOS software products ➢ If EOS software is to be installed on a machine computer, a single user dongle EOS Customer Machine Software Dongle (CMS dongle) is required for its use. The licences purchased must be activated on this dongle. - Page 116 The CodeMeter wizard undertakes the necessary steps. If you request a licence for an empty dongle (e.g. CNS dongle), you will be prompted to enter the EOS FirmCode. In the Add licence of a new producer list box enter the EOS FirmCode 101328.
- Page 117 Operation of machine & accessories EOS P 396 3. Import licence or licence update from EOS into the dongle: In the CodeMeter Control Center click the Licence Update button. • Select the Import licence update option and accept using Commit.
-
Page 118: Set-Up The Machine
➢ Checking, fitting powder supply bin ➢ Checking, fitting collector bin ➢ Recoater and building platform homing. You will find further information on setting up the machine in the Operation EOS P 396 manual, section 6, Setting up machine. Preparing job using the PSW The procedure for the preparation of a job in the PSW involves the following steps: ➢... -
Page 119: Making Material-Specific Settings
☞ Operation EOS P 396 manual, section 6, EOS Loading default job. Preparing user-defined default job In addition to the EOS default jobs, it is also possible to create user-defined default jobs. ☞ Operation EOS P 396 manual, section 6, Preparing user-defined default job. -
Page 120: Correcting Material-Dependent Shrinkage
Correcting material-dependent shrinkage To compensate for the material shrinkage that occurs during the process, the parts must be scaled up by the magnitude of the shrinkage. In an EOS default job the material-dependent scaling recommended by EOS is already pre-set. -
Page 121: Correcting Material-Dependent Beam Offset
Operation of machine & accessories EOS P 396 Correcting material-dependent beam offset To compensate for the material-dependent curing zone of the laser beam, the beam offset may need to be modified. The material-dependent beam offset is pre-set in the PSW, however it may need to be determined and modified. -
Page 122: Creating A Job
EOS P 396 Creating a job The individual steps for preparing the parts for creating a job are described in the Operation EOS P 396 manual, section 6, Preparing job: ➢ Loading a job, creating a job ➢ Loading parts After loading parts from jobs with a material setting that is different to the current material setting, the exposure type must be checked. -
Page 123: Correcting Part-Specific Shrinkage
If several parts are marked, a value is not indicated. Use this PSW functionality very carefully to avoid mistakes. ☞ Operation EOS P 396 manual, section 6, Setting part-specific beam offset. 7.11 Training manual • Basic training • Status 03.14... -
Page 124: Setting Exposure Type
SLI- files used in it are packed into a common file with the extension *.eosjz. EOS recommends saving as a packed job file *.eosjz, errors on transferring the job to another computer will then be avoided. On opening the packed job file is automatically unpacked. -
Page 125: Preparing Building Process
➢ If necessary interrupting, continuing building process ➢ If necessary cancelling building process. You will find further information on the building process in the Operation EOS P 396 manual, section 6, Building. You will find further information on dealing with process problems in section 9, Troubleshooting. -
Page 126: Monitoring Building Process Using Eostate
Operation of machine & accessories EOS P 396 Monitoring building process using EOSTATE EOSTATE is a status control and reporting software application for the analysis of the building process in relation to efficiency, part quality, machine behaviour. The PSW continuously logs important process data in a database on the machine computer. -
Page 127: Monitoring Building Process Using Basic Module
Monitoring building process using Basic module The Basic module makes it possible to monitor the states of the machines as well as to straightforwardly transfer all relevant machine data to the EOS-hotline in the case that technical support is required. -
Page 128: Monitoring Building Process Using Quality Assurance Module
Operation of machine & accessories EOS P 396 Monitoring building process using Quality Assurance module The Quality Assurance module generates the Job Quality Report as well as the Part Report. During this process the data for a selected building job are prepared, analysed, evaluated and clearly depicted. -
Page 129: Monitoring Building Process Using Controlling Module
Operation of machine & accessories EOS P 396 Monitoring building process using Controlling module The Controlling module produces a ready-to-print Controlling Report that contains cost-related data for defined and freely selectable periods. These data can be studied based on key criteria in the statistics mode. -
Page 130: Monitoring Building Process Using Machine Park Management Module
Operation of machine & accessories EOS P 396 Monitoring building process using Machine Park Management module The Machine Park Management module makes it possible, e.g., for a workshop supervisor to obtain an overview of the systems and to view data on the utilisation of the systems. -
Page 131: Take Machine Out Of Operation
➢ Recoater blades Cleaning, checking. You will find further information on taking the machine out of operation in the Operation manual EOS P 396 manual, section 6, Taking machine out of operation. Unpacking parts With the aid of the Unpacking and sieving station the parts can be conveniently unpacked and the used powder sieved and prepared. -
Page 132: Preparing Plastic Powder
Components IPCM EOSINT P manual, section 9, Unpacking and sieving station P 3. A further EOS accessory for unpacking parts is the Unpacking stand. You will find further information on this accessory in the Accessories and Option EOS P 396 manual, section 6, Unpacking stand. -
Page 133: Preparing Plastic Powder Using The Components Of The Ipcm P Plus
You will find the mixture ratio recommended by EOS for the plastic powder in the application instructions for the related material. Necessary activities for the preparation of the plastic powder: ➢... -
Page 134: Providing Refreshed Powder To The Machine
Operation of machine & accessories EOS P 396 You will find further information on operation in the Components IPCM P plus manual, section 4, Mixing & qualification station. Providing refreshed powder to the machine The multibox with the refreshed powder is pushed to the docking station on the machine and coupled. -
Page 135: Cleaning Parts
For all other materials follow the application instructions for the related material. For the thorough post-treatment of parts EOS recommends the installation of 2 Shot-peening cabinets. In the first Shot-peening cabinet the parts can be thoroughly cleaned using compressed air, in the second finely shot-peened using glass balls as the shot-peening medium. - Page 136 EOS P 396 3. If necessary, wash off parts using warm water (max. 60 - 80 °C). EOS recommends washing off the parts with warm water. In this way parts are freed of excess adhering powder. It is also possible to clean the parts in a dishwasher (max. 60 - 80 °C).
- Page 137 8Process monitoring...
-
Page 139: Process Monitoring
➢ On initial usage of refreshed powder that has been prepared using the mixing & qualification station (MQS): before the building process. ☞ Troubleshooting, Maintenance and Spare parts EOS P 396 manual, section 4, Maintenance. Training manual • Basic training • Status 03.14... -
Page 140: Determining Shrinkage And Beam Offset
The material-dependent shrinkage and the material-dependent beam offset are determined with the aid of measurement parts defined by EOS that are part of a measurement job. Determining, adjusting material-dependent shrinkage... - Page 141 Process monitoring EOS P 396 New scaling values in the X and Y direction are calculated automatically. 5. Enter newly calculated scaling values for X and Y in the PSW in the Material dependent scaling group box and accept using OK.
-
Page 142: Determining, Adjusting Material-Dependent Beam Offset
Process monitoring EOS P 396 Determining, adjusting material-dependent beam offset The material-dependent beam offset can be measured and determined for the specific machine by comparing the beam offset set in the PSW and the beam offset measured on the measurement job. -
Page 143: Documenting Machine Data And Building Process
Backing up machine configuration The file packcft.exe packs all machine-specific files in one file with a time stamp. In case of a system crash or data loss, this file can be sent to the EOS-hotline. 1. Close PSW. Risk of data loss! packcft.exe... -
Page 144: Documenting Building Process Using The Psw
Process monitoring EOS P 396 - File mpc.cft Configuration of the machine, machine type, library files - File galvocon.cfg Exposure settings - File partman.cft Exposure types - File material.cft Material parameters, scaling, temperatures, heating control system - File hwi<Machine type>.cfg Hardware configuration - File SI_<serial_number>_<counter>.ctb... -
Page 145: Documenting Building Process Using Eostate
Select destination folder and accept using OK. • The selected job(s) is (are) exported. In case of problems with jobs, the exported job data can be sent to the EOS- hotline for analysis. Recording building temperature Using the EOSTATE Basic module the building temperatures of the individual machines, jobs and PPP can be recorded. -
Page 146: Displaying, Preparing Results, Reports, Statistics
Process monitoring EOS P 396 4. Open job list: Click Open job list button. 5. In the Job list field select the job(s) for which the building temperatures are to be recorded and accept using OK. 6. In the Feedback Form list box select the BT option and click the New Entry button. - Page 147 Process monitoring EOS P 396 4. In the Job list field select the job(s) to be exported and accept using OK. 5. Display job to be analysed using the arrow buttons. 6. Select event type: If only job events are to be displayed: •...
-
Page 148: Backing Up, Archiving Database
EOSTATE software application. In case of problems with the software, the database with the saved job data can be sent to the EOS-hotline for analysis. Note that the backup copy of the database can have a size of several hundred 1. - Page 149 9Troubleshooting and maintenance...
-
Page 151: Troubleshooting And Maintenance
The most common mechanical malfunctions on the machine or malfunctions in the sequence can be identified via error messages in the PSW and rectified. ☞ Troubleshooting, Maintenance and Spare parts EOS P 396 manual, section 3, Error messages. In the following in this manual, the process problems with which the operator could be confronted the most frequently at the start are described. -
Page 152: Scoring In The Surface Of The Powder
Clean the recoater and the recoater blades: 1. Cancel building process. See Operation EOS P 396 manual, section 6, Cancelling building process. 2. Move building platform 50 mm below the building plane: In the Building platform / Step movement group box, enter -50 in the field and click the Step movement up / down button. - Page 153 7. Close process chamber door and front valve. ☞ Operation EOS P 396 manual, section 6, Closing front valve. 8. Move building platform up 50 mm: In the Building platform / Step movement group box, enter 50 in the field and...
- Page 154 10. Load temperature job and determine building temperature. ☞ section 8, Checking, determining, setting building temperature. 11. Load a job. ☞ Operation EOS P 396 manual, section 6, Loading a job. 12. Adjust job: In the PSW delete from the job the SLI data already built.
-
Page 155: Curling Of Exposed Surfaces
Increase the building temperature in the process chamber: 1. Interrupt building process. See Operation EOS P 396 manual, section 6, Interrupting building process. 2. Increase temperature in the process chamber: On the Options menu choose the HWI… option. -
Page 156: Cracks In The Surface Of The Powder
The following procedure describes the adjustment of the job without removal of the exchangeable frame. Reduce the building temperature in the process chamber: 1. Cancel building process. See Operation EOS P 396 manual, section 6, Cancelling building process. 2. Lower building platform: On the Process menu choose the Adjust… option. •... - Page 157 5. Load temperature job and determine building temperature. ☞ section 8, Checking, determining, setting building temperature. 6. Load a job. ☞ Operation EOS P 396 manual, section 6, Loading a job. 7. Adjust job: In the PSW delete from the job the SLI data already built.
- Page 158 9. Monitor recoater alignment in the PSW in the Recoater adjustment group box in the PSW main window during the building process. See Troubleshooting, Maintenance and Spare parts P 396 manual, section 4, Checking, adjusting recoater alignment. 10. If it is not possible to rectify the problem: Check pyrometer aperture for soiling, clean if necessary •...
-
Page 159: Parts Torn Out
Cleaning the recoater blades: 1. Cancel building process. See Operation EOS P 396 manual, section 6, Cancelling building process. 2. Move building platform 50 mm below the building plane: In the Building platform / Step movement group box, enter -50 in the field and click the Step movement up / down button. - Page 160 8. Fill holes in the bed of plastic powder: Manually dose an adequate amount of plastic powder. See Operation EOS P 396 manual, section 6, Applying a powder base manually. 9.10 Training manual • Basic training • Status 03.14...
- Page 161 9. Close process chamber door and front valve. See Operation EOS P 396 manual, section 6, Closing front valve. 10. Load temperature job and determine building temperature. ☞ section 8, Checking, determining, setting building temperature.
-
Page 162: Recoater Level Not Optimal
Troubleshooting and maintenance EOS P 396 Recoater level not optimal If the powder level in the recoater is not optimal, the following problems can be caused: ➢ Lack of powder on blank layers with large areas ➢ Powder level in the recoater drops/rises from layer to layer ➢... - Page 163 EOS recommends increasing/reducing the amount dispenser in the Min. charge amount / Max. charge amount field iteratively in 10 % steps. You will find further information in the Software reference 3.6 EOS P 3 manual, section 3, Recoating II tab.
-
Page 164: Building With Soiled Plastic Powder
Accessories and Options You will find help on malfunctions in the work process on the related accessory in the Accessories and Options EOS P 396 manual. IPCM EOSINT P 3 You will find help on malfunctions in the work process on the IPCM EOSINT P 3 in the Components IPCM EOSINT P manual. -
Page 165: Maintenance
Troubleshooting and maintenance EOS P 396 Maintenance Compliance with the inspection and servicing plans is the prerequisite for effective and trouble-free work with the machine and its accessories. Follow the maintenance section in the Operating instructions manuals. Machine Cleaning the laser window The cleaning of the laser window is a very important maintenance step and can result in high costs if the procedure is not followed. - Page 166 Troubleshooting and maintenance EOS P 396 Typical causes of soiling Error image Burnt-on powder on the surface of the laser window, e.g. due to swirling up of the bed of powder. Marks along the wiping direction due to cleaning laser window when still excessively warm.
- Page 167 Then wipe again with dry cleaning paper to remove the residual moisture. You will find detailed cleaning instructions in the Troubleshooting, Maintenance and Spare parts P 396 manual, section 4, Inspection and servicing tasks. Accessories and Options You will find maintenance and servicing schedules on the related accessories in the Accessories and Options EOS P 396 manual.
- Page 168 Troubleshooting and maintenance EOS P 396 9.18 Training manual • Basic training • Status 03.14...
- Page 170 Telephone: +49 (0)89 / 893 36-0 Telefax: +49 (0)89 / 893 36-285 Internet: www.eos.info e-mail: info@eos.info Translation of the original training documentation Training manual - EOS P 396 Article number: 9241-3501 Edition: 03.14 © 2014 EOS GmbH - Electro Optical Systems. All rights reserved.
Need help?
Do you have a question about the P 396 and is the answer not in the manual?
Questions and answers