Advertisement
Quick Links
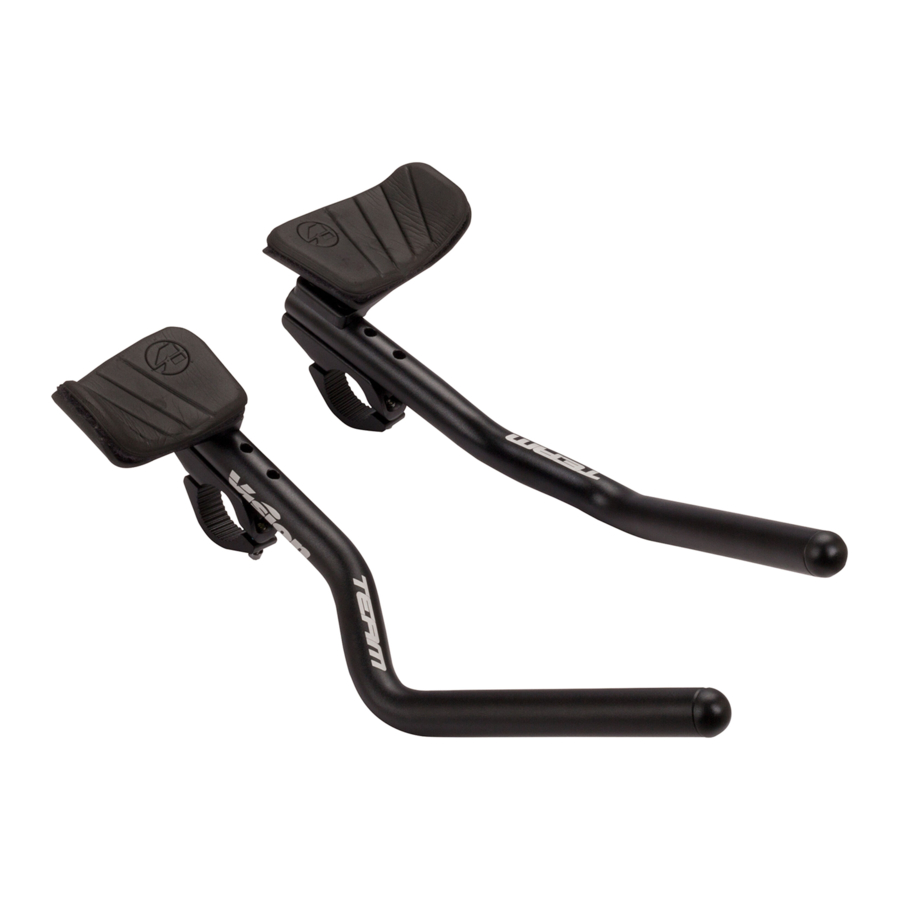
Vision Team Clip-On Handlebar Installation Instructions
Published – Dec, 2016. ZS192.v0 © Full Speed Ahead
Introduction
Congratulations on your Vision product. Please read these instructions and follow them for correct use. Failure to follow
the warnings and instructions could result in damage to product not covered under warranty, damage to bicycle; or
cause an accident resulting in injury or death. Since specific tools and experience are necessary for proper installation, it
is recommended that the product be installed by a qualified bicycle technician. FSA & Vision assumes no responsibility
for damages or injury related to improperly installed components.
Warranty
Full Speed Ahead (FSA) warrants all FSA, Vision, Metropolis and RPM products to be free from defects in materials or
workmanship for a period of two years after original purchase unless otherwise stated in the full warranty policy. The
warranty is non-transferable and valid to the original purchaser of the product only. Any attempt to modify the product in
any way such as drilling, grinding, and painting will void the warranty. For more information on warranty policy and
instructions for completing a warranty claim, check out the Full Warranty Policy found at our website:
http://www.visiontechusa.com/support/warranty-policy/
Always use a calibrated torque wrench to tighten all screws and bolts when assembling and adjusting the
vision handlebar to the bicycle. Failure to use a calibrated torque wrench can cause damage to the handlebar making it
unsafe to ride, and is not covered under warranty. Check bolt and screw torque before each ride to ensure they have not
loosened during use.
Periodically inspect your aerboars for any cracks, chips, scratches, and any other visible damage. In the
event of an accident do not ride the bicycle until the handlebars have been inspected by an experienced mechanic as the
aerobars may be damaged or weakened even if no visible damage is apparent. If there is any visible damage, the
aerobars should not be used any further and replaced.
Specification
These instructions are for the installation and adjustment of the following Vision Brand components only:
Item Number / Model Name HB-RO-a410/SB / Team Clip-on Bar-Close (1-Piece)
HB-RO-a420/JB / Team Clip-on Bar-Open (2-Piece)
Components
Follow the assembly order in the illustration:
① Handlebar
② Clamp Bolts (16 mm)x4
③ Lower Clamp x2
④ Upper Clamp x2
⑤ Armrest Mount (L & R) x2
⑥ Aero Extension (L & R) x2
⑦ Aero Extension Bolts (35 mm) x2
⑧ Armrest Plates (L & R) x2
⑨ Washer x4
⑩ Armrest Plates Fixing Bolts (10mm) x4
⑪ Adhesive Velcro Strips x2
⑫ Armrest Pad x2
⑬ Aero Extension Front Plug x2
⑭ Aero Extension Rear Plug x2
Advertisement

Related Manuals for Vision TEAM CLIP-ON S-BEND


Summary of Contents for Vision TEAM CLIP-ON S-BEND
- Page 1 Warranty Full Speed Ahead (FSA) warrants all FSA, Vision, Metropolis and RPM products to be free from defects in materials or workmanship for a period of two years after original purchase unless otherwise stated in the full warranty policy. The warranty is non-transferable and valid to the original purchaser of the product only.
- Page 2 6. Press Aero Extension Front and Rear Plugs ⑬, ⑭ in to aero extension. Use only supplied Vision bolts for installation. Using bolts other than original supplied bolts may cause damage to extension bar threads resulting in armrest plate position deflection while riding, resulting in loss of control of bicycle and can cause serious accident or injury.