
Related Manuals for Wahsega WL-SPKR-SMT-CAR


Summary of Contents for Wahsega WL-SPKR-SMT-CAR
- Page 1 Sound Reinforcement Input Panel Installer’s Guide Getting Started This step-by-step guide will help you install your Wahsega Sound Reinforcement Input Panel.
-
Page 2: What You Will Need
What You Will Need Wahsega speaker Compatible models: WL-SPKR-SMT-CAR WL-IPD-SPKR-510-CAR WL-SPKR-SMT-INF WL-IPD-SPKR-510-INF WL-SPKR-SMT-2R WL-IPD-SPKR-510D-CAR WL-SPKR-22-CAR WL-IPD-SPKR-510D-INF WL-SPKR-22-INF WL-IPD-SPKR-520-CAR WL-SPKR-22-2R WL-IPD-SPKR-520-INF WL-IPD-SPKR-540-CAR WL-IPD-SPKR-540-INF Network cable Cat 5e or Cat 6 straight cable Phillips head screwdriver Audio cable ... - Page 3 Connecting Your Sound Reinforcement Panel 1. At speaker, connect a Cat5e or Cat6 straight cable to the “WALLPLATE INPUT” RJ45 input. Do not use a crossover cable. 2. Connect this cable to RJ45 connector at Sound Reinforcement Panel (no more than 20m away). Enlarged Area Cat5e or Cat6 cable Sound Reinforcement Installation Guide...
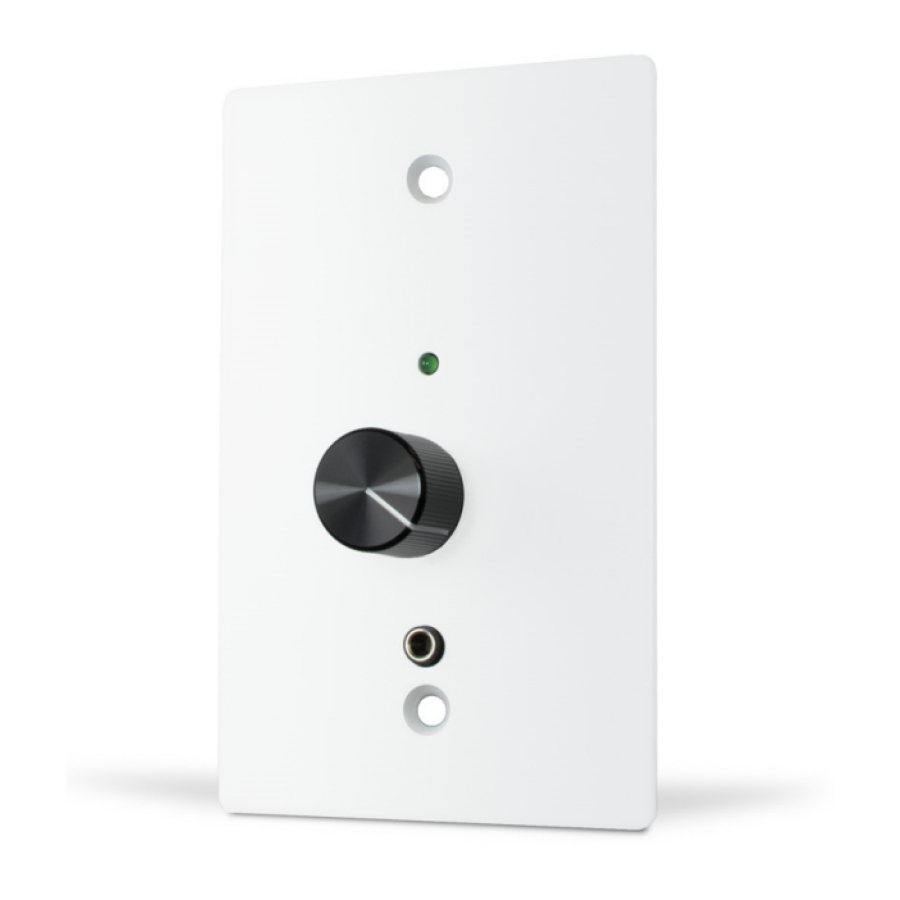
- Page 4 3. Fasten the Sound Reinforcement Panel’s faceplate to a single- gang backbox using the included screws. Sound Reinforcement Installation Guide Page 4 10.22.2020...
- Page 5 4. Connect a 3.5mm auxiliary cable to the audio source to be streamed. 5. Press the activation button to turn audio on and off. Rotate knob to adjust volume. Green status LED will turn on when the Sound Reinforcement Panel is on and activated. Status light Activation button ...
- Page 6 Dimensions Sound Reinforcement Installation Guide Page 6 10.22.2020...
- Page 7 Standards Compliant This product is designed and manufactured in the USA. ROHS compliant Temperature rating -40C to +60C. Sound Reinforcement Installation Guide Page 7 10.22.2020...
- Page 8 Wahsega Sound Reinforcement Panel WL-SPKR-RSR-W Installation Guide Sound Reinforcement Installation Guide Page 8 10.22.2020...