Table of Contents
Advertisement
Quick Links
Advertisement
Table of Contents

Related Manuals for Nogueira ROTAFLOW-1300

Summary of Contents for Nogueira ROTAFLOW-1300
- Page 1 Manual de Instruções...
-
Page 3: Introduction
ROTAFLOW. We recommend you read it carefully before putting the machine into operation. Nogueira S/A will always be at your disposal to answer any inquiry, offering you efficient and permanent technical assistance. An identification platelet is fixed to the machine, containing its manufacturing serial number. -
Page 4: Table Of Contents
INDEX Introduction Environment Safety Safety stickers Getting to know the ROTAFLOW Application Operation Actuation Items that come with the Rotaflow Agitators Coupling to the tractor Leveling Working height Preparing and adding the Cardan shaft Application rate adjustment Discharge point adjustment Using the adjustment table Calibration test Working width... -
Page 5: Environment
ENVIRONMENT Nogueira constantly worries about the environment preservation during the development as well as with the use of ecologically appropriate processes and materials in the manufacturing of our products. PROTECT AND RESPECT THE ENVIRONMENT, bearing in mind that its preservation is a social responsibility of all of us. -
Page 6: Safety
SAFETY CAUTION! Here at Nogueira we worry about the safety of the people involved in the operation and Alert for situation that can result in maintenance of the Distributor. In the project accidents. Contains instructions and development, we think about every detail to... - Page 7 SAFETY • • Observe the machine surroundings Be especially cautious when coupling before putting it into operation. Keep and uncoupling the machine from the children, animals and watchers at safe tractor! distance and out of the distribution • In case you observe vibrations, different range.
- Page 8 SAFETY • • Never leave the tractor with the When turning the machine around, pay machine on. Stop the engine, turn off attention if there is enough space to the power take off, hit the parking brake maneuver it! and remove the key from the ignition •...
- Page 9 SAFETY • Avoid the contact of the product with skin, eyes etc. Wash your hands and arms with abundant water and soap at the end of each work shift, especially before eating. • Fertilizers with nitrate can cause risk of explosion when in contact with fire. •...
-
Page 10: Safety Stickers
SAFETY Safety stickers: Turn the tractor off and remove the key Read the instruction manual before from the ignition before performing turning the machine on. regulations, maintenance Not following this instruction may result lubrication. in severe accident. Risk of wounds by mobile parts. Not following this instruction may result in severe accident. - Page 11 SAFETY Safety stickers: Never try to locate a fluid leak with your Keep distance from the machine hands. Use cardboard or wood. during operation. Risk of penetration on the skin, which Risk of wounds caused by mobile can cause infections and gangrene. parts.
-
Page 12: Getting To Know The Rotaflow
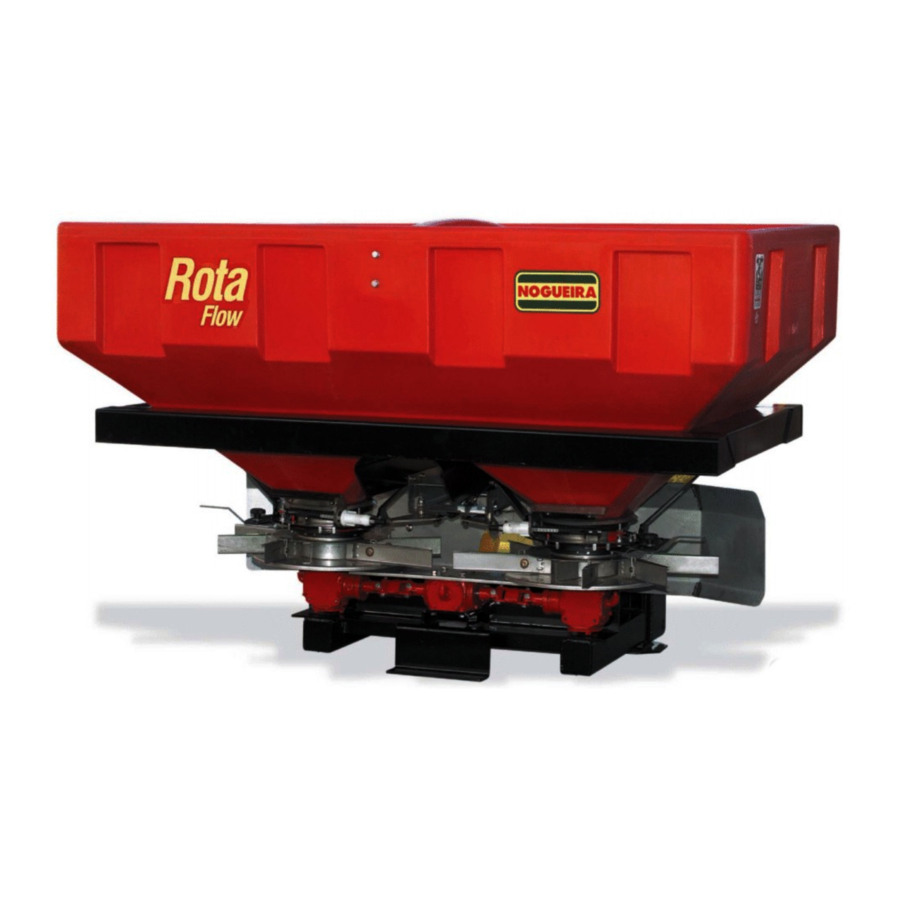
GETTING TO KNOW THE ROTAFLOW fig.1 fig.2 fig.3 1 Reservoir 2 Structure Paddle 3 Protection 10 Control bar 4 Launcher rotor (left) 11 Flow directing lever 5 Transmission box (left) 12 Flow dosing lever 6 Transmission box (central) 13 Coupling pins 7 Transmission box (right) 14 Cardan shaft 8 Launcher rotor (right) -
Page 13: Application
APPLICATION ACTUATION ROTAFLOW was designed to distribute ROTAFLOW operates coupled fertilizers and seeds with maximum agricultural tractors, category II, with remote precision. It’s a double centrifugal command valve. It’s driven by through the distributor adaptable to the hydraulic power take off with minimum power at 30 system of agricultural tractors. -
Page 14: Agitators
AGITATORS Your Rotaflow comes standard with two options Agitators: SHORT and LONG. These should be used according to the type of product to be distributed as follows: SHORT AGITATOR: to distribute granular fertilizers and seeds (this follows Shaker factory fitted); LONG AGITATOR: to distribute Powdered Fertilizers and ammonium sulfate (also supplied with the machine);... -
Page 15: Coupling To The Tractor
PREPARAÇÃO COUPLING TO THE TRACTOR To make it easier and safer, it’s and lastly, the upper arm (3 point), recommended to choose a plane place to locking the respective counter pins. carry out the coupling of the Distributor to the tractor. NOTE: For a standard distribution, the Distributor must be coupled in the upper position (fig. -
Page 16: Leveling
PREPARAÇÃO LEVELING WORKING HEIGHT The even distribution depends on an The discs must launch the product at 75 adequate leveling of the machine. cm from the ground. Using the tractor Put the tractor with the Distributor coupled hydraulic system, lift the Distributor until the indicated height (fig. -
Page 17: Preparing And Adding The Cardan Shaft
PREPARAÇÃO PREPARING AND ADDING THE CARDAN SHAFT If there is no possibility of using it in the Before coupling the Cardan shaft you must original size, mark the Cardan shaft in the check if its length is appropriate to the spots where it must be cut. - Page 18 (pto turned on, whitout the articulation in any additional load) condition. • It is the authorized Nogueira reseller’s fig.20 exclusive responsibility to execute the preparation of the Cardan shaft and Turn off the power take off when the first coupling of the machine.
-
Page 19: Application Rate Adjustment
PREPARAÇÃO APPLICATION RATE ADJUSTMENT DISCHARGE PONT ADJUSTMENT In the rear part of your Distributor there are The application rate adjustment also two control bars (fig. 21), graduated from 0 requires a determined launching point. a 90. Each bar has a limiter, which, when Through the TIMING (fig.23), it’s possible moved, determines the dimension of the to establish the exact location in which the... -
Page 20: Using The Adjustment Table
The adjustments must be made from the characteristics of the adequate fertilizer for your crop. Based in these information, you may adjust the Note: Distributor using the charts, as exemplified below. USING THE ADJUSTMENT TABLE Suppose you want to spread NITRATE (NITRAPRILL), in the following conditions: ... -
Page 21: Calibration Test
PREPARAÇÃO CALIBRATION TEST The distribution charts were determined using good quality fertilizers and modern equipment. Practical circumstances, nevertheless, may present different results in relation to the tables, making it necessary to run a calibration test. Through this test, it’s possible to detect, and if necessary, correct any differences in the characteristics of the fertilizers and also in the application rate. - Page 22 CALIBRATION TEST (continuation) WARNING Always read the safety instructions from fig.29 the fertilizer manufacturer before handling it. Use protective equipments Load the Distributor with the fertilizer such as gloves, clothes, booths, etc. until half the reservoir, approximately. Make sure you follow all the steps mentioned.
-
Page 23: Working Width
After the test, remove the calibration box CALIBRATION TEST (continuation) and assemble the launcher paddles again in the original positions (fig. 36 e 37). Turn the tractor off and remove the key from the ignition. WORKING WIDTH 4 launcher paddles are supplied with the Distributor, with lengths of 135, 185, 235 and 285 mm. -
Page 24: Adjustments For Low Application Rates
ADJUSTMENTS FOR LOW Note: APPLICATION RATES The product to be distributed will cover an Reduced application rates make the area of 180º in the terrain, that is, the distribution of the fertilizer or seed difficult. distribution width chosen (X), will be Rotaflow incorporates a discharge device maintained in the right, left and back of the... - Page 25 ADJUSTMENTS FOR LOW APPLICATION RATES (continuation) The discharge device is controlled by a lever, as shown below: fig.40 POSITION 1 The three outlets remain opened and may be regulated. This is the standard position of Rotaflow. POSITION 2 In this position, two outlets are completely closed, and only one can be regulated.
-
Page 26: Regulation Using The Discharge Device
REGULATION USING THE DISCHARGE DEVICE Type of fertilizer: NP 26 - 14 Working width: 15 meters Tractor speed: 8 Km/hour TRACTOR Application: 100Kg/ha. APPLICATION R Recurring to the table, in the column for 8 Km/h we find 105 Kg/ha (distribution closer to 100 Kg/ha). -
Page 27: Operation
OPERAÇÃO By decreasing the tractor speed, the OPERATION application rate increases. Before beginning the work, the operator must be aware of the basic safety rules to Do not start the Distributor while it is operate the Distributor. In case there are (partially) full and over the ground to avoid any questions, we recommend you to get mechanical damages. -
Page 28: Turn And Distribution At The Edges Of The Field
WORKING WITH THE CORRECT TURN AND DISTRIBUTION AT ADJUSTMENTS THE EDGES OF THE FIELD A satisfactory distribution will only be If the distribution will be carried out with a obtained with an appropriate adjustment disc turned off and with a deflector plate of the Distributor and accurate methods of (using the distribution trail), proceed as... -
Page 29: Distribution In The Unilateral Limit (With Deflector Plate) - Method A
OPERAÇÃO If you’re going to distribute with a disc turned off and with the deflector plate (without using the distribution trail) then proceed as follows: Stop and turn: Move forward with the machine until the minimum distance possible at the end of fig.45 the field and stop the distribution, DEFLECTOR... - Page 30 Put the deflector plate. fig.48 The Distributor must be regulated for the height of 75 cm from the ground. Drive in the first passage along the edge of the field, with the center of the tractor at 3 meters from the edge, approximately (fig.
-
Page 31: Distribution In The Unilateral Limit (With Deflector Plate) Method B
DISTRIBUTION IN THE UNILATERAL After the end of the distribution on the LIMIT (with deflector plate) Method B – edge: Open the disc that was closed, without using the distribution trail. performing the regulations indicated in the distribution chart. Restart the distribution normally, driving ... -
Page 32: Maintenance
MANUTENÇÃO DOSAGE PLATES MAINTENANCE There must be a clearance between the The periodic maintenance, if performed discharge router (A) and the distribution adequately, is the most efficient way to disc (B) of 0.5 to 0.8 mm (fig.52). guarantee maximum efficiency and durability to your ROTAFLOW. - Page 33 MANUTENÇÃO DOSAGE OUTLETS INSPECTION POSITION “0” fig.55 fig.53 Put the two control bars in the position “0”. This clearance can be adjusted through the 3 screws (E) and nuts that fix the plate in the machine’s structure (fig. 53). The dosage plates must be centrally assembled exactly over the distribution discs.
- Page 34 0.5 mm. Note: In case of doubts, your NOGUEIRA reseller has technicians that are prepared to carry out the necessary regulations. DISCHARGE ROUTER ADJUSTMENT In order to check, and if necessary, adjust the fertilizer discharge point, the following regulation must be performed in the fig.57...
- Page 35 Loosen the key A (fig.60) and move The adjustment must be performed on the lever to the position “Q” (fig.61). both plates. In case of doubts, your NOGUEIRA reseller has technicians that are prepared to carry out the necessary regulations CONSERVATION position “Q”...
-
Page 36: Lubrication
MANUTENÇÃO NOTICE: When cleaning the machine, the LUBRICATION pressure in the lock rings must not exceed 3 bar. The regular and adequate lubrication is the best guarantee for good operation and durability of the Distributor. The indicated EVERY SEASON: breaks take into account the normal It’s recommended to inspect the Distributor working conditions. -
Page 37: Accessories
MANUTENÇÃO ACCESSORIES CALIBRATION BOX DEFLECTOR PLATE For the distribution on the edges of the field, it’s possible to use a special deflector plate fig.66 which precisely fig.64 narrows distribution profile in only one side. The With the aid of a special calibration box, deflector plate may be assembled on the it’s possible to easily gather the amount of right or left side of the Distributor. -
Page 38: Troubleshooting
TROUBLESHOOTING FERTILIZER FAILURES OPERATIONAL FAILURES Incorrect disc or power take off rotation. The fertilizer quality can vary a lot. The presence of lumps may considerably Distributor incorrectly assembled in reduce the amount of fertilizer used. the tractor. ... -
Page 39: Field Trail Test
FIELD TRAIL TEST Due to a large fertilizer variation, it became necessary to check the distribution adjustments from your Distributor. Notice that, normally, by using the granule size box and determining the density, it’s possible to find the correct adjustment in the distribution charts. Nevertheless, this must be the start point, before the field trail test. - Page 40 FIELD TRAIL TEST (continuation) In the tables below, you may find the correct distances between the centers of the trays, for different working widths: WORKING WIDTH (m) DISTANCE BETWEEN THE TRAYS (m) 9.00 1.50 12.00 2.00 15.00 2.50 18.00 3.00 20.00 3.33 21.00...
- Page 41 FIELD TRAIL TEST (continuation) 4. Now, with the aid of a funnel, pour the product collected in the trays inside the respective tubes. Tray number 1 in tube number 1, and so forth. fig.73 fig.72 What you see now in the tubes is the overlap of the distribution pattern. In each tube there must be approximately the same amount of fertilizer.
-
Page 42: Using The Distribution Charts
DISTRIBUTION CHARTS The distribution charts have been compiled with extreme caution, at VICON’s Test Center in Nieuw-Vennep (Netherlands), especially for the Distributor ROTAFLOW NOGUEIRA, designed for the fertilizer types listed in this manful, in the following working widths: 10 - 12 - 15 -18 - 20 - 21 - 24 meters. - Page 43 DISTRIBUTION CHARTS (continuation) Place the granule all over the compartment, behind the sieve with the largest mesh (4.75). Agitate the box until the smaller granules fall on the next compartment. Hold the box so that the fertilizer is leveled in the several compartments and with the marks facing towards you.
-
Page 44: Tractor Speed Incompatible With The One Required
DISTRIBUTION CHARTS (continuation) Example: Granule size: 0-30-70-0 Density: 1.0 Kg/l. The table shows that in this case the best choice is NPK 17-17-17, Hydro Agri. Suppose you want to distribute 300 kg/ha of this fertilizer, at a working width of 21 m and speed of 8 km/h. - Page 45 TRACTOR SPEED INCOMPATIBLE WITH THE ONE REQUIRED (continuation) After calculating the FLOW (kg/min), it’s possible to calculate the APPLICATION RATE (kg/ ha), using the following equation: APPLICATION RATE = FLOW X 600 WORKING WIDTH X TRACTOR SPEED For example, suppose the result from the calibration test is 68 k/min, the distribution width is 21 m and the tractor speed is 8 km/h.
-
Page 46: Other Brands Or Types Of Fertilizers
OTHER BRANDS OR TYPES OF FERTILIZERS Proceed as described next if you wish to distribute a fertilizer that is not listed in these tables: 1- Use the granule size box to measure the size of the fertilizer. 2- Check the density (fill a one-liter container with the fertilizer, agitate it 5 times, level it and weight it). -
Page 47: Technical Specifications
TECHNICAL SPECIFICATIONS ROTAFLOW-1300 ROTAFLOW-1500 Actuation power (at the power take off) from 30 HP from 30 HP Rotation at the power take off (RPM) Reservoir capacity (liters) 1300 1500 Working width 9 to 24 m 9 to 24 m Application rate (Kg/ha) -
Page 48: Warranty Certificate
09 (nine) last months - additional warranty granted by Nogueira Máquinas Agrícolas. 2- This warranty is based on Nogueira's commitment to repair or provide free of charge in its factory any parts that in their sole discretion have manufacturing defects. The warranty covers only defects in material and / or workmanship, and labor, freight and other expenses are not covered by this certificate. - Page 49 1. Complete the TERM OF DELIVERY with the requested information and sign; 2. Photograph the completed TERM OF DELIVERY and the Sales Invoice; 3. Access the site www.nogueira.com.br and click on the ‘TERM OF DELIVERY’ tab or go to nogueira.industriasnb.com/entrega ;...
Need help?
Do you have a question about the ROTAFLOW-1300 and is the answer not in the manual?
Questions and answers