
Summary of Contents for VGO Active Presence
- Page 1 VGo User Guide v1.4.1 User Guide Page 1 © Copyright 2011 VGo Communications, Inc. All rights reserved.
-
Page 2: Table Of Contents
Using the Blue Button Touchpad ..................10 Step 2 - Setting up the Wireless Connection ..............11 Step 3 - Creating a VGo account and Downloading the VGo PC App ......13 Step 4 – Authenticating your VGo .................. 15 Enabling VGo to Automatically connect to the next WiFi Access Point while driving (sometimes referred to as “Roaming”) ................. - Page 3 Advanced Settings ......................40 System Information ......................40 Version Information ......................41 Network Settings ......................42 Muting your audio and video on your VGo ..............43 Admitting Visitors Manually.................... 44 Using your VGo to call out ....................44 Re-charging the battery ....................45 Charge Dock placement ....................
-
Page 4: Introduction
VGo is a revolutionary communications experience. About this VGo System This VGo is a truly remarkable device – it will change the way you work, interact with others and give you more time. There are a few things to remember: ... -
Page 5: Important Safety And Operational Information
VGo is for indoor, dry location use only. Do not disassemble. Refer servicing only to qualified and authorized personnel. There are no serviceable parts inside the VGo, other than the battery and fuse. Use standard North American 120 Volt outlet only. - Page 6 Install the charging dock in a location that can be easily accessed by the VGo. Allow at least 1 foot of space on either side of the charging dock. Be sure there is at least 4 ft of clear space above the charging dock.
-
Page 7: Network Requirements For The Vgo
Network Requirements for the VGo Active Presence is enabled by a remote user who is connected to a VGo through a network. The users and VGo’s “presence” and connectivity are managed by VGoNet, an intelligent cloud- based service that is invisible to users. -
Page 8: Network And Pc Requirements For Remote Users
VGo User Guide v1.4.1 Network and PC Requirements for Remote Users The person who will be operating the VGo remotely must have a PC with the following minimum configuration: Windows 7, Vista or XP (with service pack 3). Windows 7 is recommended. -
Page 9: Setting Up The Vgo
Setting up the VGo Setting up a VGo for the first time will take about 15 minutes. If you are not already a registered user on vgocom.com, it will take an additional 5 minutes to setup your account and download your VGo PC App software onto your PC. -
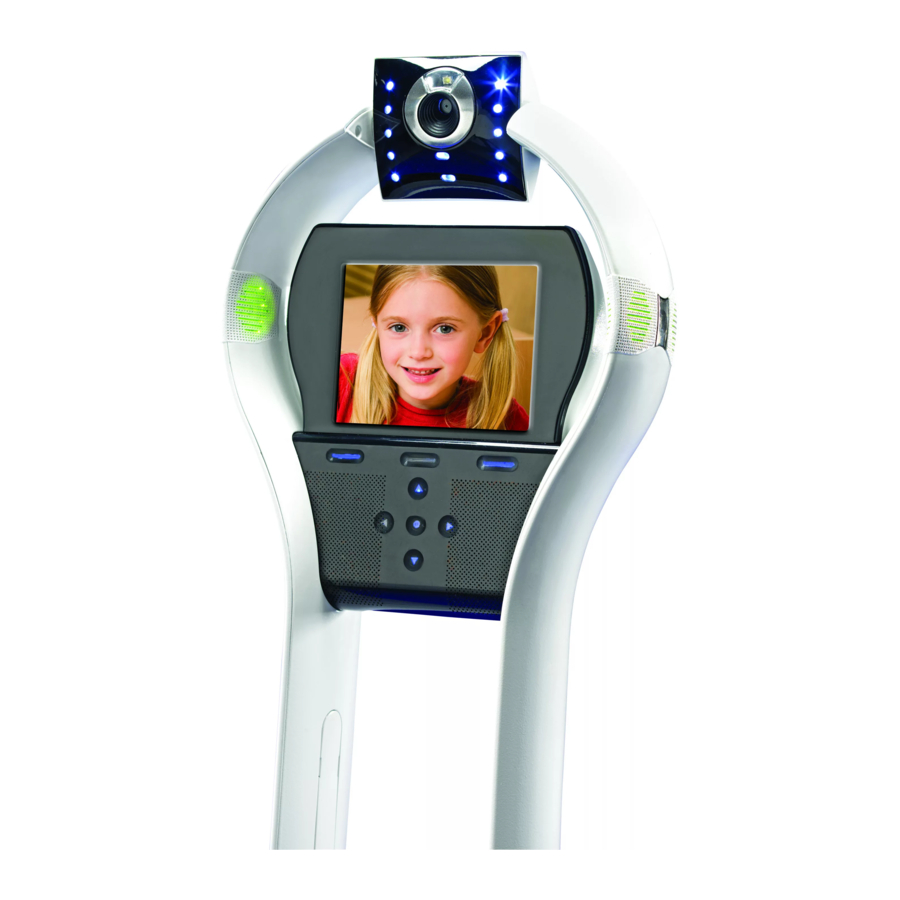
Page 10: Using The Blue Button Touchpad
VGo User Guide v1.4.1 Inserting the battery Remove the accessories box from the bottom of the VGo shipping box and ensure that it contains the following items: o Charge dock o AC adapter and power cord for the charge dock... -
Page 11: Step 2 - Setting Up The Wireless Connection
The battery should have enough power for the VGo to turn on and be setup. If the VGo does not turn on, insert the bayonet end of the AC power cord into the socket located just below the VGo’s power button on the rear of the VGo and the other end into a power outlet. - Page 12 The VGo will connect to the network – this may take a minute or two. A green check mark will appear on the screen and then display a new screen that has an activation key and says “Please login to vgocom.com . . . ”. Leave your VGo at that screen and proceed to Step 3 –...
-
Page 13: Step 3 - Creating A Vgo Account And Downloading The Vgo Pc App
To activate your VGo (establish the association between you and your new VGo), you’ll need a VGo account. To use your VGo you’ll also need to download the VGo PC App software from the vgocom.com website onto your PC or laptop. - Page 14 8) Click SAVE at the bottom of the page. Your changes will save - you now have an account and are ready to download the VGo PC App. 9) Select Download Software. 10) Click on Download Now. A new page is displayed. Follow the instructions to download and install the software.
-
Page 15: Step 4 - Authenticating Your Vgo
The download and install are complete when the popup windows close and you have this shortcut icon on your desktop. If you are setting up a new VGo, keep your web browser open and stay logged in since you’ll need to authenticate the new VGo with the network. -
Page 16: Enabling Vgo To Automatically Connect To The Next Wifi Access Point While Driving (Sometimes Referred To As "Roaming")
Click Submit – to save the changes and then Log Out. You’re now ready to use your new VGo. At some point you’ll need to find a convenient place to put the Charge Dock. See the Section – Charge Dock Placement. -
Page 17: Launching The Vgo Pc App
If you are at the edge of the range of your WiFi network, and no stronger access points are available, VGo will re-connect to its current access point and then scan again after about 20 seconds. If you see VGo “Searching for Network” more than once within about 30 seconds, you should assume that you have reached the outside range of the WiFi network and go back 10 or 15 feet to remain in good WiFi operating range. - Page 18 Only designated users who have been granted permission by the manager of each VGo, have access to VGo(s). If a VGo is not in your contact list – you cannot access it. Contact the manager of that VGo if you want access.
-
Page 19: Using Your Vgo Pc App
Offline Contacts again, the check mark will disappear, and only online VGo’s and contacts are shown. After you click on the camera icon – the VGo video window will be opened. You will see yourself until you are connected to the remote VGo. You will then see (the view through the VGo’s camera) and hear (the sound picked up by the VGo’s microphones) as if you were there. -
Page 20: Diagram Of Vgo Functions And Controls
Mute Button (see below) Hangup Button Lights Button (see below) Look Button (see below) Dock icon (house) – indicates the VGo is on the dock Charging icon (lightning bolt) – indicates the VGo battery is actively charging. It is not displayed if the battery is fully charged. -
Page 21: Muting The Audio And Video
The distant VGo will not display your video image or reproduce your voice (people in the presence of the VGo cannot hear or see you) o You will still be able to see and hear from the VGo, unless it is also muted ... -
Page 22: Looking Around (Without Moving)
Move your mouse pointer over the video window to illuminate the left and right arrows at the bottom of the window. Click on the left arrow to look left (VGo will rotate in place) or click on the right arrow to look right. You can also use the arrow keys on your PC/laptop keyboard. -
Page 23: Moving Around Remotely - Driving The Vgo
While holding down the mouse button, slide the pointer in the direction you want to go. The VGo will move in the direction of the arrow. Release the button to stop. The VGo’s speed is determined by how far you are from the starting point at the bottom center. -
Page 24: Taking A Snapshot
Using Auxiliary Camera Lights A set of small LED lights surround the camera on the VGo. These lights are normally off. They can be toggled on and off remotely. In normal lighting conditions, they will not show a noticeable difference in the video picture. -
Page 25: Toggling The Local Video Window (Pip) On And Off
Toggling the Local Video Window (PIP) ON and OFF When you first connect to VGo, overlaid in the upper right hand corner of the video window is a small video window that displays live video of what the far end is seeing – usually you! ... -
Page 26: Adjusting The Vgo's Volume Remotely
Docking the VGo to Re-charge the Battery VGo can dock itself to re-charge its battery. The remote user must drive the VGo in front of the dock so that both devices “sense” each other. VGo can charge on any VGo charge dock. -
Page 27: Making A Call To Another Vgo Pc App User (Pc To Pc)
The VGo will position itself correctly in front of the dock, turn around so it is not facing a wall, and then back onto the dock. Once the VGo is on the charging dock the label will change to Docked and the Docked icon (house) and Actively Charging icon (lightning bolt) will appear above the battery gauge. -
Page 28: Adding A Contact To Your List
At the bottom of your VGo / Contact list, click on Add. Enter the username of the person you want to add. If you want to add a VGo, you’ll need to enter the username of the manager of that VGo. -
Page 29: Changing Settings In Your Vgo Pc App
Click on SETTINGS on your VGo PC App (located at the bottom). General Settings Start-up Settings: o To launch the VGo PC App when your computer starts, check the “Launch” box. o To auto-answer video calls that come into your PC from another user, check the corresponding box. ... -
Page 30: Driving Settings
Auto Camera Tilt o Auto Camera Tilt enables VGo to automatically tilt the camera as you drive (driving slower makes the camera tilt to the ground directly in front of it, and driving faster makes the camera tilt up, to see what is ahead). -
Page 31: Audio Settings
Audio Settings Microphone o This is where you select the microphone that is used by the VGo PC App. If there is just one microphone, the VGo PC App will select it for you. Many computers have a built-in microphone. In the instance that you have an external microphone plugged in, you will need to specify which of those you want to use for audio input. -
Page 32: Video Settings
Video Settings Capture Device o Identifies the camera that is used by the VGo PC App Preview o Turns on the camera and displays the image it sees in a window. This enables you to see that the camera is working properly. -
Page 33: About Tab
VGo User Guide v1.4.1 About tab This is where you will find the software version number for your VGo PC App Page 33 © Copyright 2011 VGo Communications, Inc. All rights reserved. -
Page 34: Operating The Vgo Locally
The VGo is intended to be left on at all times – that way someone can visit any time, even if they are somewhere else. The VGo can be carried without turning it off. For example, you can carry it for use on another floor or building within your facility. -
Page 35: Using The Vgo's Handheld Remote Control
The MENU key always displays the Home menu. o The MENU key does not function when the VGo is in use by a remote visitor. MUTE stops the transmission of your audio and video to the far end to give privacy to people who are with the VGo. - Page 36 The LCD will continuously display a diagram of the keys on the handheld remote control that are available to drive the VGo. It is recommended that the user place the VGo in an open space as they learn how to drive with the handheld remote control.
-
Page 37: The Vgo Lcd Display And Menus
The VGo LCD Display and Menus When your VGo is not in use, or it hasn’t been used for about five minutes, the LCD will display a screen saver such as the date and time, or a series of photos or it will be turned off. To get to the previous screen, just touch any of the touchpad keys or press any key on the handheld remote control. -
Page 38: Contacts
VGo User Guide v1.4.1 Contacts Contacts is a list people or locations that can access the VGo. You can also initiate a connection to those contacts using the VGo. Use UP/DOWN ARROW KEYS to highlight a contact, touch the center OK button to select. -
Page 39: Vgo Settings
VGo Settings Settings are a set of screens that details information about your VGo. This is also where you can set specific VGo behavior particularly with respect to your privacy. Most settings are changed by toggling using the center OK button. Other settings are changed by touching the left or right ARROW KEYS. -
Page 40: Advanced Settings
The Cliff Detection setting may be set to OFF if the type of flooring, where VGo is being used, triggers false warnings. o Cliff Detection prevents the remote user from driving the VGo over a drop-off such as a stair or ledge. -
Page 41: Version Information
This information is primarily for your VGo support representative. o Software version number - You may be asked for the version number of the Application software that is currently loaded into the VGo. This user guide reflects Application version 1.4.0. -
Page 42: Network Settings
VGo automatically sense when the network is getting weak and then switch to the next access point as you are driving from one place to another. In the wireless world this feature is called Roaming (no - your VGo will not roam about on its own, VGo only moves when you drive it). -
Page 43: Muting Your Audio And Video On Your Vgo
VGo. When the VGo is muted, the remote user cannot see or hear anything from the VGo. People who are in the presence of the VGo will still be able to see and hear the remote user. -
Page 44: Admitting Visitors Manually
If you have changed the SETTINGS to manually admit incoming visitors, the visitor will not be admitted until you tell the VGo to answer, much in the same way that you answer the door in your home when someone knocks. If you don’t answer the door, no one comes in. -
Page 45: Re-Charging The Battery
Once the VGo is successfully docked, the battery charge level icon on the VGo will change to look like this: The VGo can also be docked by the remote user – see the section on Using the VGo PC App. If the charge dock is not available: ... -
Page 46: Getting Vgo Serviced
You can also consult the Support section on vgocom.com Also available from your reseller are accessories and replacement parts including: Replacement and large capacity (12 hr) batteries Hand held remote controls Charge docks Page 46 © Copyright 2011 VGo Communications, Inc. All rights reserved. -
Page 47: Appendix 1 - Configuring Eap-Tls Authentication For Wifi Connectivity
Appendix 1 – Configuring EAP Authentication (802.1X) for WiFi connectivity Before configuring the VGo, you must have your EAP authentication certificate(s) (files) loaded on a USB drive (if required). You might have one file that has the entire certificate verification chain or there could be two files (client certificate and authentication chain). - Page 48 DNS Nameserver The VGo will then connect to the network – this may take a minute or two – you will see Please Wait . . . Connecting to . . . A green check mark will appear on the screen when the connection is successful.
Need help?
Do you have a question about the Active Presence and is the answer not in the manual?
Questions and answers