Table of Contents
Advertisement
Quick Links
Advertisement
Chapters
Table of Contents

Summary of Contents for Aiqidi Smarine AiF5PS
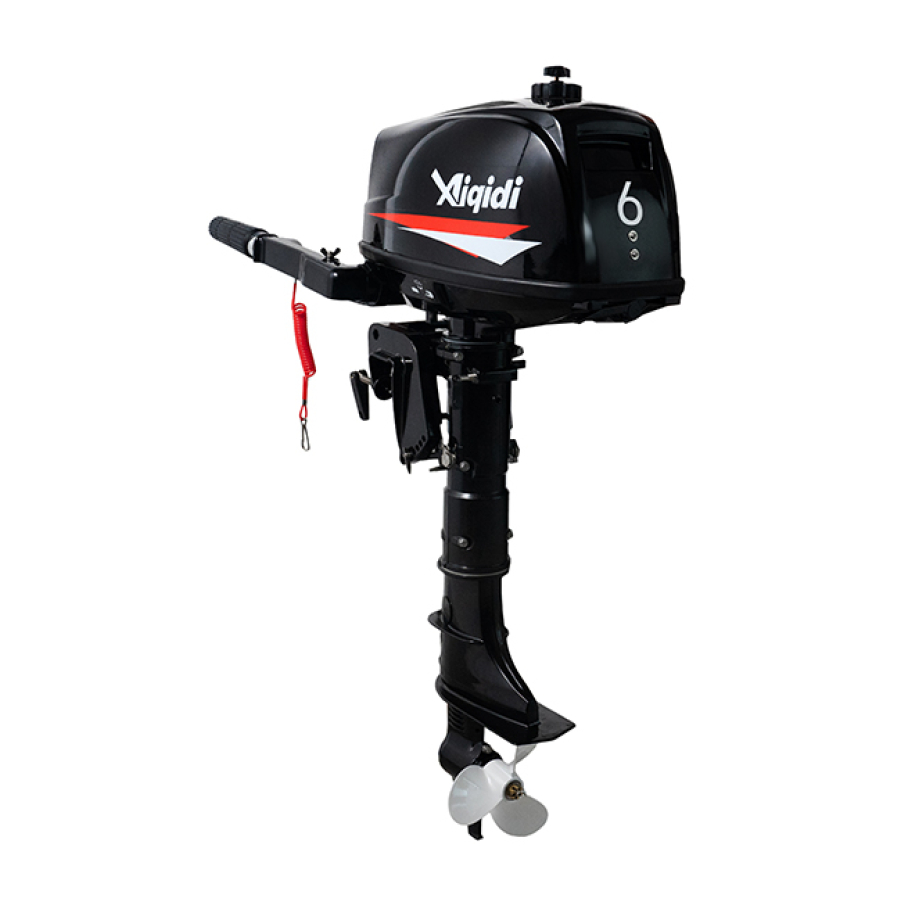
- Page 1 Außenbordmotor Bedienungsanleitung AiF5/6/8PS www.smarine.de...
- Page 2 Diskrepanzen zwischen dem Handbuch und Ihrem Motor kommen. Sollten sich daraus Verständnisschwierigkeiten ergeben fragen Sie bitte Ihren AIQIDI-Händler. • Daten, Bilder oder Erklärungen können nicht als Klagegrund gegen AIQIDI benutzt werden, es handelt sich um unverbindliche Informationen, für alle unklaren Fragen,...
-
Page 3: Table Of Contents
Inhalt 1.1 Hauptbaugruppen ..............Seite 01 1.2 Allgemeine Hinweise ..............Seite 03 1.2.1 Spezifikationen ..............Seite 03 1.2.2. Treibstoff ................Seite 04 1.2.3. Treibstoff ................Seite 04 1.2.2. Treibstoff ................Seite 04 2.2 Den Motor richtig einfahren............Seite 07 2.4 Tanken................... Seite 08 2.5 Motor starten................ -
Page 4: Hauptbaugruppen
1. Hauptbaugruppen und allgemeine Hinweise Hauptbaugruppen 1. Motorhaube Klemme 2. Motorhaubenverschluss/Tragegriff Klemmschrauben 3. Schalthebel 12.Tragegriff 4. Sicherheitsseilöse 13.Drehgaseinsteller 5. Steuerungseinstellschraube 14.Drehgasgriff Kavitationsplatte 15.Steuerspinne Propeller 16.Notstop-Schalter Kühlwassereintritt 17.Choke 9.Trimmungsstab 18.Handstarter... - Page 5 Nur für Außenborder mit eingebautem Tank. 1. Luftschraube 2. Tankverschluss 3. Einbautank 4. Brennstoffhahn (geschlossene Position) Warnung: • Der mitgelieferte Brennstofftank sollte nur während des Betriebs als Tank dienen. Er eignet sich nicht als Aufbewahrungsbehälter für Brennstoffe über einen längeren Zeitraum.
-
Page 6: Allgemeine Hinweise
Allgemeine Hinweise 1.2.1 Spezifikationen Motortyp 4-Taktmotor, OHV Nennleistung 5/6/8 PS Hubraum 139 ccm Bohrung 62mm x 46mm Getriebeübersetzung 2.08 (27/13) Motorgröße quer (S) 440 mm Motorgröße quer (L) 568 mm Gewicht netto (S) 27 kg Gewicht netto (L) 28 kg Empfohlenes Benzin Bleifreies Normalbenzin Tankkapazität... -
Page 7: Treibstoff
1.2.2. Treibstoff Für den Betrieb des Motors sollten mindestens 91 Oktan Benzin verwendet werden, oder Benzin mit einer höheren Oktanzahl. Sollten Sie ein Klingeln hören, verwenden Sie bitte ein anderes Benzin, möglichst ein Benzin mit einer höheren Oktanzahl. Es darf kein verbleites Benzin benutzt werden, verbleites Benzin kann die Ventile beschädigen. Warnung: •... - Page 8 Propellern ausgestattet die für verschiedene Boote geeignet sind, aber es besteht die Möglichkeit Propeller mit einer anderen Neigung für bessere Leistungsoptimierung zu installieren. “AIQIDI“ Händler haben eine Menge an Propellern vorrätig und beraten Sie gerne welcher Propeller die beste Wahl für Boot ist.
- Page 9 Querbalken fällt. 3. Sichern Sie den Klemmbock auf dem Querbalken mit den mitgelieferten Schrauben. Für weitere Fragen, kontaktieren Sie Ihren AIQIDI – Händler. Warnung: Benutzten Sie ausschließlich mitgeliefert Neuteile, oder setzten Sie sich mit Ihrem AIQIDI-Händler in Verbindung!
-
Page 10: Treibstoff
2.2 Den Motor richtig einfahren Ihr neuer Motor benötigt eine Einlaufphase, um die Oberflächen gleichmäßig einzulaufen. Achtung: Erfolgt die Einlaufphase nicht, kann das einen Verlust der Motorlebensdauer oder eine Motorbeschädigung zur Folge haben. 1. Während der ersten Betriebsstunden: Fahren Sie den Motor nicht über 2000 r/min bzw. nur mit halbem Gas. 2. -
Page 11: Tanken
2.4 Tanken Achtung: • Der Treibstoff und seine Dämpfe sind hochentflammbar und explosiv. • Von Zigaretten, Flammen oder anderen glühenden Gegenständen fernhalten. 1.Entfernen Sie den Tankdeckel 2.Befüllen Sie den Tank sorgfältig 3.Verschließen Sie den Tank wieder fest mit dem Tankdeckel. Bemerkung: •... -
Page 12: Motor Starten
2.5 Motor starten Prüfen Sie vor dem Starten: • Der Kühlwassereinlass muss frei sein bzw. das Sieb darf nicht verstopft sein • Ölstand • Ob der Propeller frei ist (z.B. kann Angelschnur den Propeller behindern. 1. Lösen Sie die Entlüftungsschraube auf dem Tankdeckel. Eine Drehung für den eingebauten Tank. - Page 13 • Verlust der Motorleistung bedeutet auch einen Verlust der Steuerbarkeit/Lenkbarkeit. Außerdem wird das Boot ohne Motorleistung sehr schnell langsamer. Das könnte die Ursache dafür sein, dass Personen und Gegenstände nach vorne geworfen werden. Bemerkung: Bringen Sie die Notstopp-Leine so an, dass diese im Falle eines Überbordfallens abreist. Verbinden Sie die Notstopp- Leine nicht mit Ihrer Kleidung, da diese ausreißen könnte.
-
Page 14: Motor Aufwärmen
• Fließt über längere Zeit kein Wasser aus dem Kühlwasserauslass, stoppen Sie den Motor und überprüfen Sie, ob der Kühlwassereinlass an der Unterseite, oder die Außlassbohrung blockiert sind. • Wenn das Problem nicht lokalisiert und behoben werden kann, nehmen Sie Verbindung mit ihrem AIQIDI- Händler auf. -
Page 15: Schalten
2.7 Schalten Warnung: • Vor dem Schalten vergewissern Sie sich, dass keine Personen oder Hindernisse sich in Ihrer Nähe im Wasser befinden. Achtung: • Um aus dem Vorwärtsgang in den Rückwärtsgang zu schalten, reduzieren Sie das Gas, bis der Motor sich im Leerlauf befindet. -
Page 16: Das Ruder
2.8 Das Ruder 1. Richtungswechsel Bewegen Sie die Pinne nach rechts oder nach links. 2. Geschwindigkeitswechsel Drehen Sie den Griff entgegen dem Uhrzeigersinn, um die Geschwindigkeit zu erhöhen und mit dem Uhrzeigersinn, um die Geschwindigkeit zu vermindern. 3. Gashebel-Anzeiger Die Benzinverbrauchskurve auf dem Gashebelanzeiger zeigt Ihnen den relativen Verbrauch für die jeweilige Gas-Regler-Position. -
Page 17: Motor Stoppen / Ausschalten
2.9 Motor stoppen / ausschalten Bemerkung: • Vor dem Ausschalten des Motors erst ein paar Minuten im Leerlauf, oder bei geringer Geschwindigkeit, abkühlen lassen. • Das Ausschalten des Motors sofort nach Betrieb, bei hohen Geschwindigkeiten oder Drehzahlen, wird nicht empfohlen. 1. -
Page 18: Einstellen Des Außenbordmotors
2.10 Einstellen des Außenbordmotors Die Trimmplatte ist mit vier oder fünf Löchern zum Einstellen des Trimmwinkels des Außenbordmotors ausgestattet. 1. Arbeitsschritt Schalten Sie den Motor aus. 2. Arbeitsschritt Schrauben Sie die Winkeleinstellstange heraus, während Sie den Motor leicht kippen. 3. Arbeitsschritt Schrauben sie die Winkeleinstellstange nach dem Ausrichten wieder in die Bohrung zum Feststellen des Motors. -
Page 19: Hochkippen
2.11.1 .1 Hochkippen 1. Schalten Sie den Schalthebel 2. Drehen Sie den Hebel auf Neutral und richten Sie den zur Einstellung des Lenkwiderstandes Motor nach vorne aus. fest, im Uhrzeigersinn, um zu verhindern, dass dieser sich frei dreht. 3. Schließen Sie das Luftventil auf dem Tankdeckel. 4. -
Page 20: Fahren In Seichtem Wasser
Nachdem Betrieb im Salzwasser, waschen Sie die Kühlwasserwege mit frischem Wasser aus, um zu vermeiden, dass sich Salzpartikel festsetzen. 2.12.3 Fahren in trübem Wasser Aiqidi empfiehlt Ihnen, wenn Sie den Motor in trübem oder schlammigem Wasser betreiben, diesen anschließend mit sauberem Wasser zu reinigen. -
Page 21: Instandhaltung, Wartung & Pflege
• Sind Sie oder der Besitzer nicht mit der Wartung der Maschine vertraut, sollte diese Arbeit nur durch Ihren qualifizierten AIQIDI-Händler erfolgen. Achtung: Wenn Sie Ersatzteile benötigen, benutzten Sie nur originale AIQIDI-Ersatzteile. Bei der Benutzung von anderen Teilen, verfällt die Gewährleistung. 3.1 Schmieren... -
Page 22: Reinigen & Einstellen Der Zündkerze
Warnung: • Überprüfen Sie den Motor regelmäßig auf austretendes Benzin. • Wenn Sie Benzinlecks gefunden haben, muss das System von Ihrem AIQIDI-Händler repariert werden. 2. Prüfen Sie den Benzinfilter regelmäßig, ist zu viel Schmutz im Filter, tauschen Sie diesen aus. -
Page 23: Überprüfung Der Leerlaufdrehzahl
Sie können die korrekte Leerlaufdrehzahl nur messen, wenn Motor vollständig aufgewärmt ist. Wenn dieser nicht vollständig aufgewärmt ist, wird das Messergebnis erhöht ausfallen. Wenn eine falsche Leerlaufdrehzahl festgestellt wird, und Sie dieses Problem nicht beheben können, kontaktieren Sie bitte Ihren AIQIDI-Händler. -
Page 24: Motor-Ölwechsel
Motor-Ölwechsel Achtung: • Vermeiden Sie ein sofortiges Entleeren kurz nach dem Ausschalten des Motors. • Das Öl ist heiß und sollte mit Vorsicht behandelt werden, um Verbrennungen zu verhindern. Warnung: • Wechseln Sie das Öl nach den ersten 10 Betriebsstunden und danach alle 100 Betriebsstunden oder in einem 6-monatigen Intervall. -
Page 25: Überprüfung Der Verkabelung Und Der Steckerverbindungen
3.7 Dichtigkeit überprüfen Es darf kein Abgas oder Wasser zwischen der Abgasanlage, dem Motorblock oder dem Zylinderkopf austreten. Überprüfen Sie den gesamten Motor nach austretendem Öl. Achtung: Wenn Sie Lecks am Motor lokalisiert haben sollten, dann kontaktieren Sie bitte Ihren AIQIDI-Händler. -
Page 26: Propeller Überprüfung
3.8 Propeller Überprüfung Warnung: • Bevor Sie den Propeller prüfen, abbauen oder anbauen, sichern Sie den Motor gegen unbeabsichtigtes Einschalten. Dies können Sie Gewährleisten durch Entfernen der Zündkerze, den Ganghebel auf Neutral-Position schalten und Entfernen der Sicherungsschlaufe am Stoppschalter. Diese Sicherheitsmaßnahmen können erhebliche Verletzungen verhindern, während Sie am Propeller arbeiten. -
Page 27: Getriebeölwechseln
Überprüfen Sie das abgelassene Öl, ist das Öl milchig, so befindet sich Wasser im Öl, welches das Getriebe beschädigen kann, in diesem Fall kontaktieren Sie Ihren AIQIDI-HÄNDLER. 5. Benutzen Sie eine flexible und druckbeständige Einfüllleitung und füllen Sie das neue Getriebeöl über die Ölablassschraube ein. -
Page 28: Benzintank Reinigen
3.11 Überprüfung der oberen Abdeckung Prüfen Sie, ob die Abdeckung fests i t z t , indem Sie mit beiden Händen gegen die Abdeckung drücken. Wenn die Abdeckung lose ist, dann setzen Sie sich bitte mit ihrem AIQIDI-Händler in Verbindung. -
Page 29: Transport & Lagerung
4. Transport & Lagerung 4.1 Transport Die Lagerung und der Transport sollten in einer normalen Betriebslage erfolgen, sollte in dieser Position nicht genügend Platz vorhanden sein, dann kann der Außenbordmotor in gekippter Position mit entsprechender Haltevorrichtung transportiert werden (seitliche Lagerung auf der Pinnenseite). Achtung: Den Motor nicht in gekippter Lage transportieren, sondern nur in einer aufrechten Position. -
Page 30: Lagerung
4.2 Lagerung Wenn Sie ihren AIQIDI Außenbordmotor für eine Dauer, länger als zwei Monate, lagern möchten, müssen sie einige wichtige Instruktionen beachten, um diesen vor erheblichen Beschädigungen zu schützen. Es ist ratsam eine Inspektion des Motors vor dem Einlagern von Ihrem AIQIDI-Händler durchführen zu lassen. Allerdings können auch Sie als Besitzer mit einem Minimum an Werkzeug die folgenden Arbeitsschritte durchführen. -
Page 31: Vorgehensweise Im Notfall
3. Wenn irgendwelche Beschädigungen lokalisiert worden sind, steuern Sie langsam und vorsichtig den nächsten Hafen an. 4. Lassen Sie den Motor durch Ihren AIQIDI – Händler überprüfen, bevor Sie ihn wieder in Betrieb nehmen. 5.2 Starter funktioniert nicht gültig nur für 4 und 5 PS Motor beim2,6 PS nicht möglich Wenn der Starter-Mechanismus nich funktioniert, kann der Motor mit der Not-Abrissleine gestartet werden. -
Page 32: Handhabung Eines Untergegangenen Motors
5.3 Handhabung eines untergegangenen Motors Wenn der Motor unter Wasser gekommen ist, dann bringen Sie diesen sofort zu Ihrem AIQIDI-Händler, andernfalls setzt sofort Korrosion ein. 1. Waschen Sie den Motor sorgfältig mit frischem Wasser 2. Entfernen Sie die Zündkerze, drehen Sie den Motor auf den Kopf mit dem Zündkerzenloch nach unten, damit Schmutz und Dreck heraus laufen kann. - Page 33 6. Die Fehlerbehebung Starter funktioniert nicht Einzelteile am Starter sind defekt Wird durch Ihren Händler instand gesetzt Der Ganghebel steht nicht auf Schalten Sie den Ganghebel auf neutral neutral Der Motor startet nicht Benzintank ist leer Füllen Sein den Tank mit sauberen und frischen Benzin.
- Page 34 Verlust von Motorleistung Der Propeller ist beschädigt Reparieren oder tauschen Sie den Propeller aus. Trimmung ist falsch eingestellt Justieren Sie Ihn nach der besten Leistungsabgabe. Der Motor ist nicht in korrekter Befestigen Sie den Motor in der richtigen Arbeitshöhe befestigt Arbeitshöhe.
- Page 35 To the Owner Thank you for selecting a outboard motor.This Owner’s Manual contains information needed for proper operation,maintenance and care.A thorough understanding of these simple instructions will help you obtain maximum enjoyment from you.If you have any question about the operation or maintenance of your outboard motor,please consult a dealer.
- Page 36 Table of Contents 1.Safety information………………..……………………… ………..1 2. General information………………………………………………….5 3.Specifications and requirements………………………………..8 4.Component ………..………………………………..………………...13 5. Installation…………………………………………………………… 23 6.Operation…………………………………………….………….……..26 7.Maintenance…………………………………………………………...51 8.Trouble recovery…………………………….……………..………..70...
-
Page 37: 1.Safety Information
Safety information Observe these precautions at all times. Propeller People can be injured or killed if they come in contact with the propeller.The propeller can keep moving even when the motor is in neutral,and sharp edges of the propeller can cut even when stationary. - Page 38 could slow rapidly,throwing people and objects forward. Gasoline Gasoline and its vapors are highly flammable and explosive.Always,refuel according to the procedure on page to reduce the risk of fire and explosion. Gasoline exposure and spills Take care not to spill gasoline.If gasoline spills,wipe it up immediately with dry rags.Dispose of rage properly.
- Page 39 stop the engine. Stay away from swimming areas,Swimmers can be hard to see. The propeller can keep moving even when the motor is in the neutral.Stop the engine when a person is in the water near you. Passengers Consult your boat manufacturer’s instructions for details about appropriate passenger locations in your boat and be sure all passengers are positioned properly before accelerating and when operating above an idle speed.Standing or sitting in non-designated locations may result is being thrown either overboard or within the boat due to...
- Page 40 control,ejection,and collision. ⚫ Take early action to avoid collisions.Remember,boats do not have brakes,and stopping the engine or reducing throttle can reduce the ability to steer.If you are not sure that you can stop in time before hitting an obstacle,apply throttle and turn in another direction. Weather Stay informed about the weather.Check weather forecasts before boating.Avoid boating in hazardous weather.
-
Page 41: General Information
General information Identification numbers record Outboard motor serial number The outboard motor serial number is stamped on the label attached to the port side of the clamp bracket. Record your outboard motor serial number in the spaces provided to assist you in ordering spare parts from your dealer of for reference in case your outboard motor is stolen. - Page 42 Contents of labels The above warning labels mean as follows. Emergency starting does not have start-in-gear protection.Ensure shift control is in neutral before starting engine. ⚫ Keep hands,hair,and clothing away from rotating parts while the engine is running. ⚫ Do not touch or remove electrical parts when starting or during operation.
- Page 43 ⚫ Read Owner’s Manuals and labels. ⚫ Wear an approved personal flotation device(PFD) ⚫ Attach engine shut-off cord(lanyard) to your PFD,arm,or leg so the engine stops if you accidentally leave the helm,which could prevent a runaway boat. Gasoline is highly flammable and explosive,Shut off engine before refueling.Tighten tank cap and air vent valve when not in use.
-
Page 44: 3.Specifications And Requirements
Specifications and requirements Specifications TIP: “AL” stated in the specification data below represents the numerical value for the aluminum propeller installed. Dimension: Overall length:750mm(29.5 inch) Overall width:403mm(15.9 inch) Overall height S:1040mm(40.9 inch) Overall height L:1168mm(46.0 inch) Motor transom height S:440MM(17.3 inch) Motor transom height L:568mm(22.4 inch) Dry weight(AL) S:27.0kgs(60 lb) Dry weight(AL) L:28.0kgs(62 lb) - Page 45 Bore x Stroke:62.0x46.0mm(2.44x1.81 in) Ignition system:CDI Spark plug(NGK):CR6HSB Spark plug gap:0.6-0.7mm(0.024-0.028 in) Control system:Tiller handle Starting system:Manual starter Starting carburetor system:Choke valve Valve clearance IN(cold engine):0.08-0.12mm(0.0032-0.0047 in) Valve clearance EX(cold engine):0.08-0.12mm(0.0032-0.0047 in) Lower unit: Gear shift positions:Forward-neutral-reverse Gear ratio:2.08(27/13) Trim and tilt system:Manual tilt Propeller mark:A Trim and tilt system:Manual tilt Propeller mark:7-1/2x8...
- Page 46 Boats horsepower rating Overpowering a boat can cause severe instability. Before installing the outboard motor(s),confirm that the total horsepower of your outboard motor(s) does not exceed the boats maximum horsepower rating.See the boat’s capacity plate or contact the manufacturer. Mounting the outboard motor Improper mounting of the outboard motor could result in hazardous conditions,such as poor handling,loss of control,or fire hazards.If you are not able to mount the outboard motor properly,consult a dealer.
- Page 47 1. Type of propeller (propeller mark) 2. Propeller diameter in inches 3. Propeller pitch in inches Start-in-gear protection Our outboard motors are equipped with start-in-gear protection device.This feature permits the engine to be started only when it is in neutral.Always select neutral before starting the engine.
- Page 48 Fuel requirements Gasoline Use a good quality gasoline that meets the minumum octane rating.If knocking or pinging occurs,use a different brand of gasoline or premium unleaded fuel. Recommended fuel: Regular unleaded gasoline NOTICE ⚫ Do not use leaded gasoline.Leaded gasoline can seriously damage the engine. ⚫...
- Page 49 ⚫ An extra engine shut-off cord(lanyard)with clip. ⚫ Spare parts,such as an extra set of spark plugs. Consult your dealer for details. Components Components diagram 1. Top cowling 3. Carry handle 2. Cowling lock lever 4. Anti-cavitation plate...
- Page 50 5. Propeller 16. Fuel joint 6. Cooling water inlet 17. Fuel joint cap 7. Trim rod 18. Fuel cock 8. Clamp bracket 19. Engine shut-off cord(lanyard) 9. Steering frication adjuster 20. Engine stop button/engine shut-off 10. Fuel tank cap switch 11.
- Page 51 2. Fuel tank cap 3. Built-in fuel tank Fuel tank(portable fuel tank) This model can be equipped with an optional portable fuel tank.The parts of the fuel tank are as follows. Fuel tank cap This cap seals the fuel tank.When removed the tank can be filled with fuel.To remove the cap,turn it counterclockwise.
- Page 52 The fuel cock turns on and off the supply of fuel from the fuel tank to the engine. The fuel cock has 3 positions:the closed position,built-in fuel tank position,and portable fuel tank position.Depending on how the outboard motor will be used,align the fuel cock with the appropriate position indicated on the label that is affixed to the outboard motor.
- Page 53 1.Fuel cock 2.Built-in fuel tank position 3.Portable fuel tank position Tiller handle Gear shift lever To change direction,move the tiller handle to the left or right as necessary. 1.Tiller handle Gear shift lever Move the gear shift lever forward to engage the forward gear or rearward to engage the reverse gear.
- Page 54 Throttle indicator The throttle indicator shows the throttle position.When the 100% position of the throttle indicator is aligned with the notch in the tiller handle,the throttle is fully open.When the 0% position of the throttle indicator is aligned with the notch in the tiller handle,the throttle is fully closed.
- Page 55 1. Throttle friction adjuster Engine shut-off cord(lanyard) and clip The clip must be attached to the engine shut-off switch for the engine to run.The cord should be attached to a secure place on the operator’s clothing,or arm or leg.Should the operator fall overboard or leave the helm,the cord will pull out the clip,stopping ignition to the engine.This will prevent the boat from running aways under power.
- Page 56 Choke knob for pull type To supply the engine with the rich fuel mixture required to start,pull out this knob 1.Choke knob Fuel joint cap The fuel joint is equipped with the fuel joint cap. WARNING!When not using a portable fuel tank,make sure to install the fuel joint cap.Otherwise,injury could result from striking the fuel joint accidentally.
- Page 57 Do not overtighten the steering friction adjust.If there is too much resistance,it could be difficult to steer,which could result in an accident. The steering friction adjuster provides adjustable resistance to the steering mechanism,and can be set according to operator preference.The steering fiction adjuster is located on the port side of the outboard motor.
- Page 58 2.Reverse position 1.Tilt lock When the gear shift lever is moved to the neutral position or forward position,the outboard motor can be tilted up. Tilt support bar Use the tilt support bar to keep the outboard motor in the tilted up position or a shallow water cruising position.
-
Page 59: Installation
The carrying handle is used to carry the outboard motor.For information on carrying and transporting the outboard motor,see page 51 1. Carrying handle Installation Installation The information presented in this section is intended as reference only.It is not possible to provide complete instructions for every possible boat and motor combination.Proper mounting depends in part on experience and the specific boat and motor combination. - Page 60 1. Be sure to mount the outboard motor while the boat is on land,If the boat is on the water,move it to an area on land. 2. To prevent steering movement,turn the steering friction adjust clockwise. 1.Steering friction adjuster 3. Turn the tiller handle 180° so that it is pointing rearward. 4.
- Page 61 or which are asymmetrical,consult your dealer. 1.Center line(keel line) 6.Turn the steering friction adjuster counterclockwise to set the steering friction according to operator preference.WARNING!If there is too much resistance it could be difficult to steer,which could result in an accident. 1.Steering friction adjuster Mounting height To run your boat at optimum efficiency,the water resistance (drag) of the boat and outboard...
- Page 62 engine even if the boat is in stationary with maximum load. ⚫ Incorrect engine height or obstructions to the smooth flow of water(such as the design or condition of the boat) can create airborne water spray while the boat is cruising.If the motor is operated continuously in the presence of airborne water spray,enough water could enter the engine through the intake opening on the top cowling to cause severe engine damage.Eliminate the cause of the airbome water...
-
Page 63: 6.Operation
1.Restraint cable attachment Operation First-time operation Fill engine oil The engine is shipped from the factory without engine oil.If your dealer did not fill the oil,your must fill it before starting the engine. NOTICE:Check that the engine is filled with oil before first-time operation to avoid severe engine damage. - Page 64 TIP:Run the engine in the water,under load (in gear with a propeller installed)as follows.For 10 hours for breaking in engine avoid extended idling,rough water and crowded areas. 1. For the first hour of operation: Run the engine at varying speeds up to 2000 r/min or approximately half throttle. 2.
- Page 65 1.Cowling lock lever Fuel system Gasoline and its vapors are highly flammable and explosive.Keep away from sparks,cigarettes,flames,or other sources of ignition. Leaking fuel can result in fire or explosion. ⚫ Check for tuel leakage regularly. ⚫ If any fuel leakage is found,the fuel system must be repaired by a qualified mechanic.Improper repairs can make the outboard motor unsafe to operate.
- Page 66 ⚫ Check the shift link and start-in-gear protection cable for loose or damaged connections. Engine shut-off cord (lanyard) Inspect the engine shut-off cord and clip for damage,such as cuts,breaks,and wear. 1. Clip 2. Engine shut-off cord(lanyard) Engine oil 1.Place the outboard motor in an upright position(not tilted).
- Page 67 1. Oil filler cap 2. Oil lubrication check window TIP: The oil lubrication check window does not indicate the engine oil level.Use the oil lubrication check window to make sure that the engine is being lubricated with oil while it is running.
- Page 68 1. Fuel tank cap 2. Manual starter handle 3. Rubber seal 3. Hook the top cowling hook onto the bottom cowling,and then make sure that the fuel tank cap and manual starter handle fit properly into their respective holes. 1. Hook 4.
- Page 69 Filling fuel Be sure the outboard motor is securely fastened to the transom or a stable stand. ⚫ Gasoline and its vapors are highly flammable and explosive.Always refuel according to this procedure to reduce the risk of fire and explosion. ⚫...
- Page 70 Fuel tank capacity (built in type): 1.1L (0.29 US gal,0.24 Imp.gal) 3.Toghten the fuel tank cap securely. 4.Wipe up any spilled gasoline immediately with dry rags.Dispose of rags properly according to local laws or regulations.If you use a portable container to store and dispense fuel,only use a locally approved GASOLINE container.
- Page 71 increases. 5.Tighten the fuel tank securely. 6.Wipe up any spilled gasoline immediately with dry rags.Dispose of rags properly according to local laws or regulations.If you use a portable container to store and dispense fuel,only use a locally approved GASOLINE container. Operating engine ⚫...
- Page 72 1.Air vent screw 2.Align the fuel cock with the built-in fuel tank position 1.Built-in fuel tank position 3.Remove the top cowling,and then squeeze the primer pump in the bottom cowling repeatedly until you feel it become slightly firm. 1.Primer pump 4.Install the top cowling.
- Page 73 1.Air vent screw 3.Remove the fuel joint cap. Align the fuel joint on the fuel hose with the fuel joint on the outboard motor and connect the fuel hose securely between the tank and the outboard motor while pinching the joint so that the primer pump arrow is pointing toward the outboard motor.
- Page 74 5.Squeeze the primer pump,with the arrow pointing up,until you feel it become firm.While the engine is running,make sure to keep the portable fuel tank horizontal.Otherwise,fuel cannot be drawn from the fuel tank. 1.Arrow Starting engine Before starting the engine,make sure that the boat is tightly moored and that you can steer clear of any obstructions.Be sure there are no swimmers in the water near you .
- Page 75 2. Attach the engine shut-off cord to a secure place on your clothing,or your arm or leg.Then,install the clip on the other end of the cord to the engine shut-off switch. 3. Align the engine start mark “ ” on the throttle grip with the notch in the tiller handle. 1.Start mark “...
- Page 76 TIP: It is not necessary to use the choke when starting a warm engine,such as immediately after the outboard motor has been operated under a load. 5. Pull the manual starter handle slowly until you feel resistance.Then give a strong pull straight out to crank and start the engine.If the engine does not start on the first try.repeat the procedure.
- Page 77 running,overheating and serious damage could occur.Stop the engine and check whether the cooling water inlet on the lower case or the cooling water pilot hole is blocked.Consult your dealer if the problem cannot be located and corrected. 1.Cooling water pilot hole Warming up engine Warming up After starting the engine,return the choke knob to the halfway position.For approximately...
- Page 78 Shifting Before shifting,make sure there are no swimmers or obstacles in the water near you . NOTICE: Before shifting the outboard motor,turn the throttle grip to the fully closed position and let the engine speed return to idle speed.Otherwise,the shift mechanism could be damaged.
- Page 79 weight,water surface conditions,and wind direction. Stopping engine Before stopping the engine,first let it cool off for a few minutes at idle or low speed.Stopping the engine immediately after operating at high speed is not recommended. Procedure Procedure for stopping engine when using built-in fuel tank 1.
- Page 80 3.Align the fuel cock with the closed position. 1.Closed position 4.Disconnect the fuel hose from the fuel joint on the outboard motor ,and then install the fuel joint cap. WARNING! When not using a portable fuel tank,make sure to install the fuel joint cap.
- Page 81 1.Trim operating angle Adjusting trim angle for manual tilt models ⚫ Stop the engine before adjusting the trim angle. ⚫ Use care to avoid being pinched when removing or installing the rod. ⚫ Use caution when trying a trim position for the first time.Increase speed gradually and watch for any sings of instability or control problems.Improper trim angle can cause loss of control.
- Page 82 The outboard motor trim angle changes approximately 4 degrees When the trim rod position is changed by 1 hole. 4. Make test runs with the outboard motor set at different trim angles to find the position that works best for your boat and operating conditions. Adjusting boat trim When the boat is on plane,a bow-up attitude results in less drag,greater stability and efficiency.This is generally when the keel line of line the boat is up 3 to 5 degrees.With the...
- Page 83 TIP: Depending on the type of boat,the outboard motor trim angle may have little effect on the trim of the boat when operating. Tilting up and down If the engine will be stopped for some time or if the boat is moored in shallows,the outboard motor should be tilted up to protect the propeller and lower casing from damage by collision with obstructions,and also to reduce salt corrosion.
- Page 84 break the handle. ⚫ The outboard motor cannot be tilted when in reverse . Procedure for tilting up 1.Align the fuel cock with the closed position. 1.Closed position 2.Move the gear shift lever to the neutral position. 1.Neutral position 3. To prevent steering movement,turn the steering friction adjuster clockwise. 1.
- Page 85 5.Disconnect the fuel hose from the fuel joint on the outboard motor,and then install the fuel joint cap. WARNING! When not using a portable fuel tank,make sure to install the fuel joint cap. Otherwise,injury could result from striking the fuel joint accidentally. 1.Fuel hose 2.Fuel joint cap 6.Hold the rear of the top cowling and fully tilt the outboard motor up.Slightly lower the...
- Page 86 1.Steering friction adjuster Shallow water Cruising in shallow water ⚫ Operate the boat at the lowest possible speed when cruising in shallow water.Hitting an underwater obstacle could cause the outboard motor to lift out of the water,resulting in loss of control. ⚫...
- Page 87 2. Hold the rear of the top cowling and slightly tilt the outboard motor up until the tilt support bar automatically locks.The outboard motor can be operated in this position for shallow water cruising.The outboard motor is equipped with 3 shallow water cruising positions. 1.
-
Page 88: 7.Maintenance
Cruising in muddy,turbid,or acidic water Water in some areas can be acidic or with a lot of sediment in it,such as muddy or turbid (cloudy) water.After operating in such water,flush the cooling passages with fresh water to prevent corrosion.Also rinse the outside of the outboard motor with fresh water . Maintenance Transporting and storing outboard motor ⚫... - Page 89 When the outboard motor is tilted for a prolonged time while the boat is moored or trailered,make sure to follow the procedure listed below. ⚫ Disconnect the fuel hose from the fuel joint on the outboard motor and install the feul joint cap.
- Page 90 4.When using a portable fuel tank,disconnect the fuel hose from the fuel joint,and then install the fuel joint cap. WARNING! When not using a portable fuel tank,make sure to install the fuel joint cap. Otherwise,injury could result from striking the fuel joint accidentally.
- Page 91 9. When transporting or storing the outboard motor while removed from a boat,use an outboard motor stand. 10. If transportong or storing the outboard motor horizontally cannot be avoided,tighten the clamp screws completely,place a towel or something similar under the outboard motor to protect if from damage,and then place the outboard motor in the attitude shown.If the front side of the outboard motor is facing down,turn the clamp bracket 90°so that it does not contact the ground,and then turn the steering friction adjuster clockwise to secure the...
- Page 92 Storing outboard motor When storing your outboard motor for prolonged periods of time (2 months or longer),several important procedures must be performed to prevent excessive damage. It is advisable to have your outboard motor serviced by an authorized dealer prior to storage.However,you,the following procedures can be performed by the owner.
- Page 93 4. Remove the top cowing and fogging hole cap. 1.Cap 5. Remove the propeller.For further information,see page 67 6. Install the outboard motor on the test tank. 1.Water surface 2.Lowest water level 3.Cooling waer inlet 7. Fill the test tank with fresh water to above the level of the anti-cavitation plate.NOTICE:If the fresh water level is below the level of the anti-cavitation plate,or if the water supply is insufficient,engine seizure may occur.
- Page 94 11. If “Fogging Oil” is not available,run the engine at engine idle speed until the fuel system empties and the engine stops.Check that the engine has stopped,and then remove the spark plug.Pour a teaspoonful of clean engine oil into the cylinder.Crank several times manually.Install the spark plug.
- Page 95 Periodic maintenance These procedures require mechanical skills,tools,and supplies.If you do not have the proper skills,tools,or supplies to perform a maintenance procedure,have a dealer or other qualified mechanic do the work. The procedures involve disassembling the motor and exposing dangerous parts.To reduce the risk of injury from moving,hot,or electrical parts: ⚫...
- Page 96 Maintenance chart 1 TIP: ⚫ Refer to sections in this chapter for explanations of each owner-specific action. ⚫ The maintenance cycle on these charts assume usage of 100 hours per year and regular flushing of the cooling water passage.Maintenance frequency should be adjusted when operating the engine under adverse conditions such as extended trolling.
- Page 97 Initial Every Item Actions 20 hours 100 hours 300 hours 500 hours (3 months) (1 year) (3 years) (5 years) Inspection or replacement as ○ Fuel pump necessary ○ ○ Fuel/engine oil leakage Inspection ●/○ ●/○ Gear oil Replacement ●/○ ●/○...
- Page 98 Maintenance chart 2 Every Item Actions 1000 hours (5 years) Exhaust guide/exhaust Inspection or replacement ○ manifold as necessary...
- Page 99 Greasing Grease (Water resistant grease) Grease (Corrosion resistant grease;for propeller shaft)
- Page 100 Cleaning and adjusting spark plug The spark plug is an important engine component. The condition of the spark plug can indicate something about the condition of the engine.For example,if the center electrode porcelain is very white,this could indicate an intake air leak or carburetion problem in that cylinder.Do not attempt to diagnose any problems yourself.
- Page 101 4.When fitting the plug,wipe off any dirt from the threads,and then screw it in to the correct torque. Spark plug torque: 13Nm(1.33kgf-m,9.6ft-lb) TIP: If a torque-wrench is not available when you are reinstalling a spark plug,a good estimate of the correct torque is 1/4 to 1/2 a turn past fingertight.Have the spark plug adjusted to the correct torque as soon as possible with a torque-wrench.
- Page 102 To prevent spilling oil where it could cause damage to nature,it is strongly recommended that you use an oil changer to change the engine oil.If an oil changer is not available,drain the engine oil by removing the drain screw.If you are not familiar with the procedure for changing the engine oil,consult your dealer.
- Page 103 7. Prepare a suitable container that holds a larger amount that the engine oil capacity.Remove the drain screw and gasket while holding the container under the drain hole.Let the oil drain complerely.Wipe up any spilled oil immediately. 1.Drain screw 2.Gasket 8.
- Page 104 15.Start the engine and make sure that there are no oil leaks.NOTICE:If there are oil leaks,stop the engine and find the cause.Consult your dealer if the problem cannot be located and corrected.Continued operation with a problem could cause severe engine damage. 16.Dispose of used oil according to local regulations.
- Page 105 1.Propeller shaft Removing propeller Spline models 1. Straighten the cotter pin and pull it out using a pair of pliers. 2. Remove the propeller nut and washer. WARNING! Do not use your hand to hold the propeller when loosening the propeller nut. 1.Cotter pin 2.Propeller nut 3.Washer...
- Page 106 TIP: If the propeller nut hole does not align with the propeller shaft hole after tighten the nut further or loosen the nut to align the holes. Change gear oil Be sure the outboard motor is securely fastened to the transom or a stable stang.You could be severely injured if the outboard motor falls on you.
- Page 107 6. Put a new gasket on the oil level plug. When the oil begins to flow out of the oil level plug hole, insert and tighten the oil level plug. Tightening torque: 9.0Nm(0.92 kgt-m,6.6ft-lb) 7. Put a new gasket on the gear oil drain screw. Insert and tighten the gear oil drain screw. Tightening torque: 9.0Nm(0.92 kgt-m,6.6ft-lb) Inspecting and replacing anode(external)
- Page 108 Trouble Recovery Troubleshooting This section describes the likely causes and remedies for problems, such as those in the fuel, compression, and ignition systems, poor starting, and loss of power.Please note that all of the items in this section may not apply to your model. If your outboard motor requires repair, bring it to a dealer.
- Page 109 Q. Is clip on engine shut-off cord (lanyard) in-stalled? A. Install clip to engine shut-off switch. Q. Are engine inner parts damaged? A. Have serviced by a dealer. Engine idles irregularly or stalls. Q. Is fuel system obstructed? A. Check for pinched or kinked fuel line or other obstructions in fuel system. Q.
- Page 110 A. Have serviced by a dealer. Q. Is fuel pump malfunctioning? A. Have serviced by a dealer. Q. Is air vent screw tightened or air vent valve closed ? A. Loosen air vent screw or open air vent valve. Q. Is choke knob pulled out? A.
- Page 111 Q: Is boat bottom fouled with marine grouwth? A: Clean boat bottom. Q. Is spark plug fouled or of incorrect type? A. Inspect spark plug .Clean or replace with recommended type. Q. Are weeds or other foreign material tangled on gear housing? A.
- Page 112 Q. Is thermostat malfunctioning or clogged? A. Have serviced by a dealer. Q. Is air vent screw tightened or air vent valve closed? A.Loosen air vent screw or open air vent valve. Q.Is fuel pump malfunctioning? A.Have serviced by a dealer. Q.Is fuel joint connection incorrect? A.Connect correctly.
- Page 113 If the outboard motor hits an object in the water,follow the procedure below. 1.Stop the engine immediately. 2.Check the control system and all components for damage.Also,check the boat for damage. 3.Whether damage is found ot not,return to the nearest harbor slowly and carefully. 4.Have a dealer check the outboard motor before operating it again.
- Page 114 ⚫ An unguarded,rotating flywheel is very dangerous.keep loose clothing and other objects away when starting the engine.Use the emergency starter rope only as instructed.Do not touch the flywheel or other moving parts when the engine is running.Do not install the starter mechanism or top cowling after the engine is running.
- Page 115 5. Reinstall 2 bolts to secure the fuel tank. 6. Insert the knotted end of the emergency starter rope into the notch in the flywheel magnet and wind the rope several turns around the flywheel magnet clockwise. 7. Attach the engine shut-off cord to a secure place on your clothing,or your arm or leg. Then,install the clip on the other end of the cord to the engine shut-off switch 8.
- Page 116 9. Give a strong pull straight out to crank and start the engine. TIP: If the engine does not start after several attempts,pull out the choke knob. 1.Choke knob Treatment of submerged motor If the outboard motor is submerged,immediately take it to a dealer.Otherwise some corrosion may begin almost immediately.
Need help?
Do you have a question about the Smarine AiF5PS and is the answer not in the manual?
Questions and answers