Advertisement
Advertisement

Summary of Contents for Axon Cerebrum CCP-4200B
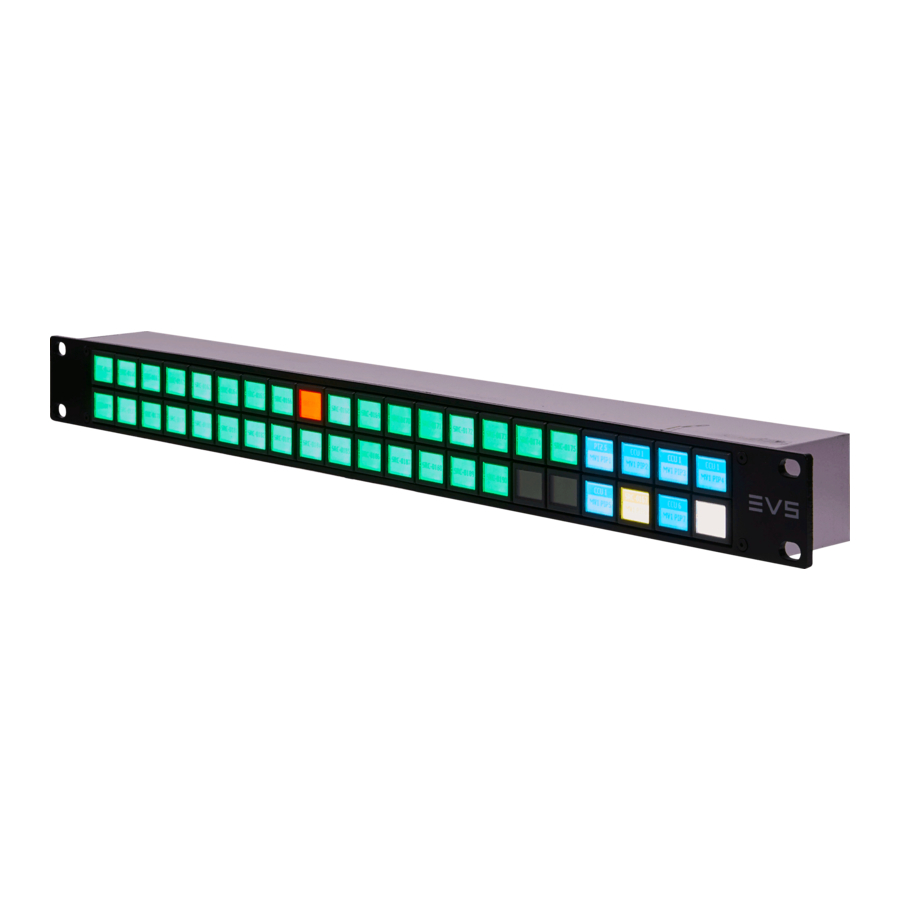
- Page 1 CCP-4200B Cerebrum 42 LCD button control panel Operation manual...
- Page 2 OPERATION MANUAL CCP-4200B Hercules 28 NL-5126 RK Gilze The Netherlands Phone: +31 161 850 450 Fax: +31 161 850 499 E-mail: Info@axon.tv Web: www.axon.tv...
- Page 3 ● NEVER operate this product in an explosive atmosphere. Warranty: Axon warrants their products according to the warranty policy as described in the general terms. That means that Axon Digital Design BV can only warrant the products as long as the serial numbers are not removed.
-
Page 4: Table Of Contents
Table of Contents Table of Contents 1. Introduction 2. Configuration Panel Configuration Adding the panel to Cerebrum Configuring functionality on the panel GPI Contacts 3. Reprogramming the panel 4. Specifications... -
Page 5: Introduction
Ethernet network and can be configured to use either DHCP or a manually assigned IP addresses. As with other Axon devices when used in manual IP assignment mode the address, sub-net mask and gateway can be assigned using the configuration mode of the panel. -
Page 6: Configuration
2. Configuration When powering on the CCP panel and connecting it to a network, all the Panel LCD buttons will display with a red backlight and show the IP address Configuration that the panel is currently configured to. As shown in the example below: To configure the Cerebrum control panel you need to enter the configuration mode. -
Page 7: Adding The Panel To Cerebrum
In order to add a CCP-4200B hardware panel on your Cerebrum system Adding the you will need to be running Cerebrum V1.13 or later. To add the panel go panel to to the Network menu and choose the ‘Add Network Device’ item. A Cerebrum dialog will appear as shown below. -
Page 8: Configuring Functionality On The Panel
This mimic allows the user interface to be viewed and tested from the active server as if pressing the buttons on the physical hardware panel. Please note this mimic will only be shown on the active Cerebrum server. The Monitoring tab, in the same way as all other devices within Cerebrum, shows a historical log of the status events for this panel. - Page 9 Function GPI 8 GPI 7 GPI 6 GPI 5 GPI 4 GPI 3 GPI 2 GPI 1 Where pin 10 is the pin on the furthest left hand side as you view the rear of the unit. The pin-out of the connector is also shown on a label on the rear of the unit.
-
Page 10: Reprogramming The Panel
IP address in the address bar it will display the following page: To upgrade the firmware supply the user name (‘axon’) and the password (‘cortex’) and press the Login button. The browser page will then prompt for a firmware file with the Browse button. - Page 11 If you locate the required file and then press the Upload button the panel will then reprogram itself. After successfully programming the unit it will then prompt the user to reset the MCU. After doing this the brower will complete and the unit will reset itself and show the normal starting UI as described above.
-
Page 12: Specifications
4. Specifications Dimensions Height 44mm (1.73”) (1RU) Width (including front panel) 484 mm (19”) Depth (including front panel and DC 90mm (3.54”) connector) Width (excluding front panel) 450 mm (17.71”) Depth (excluding front panel, 65mm (2.55”) including DC connector) Weight Weight including power adapter CCP-4200B ~1.5kg Power...
Need help?
Do you have a question about the Cerebrum CCP-4200B and is the answer not in the manual?
Questions and answers