
Subscribe to Our Youtube Channel
Related Manuals for G.A.S FlavourSpec

Summary of Contents for G.A.S FlavourSpec
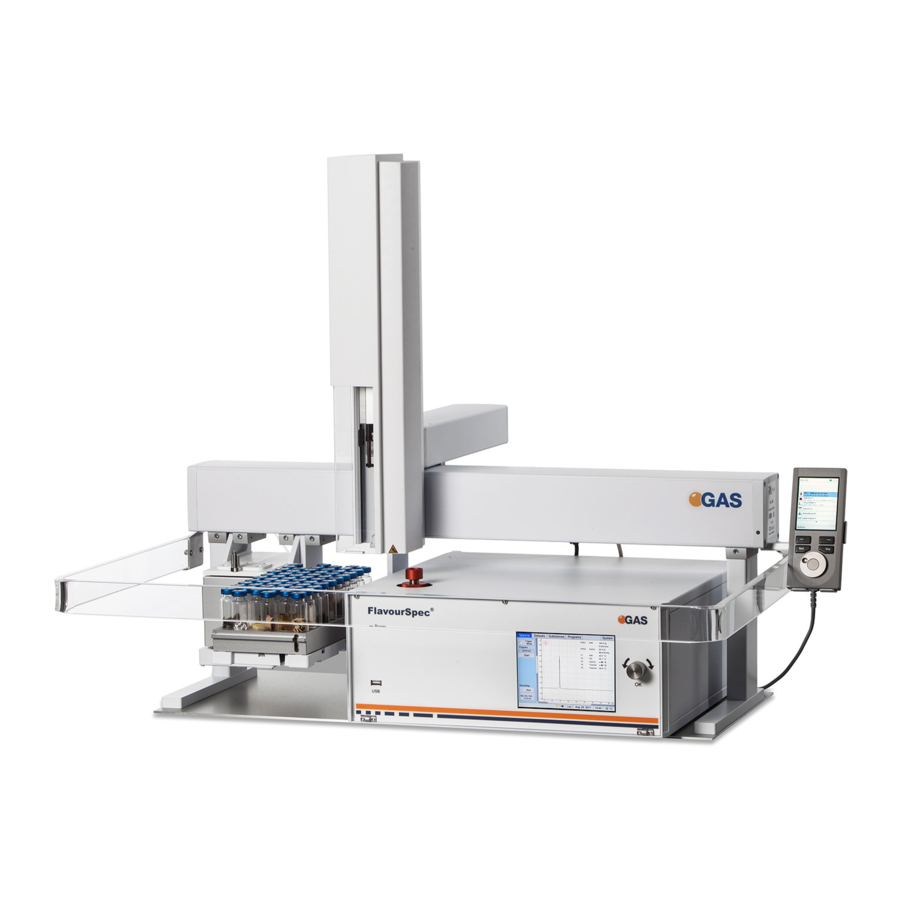
- Page 1 FlavourSpec® with PAL RSI Quickstart Manual G.A.S. Gesellschaft für analytische Sensorsysteme mbH...
- Page 2 Any infringement may be subject to legal action. Passing it on to third parties and producing copies of any kind or form – on the whole or in parts - is not permitted without written agreement of G.A.S. Any infringement may be subject to legal action.
-
Page 3: Table Of Contents
Storage and Transport ................. 18 Cleaning and Maintenance ................19 Cleaning ...................... 19 Maintenance ....................19 Installation FlavourSpec Device ................. 20 Installation Requirements ................20 Unpack the device ..................22 Unpack the accessories ................25 Mount the Safety guard ................27 Connect the PAL RSI Terminal .............. - Page 4 Workflow: Check Tray Reference Position ..........52 Workflow: Run a measurement with autosampler ........57 Workflow: Run a measurement with manual injection ......... 61 Appendix ......................64 7.1.1 IMS-Spectrum Examples ..............64 Corresponding G.A.S. Documents and Tutorials ......... 66 4/66...
-
Page 5: General Information
FlavourSpec® – Quickstart Manual 1 General Information 1.1 Information about the Manual INFORMATION! This Quickstart User Manual is an excerpt of the most important information for installation and initial setup from the User Manual. It is an addition to the User Manual and does not replace the User Manual. -
Page 6: Notation For Dialogs, Elements And References
FlavourSpec®– Quickstart Manual DANGER This symbol marks references, which can lead to health impairments, injuries, lasting body damages or to death due to electric current. DANGER This Symbol marks paragraphs, which describe potential dangers and damage due to exposure to radioactive radiation. -
Page 7: Scope Of Supply
GAS-hotline immediately. FlavourSpec Scope of Supply FlavourSpec Device coupled Autosampler PAL3 Series II FlavourSpec Power supply with cable (1 piece) FlavourSpec Gas tube Kit • Driftgas/Carriergas (1 piece) • 2 m 3mm PFA Tubes with 3 mm Swagelok-Connector (2 Pieces) •... - Page 8 FlavourSpec®– Quickstart Manual Molecular sieve 200 ml with 1/8” connections (1 piece) LAN Cable (1 piece) FlavourSpec-PAL3 Connection Cable FlavourSpec Blind plug Set (4 pieces) (Swagelok 3mm Blind plug with red cap installed on device connectors) 8/66...
- Page 9 FlavourSpec® – Quickstart Manual FlavourSpec Torx Tool Kit • Torx Srewdriver 8 mm (1 piece) • Torx Srewdriver 10 mm (1 piece) Document Map with Documents and Device User Manuals USB-Stick Box with Software und Documents (1 piece) Autosampler PAL3 Series II Scope of Supply...
- Page 10 FlavourSpec®– Quickstart Manual Terminal with Connection Cable (1 piece) Agitator Connection Cable (installed) (1piece) PAL3 Torx Tool Kit • Torx Screwdriver 8 mm (1 piece) • Torx Screwdriver 10 mm (1 piece) • Torx Screwdriver 20 mm (1 piece) • Torx Screwdriver 25 mm (1 piece)
- Page 11 FlavourSpec® – Quickstart Manual Syringe Kit (2 pieces) PAL3 Teaching Tool Starter Kit (100 x 20 ml Headspace Vials, 100 magnetic caps, 3 Septa for Injector Transport box (1 piece) 11/66...
- Page 12 FlavourSpec®– Quickstart Manual FlavourSpec Transport palett (120 x 80 cm) Optional Scope of Supply (only available if ordered) Nitrogen Generator with accessories (example picture) Laptop Computer (different design) including software for control and evaluation PAL ITEX-Kit 12/66...
-
Page 13: Liability And Guarantee
All claims of any kind related to damage from a not intended use of the device will be rejected. G.A.S. reserves the right to realize technical changes of the product due to improvements without explicitly mentioning them. -
Page 14: Return And Disposal
FlavourSpec®– Quickstart Manual 1.7 Return and Disposal For an adequate disposal, the device or/and its equipment must be returned to the G.A.S. or to a third party authorized by the G.A.S.! For questions please contact G.A.S. 1.8 Software Updates If there are any software updates customers will be contacted by G.A.S. Gesellschaft für analytische Sensorsysteme mbH as soon as the updates are available. -
Page 15: Safety
The intended use of the equipment and its correct handling according are described in the operating instructions of this manual. Other parts than the parts belonging to the scope of supply, may only be used after G.A.S. approval. 2.2 Responsibility of Operator The device may only be operated in a perfect technical condition. -
Page 16: Requirements Of Personnel
The device is reliable in service when operated according to its intended use. INFORMATION! If the housing of the device is damaged, the device must not be used anymore and must be returned to the G.A.S. by using the original transportation case. DANGER The FlavourSpec®... - Page 17 FlavourSpec® – Quickstart Manual DANGER The FlavourSpec® and its equipment is not certified for the employment in areas with explosive gas air mixtures (Zone 0). DANGER Exercise great care in handling current-carrying parts like the power supply cord. Do not get directly in touch with current-carrying parts.
-
Page 18: Transport, Packing And Storage
FlavourSpec®– Quickstart Manual 3 Transport, Packing and Storage 3.1 Inspection after Transport Check the supply immediately after delivery concerning its completeness and/or transport damages. If you detect externally visible transport damage, do not receive the supply, or only under reservation. State the extent of the damage on the provided delivery note and/or the transportation documents of the feeder. -
Page 19: Cleaning And Maintenance
Do not use cleaning agents, which contain solvents, acids, or bases. 4.2 Maintenance INFORMATION! Maintenance of the device should only be carried out at G.A.S. or through specially trained and by G.A.S. authorized personnel. The recommended maintenance interval is 24 months. 19/66... -
Page 20: Installation Flavourspec Device
FlavourSpec®– Quickstart Manual 5 Installation FlavourSpec Device 5.1 Installation Requirements The following requirements must be fulfilled by the customer: Location of Installation • Available space of 1000 x 900 x 800 mm (W x D x H) • Ambient temperature of 5 – 40 °C •... - Page 21 FlavourSpec® – Quickstart Manual • Administrator right to install G.A.S. software Figure 1: Space requirement FlavourSpec with Autosampler PAL RSI INFORMATION! To ensure correct measurements it is absolutely necessary to connect the supplied exhaust tubes (Gas out and Sample gas out).
-
Page 22: Unpack The Device
FlavourSpec®– Quickstart Manual 5.2 Unpack the device At least two people are necessary to unpack the device. Remove the cover Remove the cardboard spacers. Remove the foam spacer. 22/66... - Page 23 FlavourSpec® – Quickstart Manual Remove both Accessories boxes. Remove both foam spacers. Remove the safety guard. 23/66...
- Page 24 FlavourSpec®– Quickstart Manual Remove the big foam spacer. Lift the device carefully WARNING The arm of the autosampler can move freely. It is recommended to hold the arm by a third person. Put the device on a stable table. 24/66...
-
Page 25: Unpack The Accessories
FlavourSpec® – Quickstart Manual Check the position of the instrument feet. The instrument feet and the position holes of the baseplate must fit. 5.3 Unpack the accessories Safety guard Accessories box Packing list The figure shows the opened box. 25/66... - Page 26 FlavourSpec®– Quickstart Manual The figure shows the delivered standard components. Check the entire delivery for completeness on basis of the packing list. 20 ml headspace vials magnetic caps for headspace vials 3Tray Gas tubes with 3 mm Swagelok connection LAN-Cable...
-
Page 27: Mount The Safety Guard
FlavourSpec® – Quickstart Manual 5.4 Mount the Safety guard The neccessary screws are included. To connect the Safety Guard the following required: A: four M4 Torx screws with spring washer and washer B: Screwdriver Torx T20 Connect the Safety Guard to the Safety Guard Brackets on the left and …... -
Page 28: Connect The Pal Rsi Terminal
FlavourSpec®– Quickstart Manual …right side of the X-Axis using the screws. The figure shows the autosampler with installed Safety Guard. 5.5 Connect the PAL RSI Terminal Connect the Terminal cable to the Terminal Connector (green marking). 28/66... -
Page 29: Check The Preinstalled Connecting Cable
FlavourSpec® – Quickstart Manual Place the Terminal into the Terminal Holder. 5.6 Check the Preinstalled Connecting Cable Rear FlavourSpec: Check the connection cable Autosampler/FlavourSpe c (Grey Plug, Yellow marking) at the Signal Converter I/O Ports Rear Agitator: Check the connection... -
Page 30: Connect The Gas Supply
FlavourSpec®– Quickstart Manual Rear Autosampler X- Axis: Check the connetion cable Agitator (blue marking) at the port PALbus. Check the connection cable Autosampler/FlavourSpe c (Yellow plug, yellow marking) at port Interface Rear FlavourSpec: Check the 3mm Swagelok-Connection of the Driftgas-/Carriergas- Adapter- 5.7 Connect the Gas Supply... - Page 31 FlavourSpec® – Quickstart Manual Mount the pressure reducer at the rear of the autosampler. Remove the red caps on the rear panel of the device. Keep the red caps. Connect a tube (green marking) with 3 mm Swagelok-connection to the Driftgas/Carriergas- connection using a 12 mm spanner.
- Page 32 FlavourSpec®– Quickstart Manual Connect the tube to a nitrogen or synthetic air gas supply. (Gasquality: nitrogen 5.0 or synthetic air 5.0). Set up the back pressure to 3 bar. OPTIONAL To ensure a high purity of the gas install the delivered molecular sieve.
- Page 33 FlavourSpec® – Quickstart Manual INFORMATION! Only use stainless steel pressure reducer, PTFE tubes with 3 mm outer diameter and 3 mm swagelok connectors. To ensure a high purity of the gas install the provided moisture trap. Figure 2: Gas supply installation...
- Page 34 Pressure reducer (provided by customer) 2 m PFA gas tube with 3 mm Swagelock connector (provided by G.A.S.) Molecular sieve with 3 mm connection (provided by G.A.S.) 2 m PFA gas tube with 3 mm Swagelock connector (provided by G.A.S.) Device (provided by G.A.S.)
-
Page 35: Connect The Power Supply
FlavourSpec® – Quickstart Manual 5.8 Connect the Power Supply Power supply Autosampler: A: PAL RSI Autosampler Power Supply B: Country-specific Power Plug Connect the Power supply unit with the power plug. Connect the power plug to a power supply. Connect the power plug... - Page 36 FlavourSpec®– Quickstart Manual Power Supply FlavourSpec: A: FlavourSpec Power Supply B: Country-specific Power Plug Connect the Power supply unit with the power plug. Connect the power plug to a power supply. Connect the power plug to the power connector at...
-
Page 37: Remove The Transport Lock
FlavourSpec® – Quickstart Manual 5.9 Remove the Transport Lock Transport Lock Sign at the front of the autosampler. Transport Lock Sign at the rear of the autosampler. Remove the transport lock screw with a screwdriver (Torx T20). Keep the screw for future use. -
Page 38: Complete The Device
FlavourSpec®– Quickstart Manual 5.10 Complete the Device Place the tray to the trayholder. 5.11 Switch on the Device Switch on PAL RSI Autosampler. Switch on the FlavourSpec. 38/66... -
Page 39: Check Essential Device Postion
FlavourSpec® – Quickstart Manual INFORMATION! For detailed information concering the autosampler please refer the autosampler manual. 5.12 Check essential device postion Before working with the intrument the position of the injector, agitator and the trayholder must be tested and if neccessary adapted. -
Page 40: Prepare The Device For Operation
FlavourSpec®– Quickstart Manual OPTIONAL Teach the position of the agitator (see FlavourSpec User Manual) 5.13 Prepare the device for operation Before using the device for the first time or after being disconnected from the nitrogen source for some time it must be cleaned to ensure proper operating conditions. - Page 41 FlavourSpec® – Quickstart Manual Inspect spectrum for contamination. Control the baseline. Start cleaning when contaminated. Contamination is indicated by peaks or the disappearing of the RIP. Select duration in hours: System › Modes › Cleaning Mode › x h Option...
- Page 42 FlavourSpec®– Quickstart Manual Start cleaning: System › Modes › Cleaning Mode › Start Wait until cleaning process is completed. The process can be stopped with Skip. 42/66...
- Page 43 FlavourSpec® – Quickstart Manual After all temperatures reached the default values inspect visually the current spectrum and compare it with the reference spectrum of the analytical approval. The RIP should reach ~80% of the RIP height displayed in the delivered Analytical...
-
Page 44: System Operation
FlavourSpec®– Quickstart Manual 6 System Operation 6.1 Measurement Requirements INFORMATION! Only use the original accessories supplied with the device. INFORMATION! Make sure that the gas quality is 5.0 (99,999%) or better. INFORMATION! Only use stainless steel pressure reducer. INFORMATION! Make sure that the spectrum is clean a without contamination. -
Page 45: Workflow: Check Injector Position
FlavourSpec® – Quickstart Manual 6.2 Workflow: Check Injector Position INFORMATION! It is recommended to check the position of the injector after every transport of the device. A false position can damage the syringe. When using the Headspace-Tool it is recommended to use the Injector Adapter. - Page 46 FlavourSpec®– Quickstart Manual In options menu select Check Teaching. With the right function key select Check. After a warning signal the arm moves to actual injector position. 46/66...
- Page 47 FlavourSpec® – Quickstart Manual The magnetic adapter of the tool and the injector adapter has to fit. Otherwise the injector position must be teached (see FlavourSpec User Manual) With the right function key select Next. With the right function key select OK.
-
Page 48: Workflow: Check Agitator Position
FlavourSpec®– Quickstart Manual Select the BACK-button to go to the main screen. 6.3 Workflow: Check Agitator Position INFORMATION! It is recommended to check the position of the agitator after every transport of the device. On the PAL RSI main screen select Agitator 1. - Page 49 FlavourSpec® – Quickstart Manual With the left function key select Options In option menu select Check Teaching Follow the instruction on the screen: Prepare the module… 49/66...
- Page 50 FlavourSpec®– Quickstart Manual Move the cover backA, insert the teaching tool in position 1 and close the cover. C. With the right function key select Check. After a warning signal the arm moves to the actual agitator position. 50/66...
- Page 51 FlavourSpec® – Quickstart Manual The magnetic adapter of the tool and the teaching tool has to fit. Otherwise the agitator position must be teached. (see FlavourSpec User Manual) With the right function key select Next. With the right function key select OK.
-
Page 52: Workflow: Check Tray Reference Position
FlavourSpec®– Quickstart Manual Select the Back button to go to the main screen. 6.4 Workflow: Check Tray Reference Position INFORMATION! It is recommended to check the position of the agitator after every transport of the device. A false position can damage the syringe. - Page 53 FlavourSpec® – Quickstart Manual With the left function key select Options. In options menu select Check Teaching. Follow the instruction on the screen: Prepare the module… 53/66...
- Page 54 FlavourSpec®– Quickstart Manual Remove the tray. The figure shows the teaching point of the tray holder. With the right function key select Check. 54/66...
- Page 55 FlavourSpec® – Quickstart Manual After a warning signal the arm moves to the actual teaching point. The magnetic adapter of the tool and the teaching point has to fit. Otherwise the tray reference position must be teached. (see FlavourSpec User...
- Page 56 FlavourSpec®– Quickstart Manual With the right function key select OK. Select the Back button to go to the main screen. 56/66...
-
Page 57: Workflow: Run A Measurement With Autosampler
FlavourSpec® – Quickstart Manual 6.5 Workflow: Run a measurement with autosampler INFORMATION! To run measurements with an autosampler the following steps are required. Put the sample into the tray. Create a measurement program or select one (see FlavourSpec User Manual) The start values for E1 and E2 must correspond…... - Page 58 FlavourSpec®– Quickstart Manual In spectra window select Trigger mode. Select Sample Names. To generate an automatic samplelist select autogenerate samplelist. 58/66...
- Page 59 FlavourSpec® – Quickstart Manual Enter the number of samples. The actual samplelist is shown. Create a new method or edit a method (see FlavourSpec User Manual) 59/66...
- Page 60 FlavourSpec®– Quickstart Manual Create a new job or edit a (see FlavourSpec User Manual) Enter the number of samples. Select the job and start. View and analyze the measurement files with the VOCAL software. INFORMATION! For detailed information about the Laboratory Analytical Viewer LAV...
-
Page 61: Workflow: Run A Measurement With Manual Injection
FlavourSpec® – Quickstart Manual 6.6 Workflow: Run a measurement with manual injection INFORMATION! Measurements can also be done without autosampler. The headspace- sample must be inject manually and the device has to be start manually too. Put the sample into the tray. - Page 62 FlavourSpec®– Quickstart Manual Go to Spectra window and press start. An information windows appears. Select the headspace sample with a proper gastight syringe. 62/66...
- Page 63 FlavourSpec® – Quickstart Manual Select YES in the information window. Inject the headspace sample into the sample injector port. View and analyze the measurement files with the VOCAL software. INFORMATION! For detailed information about the Laboratory Analytical Viewer LAV refer the VOCAL Software Manuals and Tutorials...
-
Page 64: Appendix
FlavourSpec®– Quickstart Manual 7 Appendix 7.1.1 IMS-Spectrum Examples Schematic of IMS Spectrum reasons / suggestions spectrum description Clean spectrum Perfect Clean spectrum, up to two extra signals left Perfect hand side of the RIP RIP shifted to lower - elevated temperature... - Page 65 FlavourSpec® – Quickstart Manual - gas quality out of Minor impurities specifications - device is polluted > run system cleaning - gas quality out of Major impurities specifications - device is polluted > run system cleaning Elevated noise Contact G.A.S. support No signal Contact G.A.S.
-
Page 66: Corresponding G.a.s. Documents And Tutorials
FlavourSpec®– Quickstart Manual 7.2 Corresponding G.A.S. Documents and Tutorials INFORMATION! • FlavourSpec User Manual • PAL3 System User Manual • Sequence Designer Manual • IMS Control TFTP-Server Manual • Tutorials Sequence Designer • Tutorials VOCal • Manuals VOCal 66/66...
Need help?
Do you have a question about the FlavourSpec and is the answer not in the manual?
Questions and answers