
Summary of Contents for Ivation JID0124TBLU
- Page 1 ® Ivation LED Digital Time Bar SKUs: JID0124TBLU JID0124TRED JID0136TBLU JID0136TRED User Guide...
-
Page 3: Introduction
Thank you for purchasing the Ivation® LED Digital Time Bar. This User Guide is intended to provide you with guidelines to ensure that operation of this product is safe and does not pose risk to the user. Any use that does not conform to the guidelines described in this User Guide may void the limited warranty. -
Page 4: Table Of Contents
INTRODUCTION TABLE OF CONTENTS SAFETY PRECAUTIONS PACKAGE CONTENTS / PRODUCT OVERVIEW BASIC OPERATION REMOTE CONTROL FUNCTIONS MOUNTING THE TIME BAR CARE AND MAINTENANCE SPECIFICATIONS WARRANTY INFORMATION GET IN TOUCH! TABLE OF CONTENTS... -
Page 5: Safety Precautions
If damage is incurred as a result of non-compliance with the instructions laid out herein, this will void the manufacturer’s guarantee. Ivation assumes no liability for personal injury or damage to property caused by incorrect handling or non-observance of these safety instructions. -
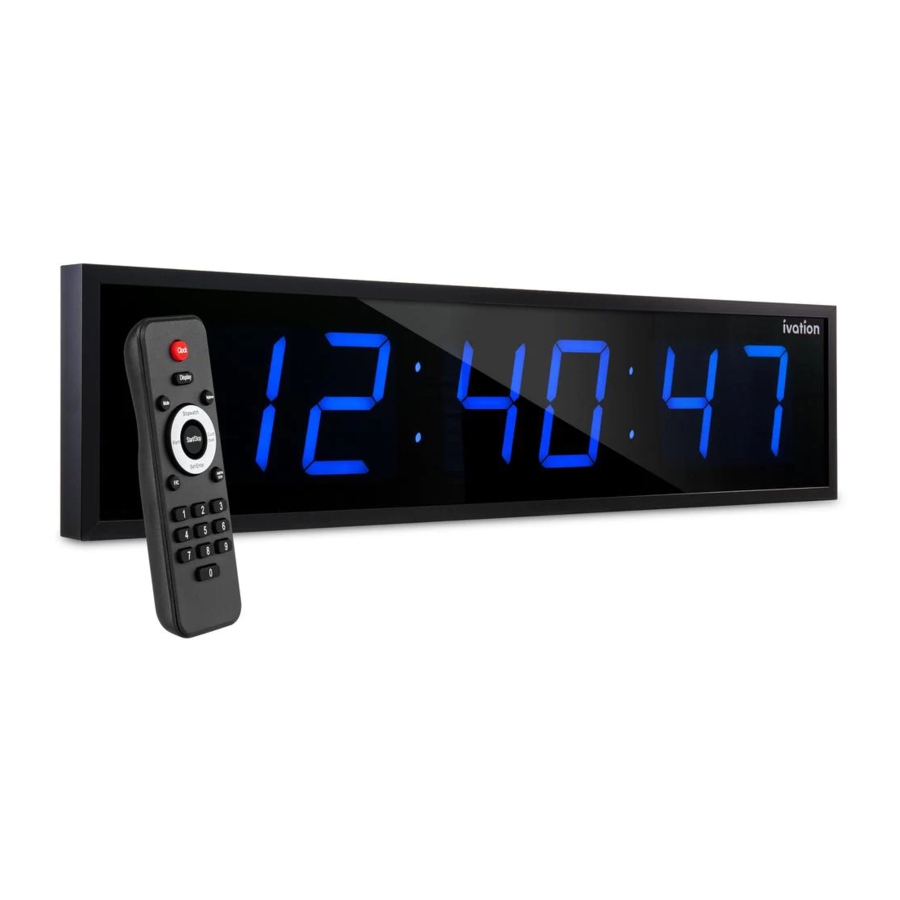
Page 6: Package Contents / Product Overview
PACKAGE CONTENTS - LED digital time bar - Power cable - Remote control - User guide PRODUCT OVERVIEW LED Display 12 V power input jack Holes for wall-mounting LED digital time bar Holes for wall-mounting Holes for wall-mounting 12 V power input jack See page 6 for full details on the remote control buttons and functions. -
Page 7: Basic Operation
BASIC OPERATION 1. Follow these steps to insert the smaller end of the power cable into the 12 V power input jack on the rear of the clock. a. Position the cable end perpendicular to the backside of the clock. b. -
Page 8: Remote Control Functions
REMOTE CONTROL FUNCTIONS: 1. CLOCK button a. While setting an alarm, press this button to exit and return to the time display without saving your settings. b. While auto-scrolling is on, press this button to display the time. c. While auto-scrolling is off, press this button to display the time. - Page 9 The Countdown function can run in the background as well; simply press the CLOCK button while the countdown is running to return to the time display mode. You will be able to see the current time, and the countdown will continue to run in the back- ground.
-
Page 10: Mounting The Time Bar
Celsius and Fahrenheit temperature readings. MOUNTING THE TIME BAR Your Ivation® time bar can be mounted to the wall by fitting a nail or hook into the openings on the rear of the unit. Make sure that the unit is securely mounted to a wall that can support its weight. -
Page 11: Care And Maintenance
10 minutes, and then reconnect it. SPECIFICATIONS Dimensions: 8” H x 1.75” D x 24” L (20.3 x 4.45 x 61 cm)(JID0124TBLU, JID0124TRED) 8.75” H x 1.75” D x 36” L (22.2 x 4.45 x 91 cm) (JID0136BLU, JID0136RED) Digit Height: 3.25”... -
Page 12: Warranty Information
WHAT DOES THIS WARRANTY COVER? This limited warranty covers defects in materials and workmanship of the Ivation LED digital time bar (the “product”) for the Warranty Period as defined below. -
Page 13: Get In Touch
GET IN TOUCH! info@myivation.com 1-866-849-3049 IVATION is a trademark of C&A IP Holdings, LLC in the US, Canada, China and the EU. All other products, brand names, company names, and logos are trademarks of their respective owners, used merely to identify their respective products, and are not meant to connote any sponsorship, endorsement or approval.
Need help?
Do you have a question about the JID0124TBLU and is the answer not in the manual?
Questions and answers
How do I turn off auto scrolling and just be on clock mode