Table of Contents
Advertisement
Quick Links
Advertisement
Table of Contents

Related Manuals for GRADEN AIRROW


Summary of Contents for GRADEN AIRROW
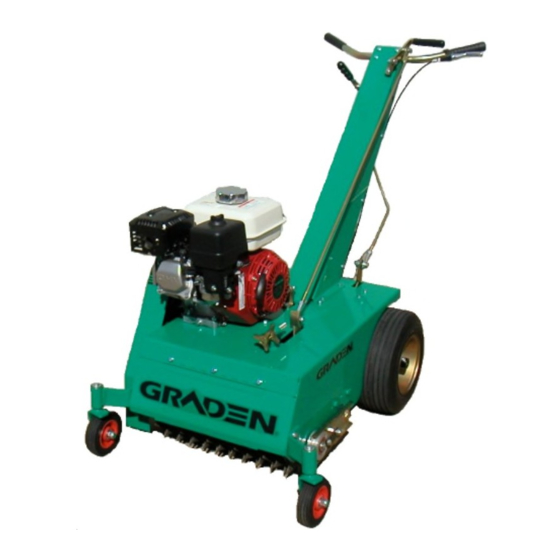
- Page 1 AIRROW VERTICUTTER / SCARIFIER Owner’s Manual...
-
Page 3: Table Of Contents
Table of Contents 1. Specifications Specifications Statement of Machine Use Serial Number Plate 2. To the Owner Preliminary Instructions Warning Symbols Servicing the Verticutter 3. Safety Information General Rules Training Personal Protective Equipment (PPE) Preparation Operational Safety Maintenance Safety 4. Controls Pulley Clutch Handle Lifting / Lowering Handle Motion Lever... -
Page 4: Specifications
1. Specifications 1.1 Specifications Model Graden Airow Verticutter/Scarifier Engine Honda GX200 Power 4.1Kw (5.5hp) Horizontal shaft Engine Oil 0.6 litres SAE 30W Grade Fuel Unleaded 86 RON (minimum) Transmission Oil 5W-30 Engine Oil Cutting Width 380mm Cutting Depth 0-25mm (maximum with standard blades) -
Page 5: Statement Of Machine Use
The serial number plate layout is shown below. It is important to note in particular the Model and Serial numbers to assist you when ordering parts or discussing servicing needs with your Graden Dealer. Also on the plate you will find mass information and the year of manufacture. -
Page 6: To The Owner
• Keep this manual at hand as a ready reference for anybody using the Graden Airrow Verticutter • The designed and tested safety features of this machine are dependent on it being operated within the limitations described in... -
Page 7: Servicing The Verticutter
Your authorised Graden representative has access to tools, genuine spares and equipment to service any and all of your requirements. Use only genuine Graden parts; substitute parts will void the warranty and may not meet the safety and performance standards required for safe and effective operation of the Verticutter. -
Page 8: Safety Information
At the time of printing, material in this manual was current but may vary due to the aforementioned ongoing development. Graden Industries reserve the right to change the machinery specifications without notice. General Rules •... -
Page 9: Training
• Do not allow children to operate the machine or be near it during its operation. • Only people who are very familiar with the rules of safe operation should be allowed to use this machine • Only use the machine during daylight or in good artificial light •... -
Page 10: Personal Protective Equipment (Ppe)
WARNING Stay alert for holes, ditches or obstacles that might obstruct the unit or cause it to tip over. • Be aware of the hazards associated with the engine : ⇒ Petrol is highly flammable so only use an appropriate container ⇒... -
Page 11: Preparation
Preparation • Ensure all safety warnings and decals are in place and legible. • Remove any accumulated debris that might represent a fire hazard. • Ensure that the blades are in a serviceable condition and that the rotor shaft mounting bolts are secure. •... -
Page 12: Maintenance Safety
Maintenance Safety DANGER Raise blades clear of turf or surface, disengage blades and turn off the engine before carrying out any maintenance or servicing. • Never allow anybody to start the engine while adjustments, maintenance or servicing are being performed. •... -
Page 13: Controls
4. Controls All directions are given with reference to standing behind the handles and facing in the direction of forward travel. Pulley Clutch Handle Located behind the engine on top of engine base. This handle engages the rotor blades. To engage the blades pull the pulley clutch handle towards you gently and smoothly until it locks down in position. -
Page 14: Operating Instructions
5. Operating Instructions DANGER Do not operate the Verticutter until you have completely read this manual. Preliminary Checks 1. Clear any debris from above and underneath the machine 2. Ensure scheduled maintenance activities have been completed. 3. Inspect belts for condition and correct tension. 4. -
Page 15: Verticutting
Verticutting 1. Select the depth of cut via the height adjustment knob. Normal range of cut (with standard 190mm blades) is 0mm to 25 mm deep. One revolution of the knob is approximately equivalent to 1mm change in the cutting depth. Clockwise rotation of the knob means a shallower cut;... -
Page 16: Maintenance Operations
6. Maintenance Operations The performance of certain maintenance, adjustment or repair operations will be determined by the owner’s facilities. Tilting of the machine for the purpose of under-deck servicing should be done with great care. If the Verticutter is tilted forward (i.e. pivoting over the front axle) there is a risk that engine oil can enter the cylinder head of the engine and transmission oil can leak from the breather located on top of the transmission. -
Page 17: Adjustments And Settings
Adjustments and Settings 6.1.1 Rotor belt This belt runs from the blade transfer pulley to the rotor shaft. Correct tension on the rotor belt is provided by an idler pulley in a slot under the cover. First remove the cover then loosen the bolt holding the rotor belt idler pulley in place. -
Page 18: Replacements
Replacements 6.2.1 Blade replacement Remove the belt guard. Remove the rotor belt from the rotor shaft. Loosen the retainer bracket on the bearing housing on the left hand side and swivel it up out of the way. From the operating position, push the Lifting/Lowering Lever forward and tilt back the machine at the same time. - Page 19 6.2.2.2 Rotor Clutch Belt Remove the belt guard. Take tension off the rotor belt by loosening the idler pulley in its slot. Remove the rotor belt from the transfer pulley end only. Release tension off the rotor clutch belt by pushing the lever forward.
-
Page 20: Engine Maintenance
• Check all belts for wear and tension ; replace if necessary Transmission Maintenance • Transmission fitted to this machine is a sealed hydrostatic unit which should not require attention. In the event of drive issues contact the company your Verticutter was purchased through or your local Graden agent for advice. -
Page 21: Warning Decals
Warning Decals PART NO. 5312 – Cover Removed Decal (x1) PART NO. 5154 – Danger Decal (x3)
Need help?
Do you have a question about the AIRROW and is the answer not in the manual?
Questions and answers