Table of Contents
Advertisement
Advertisement
Table of Contents

Related Manuals for Paul CLIMOS F 200

Summary of Contents for Paul CLIMOS F 200
- Page 1 Version: 2.0_06/2016...
- Page 2 • CLIMOS F Basic – series (Zehnder Climos 200 Enthalpy – series) • CLIMOS Comfort – series (Zehnder Climos 200 V Enthalpie – series) The design versions CLIMOS F 200 Basic and CLIMOS F 200 Comfort are hereinafter referred to under the product name CLIMOS unless details are for distinguishing device.
-
Page 3: Table Of Contents
Index Introduction ..........................6 Warranty and Liability ......................6 1.1.1 Warrant Terms ......................... 6 1.1.2 Liability ............................. 6 Safety ............................6 1.2.1 Intended use ..........................6 1.2.1.1 Heat recovery unit CLIMOS ..................... 6 1.2.1.2 Control unit ..........................7 1.2.2 Qualification of the target group ....................7 1.2.2.1 Operators .......................... - Page 4 2.4.2.2 Resetting the filter run-time by means of the TFT touch panel ..........26 2.4.3 What to do in the event of a failure? ..................27 Disposal ..........................27 Hints for qualified personnel ....................28 Prinzipal configuration of the system ..................28 Installation requirements ......................
- Page 5 3.9.7 Terminal scheme master controller..................60 Annexes ..........................61 Checklist A Maintenance Works User ................... 61 Checklist B maintenance works qualified personnel.............. 62 Commissioning and handover certificate ................63 Air volume log ........................64 Product fiche .......................... 65 Product label .......................... 66 Declarations of conformity .....................
-
Page 6: Introduction
For safety reasons, it is not permitted to modify the product or to install parts which are not expressly recommended for this product or distributed by PAUL Wärmerückgewinnung GmbH. Only use the CLIMOS in accordance with the information contained in the enclosed documentation and the standards and directives valid on site: •... -
Page 7: Control Unit
• The instructions for regular checking and maintenance of the device must be strictly complied with; • Any modification of the CLIMOS is prohibited; All enclosed documentation is a part of the product: • Read and observe the documentation; • Store the documentation in such a way that they are accessible at any time. 1.2.1.2 Control unit By means of the control units TFT touch panel or LED control panel, you configure and operate the... -
Page 8: Hints For The Operator And The Qualified Personnel
2 Hints for the operator and the qualified personnel This section describes how to use the CLIMOS. Product description The CLIMOS is a ventilation device with heat recovery for healthy, balanced and energy-saving comfort ventilation. A comfort ventilation system consists in exhausting stale, odorous air for example from the kitchen, the bathroom, W.C.s and in introducing an equal quantity of fresh air into living rooms, bedrooms and children’s rooms. -
Page 9: Type Plate
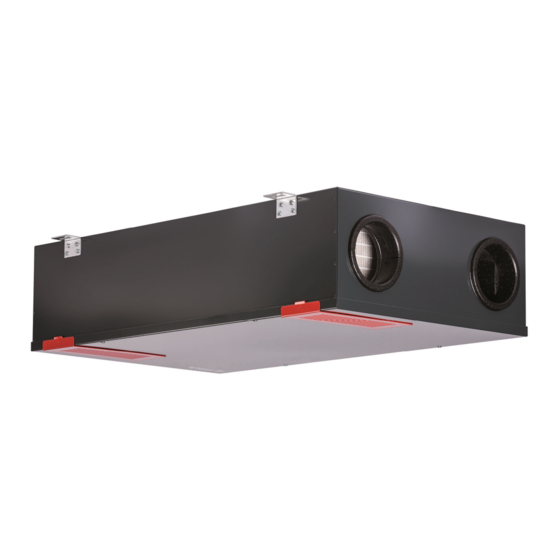
Item Designation Casing cover with quarter turn lock (4x) EPP filter cover (2x) Filter (2x) Retaining clamps (4x) Mounting bracket (4x) Design filter cover (2x), Option Heat exchanger box Control system Fan box (2x) Housing Tab. 1: Main components CLIMOS 2.1.1 Type plate The type plate clearly identifies the product. -
Page 10: Avaiable Control Modules
Avaiable control modules The CLIMOS can be equipped with the following control modules: • Control unit LED control panel (w x h x d in mm: 80 x 80 x 12) • Control unit TFT touch panel (w x h x d in mm: 102 x 78 x 14) •... - Page 11 pressing another function key, the boost ventilation mode can be cancelled at any time. For cyclic filter checking, an operating hours counter is Reset filter run-time integrated in the control. The key Reset filter run-time is used for resetting the filter run-time. Key combination By means of the standby function, the ventilation device is activation / deactivation...
-
Page 12: Signalling Of Operating And Error Conditions
2.2.1.2 Signalling of operating and error conditions LED L8 LED L1 … L7 LED L11 LED L9 LED L12 LED L10 Fig 4 : LED signalling of the LED control panel LED signalling Function / meaning LED lamp display No LED fan speed 0 (fan off, standby) L1 ... -
Page 13: Tft Touch Panel
2.2.2 TFT touch panel The 3.5“ TFT display of the touch panel is operated by touching the symbolised buttons with the fingers. The display of the active operating mode and the corresponding button are signalled in colour. The comfort edition of the control panel, as a TFT touch panel with a stainless steel frame, is designed for an in-wall installation. - Page 14 Button The automatic mode has 2 automatic functions – automatic Automatic mode timing and automatic sensor. The manual settings are deactivated by touching the button. By means of the automatic timing mode, different fan speeds Automatic timing mode (FS0, FS1, FS2 or FS3) can be defined for every day of the week with a resolution of 15 minutes.
- Page 15 expired. In case the filter run-time has expired, the message “Replace filter” is generated. Buttons By touching these buttons, values can be changed in the + / - menus (e.g. fan speeds in steps of 1% or the time in steps of minutes or seconds).
-
Page 16: Menu Structure Of The Tft Touch Panel
Menu structure of the TFT touch panel The menu structure is made up of the start menu and three main menus (information, settings and setup). When activating the TFT touch panel, the start menu is displayed. The main menus are each divided up into submenus, allowing the access to information or parameter changes. -
Page 17: Main Menu Information
2.3.1 Main menu Information The main menu Information is divided into eight submenus. In the submenus, information on the current device status as well as selected factory pre-sets (e.g. type of device) are visualised. Using the navigation buttons, the respective menu is selected and called up with the Enter key. 2.3.1.1 Submenu Current messages Here, a piece of information (e. -
Page 18: Submenu Filter
Symbol Designation Explanation / actions Button Using the button Fan speed 1, activate FS1 and parameterise Fan speed 1 (FS1) it with the navigation buttons. Setting range: 20 % < FS1 < FS2 Button Using the button Fan speed 3, activate FS3 and parameterise Fan speed 3 (FS3) it with the navigation buttons. -
Page 19: Submenu Automatic
2.3.2.4 Submenu Automatic Two operating modes are provided in the automatic mode: • Automatic timing • Automatic sensor The desired operating mode of the automatic mode is selected using the navigation buttons (red background of the text) and by setting the checkmark, and confirmed with Enter. 2.3.2.4.1 Automatic timing Symbol... -
Page 20: Automatic Sensor
Fan speed (FS) Time slot (time 0 - 24 - 16 - 24 – 8 Tab. 9: Time slot factory setting, group weekdays Mon-Fri Fig 8: Automatic timing factory setting, group weekdays Sat-Sun Fan speed (FS) Time slot (time 0 - 24 - 24 Tab. -
Page 21: Submenu Date/Time
parameterized between 17 % and 100 %. Using the navigation buttons, the characteristic variables (red background of the text) to be parameterised can be selected and the values can be set using the buttons + / -. Output signal sensor Symbol Designation 0 …... -
Page 22: Submenu Key Lock
2.3.2.8 Submenu Key lock The user interface of the TFT touch panel can be deactivated with a password-protected key lock. Symbol Designation Explanation / actions Password Entry of the password <11111> and confirmation with Enter. On prompt the touch pad, “Key lock” is displayed as current status. Button After touching the button, the user is prompted to enter the Deactivate key... -
Page 23: 2.3.2.12 Submenu Brine Loop Cooling
Tab. 15: Parameterization temperature thresholds flap of the geothermal heat exchanger 2.3.2.12 Submenu Brine loop cooling Only for the CLIMOS F 200 Basic series without integrated defroster! In this menu, an optionally available brine defroster is displayed. The cooling function of the brine defroster can be activated or deactivated. -
Page 24: Replacement Of The Filter
2.4.1 Replacement of the filter The plant must not be operated without filter. During filter replacement and maintenance work, the ventilation device must be switched off! Two high-quality original filters of the manufacturer are installed inside the CLIMOS. After the corresponding message of the control panel or after visualisation of a programmed digital output signal, the filters in the CLIMOS shall be checked. - Page 25 4. Remove the EPP filter cover C. Fig 12: Removal of the EPP filter cover 5. Pull the filter D out of the filter compartment by holding it on the strap. Fig 13: Removal of the filter 6. Insert the new filter. The arrow E on the filter frame and the arrow F impressed into the EPP filter compartment (next to the recessed grip) must point in the same direction! Fig 14: Insertion of the new filter...
-
Page 26: Resetting The Filter Run-Time
7. Close all filter covers in reverse order. 8. Proceed in the same manner for the other device filter. 9. Re-establish the mains connection. 2.4.2 Resetting the filter run-time Once the filter has been changed, the counter for the filter run-time must be reset. Resetting the filter run- time can be performed using the respectively connected control unit or the digital input signal (programmable with PC software as special solution). -
Page 27: What To Do In The Event Of A Failure
Disposal When the life time cycle of your CLIMOS has expired, the company PAUL Wärmerückgewinnung GmbH offers you free take-back. If you do not make use of the possibility of feedback of recyclable product parts into the cycle of materials, we would like to remind you that the CLIMOS must not be disposed of in the normal household garbage. -
Page 28: Hints For Qualified Personnel
Prinzipal configuration of the system Fig 15: General system outline with CLIMOS F 200 Comfort series The basic configuration of the system is universally valid and does not represent the system outline of the project-related ventilation plant! It is designed for representation of the plant-specific system structure for sensors and ventilation equipment. -
Page 29: Transport And Packing
3.2.1 Transport and packing Proceed with care when transporting and unpacking the CLIMOS. The packaging of the device may only be removed immediately before assembly! Prior to and during assembly interruptions, the open air duct connection stubs must be protected against ingress of construction dust and moisture! 3.2.2 Checking of the scope of delivery... -
Page 30: Mounting Position Ceiling-Hanging
3.3.2 Mounting position ceiling-hanging In case of the mounting position ceiling-hanging, the mounting is made horizontally at the ceiling surface in the slotted holes (38x10 mm) of the 4 mounting brackets with suitable fixing elements depending on the ceiling construction. If the CLIMOS is to be mounted in an intermediate ceiling, we recommend the use of the product-related drywall inspection flap in the suspended ceiling. -
Page 31: Mounting Position Wall-Mounted Vertically
3.3.5 Mounting position wall-mounted vertically In case of the mounting position wall-mounted vertically, the mounting is made horizontally at the wall surface in the slotted holes (38x10 mm) of the 4 mounting brackets with suitable fixing elements depending on the wall construction. The exhaust air connection for the construction types A or B must always be located at the top! Fig 20: Mounting position wall-mounted vertically... -
Page 32: Air Duct Connection
Fig 22: Mounting position inclined wall vertically 3.3.8 Air duct connection When mounting the air ducts, the following points must be taken into account: • Mount the types of air ducts of the ventilation plant to the connection stubs according to the present construction form right (type A) or left (type B), see label air ducts next to the type plate. -
Page 33: Electrical Connections
Electrical connections Electrical connections must be established in accordance with the applied standards to electrical equipment and only by qualified personnel! The electrical power supply of the CLIMOS is provided via the 3-pole plug connection A of a lower power device by means of the power cable. -
Page 34: Connection Of The Tft Touch Panel
A screened 4-wire cable is connected to the 5-pole screw terminal X1 of the adapter board. This cable connects the adapter board to the 5-pole screw terminal of the control unit’s adapter board. In order to be protected against error voltage, short circuit and dust, the adapter board must be mounted into the casing made of transparent plastic. -
Page 35: Connection Of Several Tft Touch Panels
3.4.3 Connection of several TFT touch panels It is possible to connect up to three TFT touch panels as control units for the ventilation device. On the hardware side, the TFT touch panels shall be connected in parallel to the terminal X1 of the adapter board according to conductor assignment Tab. -
Page 36: Connection Of External Actuators / Sensors At The Master Controller
Fig 30: Adapter board with terminal X1 on an in-wall base plate; ribbon cable of the adapter board; rear panel LED key-pad (from left to right) Do not pull the ribbon cable off the adapter board, but put the LED-Control panel diagonally through the PEHA frame! 3.4.5 Connection of external actuators / sensors at the master controller... - Page 37 Fig 32: Casing cover with 4x quarter turn lock B Fig 33: Quarter turn lock with captive screw 4. Remove the casing cover C and remove the cable for potential equalisation from the flat plug of the casing cover. Fig 34: Remove the casing cover C from the device...
- Page 38 5. Loosen the 2 locking screws D of the control system casing by approx. 4 - 6 mm by turning them counter clockwise and remove the cable for potential equalisation from the flat plug of the control system casing. Fig 35: Screws D for fastening the control system casing 6.
- Page 39 Fig 38: Removal of the control system casing above 8. Guide the cable through one of the two rubberised grommets F of the control system casing. Fig 39: 2x cable grommet F at the control system casing 9. Connect it to the terminal points provided for that purpose according to Appendix 3 Terminal scheme master controller.
-
Page 40: Connection Of External Boost Ventilation Switch
10. Remount the control system casing in reverse order. Introduce the press-in keyhole fasteners of the control system casing into the keyholes E. Fig 41: Establishment of the keyhole connection 11. Place the cables into the free space between the control system casing and the EPP modules. Make sure that no cables get jammed under the control system casing! 12. -
Page 41: Connection Of External Sensors
3.4.5.2 Connection of external sensors The operating mode Automatic sensor auf the automatic mode is controlled by an analogue sensor signal which is generated by one or more sensors. The connection between the sensor module and the terminal2 of the master controller is established by means of the cable prescribed for the transmission of the sensor signal. -
Page 42: Operation Without A Control Unit Connected
Terminal X1 master controller Contact designation X2.1 Digital input or output 1 (can be parameterized) X2.2 Digital input or output 1 (GND) X2.3 Digital input or output 2 (can be parameterized) X2.4 Digital input or output 2 (GND) Tab. 27: Terminal assignment DIO1 und DIO2 3.4.7 Operation without a control unit connected When operating the ventilation device without control panel, the control operates according to the... -
Page 43: Adjustment Of The Nominal Air Flow With Led Control Panel
Buttons By touching the navigation buttons, select the submenu Fan Navigation speeds and confirm with the Enter button. Button Activate the fan speed 2 (FS2) by touching the corresponding Fan speed 2 button. (FS2) Buttons Parameterise fan speed 2 (FS2) in accordance with characteristic Navigation curves for the nominal air volume flow Button... -
Page 44: Adjustment Of The Valves
The values for the balancing factor are pre-set and should only be changed if needed. 3.5.3 Adjustment of the valves Make sure that the supply and extract air valves are open as much as possible at the beginning of the volume flow measurement. •... -
Page 45: Submenu Fan Speeds
• Selection of the type of defroster heater, only for CLIMOS F 200 Basic series: Electric defroster PTC defroster Brine defroster Symbol Designation Explanation / actions Buttons Temperatures Navigation Select touching navigation buttons (red background of the text) and confirm with Enter. -
Page 46: Submenu Post-Heating
Button Using the button Fan speed 3, activate the FS 3 and Fan speed 3 parameterise it with the navigation buttons. (FS3) Setting range: FS2 < FS3 < 100 % Using the buttons + / -, an imbalance can be set. Buttons Confirm by touching the Enter button. -
Page 47: Submenu Ground Pipe Diverter Valve
Buttons Temperature / Hysteresis/ inactive below Navigation Select by touching the navigation buttons (red background of the text) and confirm with Enter. Buttons Set the selected parameter with the buttons + / - . + / - Buttons Confirm by touching the Enter button. By touching the Cancel / Enter back button, exit the menu level. -
Page 48: Maintenance And Repair By Qualified Personnel
Maintenance and repair by qualified personnel If regular maintenance work is not performed at the CLIMOS, this impairs the functioning of the comfort ventilation. The maintenance and repair by qualified personnel should only be carried out by a maintenance service on the basis of a maintenance contract. - Page 49 Fig 46: Quarter turn lock with captive screw 4. Remove the casing cover C and remove the cable for potential equalisation from the flat plug of the casing cover. Fig 47: Remove the casing cover C from the device 5. Pull the retaining clamps D (4x) out of the EPP foam modules in vertical position. Fig 48: Retaining clamps D for form-fit fastening of the EPP foam modules...
- Page 50 6. Push each of the fan boxes F in the direction of the air duct connections by approx. 3 - 4 mm so that the heat exchanger box G is unlocked out of the tongue-and-groove joint. Fig 49: Unlocking of the heat exchanger box G by shifting the fan boxes F In the event that the fan boxes F cannot be shifted, the air duct connection stubs of the fan boxes F must be shortened! Cut through the EPP connection stubs in the circumferential groove H (set point of sectioning)
- Page 51 7. Pull out the heat exchanger box G in vertical position. Fig 51: Removal of the heat exchanger box G 8. Clean the internal heat exchanger I of the heat exchanger box G, if necessary. Fig 52: Heat exchanger I in the heat exchanger box G In order to do so, proceed as follows: •...
- Page 52 9. Carefully aspirate with a vacuum cleaner the intake casing J of the fan boxes and, if it is the version CLIMOS Comfort, you suck the PTC heating elements of the integrated defroster off with a suitable suction nozzle. Do not touch any parts of the defroster with your hands, and do not damage the temperature sensor while cleaning! Fig 53: Intake casing fan box J (2x) 10.
-
Page 53: Visualisation Of Errors And Error Treatment
Visualisation of errors and error treatment The device control is equipped with an internal system for error detection.. The visualisation of the error messages and the error forecast is made according to the display possibilities of the connected control panel. In response to an error condition, the fans are switched off. - Page 54 Error sensor 4 Sensor break or short circuit Check or replace sensor temperature sensor T4 Supply air temperature too Minimum supply air temperature < Supply air temperature > setpoint setpoint; + 1 K Current intake air temperature < Intake air temperature too Intake air temp >...
-
Page 55: Technical Description
Technical description 3.9.1 Versions CLIMOS Basic – right (type A) / left (type B) Ventilation unit with counter flow enthalpy exchanger without integrated defroster CLIMOS Comfort – right (type A) / left (type B) Ventilation unit with counter flow enthalpy exchanger with integrated defroster 3.9.2 Designs layout air connection Design right (type A) - Page 56 38 dB(A) (at 100 m³/h / 100 Pa) ISO 3743-1, distance of 3 m, freefield) 42 dB(A) (at 200 m³/h / 100 Pa) Tab. 42: Operating data Certificates / Approvals CLIMOS F 200 Comfort Passivhouse-certificate Certificate acc. DIN 4719 Tab. 43: Certificates / Approvals p- -characteristic curve...
-
Page 57: Dimensional Sketch
3.9.4 Dimensional sketch Fig 55: Dimension drawing HRU CLIMOS... -
Page 58: Circuit Diagram Climos Basic - Series
3.9.5 Circuit diagram CLIMOS Basic - series Fig 56: Terminal assignment CLIMOS Basic... -
Page 59: Circuit Diagram Climos Comfort - Series
3.9.6 Circuit diagram CLIMOS Comfort - series Fig 57: Terminal assignment CLIMOS Comfort... -
Page 60: Terminal Scheme Master Controller
3.9.7 Terminal scheme master controller Fig 58. Terminal assignment Master-Controller... -
Page 61: Annexes
4 Annexes Checklist A Maintenance Works User Maintenance works Enter date for the quarter 1. Change both the filters in the device (Filter change cycle 90 days) Quarter Year 20... 20... 20... 20... 20... 20... 20... 20... 20... 20... 2. Clean extract air prefilter / filter in extract air valves (change approx. -
Page 62: Checklist B Maintenance Works Qualified Personnel
Checklist B maintenance works qualified personnel Maintenance works Enter Result − Inspection of MVHR unit based according to the currently valid national standards − Informal report for comments on MVHR unit's condition − Use additional sheet of paper for adding reports of subsequent years Parts Annually Result... -
Page 63: Commissioning And Handover Certificate
Commissioning and handover certificate Customer data Name: First Name: Tel: Street: Postal Code: City: Construction Projects: Type of device: Serial number: Year of manufacture: Completeness Parts Design Result - Design as planned yes / no Supply air duct yes / no - There is an option to clean - Layout as planned yes / no... -
Page 64: Air Volume Log
Air volume log Customer data Name: First name: Tel: Street: Postcode: City: Construction Projects: Type of device: Serial number: Year of manufacture: Measurement data Used measuring device: Description of failures during Internal temperature: the measurement: External temperature: Filer status during calibration Intake air Exhaust air State of building Fan speed ratio... -
Page 65: Product Fiche
Product fiche... -
Page 66: Product Label
Product label For the CLIMOS, there are two different product labels, depending on the application of the device. The product label, which applies for the ventilation plant, conforms to the installation of the plant and to the model identifier of the product data sheet. The product label shows the following information from the product data sheet: •... -
Page 67: Declarations Of Conformity
Product Description: Heat Recovery Unit CLIMOS F 200 Basic - series Heat Recovery Unit CLIMOS F 200 Comfort - series Derivative 2004/108/EG of the European Parliament and the council on 15... - Page 68 PAUL Wärmerückgewinnung GmbH August-Horch-Str. 7 08141 Reinsdorf Germany Phone: +49 (0) 375 - 30 35 05 0 Fax: +49 (0) 375 - 30 35 05 55 info@paul-lueftung.de www.paul-lueftung.de Version: 2.0_06/2016...
Need help?
Do you have a question about the CLIMOS F 200 and is the answer not in the manual?
Questions and answers