Table of Contents
Advertisement
Quick Links
ATTENTION
INSTALLER: PLEASE LEAVE THESE INSTRUCTIONS WITH THE CONSUMER.
CONSUMER: PLEASE READ & RETAIN THESE INSTRUCTIONS FOR FUTURE REFERENCE AND BEFORE
INSTALLING OR OPERATING.
WARNING
• If the informa�on in this manual is not followed exactly, a fire or explosion may result and cause
property damage, personal injury, or loss of life.
WARNING
•
Read the installa�on, opera�on, and maintenance instruc�ons thoroughly
before installing, opera�ng, or servicing this equipment to reduce risk of fire,
burn hazard, or other injury.
• This manual should be retained for your informa�on.
• Do not operate this electric fireplace without having read this manual.
•
All electrical installa�ons, service, and repairs must be performed by a
qualified technician or authorized service agent.
• NOTE: This fireplace is not intended for commercial use.
CALIFORNIA PROPOSITION 65 WARNING
WARNING: This product can expose you to chemicals including lead and lead compounds,
which are known to the State of California to cause cancer and birth defects
or other reproduc�ve harm. For more informa�on, go to: www.P65Warnings.ca.gov
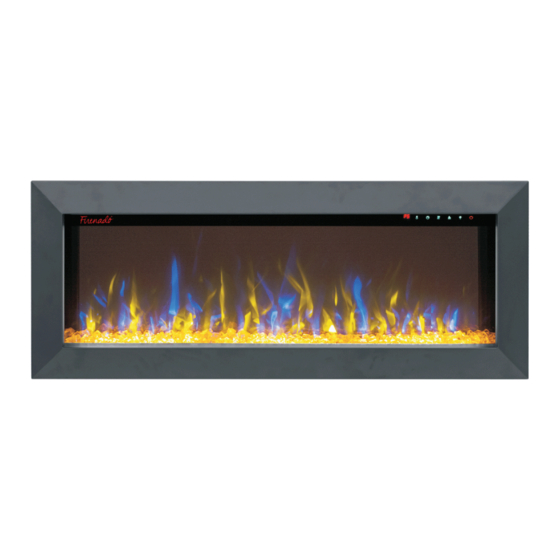
Firenado® Electric Fireplace Owner's Manual
FN-50-BIF, FN-60-BIF, FN-72-BIF
50"/60"/72" - Built-In Electric Fireplace
AC 110-120V 60Hz 1400-1600W
This appliance has a
remote that requires
button batteries that
are hazardous to
young children.
1
Advertisement
Table of Contents

Summary of Contents for Firenado FN-50-BIF
- Page 1 Firenado® Electric Fireplace Owner’s Manual FN-50-BIF, FN-60-BIF, FN-72-BIF 50”/60”/72” - Built-In Electric Fireplace AC 110-120V 60Hz 1400-1600W ATTENTION INSTALLER: PLEASE LEAVE THESE INSTRUCTIONS WITH THE CONSUMER. CONSUMER: PLEASE READ & RETAIN THESE INSTRUCTIONS FOR FUTURE REFERENCE AND BEFORE INSTALLING OR OPERATING.
-
Page 2: Table Of Contents
Table of Contents Warnings/Safety Information Rating Plate Information Locating the Appliance Grounding the Appliance Speci cations and Dimensions Parts and Hardware Installation and Assembly 8-12 Hardwiring Installation Operation - Remote Control and Touch Panel 14-16 Temperature Limiting Control Care and Maintenance Troubleshooting 18-19 Warranty Information... - Page 3 WARNING • THIS APPLIANCE IS HOT WHEN OPERATING AND CAN CAUSE SEVERE BURNS. • Do not install damaged, incomplete, or substitute components. • Young children should be carefully supervised when they are in the same room as the appliance. Toddlers, young children, and others may be susceptible to accidental burns.
-
Page 4: Warnings/Safety Information
SAFETY INFORMATION WARNING • Due to high temperatures, the replace should be located out of tra c and away from furniture and draperies. • Ensure that you have incorporated adequate safety measures to protect infants/toddlers from touching hot surfaces. • It is imperative that that the control compartments, circulating blower, and its passageway in the replace are kept clean. -
Page 5: Rating Plate Information
CERTIFIED UNDER CANADIAN AND AMERICAN NATIONAL STANDARD: CSA 22.2 NO. 46 AND UL 2021 ELECTRIC FIREPLACE. SUITABLE FOR BEDROOM AND BED-SITTING ROOM INSTALLATION. SUITABLE FOR MOBILE HOME INSTALLATION. MASTER CONTRACT: MODEL FN-50-BIF (BEF-50BIF) VOLTAGE: 120VAC FREQUENCY: 60Hz POWER: 1450W DATE CODE: DESIGNED IN NORTH AMERICA... -
Page 6: Locating The Appliance
Locating the Appliance WARNING DUE TO HIGH TEMPERATURES, THIS ELECTRIC APPLIANCE SHOULD BE LOCATED OUT OF TRAFFIC. KEEP COMBUSTIBLE MATERIALS SUCH AS FURNITURE, PILLOWS, BEDDING, PAPERS, CLOTHES, AND CURTAINS AT LEAST 36” FROM THE FRONT OF THE APPLIANCE. NEVER LOCATE THIS ELECTRIC APPLIANCE WHERE IT MAY FALL INTO A BATHTUB OR OTHER WATER CONTAINER. WEAR SAFETY GLASSES FOR PROTECTION DURING INSTALLATION AND MAINTENANCE. -
Page 7: Speci Cations And Dimensions
Specifications and Dimensions PRODUCT DIMENSIONS Model No 50" 20-7/8” 7-1/4” 6-1/4” 18" 47-3/4” 44" 12" FN -50-BIF [1270mm] [456mm] [1120mm] [304mm] [529mm] [529mm] [529mm] [529mm] 20-7/8” 7-1/4” 6-1/4” 60" 18" 54" 12" 57-3/4” FN -60-BIF [529mm] [529mm] [529mm] [1524mm] [456mm] [1374mm] [304mm] [529mm]... -
Page 8: Installation And Assembly
Assembly Installation Your appliance is a recessed and/or mantel installed appliance. Select a suitable location that is not susceptible to moisture and is away from drapes, furniture, and high-traffic areas. NOTE: Follow all national and local electrical codes. MINIMUM CLEARANCE TO COMBUSTIBLES Measurements are taken from the glass front. - Page 9 Assembly Installation Framing Size Model Number 48-1/4” [1225mm] FN -50-BIF 18-1/2”(467mm) 6-1/2”(165mm) FN -60-BIF 58-1/4” [1480mm] 18-1/2”(467mm) 6-1/2”(165mm) FN -72-BIF 70-1/4” [1784mm] 18 -1/2”(467mm) 6-1/2”(165mm) STEP 1. Select a dry wall to cut a hole for the replace box. Please refer to the framing sizes in above chart.
- Page 10 Figure B STEP 2. Place the replace on a clean surface. Using the screw driver, take o the TWO screws in both sides. See Figure B Figure C STEP 3. Have two people pull the trim up, then take them out of the replace box.
- Page 11 STEP 4. Using the screw driver, take o the 8 screws as shwon below in Figure D. Have two people take out the glass panel as shown in Figure E and move it to a clean, soft place to avoid scratching. Figure D Figure E...
- Page 12 Have two people lift the replace box and place it into the opened hole. Attach STEP 5. the replace to the wall using the four wall screws on each side of the replace box. See Figure F Figure F STEP 6. Place the decorative crystals or log set on the designated slot and even with the front.
-
Page 13: Hardwiring Installation
HARDWIRING INSTALLATION WARNING TURN OFF THE APPLIANCE COMPLETELY AND LET COOL BEFORE SERVICING. ONLY A QUALIFIED SERVICE PERSON SHOULD SERVICE AND REPAIR THIS ELECTRIC APPLIANCE. HARDWIRING CONNECTION If it is necessary to hardwire this appliance, a qualified electrician must remove the cord connection and wire the appliance directly to the house hardwiring. -
Page 14: Operation - Remote Control And Touch Panel
Operation Read and understand this entire owner’s manual, including all safety information, before plugging in or using this product. Failure to do so could result in electric shock, fire, serious injury, or death. Power Plug the power cord into a 110~120 Volt 15-Amp grounded outlet (see IMPORTANT SAFETY INFORMATION on Pages 3 and 4). - Page 15 Remote Control &Touch Panel Operation BUTTON FUNCTION ACTION & INDICATION ON: Enables control panel functions Press once. Indicator light turns on. and remote control. Turns on flame Power turns on. All functions effect. enabled. POWER OFF: Disables control panel functions Press again.
-
Page 16: Temperature Limiting Control
4. Press once: Touch panel TEMPERATURE button: Turns heater on and off. indicator becomes active. 5. Press again until desired setting NOTE: Press the button for 5 seconds, the temperature setting will switch from is reached. Digital display shows °C to °F. Doing this will also switch from °F setting circles as below: to °C. -
Page 17: Care And Maintenance
Care and Maintenance Cleaning ALWAYS turn the fireplace OFF and unplug the power cord from the outlet before cleaning, performing maintenance, or moving this fireplace. Failure to do so could result in electric shock, fire, or personal injury. NEVER immerse in water or spray with water. Doing so could result in electric shock, fire, or personal injury. -
Page 18: Troubleshooting
Troubleshooting SAFETY INFORMATION WARNING DISCONNECT THE APPLIANCE COMPLETELY AND LET COOL PRIOR TO ANY SERVICE. ONLY A QUALIFIED SERVICE PERSON SHOULD SERVICE AND REPAIR THIS ELECTRIC APPLIANCE. Problem Possible Cause Solution 1. Fireplace has overheated 1. Reset switch by turning main Fireplace turns o and will not turn on. - Page 19 Replace batteries in Low batteries. Remote control remote control. does not work. Aim control at sensor located Not aiming control correctly. directly behind glass screen in center of unit just above logs. Defective remote control Replace remote control and/or and/or sensor. sensor.
-
Page 20: Warranty Information
All electric appliances must have a quali ed installer complete the installation for the warranty to be in e ect. The incorrect installation of the Firenado® electric appliance will void the warran- Firenado® shall not be liable under this or any implied warranty for incidental or consequential damages and Firenado®... -
Page 21: Product Registration
Phone__________________________________ Street Address ______________________________________________________________ Street Address Line 2_________________________________________________________ City__________________ State/Province/Region____________________ Zip/Postal Code______________________ Country________________________________ What is the model number of the Firenado product purchased? __________________________________________________________________________________ What size Firenado product did you purchase? ___________________________________________________________________________________ Where did you buy your Firenado product? ___________________________________________________________________________________...
Need help?
Do you have a question about the FN-50-BIF and is the answer not in the manual?
Questions and answers