
Related Manuals for The Renovator Transforma 24

Summary of Contents for The Renovator Transforma 24
- Page 1 SAFETY AND SAFETY AND OPERATING MANUAL OPERATING MANUAL FOR THE 24 & 35 CONFIGURATION KIT FOR THE 24 & 35 CONFIGURATION KIT...
- Page 2 OPERATING & SAFETY INSTRUCTIONS...
- Page 3 CONGRATULATIONS You have purchased one of the most versatile ladder systems in the world. The Transforma Ladder's special design is suited to all types of climbing needs. The Transforma Ladder is made from durable materials and parts to enable it to have a long life expectancy.
-
Page 4: Table Of Contents
L a d d e r S y s t e m ™ OPERATING AND SAFETY INSTRUCTIONS CONTENTS Part Page No. Description - Transforma Ladder System Using the Transforma Ladder A. The Hinge B. The Locking Mechanism C. Using the A-frame Positions D. -
Page 5: One Description - Transforma Ladder System
This mechanism locks into the rungs of the inner ladder unit, allowing adjustment at both ends of the ladder. A table of the working heights for the Transforma 24 & 35 models is as follows: Storage... -
Page 6: Two Using The Transforma Ladder
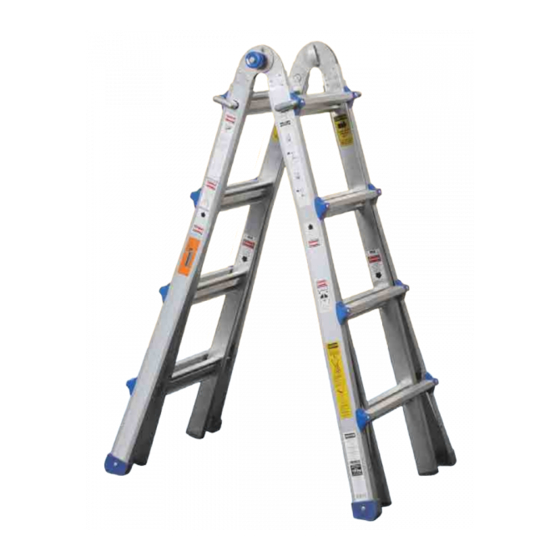
SAFETY PRECAUTION: CHECK THE CONDITION OF THE Figure A-1 LADDER UPON RECEIPT AND (Storage Position) BEFORE EACH USE. NEVER USE A BROKEN OR DAMAGED LADDER. Figure A-2 (A-Frame Position) PART TWO. Using the Transforma Ladder System The Transforma Ladder System has two mechanical components: A. -
Page 7: The Hinge
2. Open the ladder by pulling the two ladder halves apart until both hinge lock pins snap and lock into the A-frame position. (See Figure A-6). 3. IMPORTANT Once the hinge lock pins snap into place, insert the work platform as a spreader to brace the ladder. -
Page 8: Using The A-Frame Positions
Using the A-frame Positions 1. Unlock both hinge locks. (See Figures A-4 & A-5) 2. While the ladder is in the storage position, pull out the four Lock Assemblies from the rung holes and rest them on the outside ladder rail. (See Figures C-1 and C-2). -
Page 9: Using The Step Level Positions
3. Unlock the Lock Assemblies on the upper half of the ladder. Hold the outer ladder then walk backwards allowing the ladder to extend to the required height. Extend the lower half of the ladder if more height is required. (See Figure D-1) Figure D-1 4. -
Page 10: Scaffolding Trestle Instructions
Scaffolding Trestle Instructions Figure F-2 Figure F-1 Pull the entire inner ladder assembly out Open the inner ladder assembly until the of the outer ladder railings and set them hinges lock into the A-frame position. down side by side (See Figure F-1). This is one half of the trestles needed for the scaffolding facility (See Figure F-2). - Page 11 Figure F-5 Figure F-6 Trestle Joint Narrow Plate to the Outside Wide Trestle Joint Plate Narrow Trestle Ladder Rail Joint Plate Orientate the Trestle Joints so that the Wide Plate slides over the inside of the Make sure each Trestle Joint is Ladder Rail and the Narrow Plate slides positioned with its plates both inside over the outside of the Ladder Rail.
-
Page 12: Three Safety Advice
8. The stepladder is now set up for use Figure F-8 as a second trestle (See Figure F-8). 9. IMPORTANT Once the hinge lock pins snap into place, insert the work platform as a spreader to brace the ladder. (See Figure A-7) Refer to page 15 for more information on how to insert the Work Platform. -
Page 13: Work Platform Configuration Instructions
Work Platform Configuration Instructions Figure G-1 Figure G-2 Figure G-3 Adjust the bolt tightness Adjust the platform to fit Place platform at required until brackets move stiffly. the ladder rung. height. (See Figure G-1). (See Figure G-2). (See Figure G-3). Figure G-4 Figure G-5 Figure G-6 Slide platform in and Slide the platform back with Ensure the platform is carefully climb up above... - Page 14 Figure G-7 Figure G-8 7. Once finished with the work 8. The work platform can also be used as a platform, step onto the rung above utility shelf. (See Figure G-8). the work platform and push the work platform forward with the front of your foot. Step back down past the work platform.
- Page 15 IMPORTANT: When using the spreader on the inner ladder rails Figure G-9 Forks Rotate the forks on the work platform to the angled position shown right. (See Figure G-9). Fork Bolt 10. Insert the lower forks of the work 11. Insert the horizontal bar of the platform into the lower channel on work platform into the upper the back of the step.
-
Page 16: Final Precautions
Final Precautions Keep clothing and body parts away from the hinges and lock assemblies while in the process of adjusting the ladder. These heavy duty mechanisms will pinch if carelessly adjusted. Whilst extending the inner ladder within the outer ladder railings, never let clothing or body parts be placed between the moving rungs. -
Page 17: Caring For Your Transforma Ladder
Caring for your Transforma Ladder 1. To maintain easy operation, oil the hinge mechanism and lock assemblies with light machine oil every six months and before long term storage. Lubricate more often as use dictates, and during extreme weather conditions. 2. - Page 18 Safety Advice: PART THREE Portable Ladders Ladders can be a serious safety hazard if not used properly. Tough Man TMT# 0010 Tools Brand Brand Developers Developers Limited Limited Name: TMT Transforma Cartoon 10...
- Page 19 • Ensure safety feet are fitted to the ladder • Always use a ladder that is long enough. before each use. • Never climb or stand on the top two steps of a Tough Man TMT# 0006 • Make sure it is firm and steady with no stepladder. Tools Brand Brand Developers Developers Tough Man TMT# 0008 Limited Limited defective top rungs, braces or side rails.
- Page 20 • Do not set the feet of a ladder so far away that they may slip out at the bottom. Tough Man TMT# 0003 Tools Brand Brand Developers Developers Limited Limited Name: TMT Transforma Cartoon 03 • A ladder placed too close and Tough Man TMT# 0001 Tools...
- Page 21 Please read these Quick Ladder Tips before you or your Family use any Ladder ONDITION OF LADDER NGLE OF 4 to I or 75 (approximately) EVEL SETUP ENGTH IS CORRECT • Ensure the ladder is long enough for the job. •...
-
Page 22: Four Accessories
OPTIONAL LADDER ACCESSORIES PART FOUR Leg Leveller The leg leveller is designed to make working on uneven surfaces easier. Wall Standoff The Wall Standoff is great to use when working around windows, guttering, overhangs and other obstacles. The Wall Standoff’s extra width increases the versatility of any model of Transforma Ladder. - Page 23 Work Platform The Work Platform is fully compatible with all models of the Transforma Ladder and can be used to stand on or for holding your tools. Extendable Plank The Extendable Plank is ideal on those jobs where you require the additional height that the ladder provides over a small or large work area, such as painting coving in your house or maintaining your guttering.
-
Page 24: Five Warranty Registration Process
PART FIVE LIFETIME WARRANTY Brand Developers Australia Pty Limited Brand Developers Limited WARRANTY REGISTRATION PROCESS Brand Developers Australia Pty Limited and Brand Developers Limited warrants each new ladder, to the original purchaser thereof, to be used and maintained properly. This warranty covers all parts of the ladder, including hinges and lock assemblies. -
Page 25: Six Final Inspection
PART SIX FINAL INSPECTION The Transforma Ladder System is one of the best ladder systems obtainable in the marketplace. Quality Control checks have been made during each manufacturing operation to ensure your ladder meets our high manufacturing standards. The following items have been individually checked and approved before boxing. -
Page 26: Seven Transforma 24 Configuration Examples
PART SEVEN L A D D E R S M O D E L T W E N T Y F O U R... -
Page 27: Eight Transforma 35 Configuration Examples
PART EIGHT L A D D E R S M O D E L T H I R T Y F I V E... - Page 28 Exclusively Distributed Throughout Australasia by: Brand Developers Australia • New Zealand Brand Developers Aust Pty Ltd 461 Plummer Street, PORT MELBOURNE, VIC 3207 FAX: +61 3 9681 7825 AUST Customer Care: 1800 890 840 Brand Developers Limited Unit H, 686 Rosebank Road, Avondale, 1026 Auckland, NEW ZEALAND FAX: +64 9 306 8203 NZ Customer Care: 0800 002 999...
Need help?
Do you have a question about the Transforma 24 and is the answer not in the manual?
Questions and answers