Advertisement
Available languages
Available languages
Quick Links
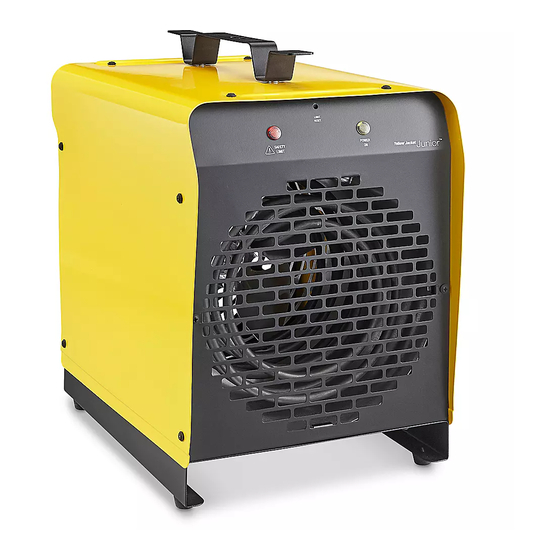
H-6100
240V ELECTRIC SHOP HEATER
TOOLS NEEDED FOR MOUNTING
Power Drill
4 mm or 5/32"
Drill Bit
Electric Shop Heater x 1
Read carefully. Use the heater only as described in
these instructions. Any other use is not recommended
and could result in fire, electric shock and personal
injury. Following these instructions will prevent injuries
that might occur during the installation and use of the
heater. Save these instructions for future use.
WARNING! Never leave heater unattended
while connected to a power source.
Fire or explosion may occur! During normal
operation the heater has hot components
and arcing or sparking parts inside. Do not
use it in areas where gasoline, paint or other
flammable liquids are used or stored.
PAGE 1 OF 15
Phillips Screwdriver
5 mm Washer x 3
10 mm Washer x 1
SPECIFICATIONS
BTU
Watts
Heating Area
Power (Volts)
Amps
Heat Settings 1
Heat Settings 2
1-800-295-5510
uline.com
Stud Finder
PARTS
16 mm Bolt x 2
20 mm Bolt x 1
Lock Washer x 3
10 mm Nut x 1
13,000B
3,750W
450 ft
2
240V ~ 60Hz
16A
On/Off
Thermostat
SAFETY
Risk of fire – To prevent a possible fire, do not
block the intakes or exhaust in any manner.
Do not use on soft surfaces, like a bed where
openings may become blocked. Keep clear
of all obstructions. Maintain a 3' minimum
clearance from front and 1' from sides and rear.
Heaters must be kept clean of lint, dirt and
debris.
Minimum Clearance From Combustibles
Front
Top
Sides
Rear
Para Español, vea páginas 6-10.
Pour le français, consulter les pages 11-15.
66 mm Screw x 3
Bracket x 1
3'
1'
1'
1'
0521 IH-6100
Advertisement

Subscribe to Our Youtube Channel
Related Manuals for U-Line H-6100

Summary of Contents for U-Line H-6100
- Page 1 Para Español, vea páginas 6-10. Pour le français, consulter les pages 11-15. H-6100 1-800-295-5510 uline.com 240V ELECTRIC SHOP HEATER TOOLS NEEDED FOR MOUNTING Power Drill 4 mm or 5/32" Phillips Screwdriver Stud Finder Drill Bit PARTS 5 mm Washer x 3...
- Page 2 SAFETY CONTINUED Risk of fire – Do not use heater with extension CAUTION! Risk of electric shock. Do not open cord. Plug the heater directly into a heater case when plugged into an electrical 208-240VAC receptacle. outlet. Overheating or fire may occur. Do not place WARNING! Prior to operating, make sure the heater behind a door.
- Page 3 INSTALLATION WALL OR CEILING MOUNT APPLICATIONS MOUNTING TO WALL OR CEILING Locate wood stud in wall or joist in ceiling. NOTE: Hardware package is located in styrofoam packaging. 2. Use holes in bracket to mark three holes for drilling. ATTACHING HEATER TO WALL BRACKET 3.
- Page 4 OPERATION HOW TO RESET THE HEATER Position the fan heater so that it stands upright on a firm, level surface (when used as portable) and at NOTE: This heater is equipped with an internal a safe distance from wet locations and flammable safety limiting thermostat and overheat objects.
- Page 5 TROUBLESHOOTING OPERATING ISSUE CAUSES RECOMMENDATIONS Fan stays on when heat Fan runs continuously while the Heater is operating correctly. shuts off. heater is operating. Heating element does not Heating element is made of Heater is operating correctly. glow red. stainless steel and will not glow red to produce heat.
- Page 6 H-6100 800-295-5510 uline.mx CALENTADOR ELÉCTRICO DE 240 VOLTIOS PARA TALLER HERRAMIENTAS NECESARIAS PARA INSTALACIÓN Taladro Eléctrico Broca de Desarmador de Cruz Detector de Vigas 4 mm o 5/32" PARTES 3 Rondanas de 5 mm 2 Pernos de 16 mm 1 Perno de 20 mm 3 Tornillos 66 mm 1 Calentador Eléctrico...
- Page 7 CONTINUACIÓN DE SEGURIDAD Riesgo de incendio – No utilice el calentador ¡PRECAUCIÓN! Riesgo de descarga eléctrica. con una extensión. Enchufe el calentador No abra la cubierta del calentador cuando directamente a un tomacorriente de 208-240VAC. esté conectado a un tomacorriente. Puede ocurrir un sobrecalentamiento o incendio.
- Page 8 INSTALACIÓN INSTALACIÓN DE PARED O TECHO INSTALACIÓN DE PARED O TECHO Localice el soporte de madera en la pared o una NOTA: La tornillería está ubicada en el viga en el techo. empaque de poliestireno. 2. Utilice los orificios del soporte para marcar los tres FIJE EL CALENTADOR AL SOPORTE DE PARED orificios para la perforación.
- Page 9 FUNCIONAMIENTO CÓMO REINICIAR EL CALENTADOR 1. Coloque el calentador de forma que quede en posición vertical sobre una superficie firme y nivelada (cuando se usa como portátil) y a una distancia NOTA: El calentador está equipado con un segura de lugares húmedos y objetos inflamables. termostato limitador interno seguridad y un circuito de protección por sobrecalentamiento.
- Page 10 SOLUCIÓN DE PROBLEMAS PROBLEMA DE FUNCIONAMIENTO CAUSAS RECOMENDACIONES El ventilador permanece El ventilador trabaja de forma El calentador está funcionando encendido cuando el calor se continua mientras el calentador correctamente. apaga. está en funcionamiento. La resistencia no se ilumina La resistencia está hecha El calentador está...
- Page 11 H-6100 1-800-295-5510 uline.ca RADIATEUR ÉLECTRIQUE D'ATELIER – 240 V OUTILS REQUIS POUR LA FIXATION Mèche de perceuse de Tournevis cruciforme Détecteur de montants Perceuse 4 mm ou 5/32 po électrique PIÈCES Rondelle de 5 mm x 3 Boulon de 16 mm x 2...
- Page 12 SÉCURITÉ SUITE Risque d'incendie – N'utilisez pas de rallonge MISE EN GARDE! Risque de choc électrique. électrique. Branchez le radiateur directement N'ouvrez jamais le boîtier du radiateur lorsqu'il à une prise de 208 à 240 VCA. est branché à une prise électrique. Une surchauffe ou un incendie peuvent s'ensuivre.
- Page 13 INSTALLATION UTILISATION AU MUR OU AU PLAFOND FIXATION AU MUR OU AU PLAFOND Repérez le colombage en bois situé dans le mur ou REMARQUE : Le matériel d'installation se la solive située au plafond. trouve dans l'emballage en styromousse. 2. Utilisez les trous du support pour marquer trois trous FIXATION DU RADIATEUR AU SUPPORT MURAL de repère pour le perçage.
- Page 14 FONCTIONNEMENT RÉINITIALISATION DU RADIATEUR Placez le radiateur à la verticale sur une surface ferme et nivelée (lorsqu'utilisé comme appareil REMARQUE : Le radiateur est muni d'un limiteur portable) et à une distance sécuritaire des zones de température intégré de sécurité et d'un humides et des objets inflammables.
- Page 15 DÉPANNAGE PROBLÈME DE FONCTIONNEMENT CAUSES RECOMMANDATIONS Le ventilateur reste allumé lorsque le Le ventilateur fonctionne en Le radiateur fonctionne chauffage s'éteint. continu lorsque le radiateur est en correctement. marche. L'élément chauffant ne devient pas L'élément chauffant est fait d'acier Le radiateur fonctionne incandescent.
Need help?
Do you have a question about the H-6100 and is the answer not in the manual?
Questions and answers