Table of Contents
Advertisement
Advertisement
Table of Contents

Subscribe to Our Youtube Channel
Related Manuals for SwissMicros DM41X


Summary of Contents for SwissMicros DM41X
- Page 1 DM41X User Manual v1.13, Jan 2021 Copyright © 2016-2021 SwissMicros GmbH...
-
Page 2: Table Of Contents
Table of Contents 1. About this User Manual .............. ... - Page 3 6. DM41X Menus ................
- Page 4 7. Firmware Update ............... . ...
-
Page 5: About This User Manual
1. About this User Manual This user manual refers to special features of DM41X. PDF version of this manual is available at https://technical.swissmicros.com/dm41x/doc/dm41x_user_manual.pdf. Search internet for documentation of original HP-41C calculator and related modules and utilities. Especially useful is HP41.org site, where manuals could be viewed on-line and/or downloaded complete DVD for off-line access. -
Page 6: General Information
2. General Information The DM41X comes with • 41CX system ROMs (with several patches) • Full "Extended Memory" configuration - i.e the basic 41CX extended memory + two additional extended memory modules • Possibility to load other 41C modules from files .mod... -
Page 7: Cpu Speed
Module Plug-in for more information. Although the DM41X prints to the HP IR printer, the functions and behavior are the same as implemented in the earlier 82143A printer, so see that Owner’s Handbook for details about usage, behavior, flags, etc. -
Page 8: Internal Fat 2.5. Keyboard Overlays
/HELP Contains help file(s) for built-in DM41X help that can be activated from menu. /KEYS Contains files with Custom Menu key mappings. /MODS Default directory for module files. /OFFIMG Bitmap files from this directory are displayed when the calculator is turned off. See OFF Images chapter for more details. - Page 9 • remove the back, • (optional) connect USB cable to prevent power loss • extract the old battery by gently pushing it out of the holder from the bottom towards the top of the case; • then insert the new battery with plus (+) side facing up (away from the board), •...
-
Page 10: Calculator Extensions
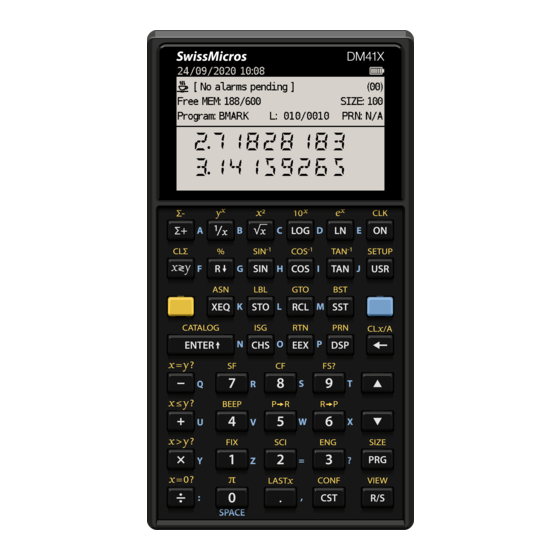
3. Calculator Extensions 3.1. Large LCD Screen 3.1.1. Calculator Mode - Stack Stack view displays all stack registers with X at the bottom: Note that while the emulation is running (e.g. a program is executing) only the portion of the screen corresponding to calculator LCD is updated. - Page 11 • A coffee cup indicates that no alarms are pending • An alarm clock means you have at least one pending alarm • A bell means you have a past-due alarm Next, the alarm text of your next pending (or past-due) alarm is shown. On the far right, the number of pending alarms is shown in parentheses.
-
Page 12: Program Mode
Figure 2. System Info View XA mode Figure 3. System Info View XY mode 3.1.3. Program Mode Figure 4. Basic program mode Figure 5. Multiline program mode Note that while the emulation is running (e.g. catalog list is executing) only the portion of the screen corresponding to calculator LCD is updated. -
Page 13: Special Keys
3.2. Special Keys DM41X has several additional keys not present on original 41C models. Following list summarizes all the additions: ‣ [ CST ] - Custom Menu key Activates Custom Menu ‣... -
Page 14: Cst Screen
Therefore, you need to use only two key strokes to invoke any CST assigned command, e.g. [ CST ] [ A ]. CST menu gives also access to several DM41X special functions labeled by numbers” CST keys could be defined in CST edit screen which is accessible using [ SHIFT ] [ CST ] labeled as CONF on DM41X keyboard. -
Page 15: Conf Screen
4. Save RAW - Invokes Save RAW Program 5. USB Disk - Invokes Activate USB disk 6. Flags - Shows Flags Screen 3.3.2. CONF Screen Figure 7. CST Edit screen (CONF) screen allows to edit key assignments as well as load and save all the assignments from/to CONF disk. -
Page 16: List Of Configuration Items
3.4.1. List of Configuration Items Items marked with • → [UConf] are stored in persistent backup • → [.d41] are part of State files, therefore not stored in UConf DMY setting Note that date format format setting is stored in two places as YMD is extension of 41C formats YMD setting →... -
Page 17: Flags Screen
FAT drive. 3.7. OFF Images The LCD display used in DM41X calculator behaves in similar way as e-ink displays and contents of the LCD is visible for a long time after the calculator is turned OFF. This feature is used to display images when the calculator is turned OFF. -
Page 18: Patched Mainframe Roms
From "N" to "X", and the Section Header names in CAT 2 for CX-FNS and CX-TIME 3.9.3. Added SLOW and FAST functions Intended to control the relative speed of DM41X’s operation. SLOW corresponds to original 41C speed, FAST is roughly 50 times faster. Implemented by adding [TURBO0] and [TURBO50] routines to mainframe ROM2. -
Page 19: Extensions To The Ed Function (Ascii File Editor)
3.9.4. Extensions to the function (ASCII file editor) Done to support lower case and special characters. The function has been renamed ED$ to signal the additional capabilities. Same XROM code of course. More on this here: Forum Article 3.9.5. Additional Functions The header function -EXT_FCN_2X is stealth for CRT?, a curtain finder tool. - Page 20 FLHD Returns to X the address (in decimal) of the File Header. Stack lifts if CPU F11 is set FLTYPE Returns to X the type of the file, ie. 1 for program, 2 for Data, etc… Stack lifts if CPU F11 is set LKAOFF Turns Local KA (Key Assignments) off, i.e.
-
Page 21: Modules
4. Modules Integral part of original HP-41 are pluggable modules. This chapter explains how to load and manage modules in DM41X. 4.1. Quick Module Load This is quick step by step reference how to load module. You can use [ ▲ ], [ ▼ ] keys to navigate items. -
Page 22: Supported Module Formats
4.3. Supported Module formats DM41X is able to load and use usual files only. .mod However you can always pack ROM file(s) into on PC and use resulting file at DM41X. .mod .mod 4.4. Flash Module Area 'Flash Module Area' is special region of flash memory dedicated for module use. It is the only place from where the emulator can access module ROMs and run module code. -
Page 23: Activating Modules (Plug-In)
• Save Active Modules (AM) List only Saves list of modules present in current AM list (all modules are marked as active in saved file). • Save Flash and AM Lists Saves list of modules present in current AM List (marked as active in saved file) followed by list of remaining non-active modules in flash area (marked as inactive in saved file). -
Page 24: Troubleshooting
4.6.1. Troubleshooting Actual layout of loaded modules could be seen in ROM Map screen. 4.7. Internals 4.7.1. Module Loader This section describes procedure for ROM address assignment. Each time module is plugged or unplugged assigns locations of ROMs to active Module Loader modules. - Page 25 save the complete RAM contents as described here and in the Save RAM Pages section. System offers 8 RAM pages organized as ordered list called Area. RAM pages from this area are linked to modules by Module Loader in order as they are requested by modules. Thus RAM pages are assigned in the same way for the same module configuration preserving the correct RAM contents for modules.
- Page 26 Figure 9. Assignment of RAM pages...
-
Page 27: Decoder/Encoder
.raw For more details follow the encoder link and look into "Quick Ref" tab. (To be implemented…) Note that this utility is originally designed for DM41 and needs update to fully support all features of DM41X. -
Page 28: Dm41X Menus
• [ CHS ] key skips between the left and right columns "EXIT" key • As the DM41X is based on more general DMCP system, there could be occasional references to the "EXIT" key which means to press the [ ← ] on DM41X. -
Page 29: Load Dm41 State File
6.2.1. Load DM41 State File > Used for loading the state files. By default from the directory of the FAT disk. .d41 /STATE/ Note that this loads only calculator memory and doesn’t affect state of currently loaded modules. To load calculator state •... -
Page 30: Activate Usb Disk
For Windows users In Windows you can eject the disk in two different ways: 1. (Prefered) Right-Click on the drive in any Explorer view and select "Eject" and the DM41X should leave USB Disk mode automatically. 2. Click the "Safely remove hardware and eject media" icon in the tray, then select DM41X from the list of devices to eject. -
Page 31: Module
6.3. Module menu 6.3.1. Active Modules (AM) Figure 10. Active Modules Screen You can use [ x<>y ] or [ DSP ] key to switch the module labels between from Title file and module filename (without directory and extension). .mod Soft menu items: Plug - Plug-in module Add module to active modules list. -
Page 32: Module Rom Map
Figure 11. Manage Modules in Flash Screen You can use [ x<>y ] or [ DSP ] key to switch the module labels between from Title file and module filename (without directory and extension). .mod Soft menu items: Imprt - Import Module Opens file selection dialog in directory (which is default directory for files). -
Page 33: Modules
Figure 13. ROM Map pages 8-F using ROM ids and "Modules list" on right side ROM map shows ROM placement in pages and banks. Each row corresponds to page denoted at the beginning of the line, columns represent banks. RAM pages are shown in first bank if other only as RAM banking isn’t supported now. Module ROM Map screen consist of two parts: •... -
Page 34: Save Modules
• Load Active Modules (AM) List • Load Flash and AM Lists • Load Flash, clear AM List Backup Module Lists for details. 6.3.5. Save Modules Activates sub-menu: Save Modules • Save Active Modules (AM) List only • Save Flash and AM Lists Backup Module Lists for details. -
Page 35: Delay
When the 'Slow Auto-repeat' flag is active auto-repeat delays are prolonged. Note that this value is stored in persistent configuration. 6.4.4. Printer Line Delay This parameter sets printer line delay the same way as DELAY command in IR printer module. It specifies how long the calculator waits between sending lines of information to the HP 82240A/B Thermal Printer. -
Page 36: System Menu
Displays information about currently loaded DM41X. This is mainly for diagnostics. 6.5.4. Reset to DMCP menu Reboots calculator back to DMCP system menu. All unsaved data is lost. Save your DM41X state before proceeding to the DMCP menu, see Save DM41 State File. -
Page 37: Power Off Mode
6.5.7. Power OFF mode This item is purely for power OFF testing purposes to avoid time consuming switching between firmwares. It is in no way mentioned to be changed by users. • Mode 0 means no deep sleep for QSPI giving approx. 12uA sleep current. •... -
Page 38: Firmware Update
[2] macOS users can get dfu-util via Homebrew 7.1. Quick Update Guide (FAT disk update) This chapter describes update of complete DM41X firmware (i.e. DMCP system, DM41X program and flash area) at once using combined firmware file. Prerequisites - Complete DM41X firmware file e.g. -
Page 39: Bootloader Mode Activation
DMCP System menu SETUP → System Enter System Menu 6. Once finished the calculator resets and should restart to updated DM41X. 7.2. Bootloader mode activation Bootloader mode can be activated from main Setup menu: or by using SETUP → System → Bootloader RESET and PGM button. -
Page 40: Launching Dm_Tool
Bootloader mode activation). Connect the calculator to the PC Be sure the libusb driver is installed if used in Windows (http://technical.swissmicros.com/doc/ libusb_install/libusb_install.html). Launch dm_tool It can be launched by clicking on the exe file or from command line with firmware filename as argument. - Page 41 Found DFU: [0483:df11] switched into bootloader mode. Prepare firmware file Download latest firmware file from https://technical.swissmicros.com/dm41x/firmware/ ensure it is accessible from current directory in console e.g. by ls -l DMCP_flash_3.16_DM41X- 1.10.bin. Or you can alternatively download firmware file directly to current directory using command...
- Page 42 -O https://technical.swissmicros.com/dm41x/firmware/DMCP_flash_3.16_DM41X- 1.10.bin Launch dfu-util command You can start flashing using command (edit to use correct firmware file name) sudo dfu-util -D DMCP_flash_3.16_DM41X-1.10.bin -d 0483:df11 -a "@Internal Flash /0x08000000/512*0002Kg" -s 0x8000000 Please, be patient, it takes some time (few minutes).
-
Page 43: Dmcp System Menu
7.5. DMCP System Menu This is main menu of DMCP system (i.e. operating system of the calculator). This menu is automatically displayed if DMCP system doesn’t contain any loaded program or starting of the program fails. If there is valid program loaded into DMCP system it is automatically started after RESET and thus the DMCP menu isn’t displayed. -
Page 44: Menu
• The DM41X’s flash disk should be visible on the computer • Read/write files • 'Eject device' on the host machine. • Calculator should end USB disk mode automatically if correctly ejected by OS. You can end USB disk mode by pressing [ EXIT ] key on the calculator but be sure all data are flushed to disk first.
Need help?
Do you have a question about the DM41X and is the answer not in the manual?
Questions and answers