Advertisement
Quick Links
AC1200 Smart Router User Manual
Thank you very much for purchasing rockspace AC1200 Smart Router. This guide
will introduce the features of the router and tell you how to connect, use and
configure the router to access Internet. Please follow the instructions in this guide
to avoid affecting the router's performance by improper operation.
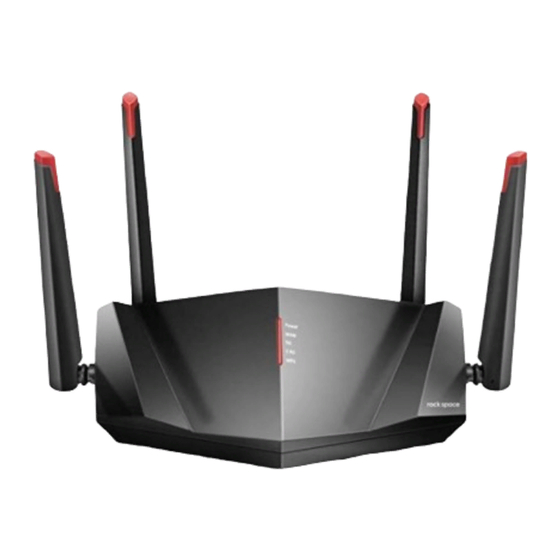
1. Product Overview
1.1 Introduction
RSD0611 using Realtek chip program in Taiwan, the 2.4GHz band wireless rate up to
300Mbps,in the 5GHz band using a new generation of 11AC technology, By
improving the bandwidth, improve the efficiency of wireless frequency modulation,
the highest rate of up to 867Mbps, can easily support HD (HD1080P) film Play,
online video, 3D games and other high speed applications.
1.2 Features
Complies with IEEE 802.11ac/a/b/g/n standards
Up to 1200Mbps data rate for Wi-Fi network
Provides WPA -PSK-MIXED security
Access User Interface by URL, the IP, MAC and URL filtering makes access and
time control more flexibly.
Supports DHCP Client, PPPoE, Static IP and supports dual access
Enhanced heat-dissipation design, ideal for home use
3*10/100/1000Mbps LAN Port, 1*10/100/1000Mbps WAN Port
Support Wireless Router, Client, Access Point work mode
Connects to secure network easily and fast using WPS
Built-in firewall, Filtering on IP address, MAC address, Domain name, etc
The fixed 4*5dBi dual band antenna
Easy setup simplifies the basic settings of the router
1.3 Panel Layout
1.3.1 Front Panel
The front panel of router RSD0611 consists of 5 LEDs, which is designed to indicate
connection status.
Advertisement

Subscribe to Our Youtube Channel
Related Manuals for rock space AC1200


Summary of Contents for rock space AC1200
- Page 1 AC1200 Smart Router User Manual Thank you very much for purchasing rockspace AC1200 Smart Router. This guide will introduce the features of the router and tell you how to connect, use and configure the router to access Internet. Please follow the instructions in this guide to avoid affecting the router’s performance by improper operation.
- Page 2 POWER This indicator lights red when the router powered on, otherwise it is off. This indicator keeps lighting after pairing successful. This indicator light when there are wireless devices connected and transmitting data to WLAN the router. When the WAN port is connected successfully the indicator light. While transmitting or receiving data through the WAN port the indicator blinks.
-
Page 3: Hardware Installation
2. Hardware Installation 2.1 Hardware Installation Please connect the router according to the following steps. 1. Connect the Modem to ADSL Filter using RJ11 network cable, LINE port to LINE port. 2. Connect the ADSL’s LAN port to Router’s WAN port using RJ45 network cable. -
Page 4: Set Up The Computer
3.Set up the Computer 3.1 Click: 【Start】 - 【Control Panel】 - 【Network and Internet】 - 【Network and Sharing Center】 - 【Change adapter setting】 - 【Local Area Connection】 ,select the connected network card,Then right click“Local Area Connection”,select【Properties】. 3.2 Select 【Internet Protocal Version 4(TCP/IPv4)】,click 【Properties】... - Page 5 3.3 Select 【Obtain an IP address automatically】-【Obtain DNS Server address automatically】,click【OK】,Return back to the previous interface and click【OK】. The default IP address of the router is http://192.168.1.1. Both of these parameters can be changed as you want. In this guide, we will use the default values for description.
-
Page 6: Router Setting
4.Router Setting This chapter introduces how to configure the basic functions of your router so that you can surf the Internet. 4.1 Open the browser,input and connect :http://192.168.1.1 , input user name “admin”and password “admin”,Click “Next”. Note: If the above screen does not prompt, it means that your web-browser has been set to using a proxy. - Page 7 4.4 Setup LAN Setting.Click“Next”. 4.5 Setup WAN Setting Here you can also set the connection types.The router supports three common connection types:Fixed IP,Obtaining IP automatically and PPPoE dial-up. To avoid IP conflict you can reboot router to get new IP. Auto Config(DHCP) Fixed IP PPPoE dial-up...
- Page 8 4.6 Wireless 5GHz Basic Setting 4.7 Wireless 5GHz Security Setting...
-
Page 9: Wireless Connection
4.8 Wireless 2.4GHz Basic Setting 4.9 Wireless 2.4GHz Security Setting The router will be reboot after you finished setting. 5.Wireless connection: (Here we take an Win7 for instance) 5.1 Click 【Start】 - 【Control Panel】 - 【Network and Internet】 - 【Network and Sharing Center】-【Change adapter settings】-【Wireless Network Connection】,Then right click“Wireless Network Connection”,select”Connect/Disconnect”. -
Page 10: Changing Password
5.2 Select the wireless network name(SSID) in the wireless network list,click “Connect”. 5.3 Enter Wi-Fi Key,click“OK”. Note:The default SSID and Network Key is on the product label on the bottom. 5.4 Connetion is successful. 6.Changing Password Password Setup: Now, we recommend that you change the password to protect the security of your Router. - Page 11 7.Setup 7.1 Setup Wizard The setup wizard will guide you to configure the Access Point for the first time.Please follow the setup wizard step by step. 7.2 Operating Mode You can setup different modes for the LAN and WLAN interfaces for NAT and bridging functions.
- Page 12 8.WLAN 5G 8.1 Basic Settings-Wireless Basic Settings-WLAN1 This page is used to configure the parameters for wireless LAN clients which may connect to your Access Point. Here you may change wireless encryption settings as well as wireless network parameters.
- Page 13 8.2 Wireless Advanced Settings -wlan1 These settings are only for more technically advanced users who have a sufficient knowledge about wireless LAN. These settings should not be changed unless you know what effect the changes will have on your Access Point. 8.3 Wireless Security Setup -wlan1 This page allows you setup wireless security.
- Page 14 8.5 WDS Settings -wlan1 Wireless Distribution System uses the wireless media to communicate with other APs, as Ethernet does. To do this, you must set these APs to the same channel and set the MAC address of other APs that you want to communicate with in the table, and then enable WDS.
- Page 15 8.7 Wi-Fi Protected Setup1 This page allows you to change the settings for WPS (Wi-Fi Protected Setup). Using this feature allows a wireless client to automatically synchronize its settings and easily and securely connect to the Access Point. 8.8 Wireless Schedule1 This page allows you setup the wireless schedule rule.
- Page 16 9.WLAN 2.4G 9.1 Basic Settings-Wireless Basic Settings-WLAN2 This page is used to configure the parameters for wireless LAN clients which may connect to your Access Point. Here you may change wireless encryption settings as well as wireless network parameters.
- Page 17 9.2 Wireless Advanced Settings -wlan2 These settings are only for more technically advanced users who have a sufficient knowledge about wireless LAN. These settings should not be changed unless you know what effect the changes will have on your Access Point. 9.3 Wireless Security Setup -wlan2 This page allows you setup wireless security.
- Page 18 Access Point. 9.5 WDS Settings -wlan2 Wireless Distribution System uses the wireless media to communicate with other APs, as Ethernet does. To do this, you must set these APs to the same channel and set the MAC address of other APs that you want to communicate with in the table, and then enable WDS.
- Page 19 9.7 Wi-Fi Protected Setup2 This page allows you to change the settings for WPS (Wi-Fi Protected Setup). Using this feature allows a wireless client to automatically synchronize its settings and easily and securely connect to the Access Point. 9.8 Wireless Schedule2 This page allows you setup the wireless schedule rule.
- Page 20 10.Network 10.1 LAN Interface Setup This page is used to configure the parameters for the local area network that connects to the LAN port of your Access Point. Here you may change the settings for IP address, subnet mask, DHCP, etc... 10.2 WAN Interface Setup This page is used to configure the parameters for Internet network which connects to the WAN port of your Access Point.
- Page 21 11.IPV6 11.1 WAN Interface Setup This page is used to configure the parameters for Internet network which connects to the WAN port of your Access Point. Here you may change the access method to static IP, AUTO, PPPoE, Bridge by click the item value of WAN Access type. 11.2 Configuring LAN Setting...
- Page 22 11.3 Configuring Router Advertisement...
- Page 23 11.4 Configuring Tunnel(6to4) 12.Firewall 12.1 Port Filtering Entries in this table are used to restrict certain types of data packets from your local network passing to the Internet through the Gateway. Use of these filters can be helpful in securing or restricting your local network. 12.2 IP Filtering Entries in this table are used to restrict certain types of data packets from your local network passing to the Internet through the Gateway.
- Page 24 12.3 MAC Filtering Entries in this table are used to restrict certain types of data packets from your local network passing to the Internet through the Gateway. Use of such filters can be helpful in securing or restricting your local network. 12.4 Port Forwarding Entries in this table allow you to automatically redirect common network services to a specific machine behind the NAT firewall.
- Page 25 12.5 URL Filtering The URL filter is used to restrict LAN users access to the internet. Block those URLs which contain keywords listed below. 12.6 DMZ A Demilitarized Zone is used to provide Internet services without sacrificing unauthorized access to its local private network. Typically, the DMZ host contains devices accessible to Internet traffic, such as Web (HTTP ) servers, FTP servers, SMTP (e-mail) servers, and DNS servers.
- Page 26 12.7 802.1Q VLAN Entries in below table are used to config vlan settings. VLANs are created to provide the segmentation services traditionally provided by routers. VLANs address issues such as scalability, security, and network management.
- Page 27 12.8 Routing Setup This page is used to setup dynamic routing protocol or edit static route entry. 12.9 QoS Entries in this table improve your online gaming experience by ensuring that your game traffic is prioritized over other network traffic, such as FTP or Web.
- Page 28 13.Management 13.1 Access Point Status This page shows the current status and some basic settings of the device. 13.2 Statistics This page shows the packet counters for transmission and reception pertaining to wireless and Ethernet networks.
- Page 29 13.3 Dynamic DNS Setting Dynamic DNS is a service that provides you with a valid, unchanging, internet domain name (an URL) to go with a (possibly changing) IP-address. 13.4 Time Zone Setting You can maintain the system time by synchronizing with a public time server over the Internet.
- Page 30 13.5 Denial of Service A "denial-of-service" (DoS) attack is characterized by an explicit attempt by hackers to prevent legitimate users of a service from using that service.
- Page 31 13.6 TR-069 Configuration This page is used to configure the TR-069 CPE. Here you may change the setting for the ACS's parameters. 13.7 System Log This page can be used to set a remote log server and view the system log. 13.8 Diagnostics This page can be used to run target system command.
- Page 32 13.9 Upgrade Firmware This page allows you to upgrade the Access Point firmware to the latest version. Please note, do not power off the device during the upload as it may crash the system. 13.10 Save/Reload Settings This page allows you to save current settings to a file or reload the settings from a file that was saved previously.
- Page 33 13.11 Reboot Device 13.12 Logout This page is used to logout.
Need help?
Do you have a question about the AC1200 and is the answer not in the manual?
Questions and answers