Chapters
Table of Contents

Summary of Contents for Philex i-Star IS-AC01
- Page 1 PROJECTION ALARM CLOCK RADIO PROJEKTIONS-WECKRADIO ALARMA PROYECTOR RADIO DESPERTADOR RADIO REVEIL PROJECTEUR SVEGLIA CON PROIETTORE RADIOSVEGLIA PROJECTIE-WEKKERRADIO IS-ACO1 www.philex.com...
-
Page 2: Table Of Contents
For more detailed information about disposal of your old appliance, please contact your local authority. Box Contents 1x Projection alarm clock, 1x 5VDC Power adaptor, 1x User guide PROJECTION ALARM CLOCK RADIO - User Guide www.philex.com... -
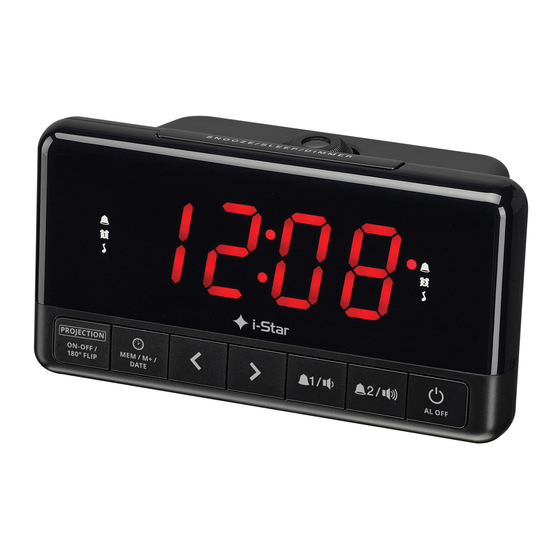
Page 3: Features And Controls
8. Alarm 2 indicator (radio) 16. Speaker 9. PROJECTOR ON/OFF button/ 17. USB charging port 180° FLIP button 18. Antenna 10. MEM/M+ button/SET button/ 19. Battery compartment DATE button 20. DC IN socket PROJECTION ALARM CLOCK RADIO - User Guide www.philex.com... -
Page 4: Box Contents
(12) button to change the year, press SET (10) to confirm. < 4 Setting month/day: Press the BACKWARD button (11) to set the > month and FORWARD button (12) to set the day, press SET (10) to confirm. PROJECTION ALARM CLOCK RADIO - User Guide www.philex.com... -
Page 5: Setting The Clock
Alarm time > Alarm sound source > Alarm frequency < 3. To set alarm time: Press the BACKWARD (11) to set the hour > and FORWARD button (12) to set the minute. Then press the PROJECTION ALARM CLOCK RADIO - User Guide www.philex.com... -
Page 6: Alarm Functions
The corresponding Alarm 1 or Alarm 2 indicator, alarm or radio , will flash on the display during the snooze period. To cancel the snooze period and the alarm, press the ALARM OFF button (15). PROJECTION ALARM CLOCK RADIO - User Guide www.philex.com... -
Page 7: Adjusting Display And Projector
/ high or off. This seeting will not affect the brightness of the projector beam. The low setting is the default (energy saving) setting. PROJECTION ALARM CLOCK RADIO - User Guide www.philex.com... -
Page 8: Specifications
No-load power consumption 0.053W Declaration of Conformity Hereby, Philex Electronic Ltd. declares that the radio equipment: i-Star Projection Alarm Clock Radio for radio broadcast reception in domestic premises is in compliance with the Radio Equipment Directive 2014/53/EU. The full text of the EU declaration of conformity is available at the following internet address: www.philex.com/doc... -
Page 9: Warnhinweise
Sie sie am Ende ihres Lebenszyklus nicht in den Hausmüll. Bringen Sie sie zu einem Sammelzentrum für das Recycling von elektrischen, elektronischen Geräten und Batterien. Wenden Sie sich an Ihren Gemeinderat, um Ratschläge zum Recycling zu erhalten. PROJECTION ALARM CLOCK RADIO - User Guide www.philex.com... -
Page 10: Funktionen Und Bedienelemente
8. Alarmanzeige 2 (Radio) AUS- Taste (POWER/ALARM OFF) 9. PROJEKTOR EIN-/AUS-Taste/ 16. Lautsprecher 180°-Rotationstaste 17. USB-Ladeanschluss (PROJECTOR ON/OFF / FLIP) 18. Antenne 10. SPEICHER-/SPEICHER+-/ 19. Batteriefach EINSTELL-/ DATUM-Taste 20. Gleichstrom- (MEM/M+/SET/DATE) Anschlussbuchse PROJECTION ALARM CLOCK RADIO - User Guide www.philex.com... -
Page 11: Packungsinhalt
(10) wiederholt drücken, um die Einstel loptionen durchzublättern: Jahr > Monat/Datum > Uhrzeit 3 Einstellen des Jahres: Die RÜCKLAUF-Taste < (11) oder die VORLAUF-Taste > (12) drücken, um das Jahr zu ändern. PROJECTION ALARM CLOCK RADIO - User Guide www.philex.com... -
Page 12: Einstellen Der Alarme
(14) gedrückt halten, um in den Alarmeinstellungsmodus zu gehen. 2. Dann die ALARM 1-Taste (13) oder die ALARM 2-Taste [ALARM] (14) wiederholt drücken, um die Einstelloptionen durchzublättern: Weckzeit > Alarmtonquelle > Alarmhäufigkeit PROJECTION ALARM CLOCK RADIO - User Guide www.philex.com... -
Page 13: Weckfunktionen
Während der Schlummerperiode blinkt der entsprechende Alarm 1- oder Alarm 2-Anzeiger, Weckton oder Radio , auf dem Display. Zum Deaktivieren der Schlummerperiode und des Alarms die ALARM AUS-Taste (ALARM OFF) (15) drücken. PROJECTION ALARM CLOCK RADIO - User Guide www.philex.com... -
Page 14: Einstellen Des Displays Und Projektors
Helligkeitsstufe des Displays zu ändern. Die verfügbaren Optionen sind: niedrig / hoch / oder Aus. Diese Einstellung hat keinen Einfluss auf die Helligkeit des Projektorstrahls. Das Display ist standardmäßig auf die niedrige Stufe (Energiesparstufe) eingestellt. PROJECTION ALARM CLOCK RADIO - User Guide www.philex.com... -
Page 15: Technische Daten
79.97% Effizienz bei geringer Last (10 %) Standby-Leistung 0.053W Konformitätserklärung Philex Electronic Ltd. erklärt hiermit, dass der Projektionsweckradio für den Funkempfang in Wohngebäuden der Funkgeräterichtlinie 2014/53/EU entspricht. Der vollständige Text der EU-Konformitätserklärung ist unter folgender Internetadresse abrufbar: www.philex.com/doc Technischer Support Weitere Hilfen, Ratschläge, Informationen und einen... -
Page 16: Advertencias
Póngase en contacto con su consejo local para obtener consejos sobre reciclaje. PROJECTION ALARM CLOCK RADIO - User Guide www.philex.com... -
Page 17: Funciones Y Controles
PROYECTOR)/botón 180° FLIP 17. Puerto de carga USB 18. Antena (GIRAR 180º) 10. Botón MEM/M+/Botón SET 19. Compartimento para las pilas (CONFIGURAR)/Botón DATE 20. Toma de corriente de (FECHA) entrada de DC PROJECTION ALARM CLOCK RADIO - User Guide www.philex.com... -
Page 18: Contenido De La Caja
(10) repetidamente para recorrer las opciones de ajuste: Year (Año) > Month/Day (Mes/Día) > Time (Hora) 3. Configurar el año: Presione el botón BACK (ATRÁS) < (11) o FORWARD (ADELANTE) > (12) para cambiar el año. PROJECTION ALARM CLOCK RADIO - User Guide www.philex.com... -
Page 19: Escuchar La Radio Fm
2. A continuación, presione repetidamente el botón ALARM 1 (13) o ALARM 2 (14) para recorrer las opciones de configuración: Hora de la alarma > Fuente de sonido de la alarma > Frecuencia de la alarma PROJECTION ALARM CLOCK RADIO - User Guide www.philex.com... -
Page 20: Funciones De Alarma
Para cancelar el periodo de aplazamiento y la alarma, presione el botón ALARM OFF (ALARMA APAGADA) (15). PROJECTION ALARM CLOCK RADIO - User Guide www.philex.com... -
Page 21: Ajustar La Pantalla Y El Proyector
Este ajuste no afectará al brillo del haz del proyector. El ajuste bajo es el ajuste predeterminado (ahorro de energía). PROJECTION ALARM CLOCK RADIO - User Guide www.philex.com... -
Page 22: Especificaciones
Consumo eléctrico en vacío 0.053W Declaración de conformidad Por la presente, Philex Electronic Ltd. declara que el proyecta la hora en dígitos rojos en el techo con receptor de radio en instalaciones domésticas cumple con la Directiva de equipos radioeléctricos 2014/53/UE. -
Page 23: Avertissement
Ne les jetez pas avec les ordures ménagères à la fin de leur cycle de vie; les emmener dans un centre de collecte pour le recyclage des équipements électriques, électroniques et des batteries. Contactez votre mairie pour obtenir des conseils sur le recyclage. PROJECTION ALARM CLOCK RADIO - User Guide www.philex.com... -
Page 24: Options Et Commandes
8. Voyant d’alarme 2 (radio) 17. Port pour chargement USB 9. Bouton Marche/Arrêt du 18. Antenne projecteur/Bouton de rotation 19. Compartiment à piles à 180° (FLIP) 20. Prise d’alimentation CC 10. Bouton de réglage MEM/M+/DATE PROJECTION ALARM CLOCK RADIO - User Guide www.philex.com... -
Page 25: Contenu De L'emballage
(10) plusieurs fois pour naviguer entre les options de réglage: Année > Mois/Jour > Heure 3. Réglage de l’année : Appuyez sur le bouton PRÉCÉDENT < (11) ou SUIVANT > (12) pour modifier l’année. PROJECTION ALARM CLOCK RADIO - User Guide www.philex.com... -
Page 26: Écouter La Bande Fm
Appuyez ensuite sur les boutons ALARME 1 (13) et ALARME (14) plusieurs fois pour parcourir les options de réglage : Heure de l’alarme > Source sonore de l’alarme > Fréquence de l’alarme PROJECTION ALARM CLOCK RADIO - User Guide www.philex.com... -
Page 27: Fonctions D'alarme
L’Alarme 1 ou 2 (alarme ou radio ) clignotera à l’écran pendant la période d’interruption. Pour désactiver l’alarme et la fonction Répétition appuyez sur le bouton de désactivation de l’alarme (15). PROJECTION ALARM CLOCK RADIO - User Guide www.philex.com... -
Page 28: Réglage De L'affichage Et Du Projecteur
Les options disponibles sont Faible/ Élevée ou Désactivée.Ce réglage n’affectera pas la luminosité de la projection. L’écran est réglé sur une faible luminosité par défaut (économie énergie). PROJECTION ALARM CLOCK RADIO - User Guide www.philex.com... -
Page 29: Caractéristiques Techniques
Consommation électrique hors charge 0.053W Déclaration de conformité Philex Electronic Ltd. déclare par la présente que l’équipement radio : radio réveil modèle IS-AC01 pour réception de diffusion radio dans des locaux domestiques est conforme à la directive relative à la mise à disposition sur le marché d’équipements radioélectriques 2014/53/UE. -
Page 30: Avvertenze
Non gettarli tra i rifiuti domestici alla fine del loro ciclo di vita; portarli in un centro di raccolta per il riciclaggio di apparecchiature elettriche, elettroniche e batterie. Contattare il consiglio locale per consigli sul riciclaggio. PROJECTION ALARM CLOCK RADIO - User Guide www.philex.com... -
Page 31: Caratteristiche E Controlli
16. Altoparlante PROIETTORE/ Pulsante FLIP 17. Porta per ricarica USB a 180° 18. Antenna 10. Pulsante MEM/M+ /pulsante 19. Scomparto batteria SET (Impostazioni) /pulsante 20. Presa DC IN (CC IN) DATE (data) PROJECTION ALARM CLOCK RADIO - User Guide www.philex.com... -
Page 32: Contenuto Della Confezione
1. In modalità standby, mantenere premuto il tasto IMPOSTAZIONI (10) per avviare la modalità di impostazione orologio. 2. Premere ripetutamente il tasto IMPOSTAZIONI (10) per scorrere le opzioni di impostazione: Year (Anno) > Month/Day (Mese/Giorno) > Time (Ora) PROJECTION ALARM CLOCK RADIO - User Guide www.philex.com... -
Page 33: Ascolto Della Radio In Fm
2. Premere quindi ripetutamente il tasto ALLARME 1 (13) o ALLARME 2 (14) per scorrere le opzioni di impostazione: Alarm time(Ora allarme) > Alarm sound source (Sorgente sonora allarme) > Alarm frequency (Frequenza allarme) PROJECTION ALARM CLOCK RADIO - User Guide www.philex.com... -
Page 34: Funzione Alarm (Sveglia)
9 minuti sarà terminato. L’indicatore corrispondente Allarme 1 o Allarme 2, allarme o radio , lampeggerà sul display durante il periodo di snooze. Per disattivare il periodo di snooze e l’allarme, premere il pulsante ALARM OFF (15). PROJECTION ALARM CLOCK RADIO - User Guide www.philex.com... -
Page 35: Regolazione Del Display E Del Proiettore
In modalità standby, premere il pulsante DIMMER per modificare il livello di luminosità delle opzioni di visualizzazione dell’orologio basse / alte o spente. Questa impostazione non influirà sulla luminosità del fascio del proiettore. L’impostazione bassa è quella predefinita (risparmio energetico). PROJECTION ALARM CLOCK RADIO - User Guide www.philex.com... -
Page 36: Specifiche
Consumo energetico a vuoto 0.053W Dichiarazione di conformità Con il presente documento, Philex Electronic Ltd. Dichiara che l’apparecchio radio: modello radio di emergenza DR500 per la ricezione delle trasmissioni radio in locali domestici è conforme alla Direttiva sulle apparecchiature radio 2014/53/UE. Il testo completo della dichiarazione di conformità... -
Page 37: Waarschuwingen
Gooi ze aan het einde van hun levenscyclus niet bij het huishoudelijk afval; breng ze naar een inzamelcentrum voor de recycling van elektrische, elektronische apparaten en batterijen. Neem contact op met uw gemeente voor recyclingadvies. PROJECTION ALARM CLOCK RADIO - User Guide www.philex.com... -
Page 38: Functies En Bediening
15. AAN/UIT-knop/ALARM UIT- (radio) knop 7. Alarm 2 indicatielampje 16. Luidspreker (alarm) 17. USB-oplaadpoort 8. Alarm 2 indicatielampje 18. Antenne (radio) 19. Batterijvak 9. PROJECTOR AAN/UIT-knop/ 20. DC IN-aansluiting knop voor 180° DRAAIEN PROJECTION ALARM CLOCK RADIO - User Guide www.philex.com... -
Page 39: Inhoud Van De Doos
(10) om door de instelopties te bladeren: Jaar > Maand/Dag > Tijd 3. Het jaar instellen: Druk op de TERUG-knop < (11) of VOORUIT- knop > (12) om het jaar te wijzigen. PROJECTION ALARM CLOCK RADIO - User Guide www.philex.com... -
Page 40: Naar Fm-Radio Luisteren
2 [ALARM] (14) ingedrukt om de modus voor het instellen van het alarm te openen. 2. Druk herhaaldelijk op de ALARM-knop 1 [ALARM] (13) of ALARM- knop 2 [ALARM] (14) om door de instelopties te bladeren: Alarmtijd > Alarmgeluidsbron > Alarmfrequentie PROJECTION ALARM CLOCK RADIO - User Guide www.philex.com... -
Page 41: Alarmfuncties
9 minuten voorbij is. Het corresponderende Alarm 1 of Alarm 2 indicatielampje, alarm of radio op het scherm knippert tijdens de sluimerperiode. Om de sluimerperiode en het alarm te annuleren, drukt u op de ALARM UIT-button (15). PROJECTION ALARM CLOCK RADIO - User Guide www.philex.com... -
Page 42: Scherm En Projector Aanpassen
Opties zijn laag / hoog of uit. Deze instelling heeft geen invloed op de helderheid van de projectorlichtbundel. De lage stand is de standaardinstelling (energiebesparend). PROJECTION ALARM CLOCK RADIO - User Guide www.philex.com... -
Page 43: Specificaties
Efficiëntie bij lage belasting (10%) Onbelast energieverbruik 0.053W Conformiteitsverklaring Hierbij verklaart Philex Electronic Ltd. dat de radio apparatuur: modellen IS-AC01 Projectiewekkerradio voor draadloze ontvangst in woningen voldoet aan de richtlijn radioapparatuur 2014/53/EU. De volledige tekst van de EU-conformiteitsverklaring is beschikbaar op het volgende internetadres:: www.philex.com/doc... - Page 44 Distributed in the EU by: Philex Electronic Ltd., Philex Electronic Ireland Ltd., Kingfisher Wharf, Robwyn House, Corrintra, London Road, Bedford, Castleblayney, Co. Monaghan, MK42 0NX, United Kingdom. A75 YX76, Ireland Made in China. © Philex Electronic Ltd 2021. vb1.5 www.philex.com...
Need help?
Do you have a question about the i-Star IS-AC01 and is the answer not in the manual?
Questions and answers