
Related Manuals for Appliance Desk Super Combo 5500

Summary of Contents for Appliance Desk Super Combo 5500
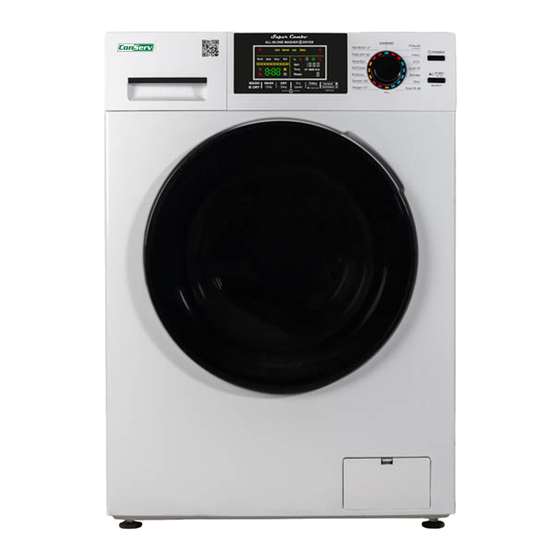
- Page 1 Super Combo ALL-IN-ONE COMBO WASHER DRYER Model: 5500 QUESTIONS / SERVICE Phone/Text: 1-800-776-3538 Email: Service@ApplianceDesk.com...
- Page 2 Please read the Owner’s Manual carefully before using your ALL-IN-ONE COMBO WASHER DRYER ..............Introduction ..............Warranty .............. Technical Data ..........Important Safety Instructions ..............Helpful Hints .............. Pre-installation ............Diagram of the Combo ............Installation Instructions ............. Unpacking and Leveling ..............
- Page 3 Congratulations on your new Super Combo! In addition to its contemporary design, this is a highly sophisticated engineered product that will give you many years of satisfaction. Here are some of the best reasons for buying your Super Combo The Washer + Dryer’s sleek and compact size design makes it a perfect appliance for any kitchen or laundry room.
-
Page 4: Warranty Information
You can register your Warranty by any of the following methods: 1. Mail in the Warranty Registration Card 2. Register online at www.ApplianceDesk.com 3. Take a picture of the bar code and text it to Appliance Desk 4. Scan the QR Code QUESTIONS / SERVICE Consolidated Brands... - Page 5 EXCLUSIONS In no event shall Consolidated Brands be liable for incidental or consequential damages or for damages resulting from external causes such as abuse, operation misuse, neglect, alterations, normal wear and tear, incorrect voltage or acts of God. This warranty does not cover service calls which involve defective workmanship, damage due to other products while combined use with this product or materials covered by this warranty.
- Page 6 23.6 / 60 33.5 / 85 24 / 61 41.3 / 105 Inlet and Drain Hose length 6 Feet Power cable length 6 Feet Note: All rights reserved. Designs, Specifications and Manual subject to change without notice.
- Page 7 Your Combo Washer + Dryer has been built in compliance with safety regulation to protect you and your family. To reduce the risk of fire due to contaminated loads, the final part of a tumble dryer cycle occurs without heat (cool down period). Avoid stopping a tumble dryer before the end of the drying cycle unless all items are quickly removed and spread out so that the heat is dissipated.
- Page 8 MODEL No: SERIAL No: Washer + Dryer 1400 rpm 19 lbs. USE HIGH EFFICIENCY (HE) DETERGENT: By using High Efficiency (HE) detergent, Front Loading detergents The unit must be installed on a strong leveled surface in a protected, dry and well-ventilated area, with a power and water supply of sufficient capacity and a sufficient outlet in close proximity.
- Page 9 Detergent Top Panel Dispenser Drawer Control Panel Drum Venting Fan and Cover Hot Water Inlet Valve Door Cold Water Inlet Valve Leveling Feet Drain Hose Tube Cap U-Connector Shipping Drain Tube Bolts Power Cord Pump Filter Door Release Lever Vent Adapter Blanking Cap s - 3 U-Connector Water Inlet Hoses...
- Page 10 Installation area Handling Please handle the machine carefully and use appropriate means while lifting and moving the machine so that it does not get damaged. Do not drag the machine on your floor. Do not hold on Appliance stability is very important otherwise to protruding parts when lifting.
- Page 11 Washer + Dryer Washer + Dryer Washer + Dryer bolts bolts bolts Retainer(3) P Clamp(1) Bush(3) Shipping bolt Retainer Washer(3) Shipping bolts(3) Lower Raise Lock nut Tighten all 4 locknuts securely NOTE · Save the bolt assemblies for future use. To prevent damage to internal components, DO NOT transport the washer-dryer combo without reinstalling the shipping bolts.
- Page 12 110V/60Hz Washer + Dryer...
- Page 13 Dryer can be used in Ventless or Vented mode Icon for Ventless Icon for Vented VENTLESS (CONDENSING) DRY Use dryer in Ventless Mode: 1. ENSURE METAL VENT COVER (1) IS INSTALLED OVER EXHAUST FAN AS SHOWN IN FIG.8 2. Power on the machine 3.
-
Page 14: Connecting To The Machine
1. Unscrew the adapter ring plate and the 4 adapter retaining screws. Ring plate Guide plate 2. Remove the guide plate if the tap is too large to fit the adapter. 3. Push the adapter onto the end of the tap so that the rubber seal forms a watertight connection. - Page 15 MAXIMUM LENGTH OF THE VENT HOSE IS 10 FEET WITH THE 0.5 AMPS ORIGINAL EXHAUST FAN. USING LONGER VENT HOSE MAY DAMAGE INTERNAL COMPONENTS. FOR LONGER VENT HOSE USE 1.5 AMPS EXHAUST FAN, WHICH IS AVAILABLE AS AN ACCESSORY. 12" 4"...
- Page 16 MINIMUM CLEARANCE OTHER THAN ALCOVE OR CLOSET INSTALATION Minimum clearances to combustible surfaces: 2" (5 cm) clearance both sides and 3" (7.5 cm) rear. BUILT-IN, RECESSED, CLOSET AND ALCOVE INSTALLATION The Combo Washer-Dryer may be installed in a built-in, recessed area, closet or alcove. The installation spacing is in inches and is the minimum acceptable.
- Page 17 1. WASH & DRY, WASH ONLY, DRY ONLY Description of Wash Features Drying Heat Wash Programs Water Temp/Spin rpm/Duration Load & Approx Time Max heat - 1300W Mixed Clothes 1. NORMAL Warm / 1200 / 51 mins 90 mins (Shirts, Trousers etc) Max heat - 1300W 2.
- Page 18 Washer + Dryer For small items such as socks, children’s garments and small towels please use a Washing Net Bag. If you are using Wash Only cycle, you can fill the drum. If you are using Wash + Dry cycle, please do not load clothes more than 2/3 full. Washer + Dryer Use Front Load detergent, as per direction...
- Page 19 NORMAL Self-Clean PAUSE Add-a-sock Extra Child Drain Rinse Lock . For extra rinse, press and hold 1 + 2 together. Vented mode Vented / Ventless mode Ventless mode. Ventless Ventless dry mode selection button Vented dry mode. Press this button to select the dry level for a Sensor Dry cycle. The default is Normal and you can select Extra, Low or Damp Dry.
- Page 20 level options Only for wash settings Ventless Mode An extra rinse can be addedd (Condensing) by pressing “Wash+Dry” and “Wash Only” at the same time. An Extra rinse and 9 minutes A. How to run WASH + DRY Cycle will be added to the cycle. 1.
- Page 21 Add-a-sock Feature Press START/PAUSE for 5 seconds. How to stop the wash cycle - The wash program can be stopped at any time. - Press START/PAUSE for 5 seconds - Press POWER button for 3 seconds to turn off the machine How to stop the dry cycle - Press POWER button for 3 seconds to turn off the machine How to turn on the display in energy saving mode?
- Page 22 (Fig.13) (Fig.14) (Fig.15) (Fig.16) Fig.13 Fig.14 Fig.15 Fig.16 (Fig.17) (Fig.18, Fig.19) Fig.17 Fig.18 Fig.19 - If Vent Dry mode is used, clean the exhaust fan and exhaust duct at least once a year to prevent lint build-up.
- Page 24 Brush off surface growth to keep mold spores form spreading. Dip article into solution of cup bleach per 1 gallon (~3.8 Litres) of cool 2 cups of water. sudsy water for 5 to 10 minutes. Rinse well. Launder.
- Page 25 Washer + Dryer Power Hose correctly connected to the faucet? Water supply turned on? Sufficient Faucet filter clean? Inlet hose kinked? 4" Does selected program incorporate water draining? Drain pump clogged? Drain hose kinked? Coin trap clean? Front Load detergent Front loading bolts Machine levelled correctly?
-
Page 26: Diagnostic Menu
DIAGNOSTIC MENU DIAGNOSTIC MENU Code Description Component Door open Door Switch Drain failure Drain Pump Water inlet failure Inlet Valves Water overfill Pressure Switch Motor failure Motor +Electronic Module Washing heater failure Washing heater Dryer Malfunction Temp. sensor (@rear-bottom of tub) Dryer Malfunction Temp.
Need help?
Do you have a question about the Super Combo 5500 and is the answer not in the manual?
Questions and answers