Table of Contents
Advertisement
Quick Links
Advertisement
Table of Contents

Subscribe to Our Youtube Channel
Related Manuals for Baumatic BTM25.1SS


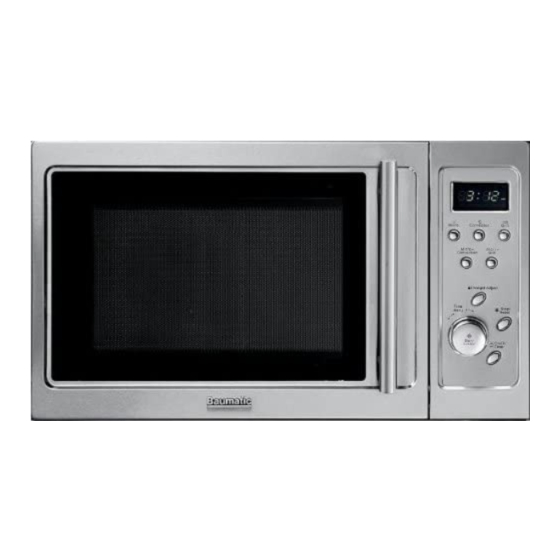
Summary of Contents for Baumatic BTM25.1SS
- Page 1 BTM25.1SS...
-
Page 2: Instruction Manual
BTM25 .1SS BTM25.1SS Convection Microwave Oven Instruction Manual... -
Page 3: Microwave Energy
4) The oven should not be adjusted or repaired by anyone except properly qualified service personnel. PLEASE- ONLY HAVE A QUALIFIED PERSON INSTALL THIS APPLIANCE, ALL, REPAIRS MUST ONLY BE CARRIED OUT BY A BAUMATIC ENGINEER OR ITS AUTHORISED AGENTS OTHERWISE THIS WILL INVALIDATE YOUR WARRANTY. -
Page 4: Table Of Contents
BTM25 .1SS TABLE OF CONTENTS MICROWAVE SPECIFICATIONS... 5 INSTALLING YOUR OVEN ... 5 GROUNDING INSTRUCTIONS... 6 RADIO INTERFERENCE ... 6 IMPORTANT SAFETY INSTRUCTIONS... 7 MICROWAVE COOKING PRINCIPLES... 9 UTENSILS GUIDE ... 9 MICROWAVE PART NAMES... 11 CONTROL PANEL ... 12 HOW TO SET THE OVEN CONTROLS ... -
Page 5: Microwave Specifications
MICROWAVE SPECIFICATIONS Power Consumption: Rated Microwave Power Output: Operation Frequency: Outside Dimensions: Oven Cavity Dimensions: Oven Capacity: Cooking Uniformity: Net weight: INSTALLING YOUR OVEN 1) Make sure that all the packing materials are removed from the inside of the door. 2) WARNING: Check the oven for any damage: such as misaligned or bent doors, damaged door seals or sealing surfaces, broken or loose door hinges and latches. -
Page 6: Grounding Instructions
GROUNDING INSTRUCTIONS PLEASE NOTE: This appliance must be grounded. This oven is equipped with a cord with a grounding wire and a grounding plug. It must be plugged into a wall receptacle that is properly installed and grounded. In the event of an electrical short circuit, grounding reduces risk of electrical shock by providing an escape wire for the electric current. -
Page 7: Important Safety Instructions
IMPORTANT SAFETY INSTRUCTIONS When using the electrical appliance basic safety precautions should be followed, including the following. To reduce the risk of burns, electric shock, fire, injury to persons or exposure to excessive microwave energy: 1) Read all instructions before using the appliance. 2) Use this appliance only for its intended use as described in this manual. - Page 8 IMPORTANT SAFETY INSTRUCTIONS – 8) Eggs in their shell and whole hard boiled eggs should not be heated in microwave ovens as they may explode even after microwave heating has ended. 9) Pierce foods with heavy skins such as potatoes, whole squashes, apples and chestnuts before cooking.
-
Page 9: Microwave Cooking Principles
MICROWAVE COOKING PRINCIPLES Arrange food carefully. Place thickest areas towards outside of dish. Watch cooking time. Cook for the shortest amount of time indicated and add more as needed. Food severely overcooked can smoke or ignite. Cover foods while cooking. Covers prevent spattering and help foods to cook evenly. - Page 10 BTM25 .1SS UTENSILS Cookware Microwave Heat-resistant glass Non heat – resistant glass Heat – resistant Ceramics Microwave –safe Plastic dish Kitchen paper Metal Tray Metal Rack Aluminium Foil and Foil container Baking Plate Combination: applicable for both “microwave +grill”, and “microwave +convection” cooking.
-
Page 11: Microwave Part Names
BTM25 .1SS MICROWAVE PART NAMES 1. Door safety lock system 2. Oven Window 3. Oven Air Vent 4. Shaft 5. Roller Ring 6. Glass Tray 7. Control Panel 8. Grill Heater 9. Baking Plate... -
Page 12: Control Panel
BTM25 .1SS CONTROL PANEL DISPLAY SCREEN: Cooking time, power, indicators and present time are shown MICRO: Press to select Microwave power level. GRILL: Press to set a grill cooking program. CONVECTION: Press to program convection temperature. MICRO + GRILL: Press to select one of two combination cooking settings. MICRO + CONVECTION: Press to select one of four combination cooking settings. -
Page 13: How To Set The Oven Controls
HOW TO SET THE OVEN CONTROLS: Beeps during Oven Settings 1. ONE BEEP: The oven accepts the entry 2. TWO BEEPS: The oven does not accept the entry. Please check and try again. Setting the Clock: Press the CLOCK/TIMER button. Rotate the TIME/MENU dial until the correct hour is displayed. -
Page 14: Microwave Cooking
MICROWAVE COOKING Microwave cooking allows you to customise cooking power and time. First, you select a power level by pressing the MICRO button a number of times (see the table below). Then you set the cooking time by rotating the TIME/MENU dial, before pushing the START button. -
Page 15: Using The Grill
USING THE GRILL: Grill cooking is particularly useful for thin slices of meat, steaks, chops, kebabs, sausages and pieces of chicken. It is also suitable for hot sandwiches and au gratin dishes. Suppose you want to program grill cooking for 12 minutes: 1. -
Page 16: Microwave + Grill
To Preheat and Cook with Convection Your oven can be programmed to combine preheating and convection cooking operations. Suppose you want to preheat to 140°C and then cook 35 minutes: 1. Press the CONVECTION button 4 times. 2. Press the START button. One beep will sound and “PREH” will flicker in the display until the oven reaches the programmed temperature. -
Page 17: Microwave + Convection
MICROWAVE + CONVECTION This oven has four pre- programmed settings that make it easy to cook with both convection heat and microwave automatically. Press MICRO + CONVECTION button to select convection temperature: COMB 1 COMB 2 COMB 3 COMB 4 Suppose you want to bake a cake for 24 minutes on COMB3: 1. -
Page 18: Auto-Menu Settings
AUTO-MENU SETTINGS “AUTO MENU” allow you to cook or reheat food automatically without entering a power level or time. BAKED POTATO 1. Rotate the TIME/MENU dial until “01” and code are displayed. 2. Press WEIGHT ADJUST to select needed - 150, 300, 450 or 600g. -
Page 19: Other Convenient Features
AUTO-MENU SETTINGS CONT. MEAT SKEWERS 1. Rotate the TIME/MENU dial until “06” is displayed. 2. Press WEIGHT ADJUST to select needed - 150,300,500 or 800g. 3. Press the START button. NOTE At the middle of cooking, beeps will remind you to open the door and rearrange the food, and then close the door to cook for the remaining time. -
Page 20: To Stop The Oven While The Oven Is Operating
QUICK START Use this feature to program the oven to microwave food at 100% power conveniently. Press START/QUICK START button in quick succession to set the cooking time. The maximum cooking time is 10 minutes. The oven will auto-start two seconds later. TO STOP THE OVEN WHILE THE OVEN IS OPERATING 1. -
Page 21: Cleaning And Care
BTM25 .1SS CLEANING AND CARE: Turn off the oven and remove the power pug from the wall socket before cleaning. Keep the inside of the oven clean. When food splatters or spilled liquids adhere to oven walls, wipe with a damp cloth. Mild detergent may be used if the oven gets very dirty. -
Page 22: Before You Call For Service
BTM25 .1SS BEFORE YOU CALL FOR SERVICE: If the oven fails to operate: Check to ensure that the oven is plugged is securely. If it is not, remove the plug from the outlet, wait 10 seconds, and plug it in again securely. Check for a blown circuit fuse or a tripped main circuit breaker. -
Page 23: Built Under Installation For Your Microwave
Built under installation for your microwave. IMPORTANT: NO OTHER METHODS OF BUILDING UNDER THE MICROWAVE ARE SANCTIONED BY BAUMATIC. - Page 24 2. The ventilation gaps below the support shelf and below the worktop MUST be adhered to. 3. The appropriate Baumatic Microwave Building In Kit MUST be fitted. 4. An induction hob MUST NOT be fitted above the microwave.
- Page 25 Baumatic appliance. * In addition, your appliance is covered by a 5 year parts warranty. Baumatic Ltd will provide free of charge the parts required to repair the appliance, only if they are fitted by a Baumatic engineer, for any defect that arises due to faulty materials or workmanship within a period of 5 years from the original purchase date.
- Page 26 Headquarters Baumatic Ltd. Baumatic Buildings, 6 Bennet Road, Reading, Berkshire RG2 0QX, United Kingdom Sales Telephone +44 118 933 6900 Sales Fax +44 118 931 0035 Service Telephone +44 118 933 6911 Service Fax +44 118 986 9124 Spares Telephone...
Need help?
Do you have a question about the BTM25.1SS and is the answer not in the manual?
Questions and answers